A New Closet

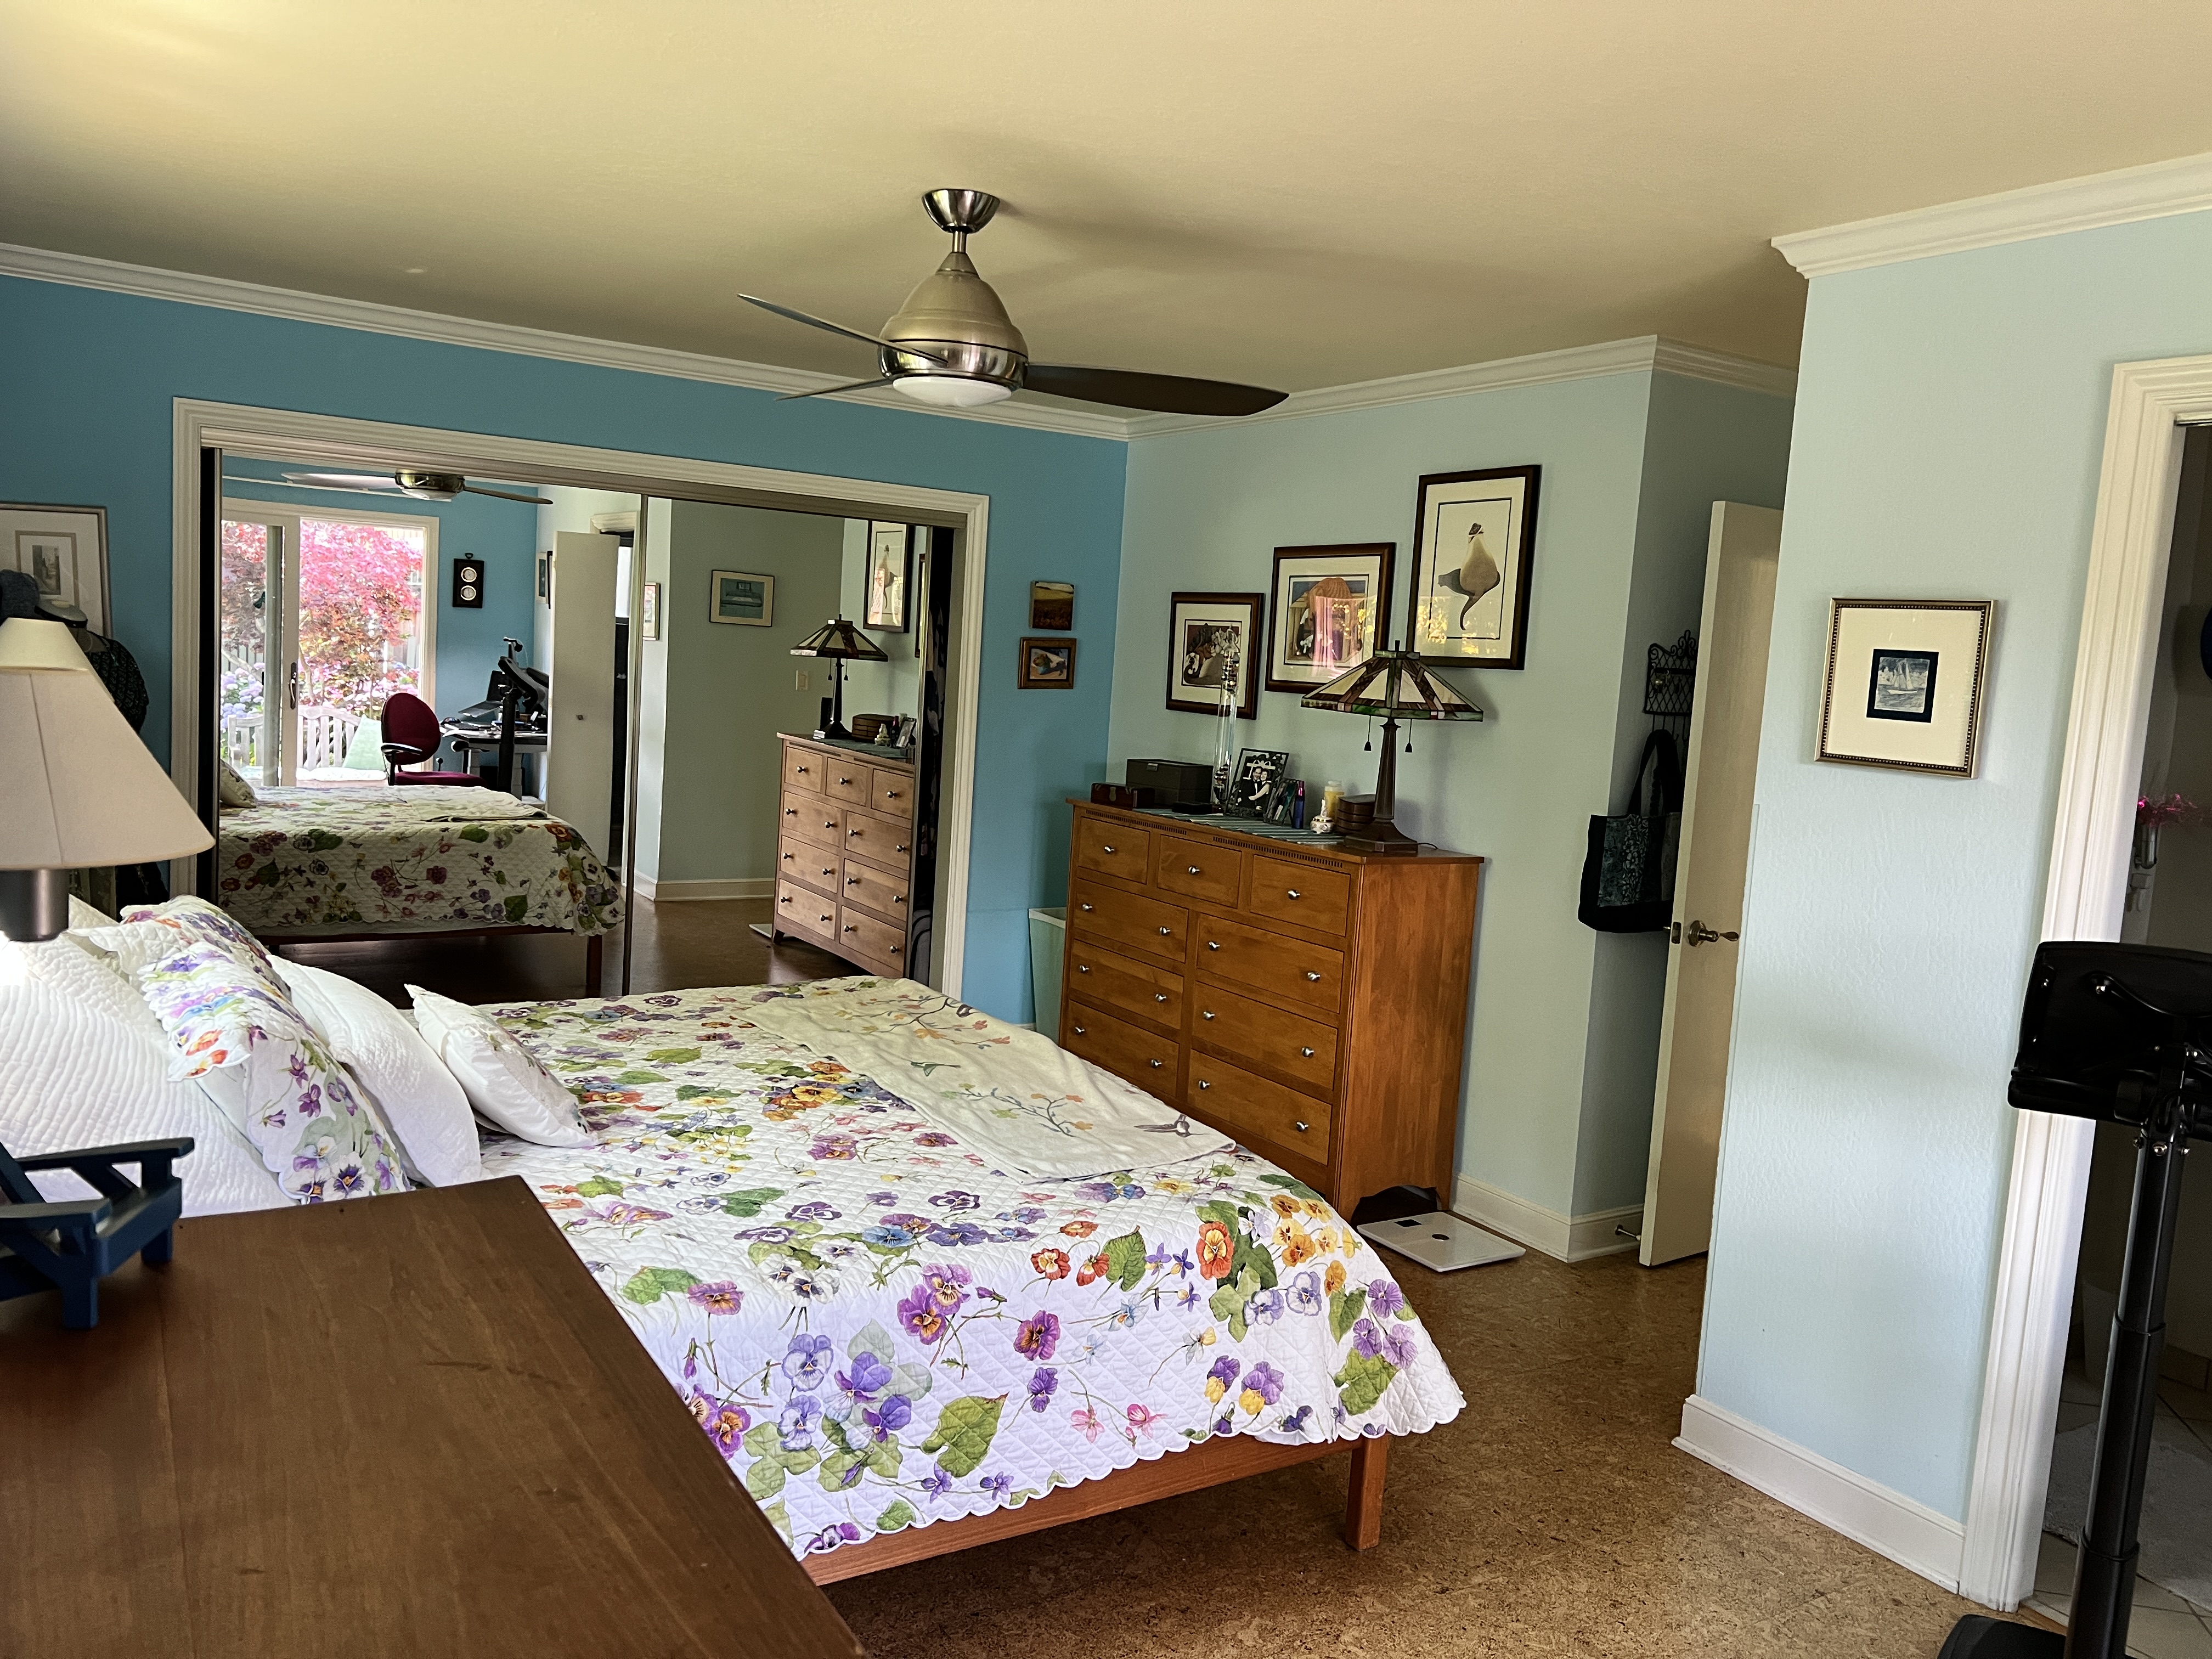
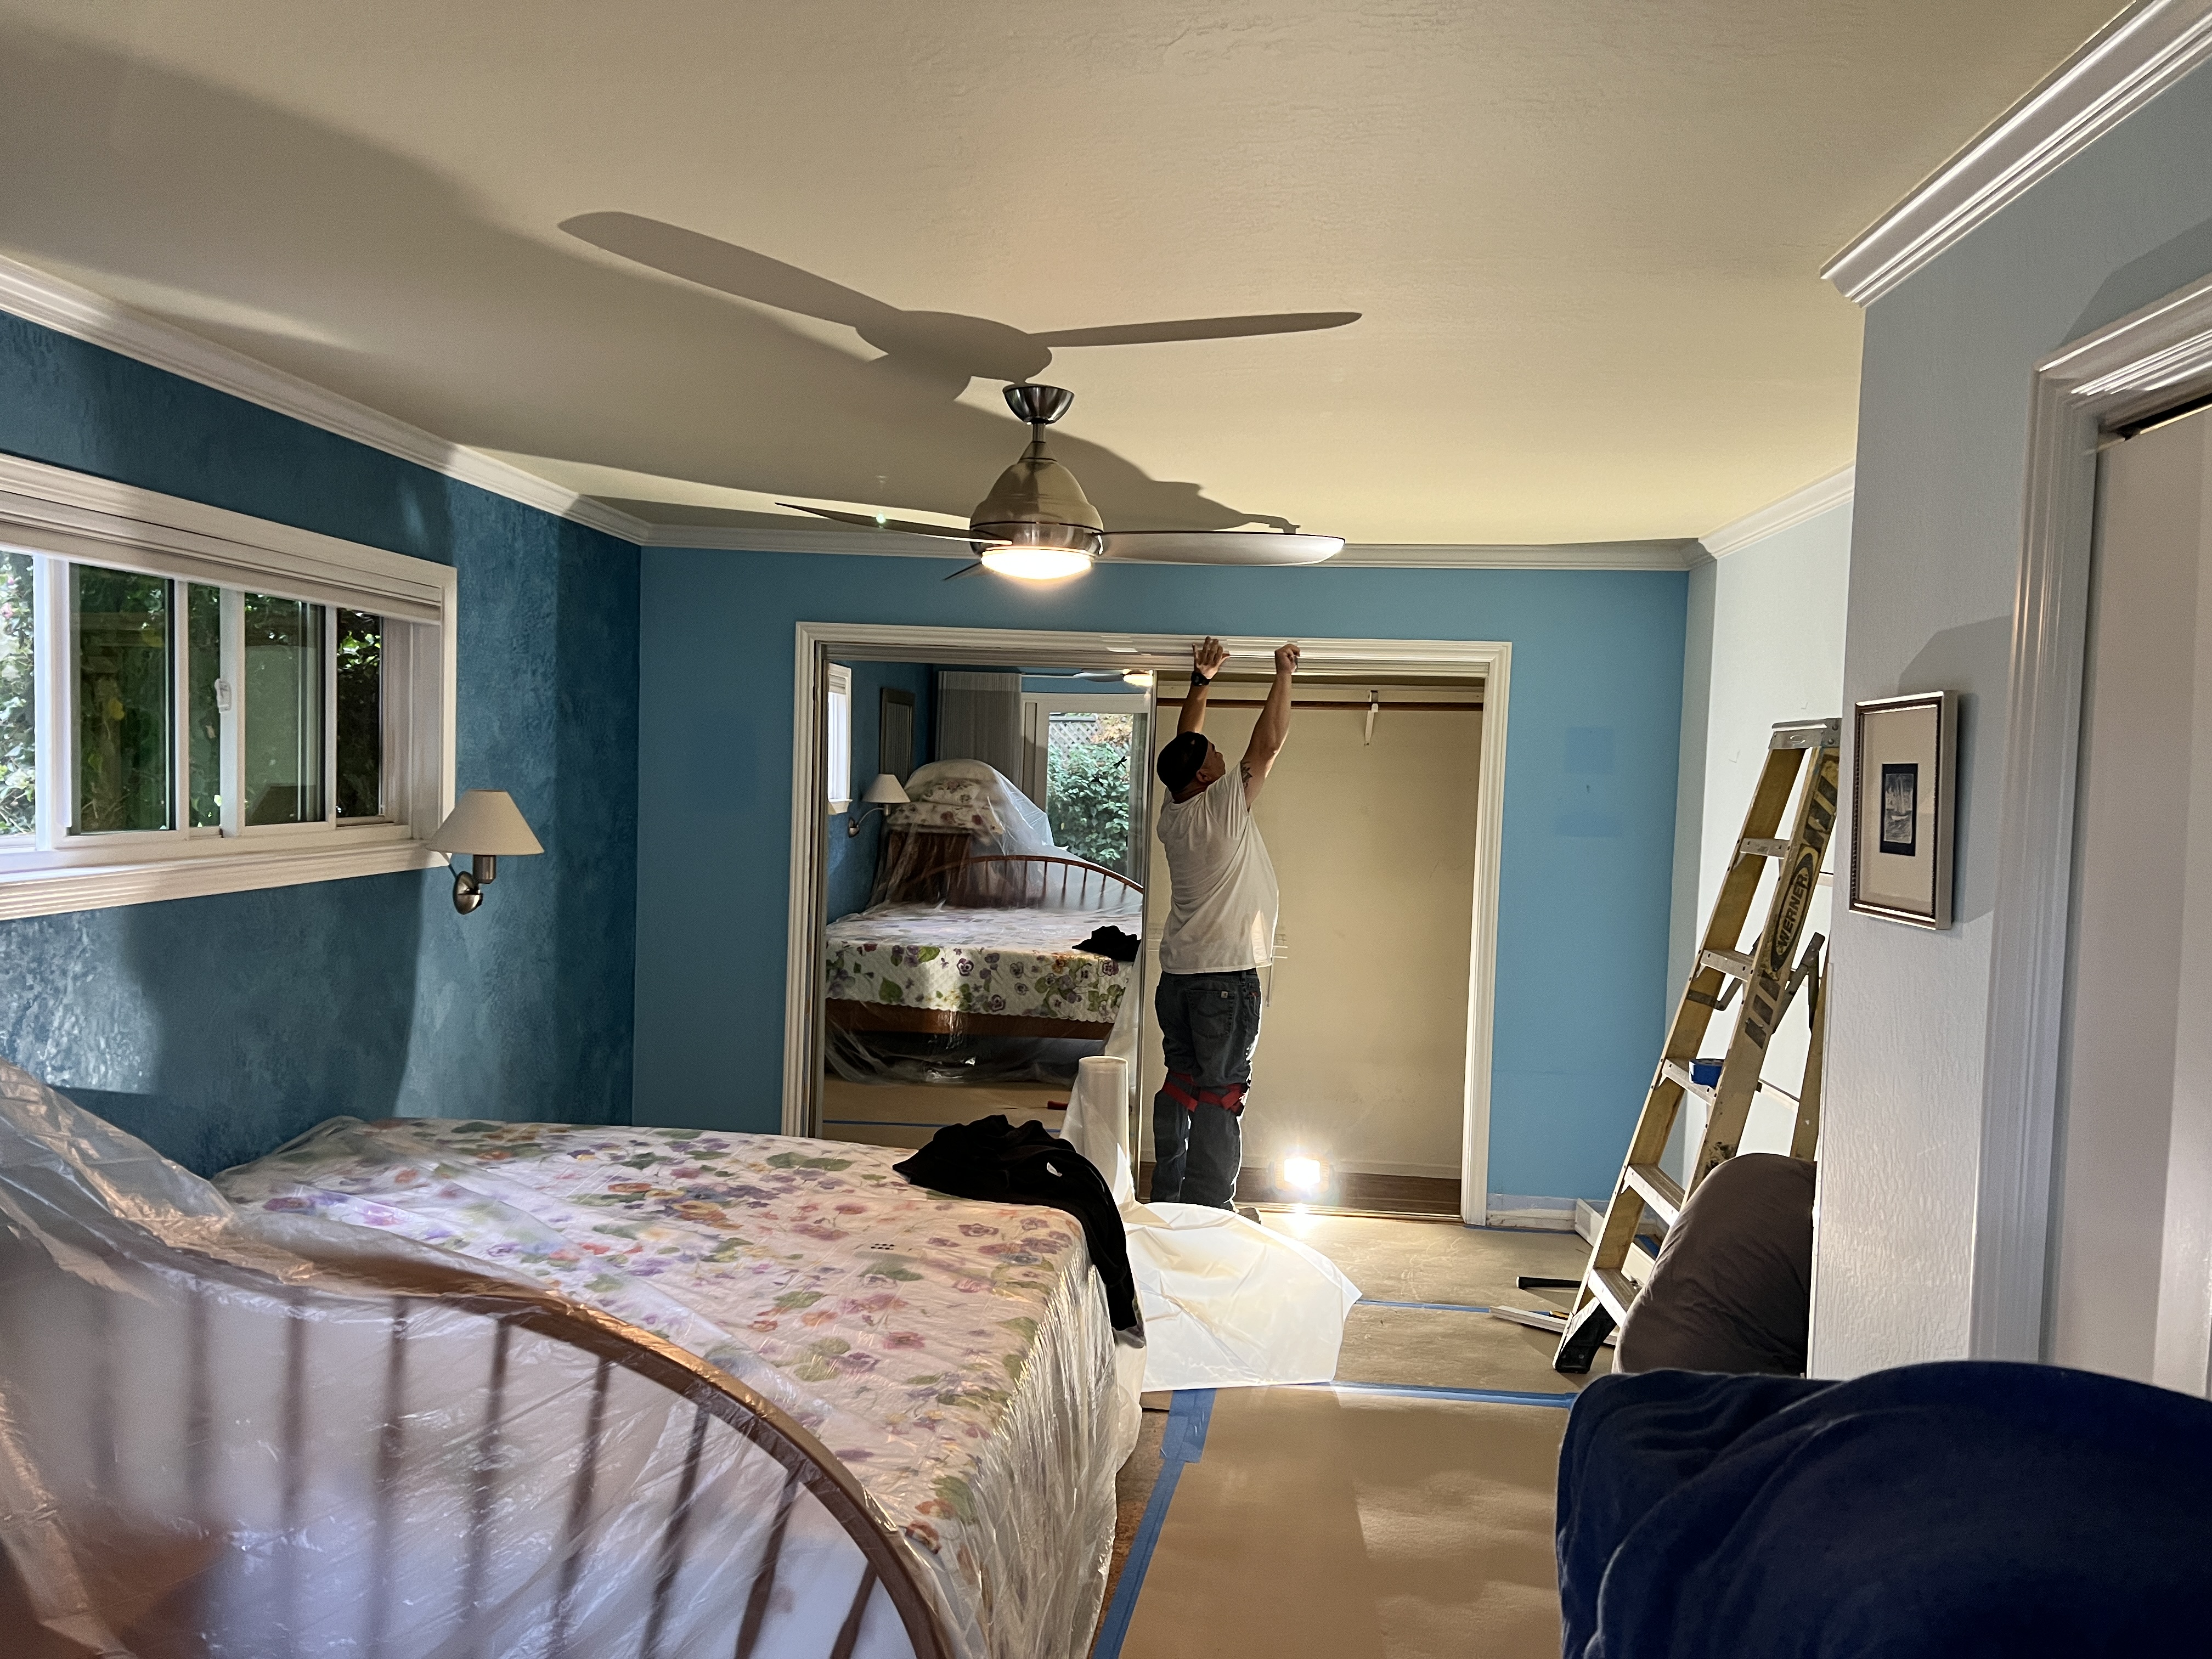
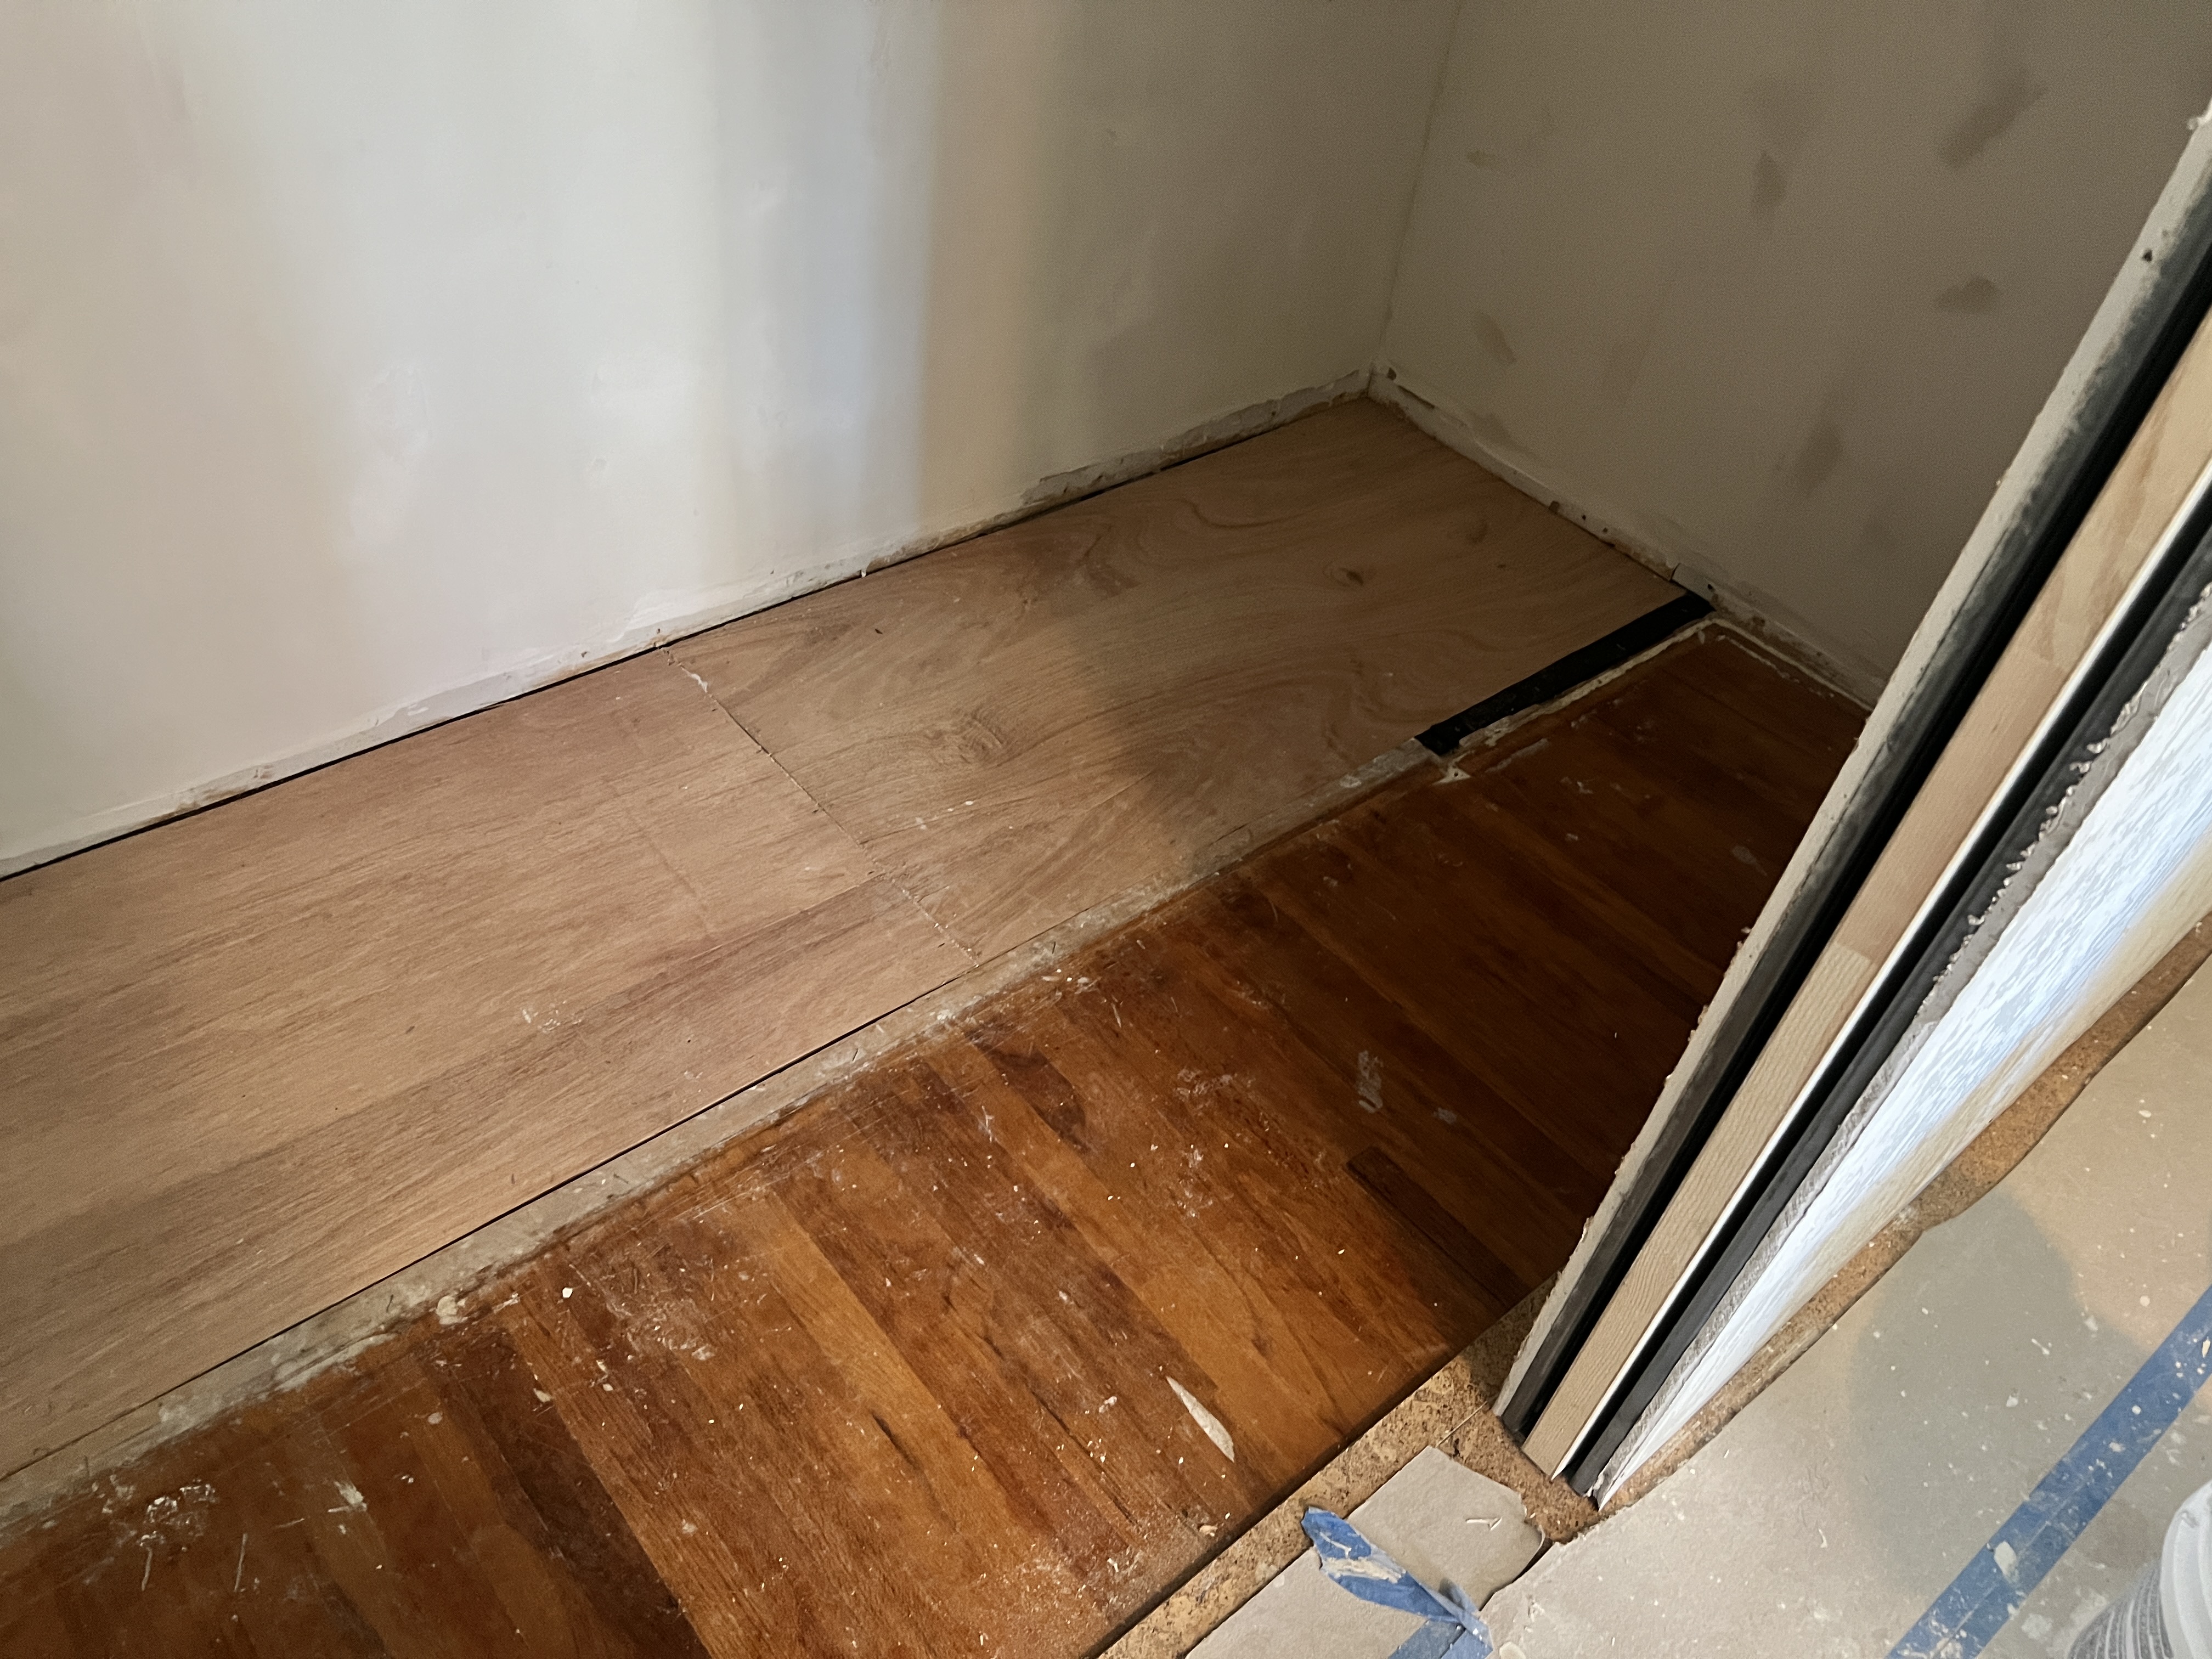
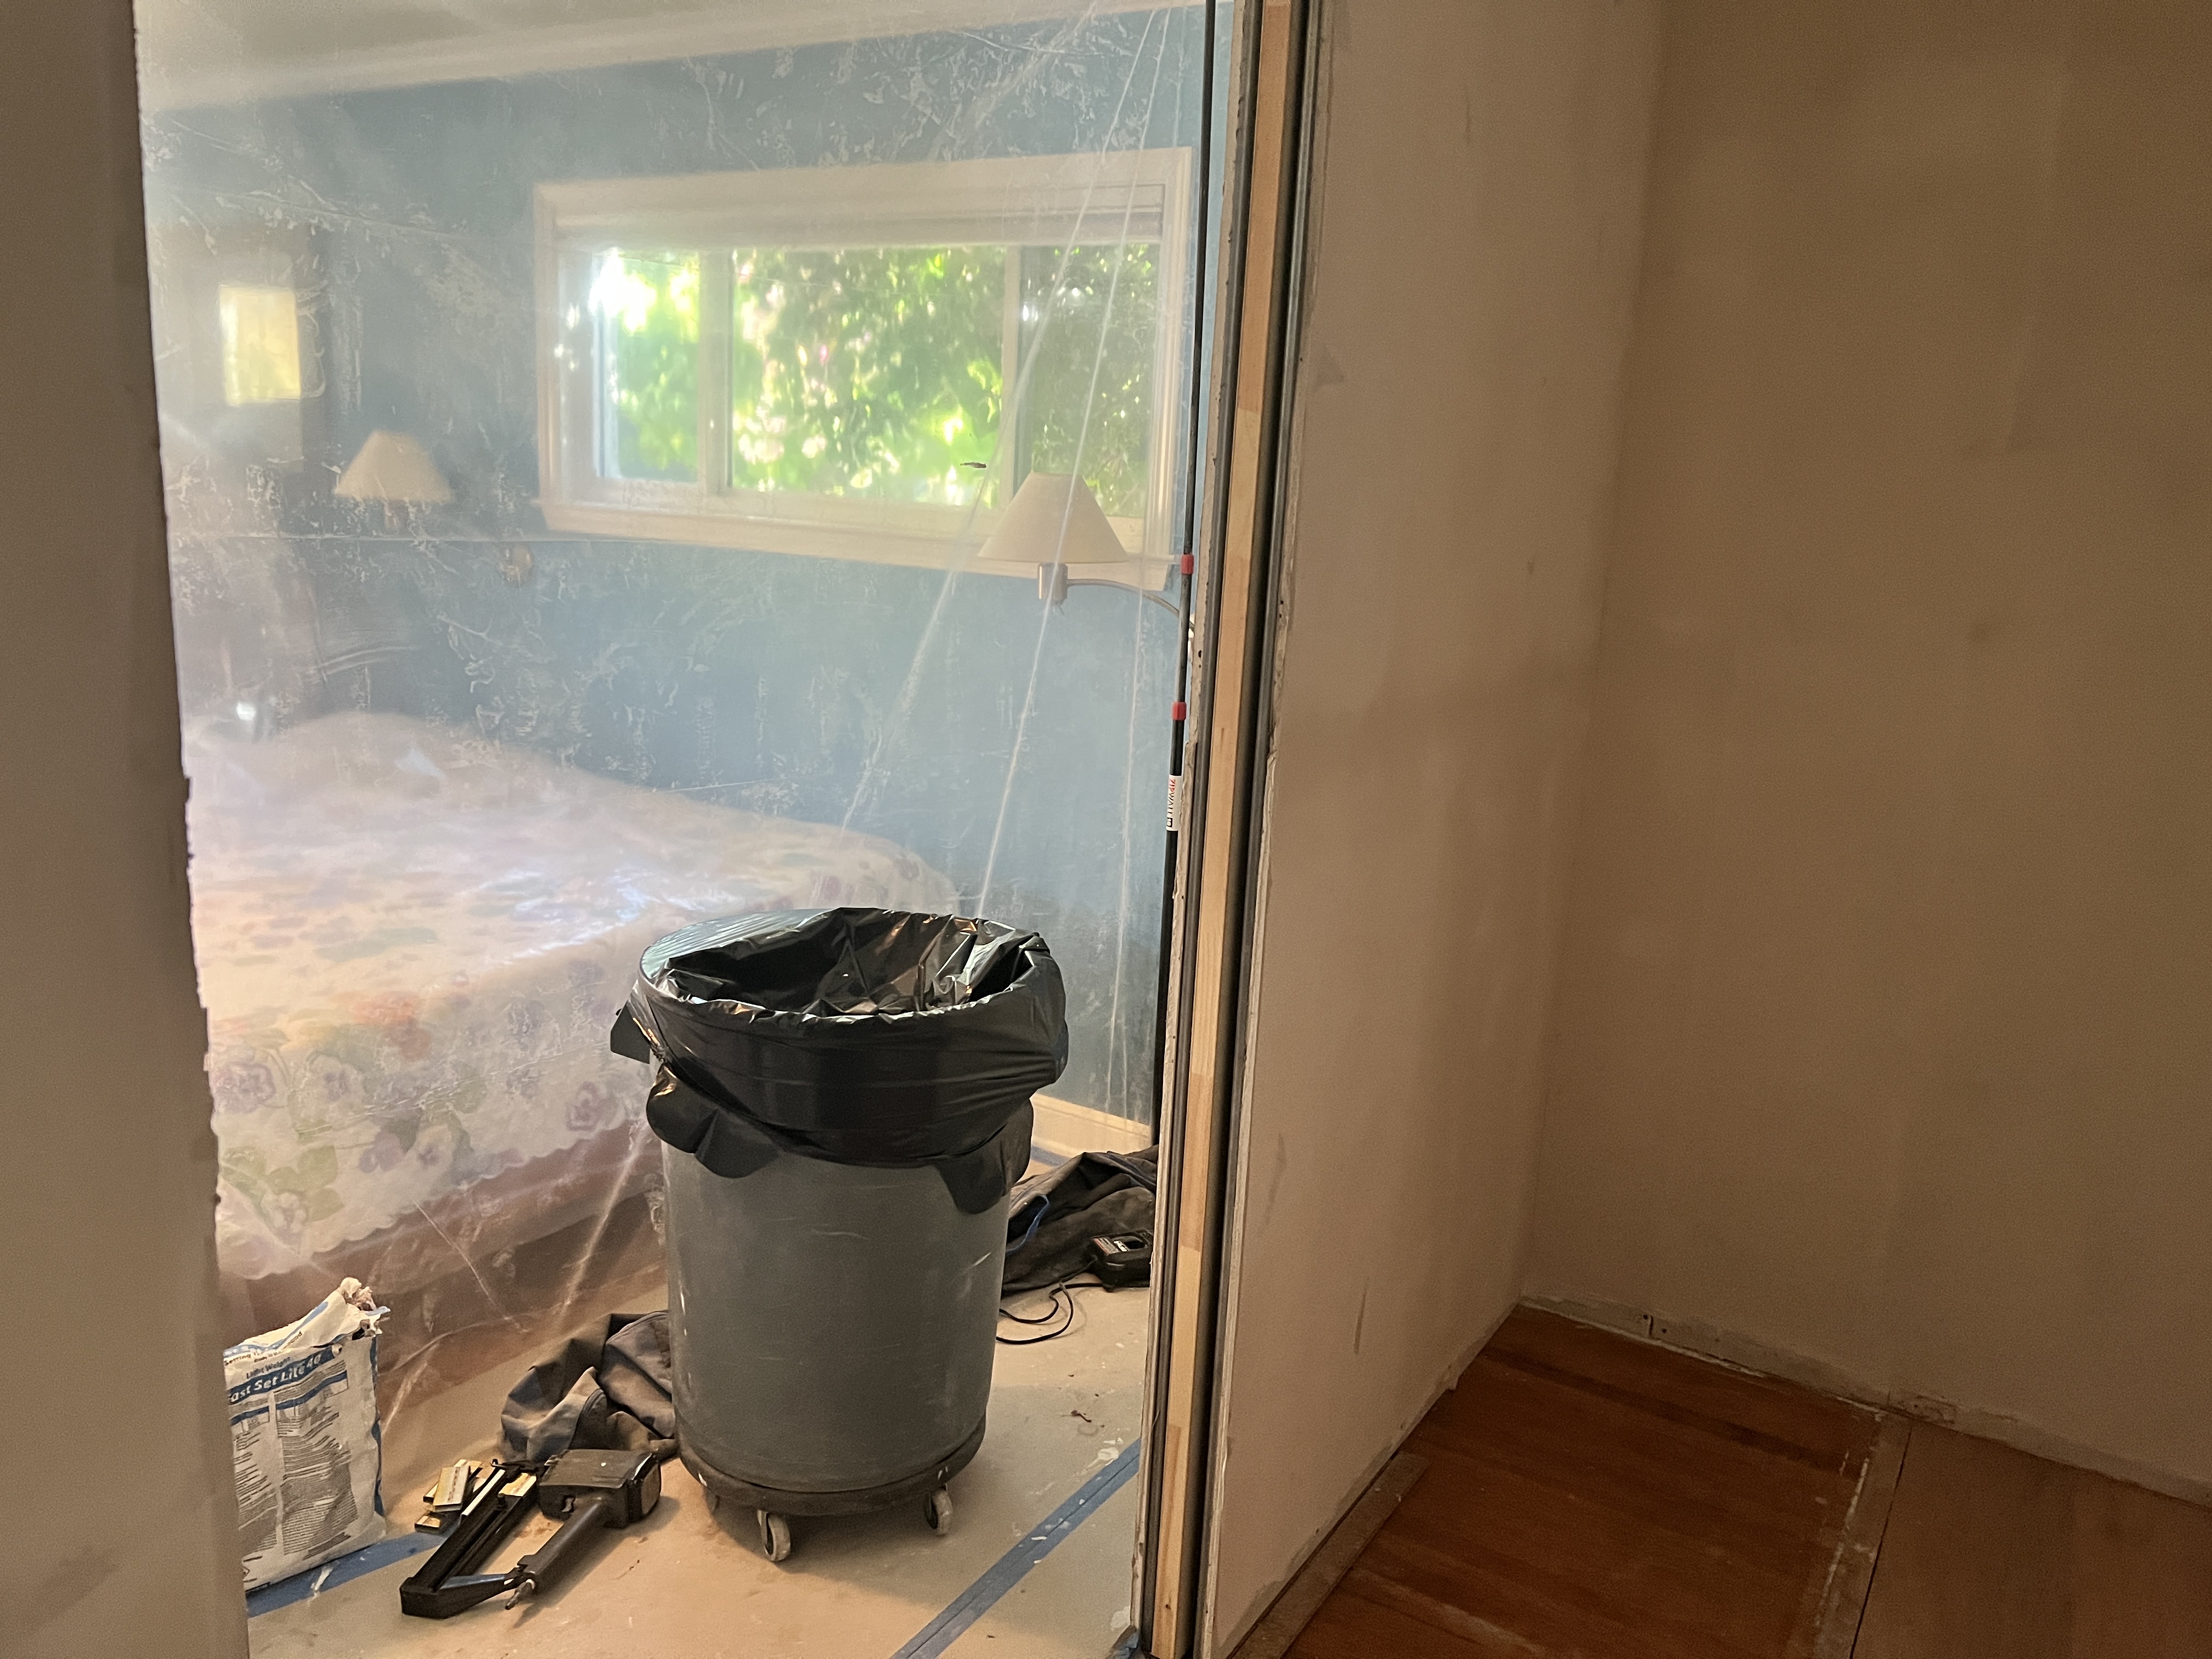
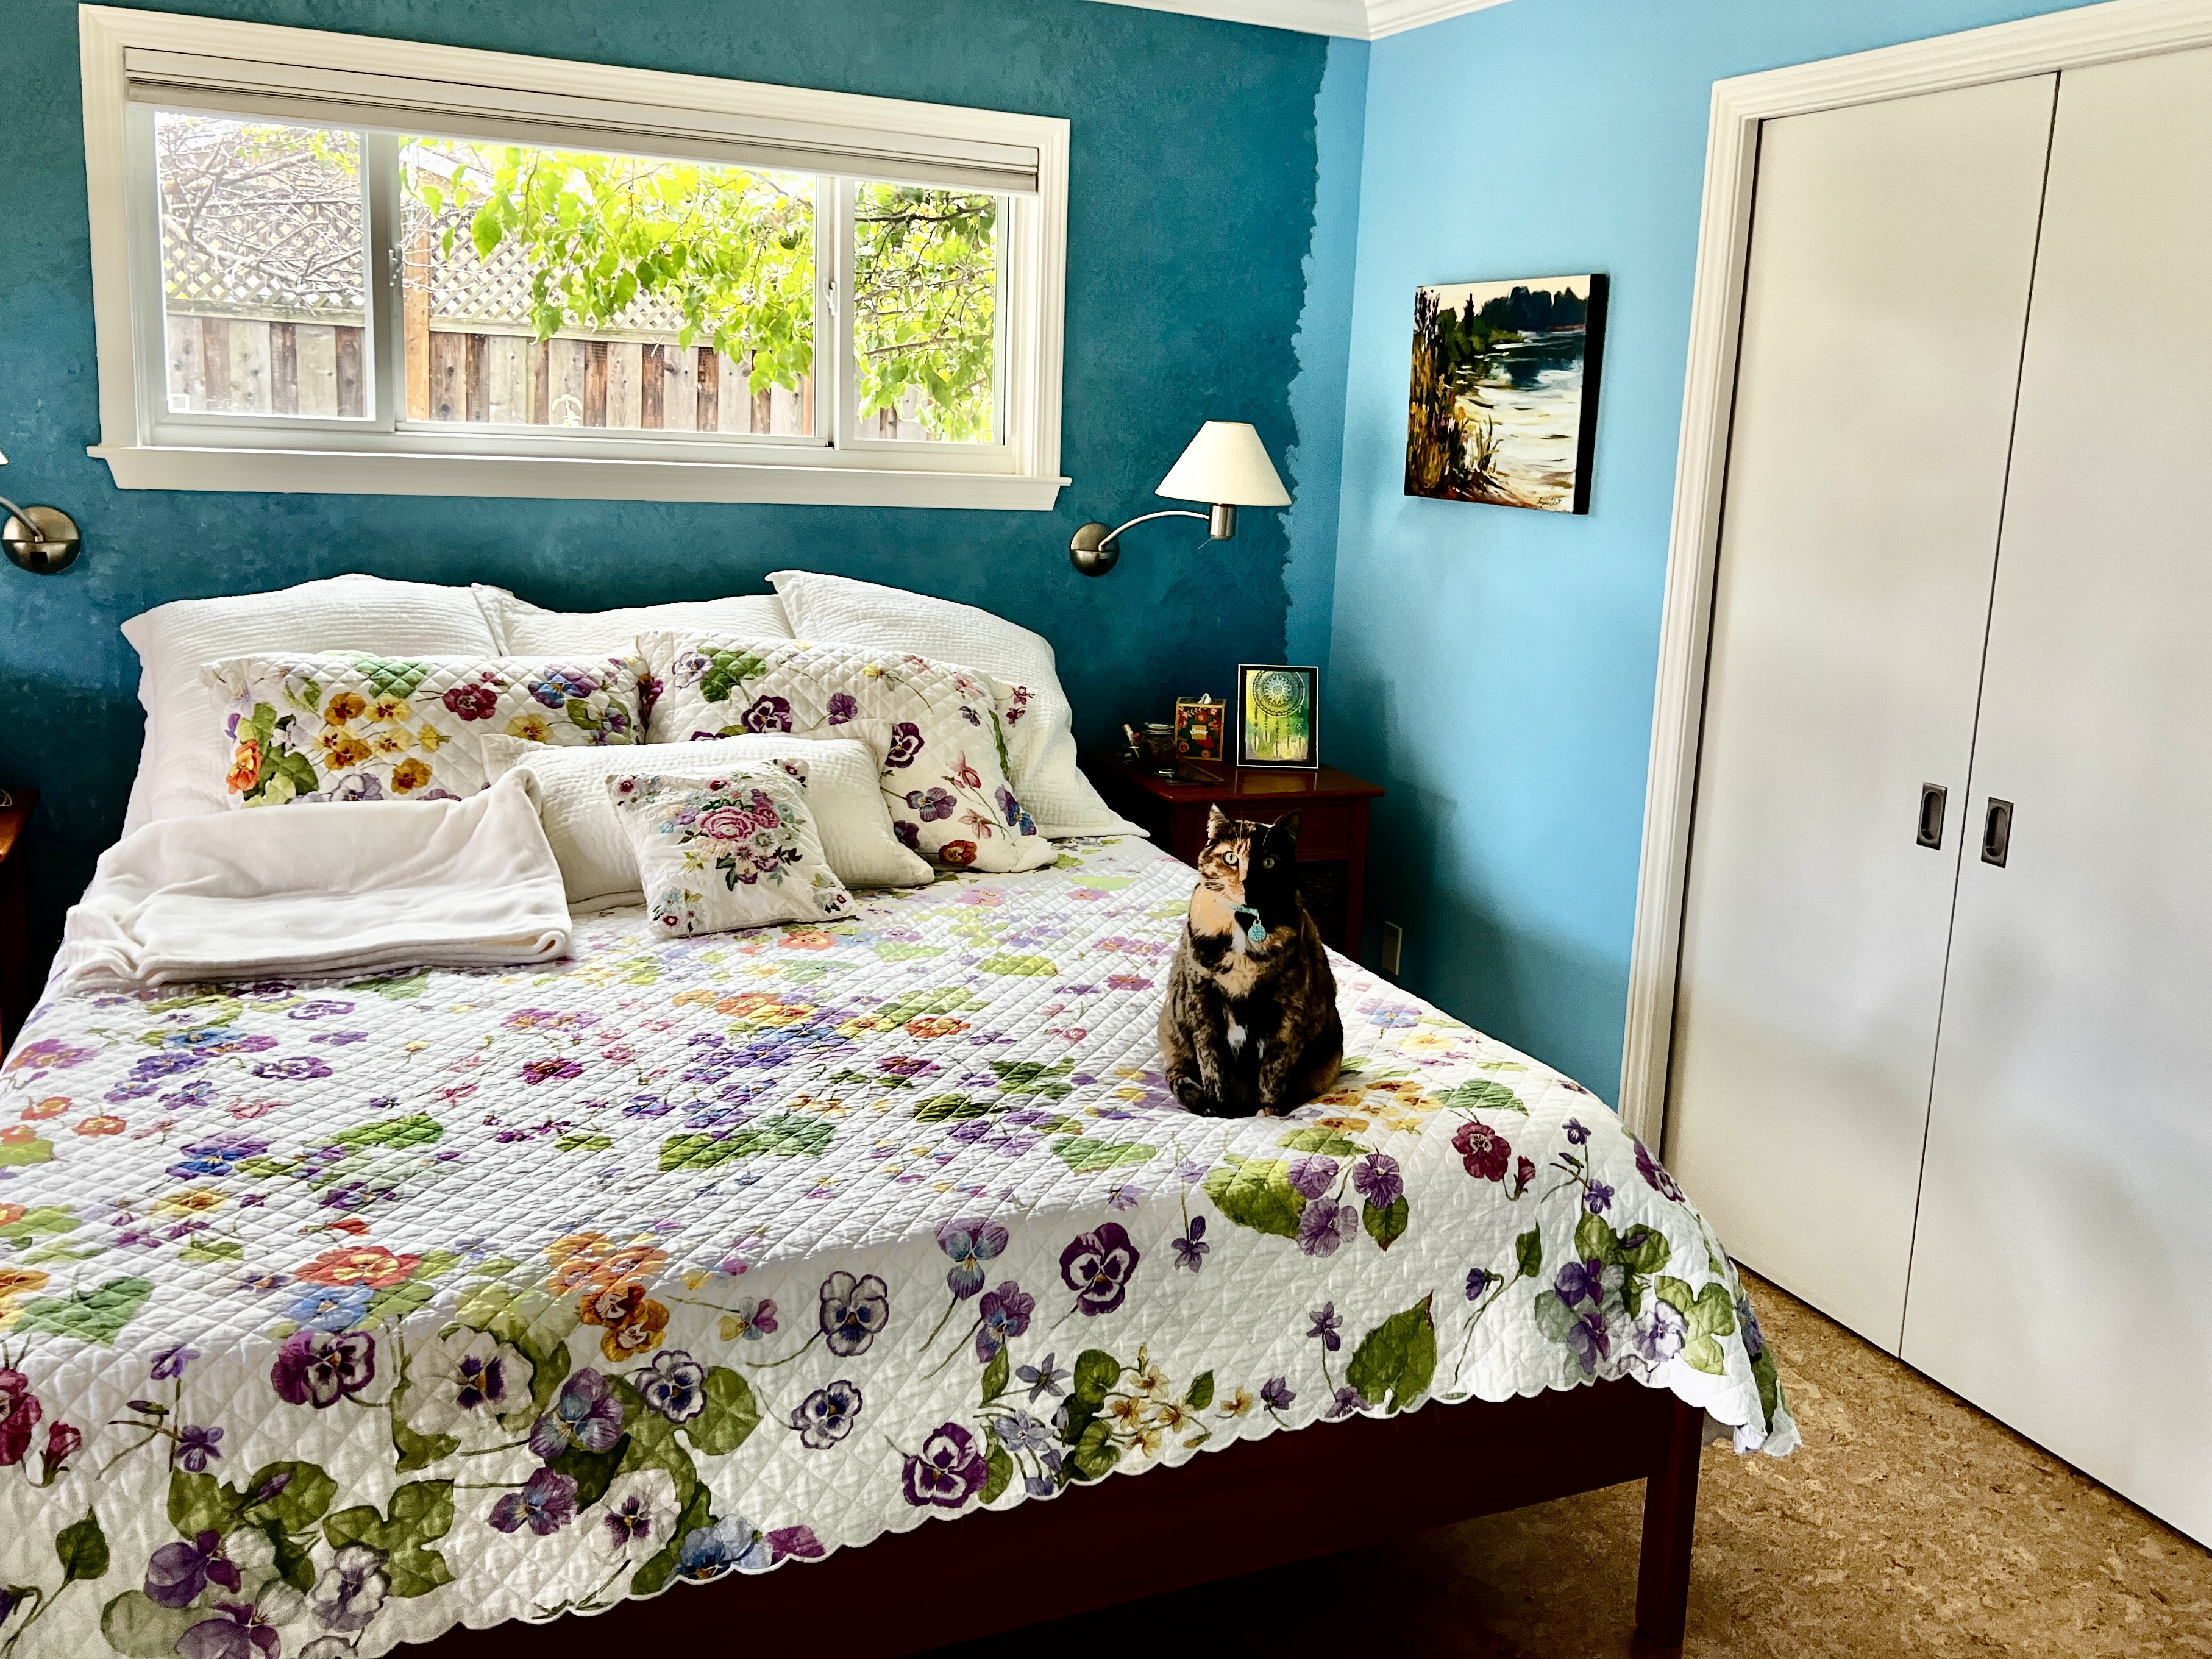
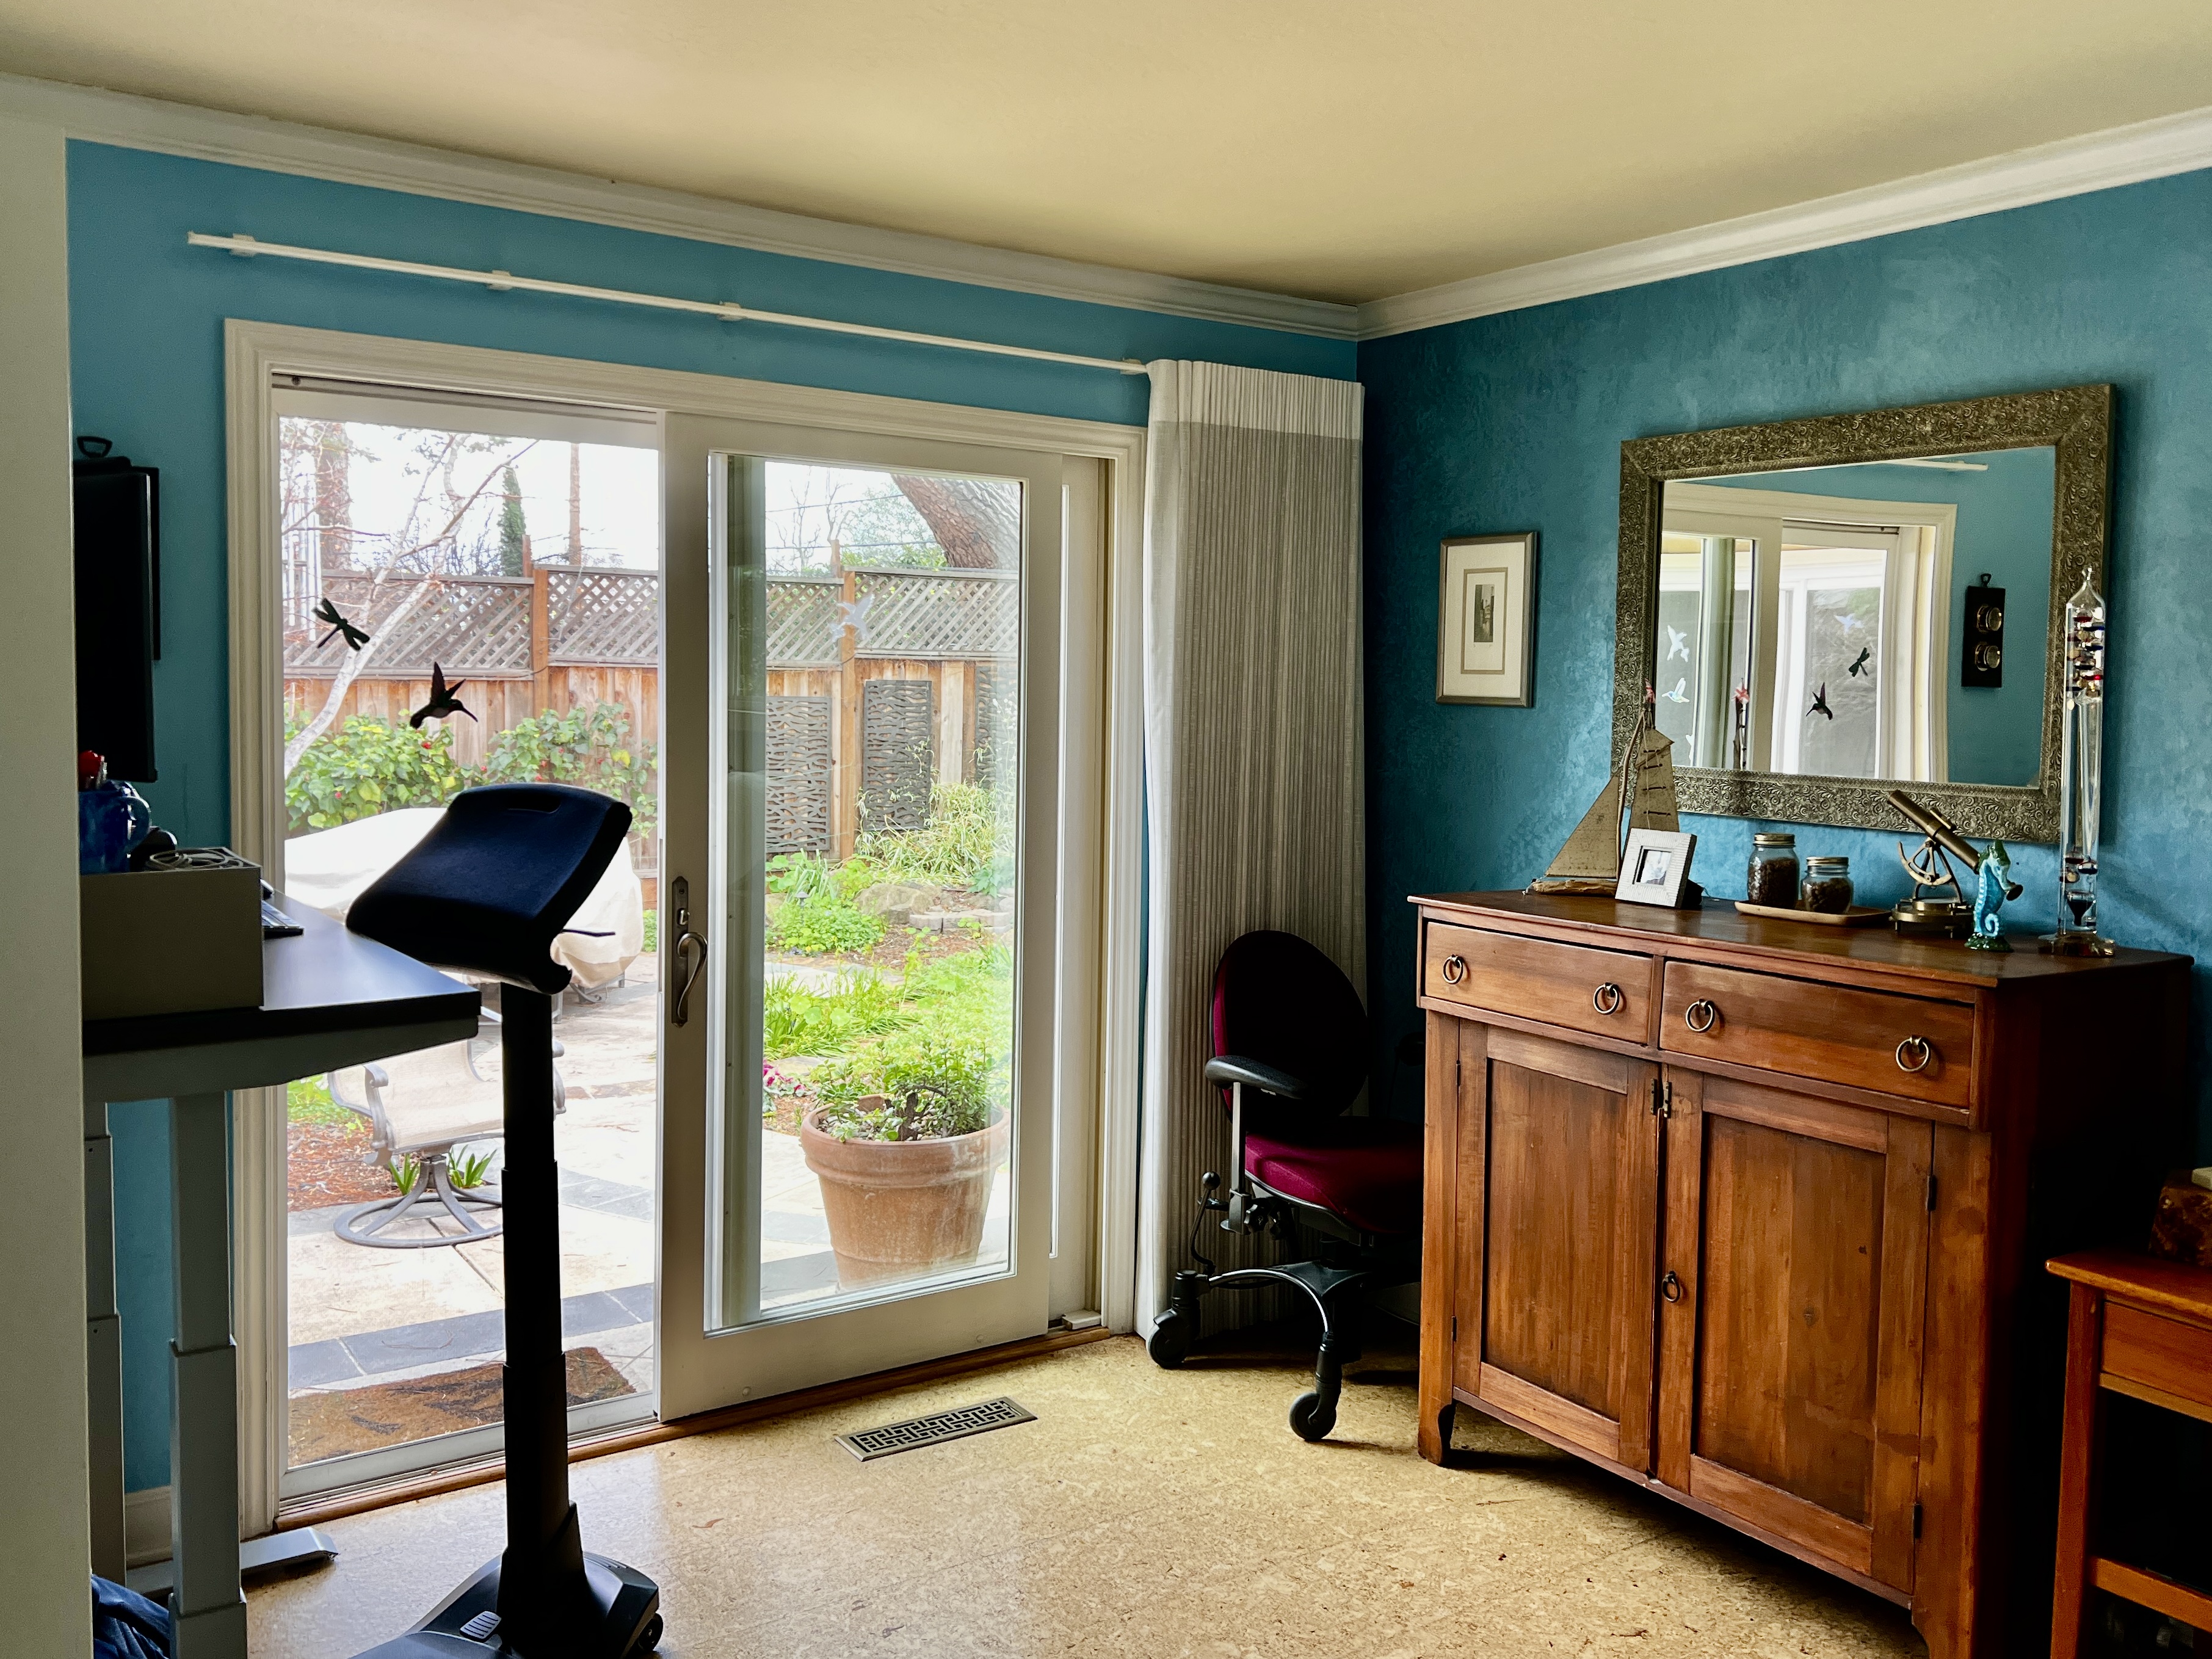
We’ve been bouncing around the idea of a bigger bedroom closet for years. We finally took the plunge and started the process of meeting with a contractor, checking to see if we needed permits and all the other boring stuff that goes with it. The fun part came later when they presented three design options, and though it was nice having a choice, we went with the design that closely fit our vision. The first set of photos shows our room from three angles with the bureau and the sliding mirrored doors. The proposed closet’s dimensions are on the right side of the plans.

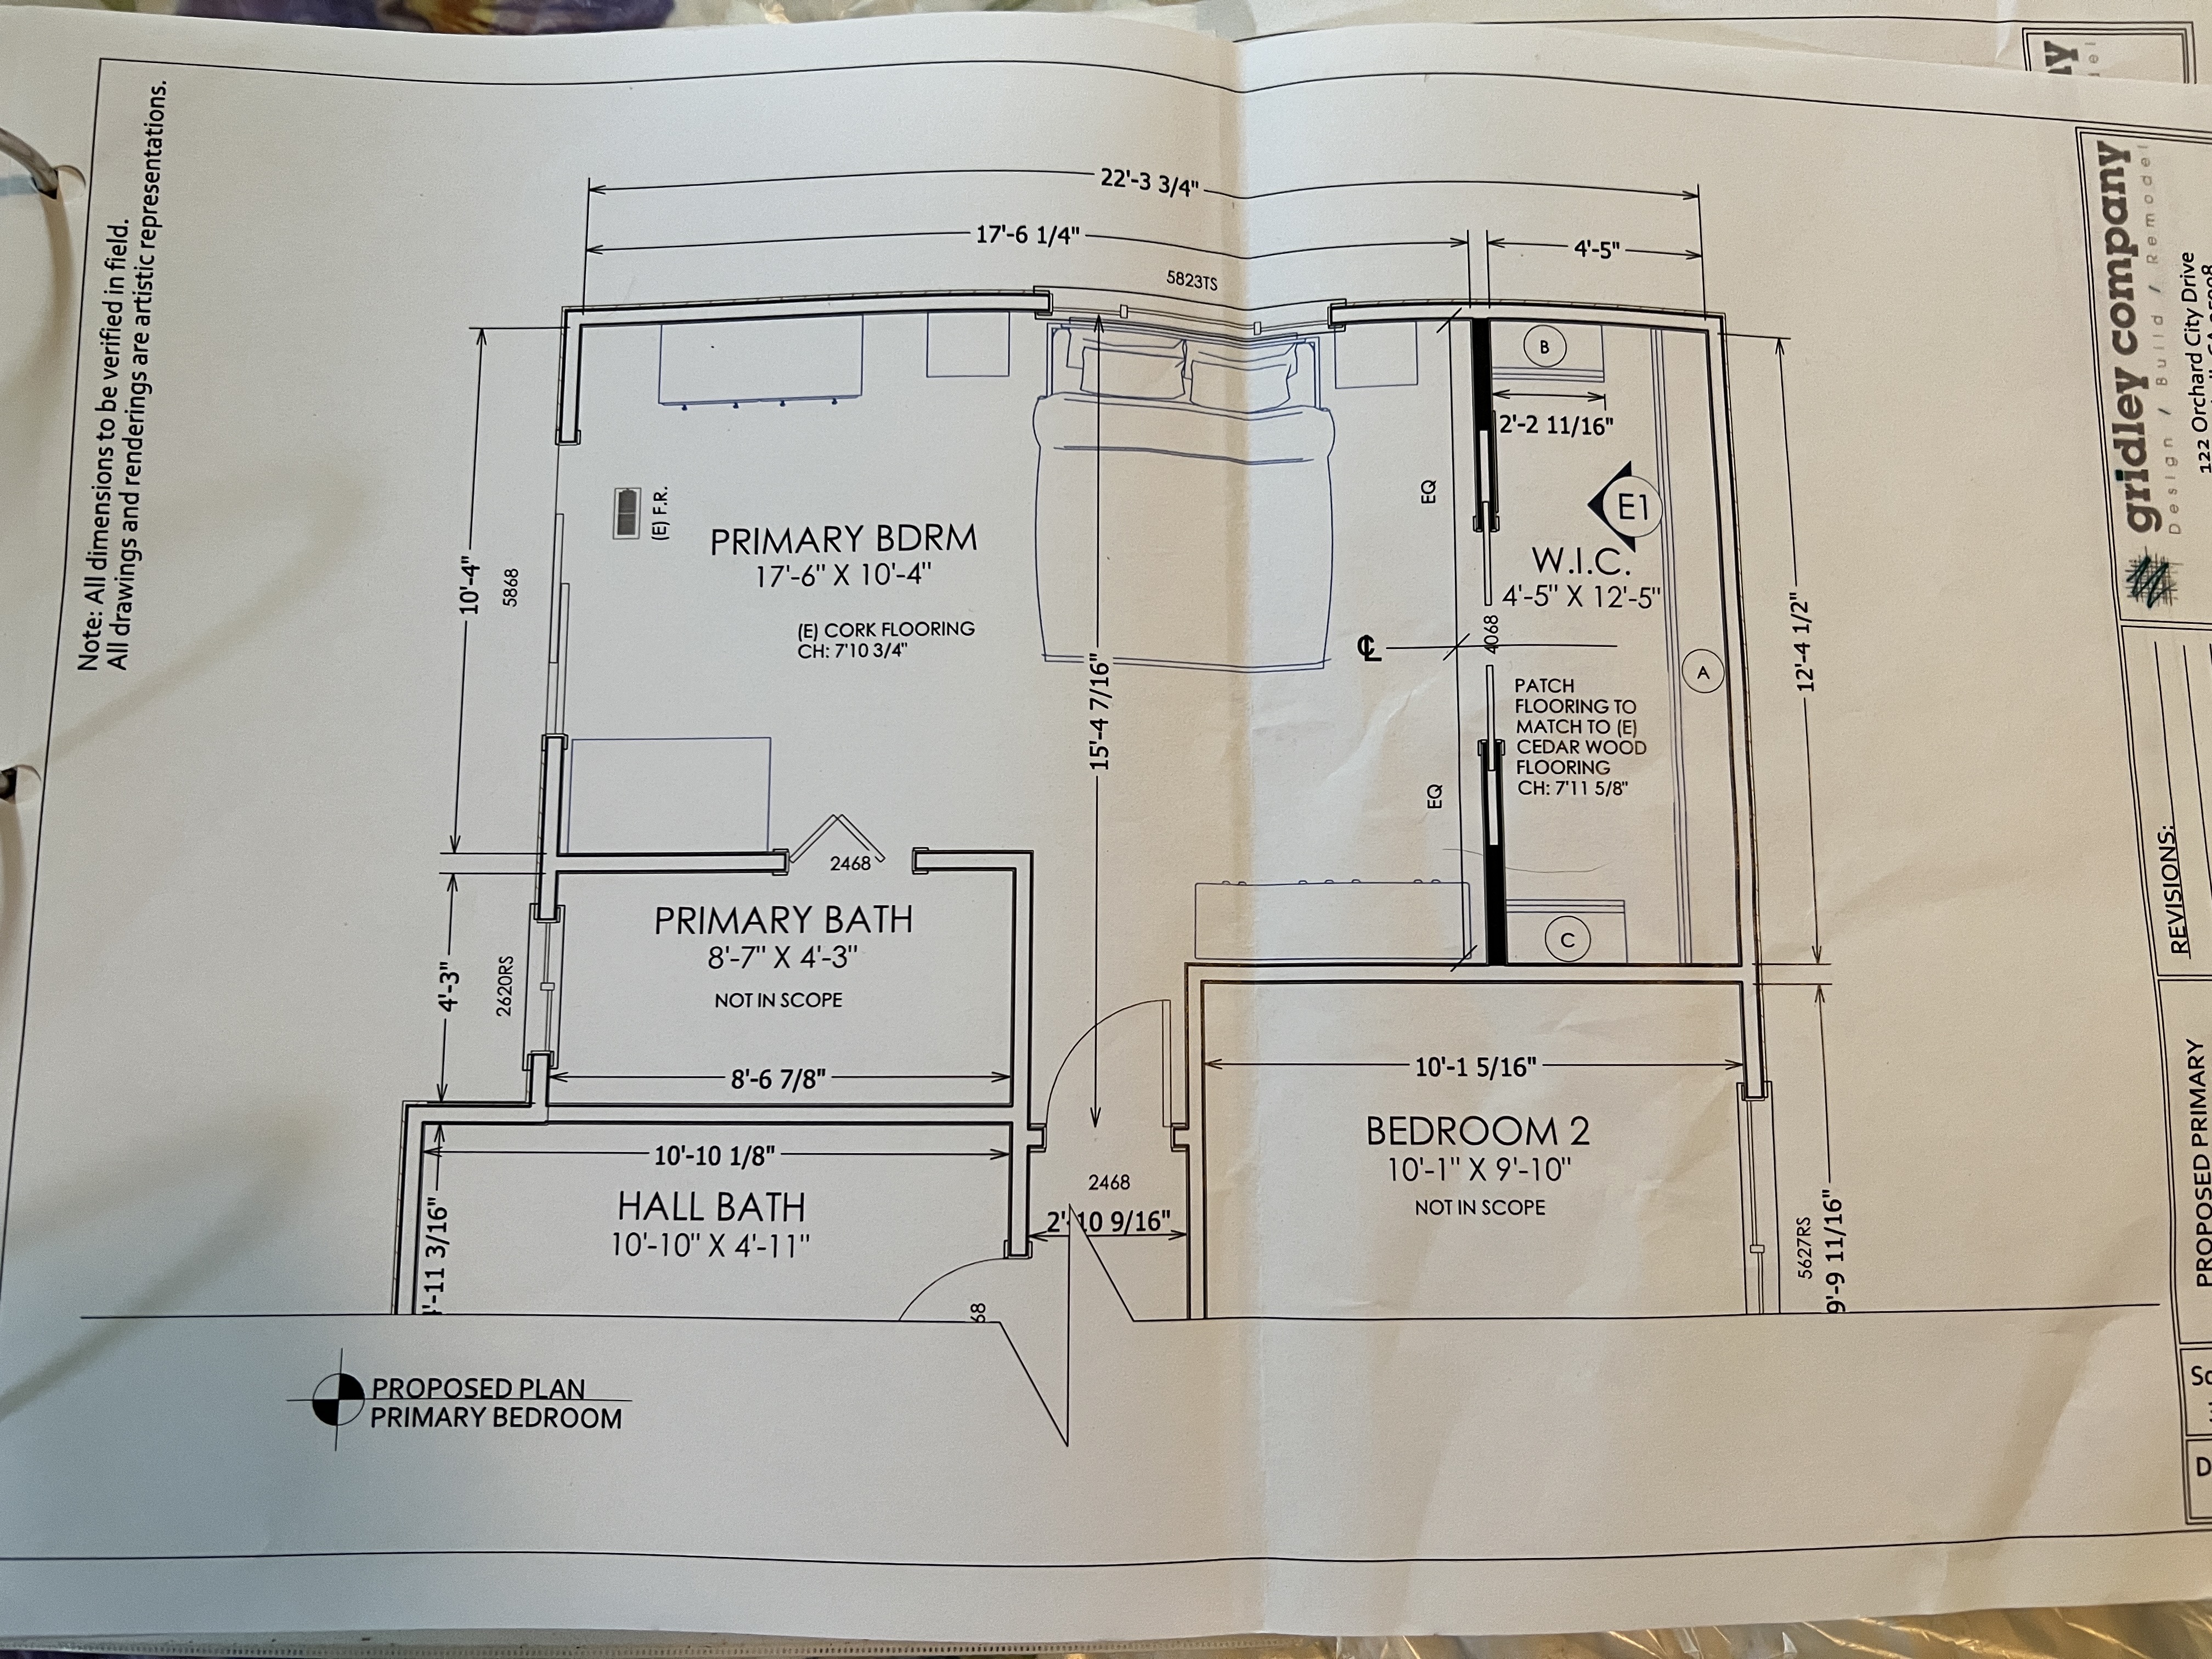
Our house is one story, about 1,500 square feet, with four bedrooms. Three bedrooms are small-to-average sized, big enough for a bed and a bureau but only a little more. On the other hand, our bedroom is oversized, with room for a king-sized bed, a bureau, Mike’s work-from-home desk, a large “pie safe” cabinet, and a pair of nightstands. We were happy to give up two feet of floor space for a new, improved closet.

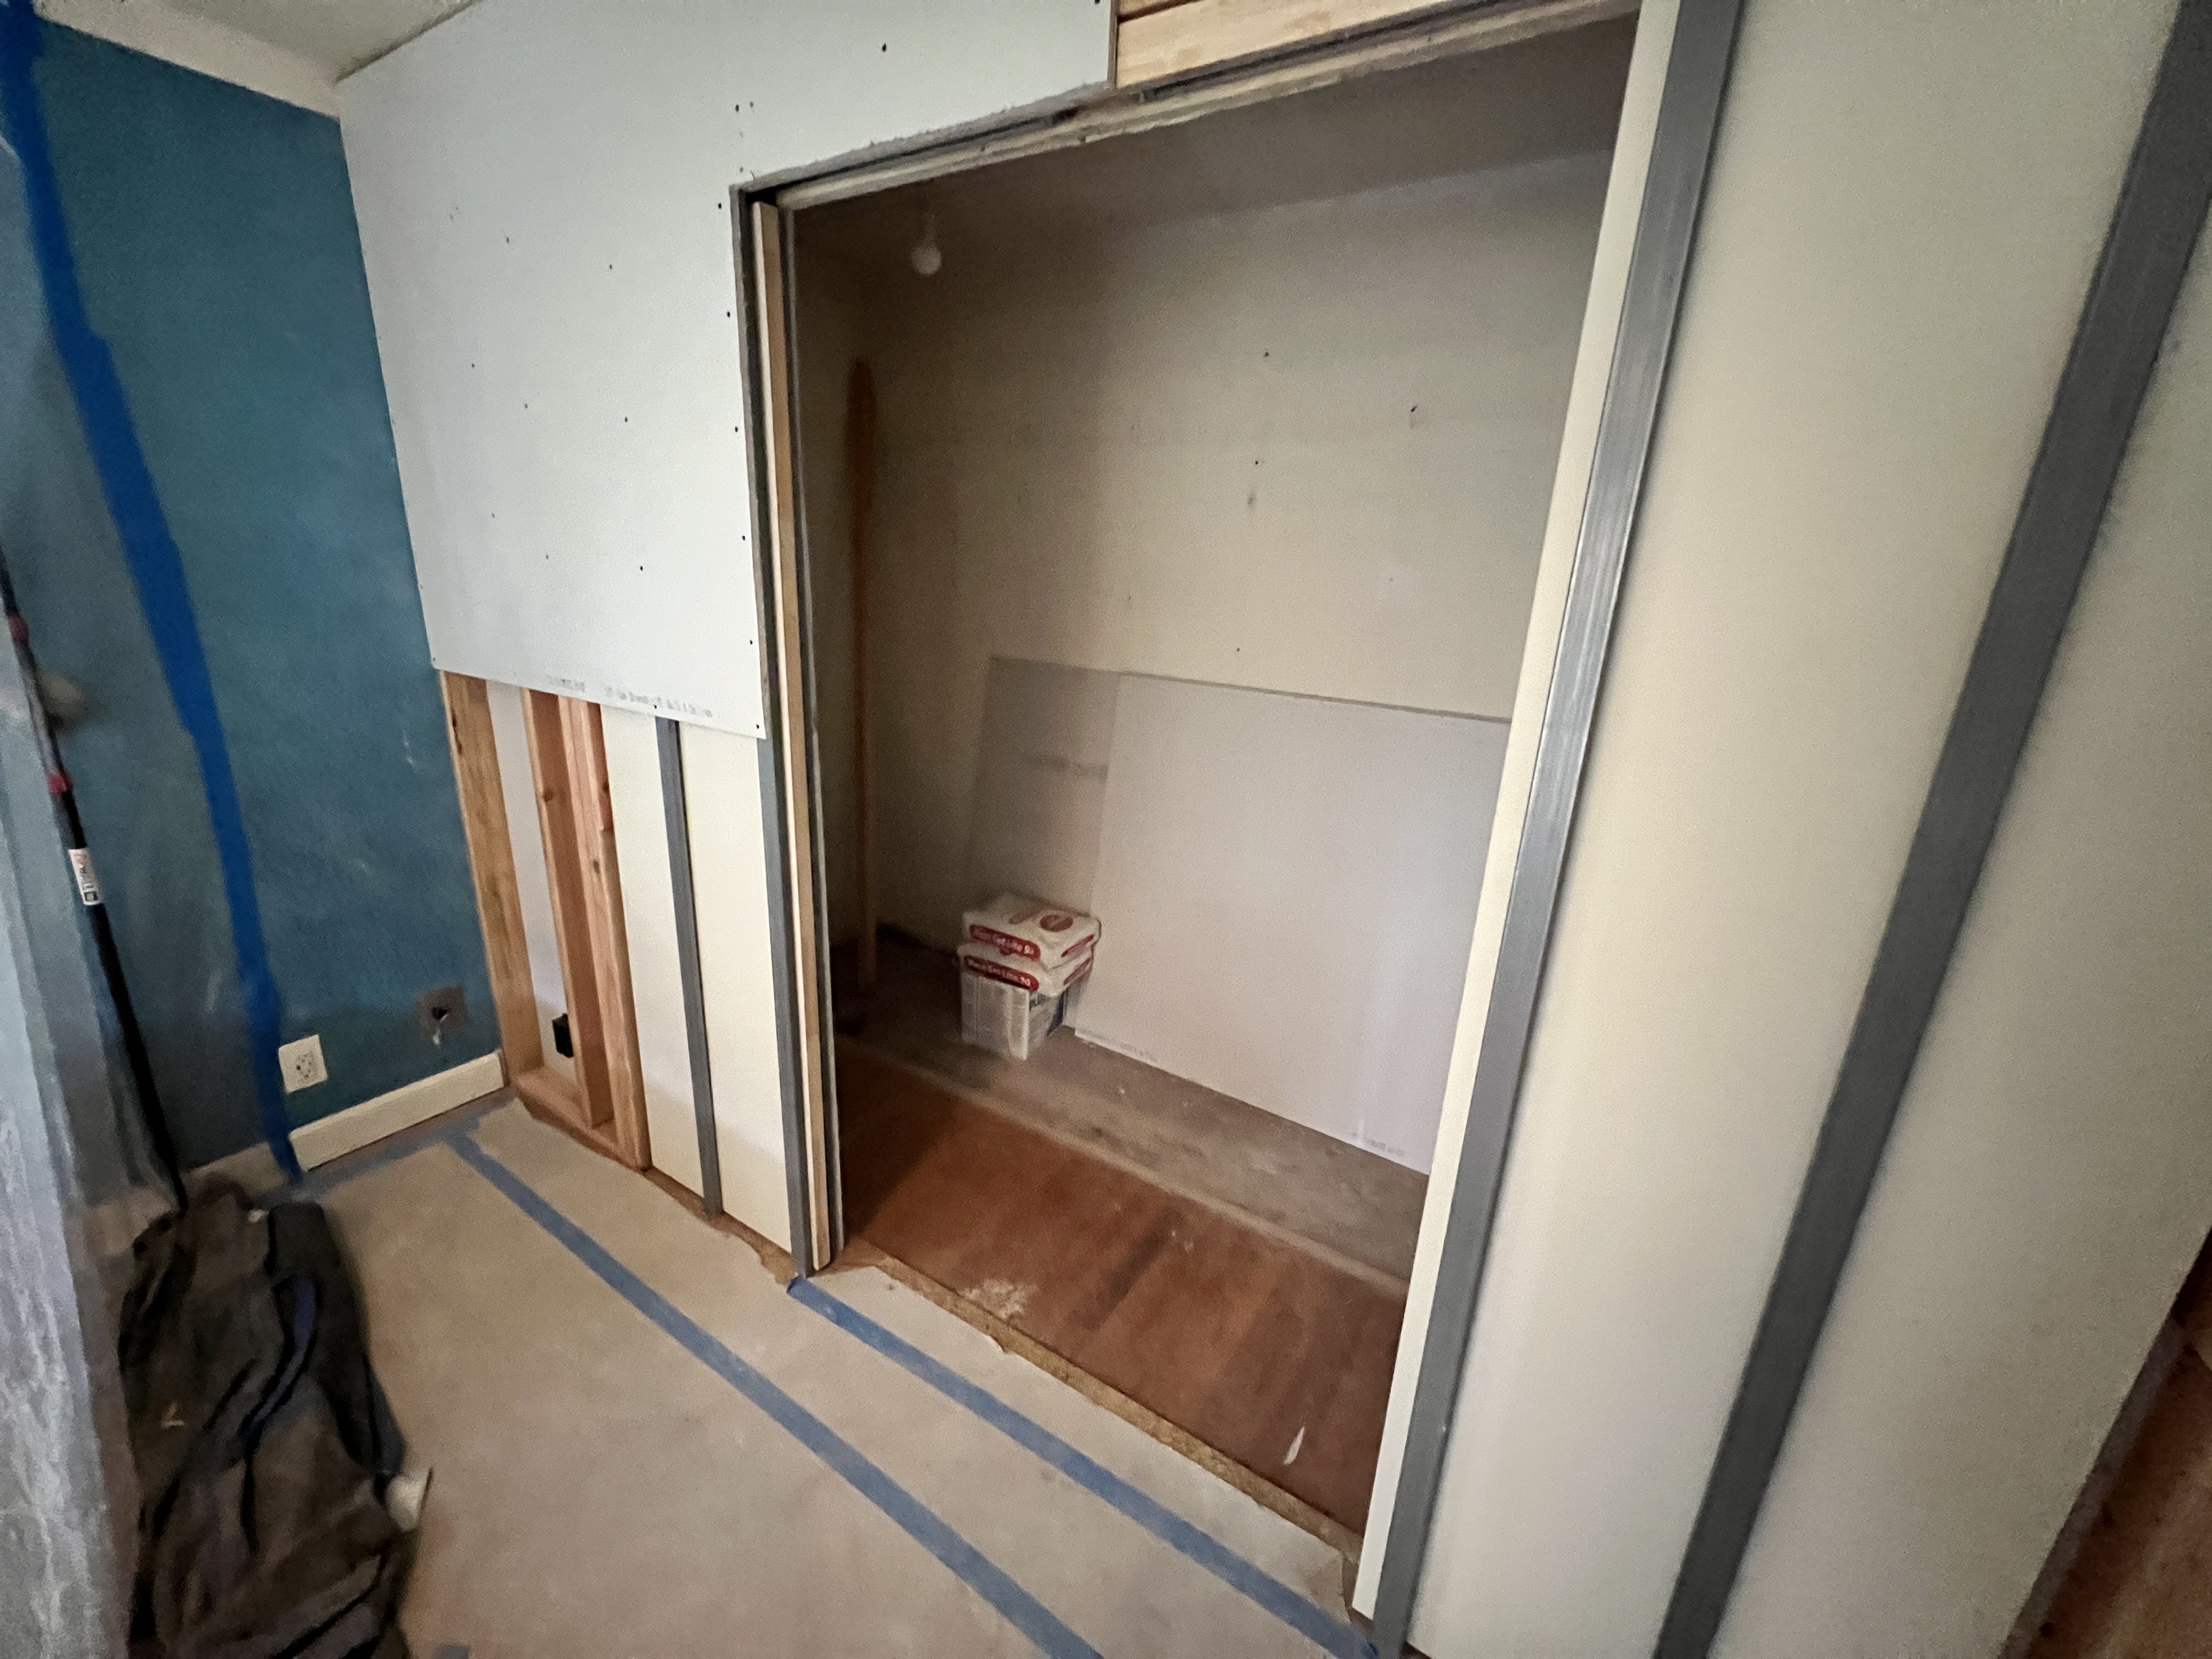
Neither of us is a clotheshound, so extra hanging space wasn’t an issue. However, the existing closet posed many challenges. The header at the top made the shelves above the hanging rods unusable. Each side of the closet had two feet of wall space between the sliding doors, limiting the usefulness of the corners. We only had one overhead light in the room, so on dark days, we struggled to see the contents of the closet and our bureau drawers. We wanted a closet with bright overhead lighting, drawers, shelves, and space for our hanging clothes.

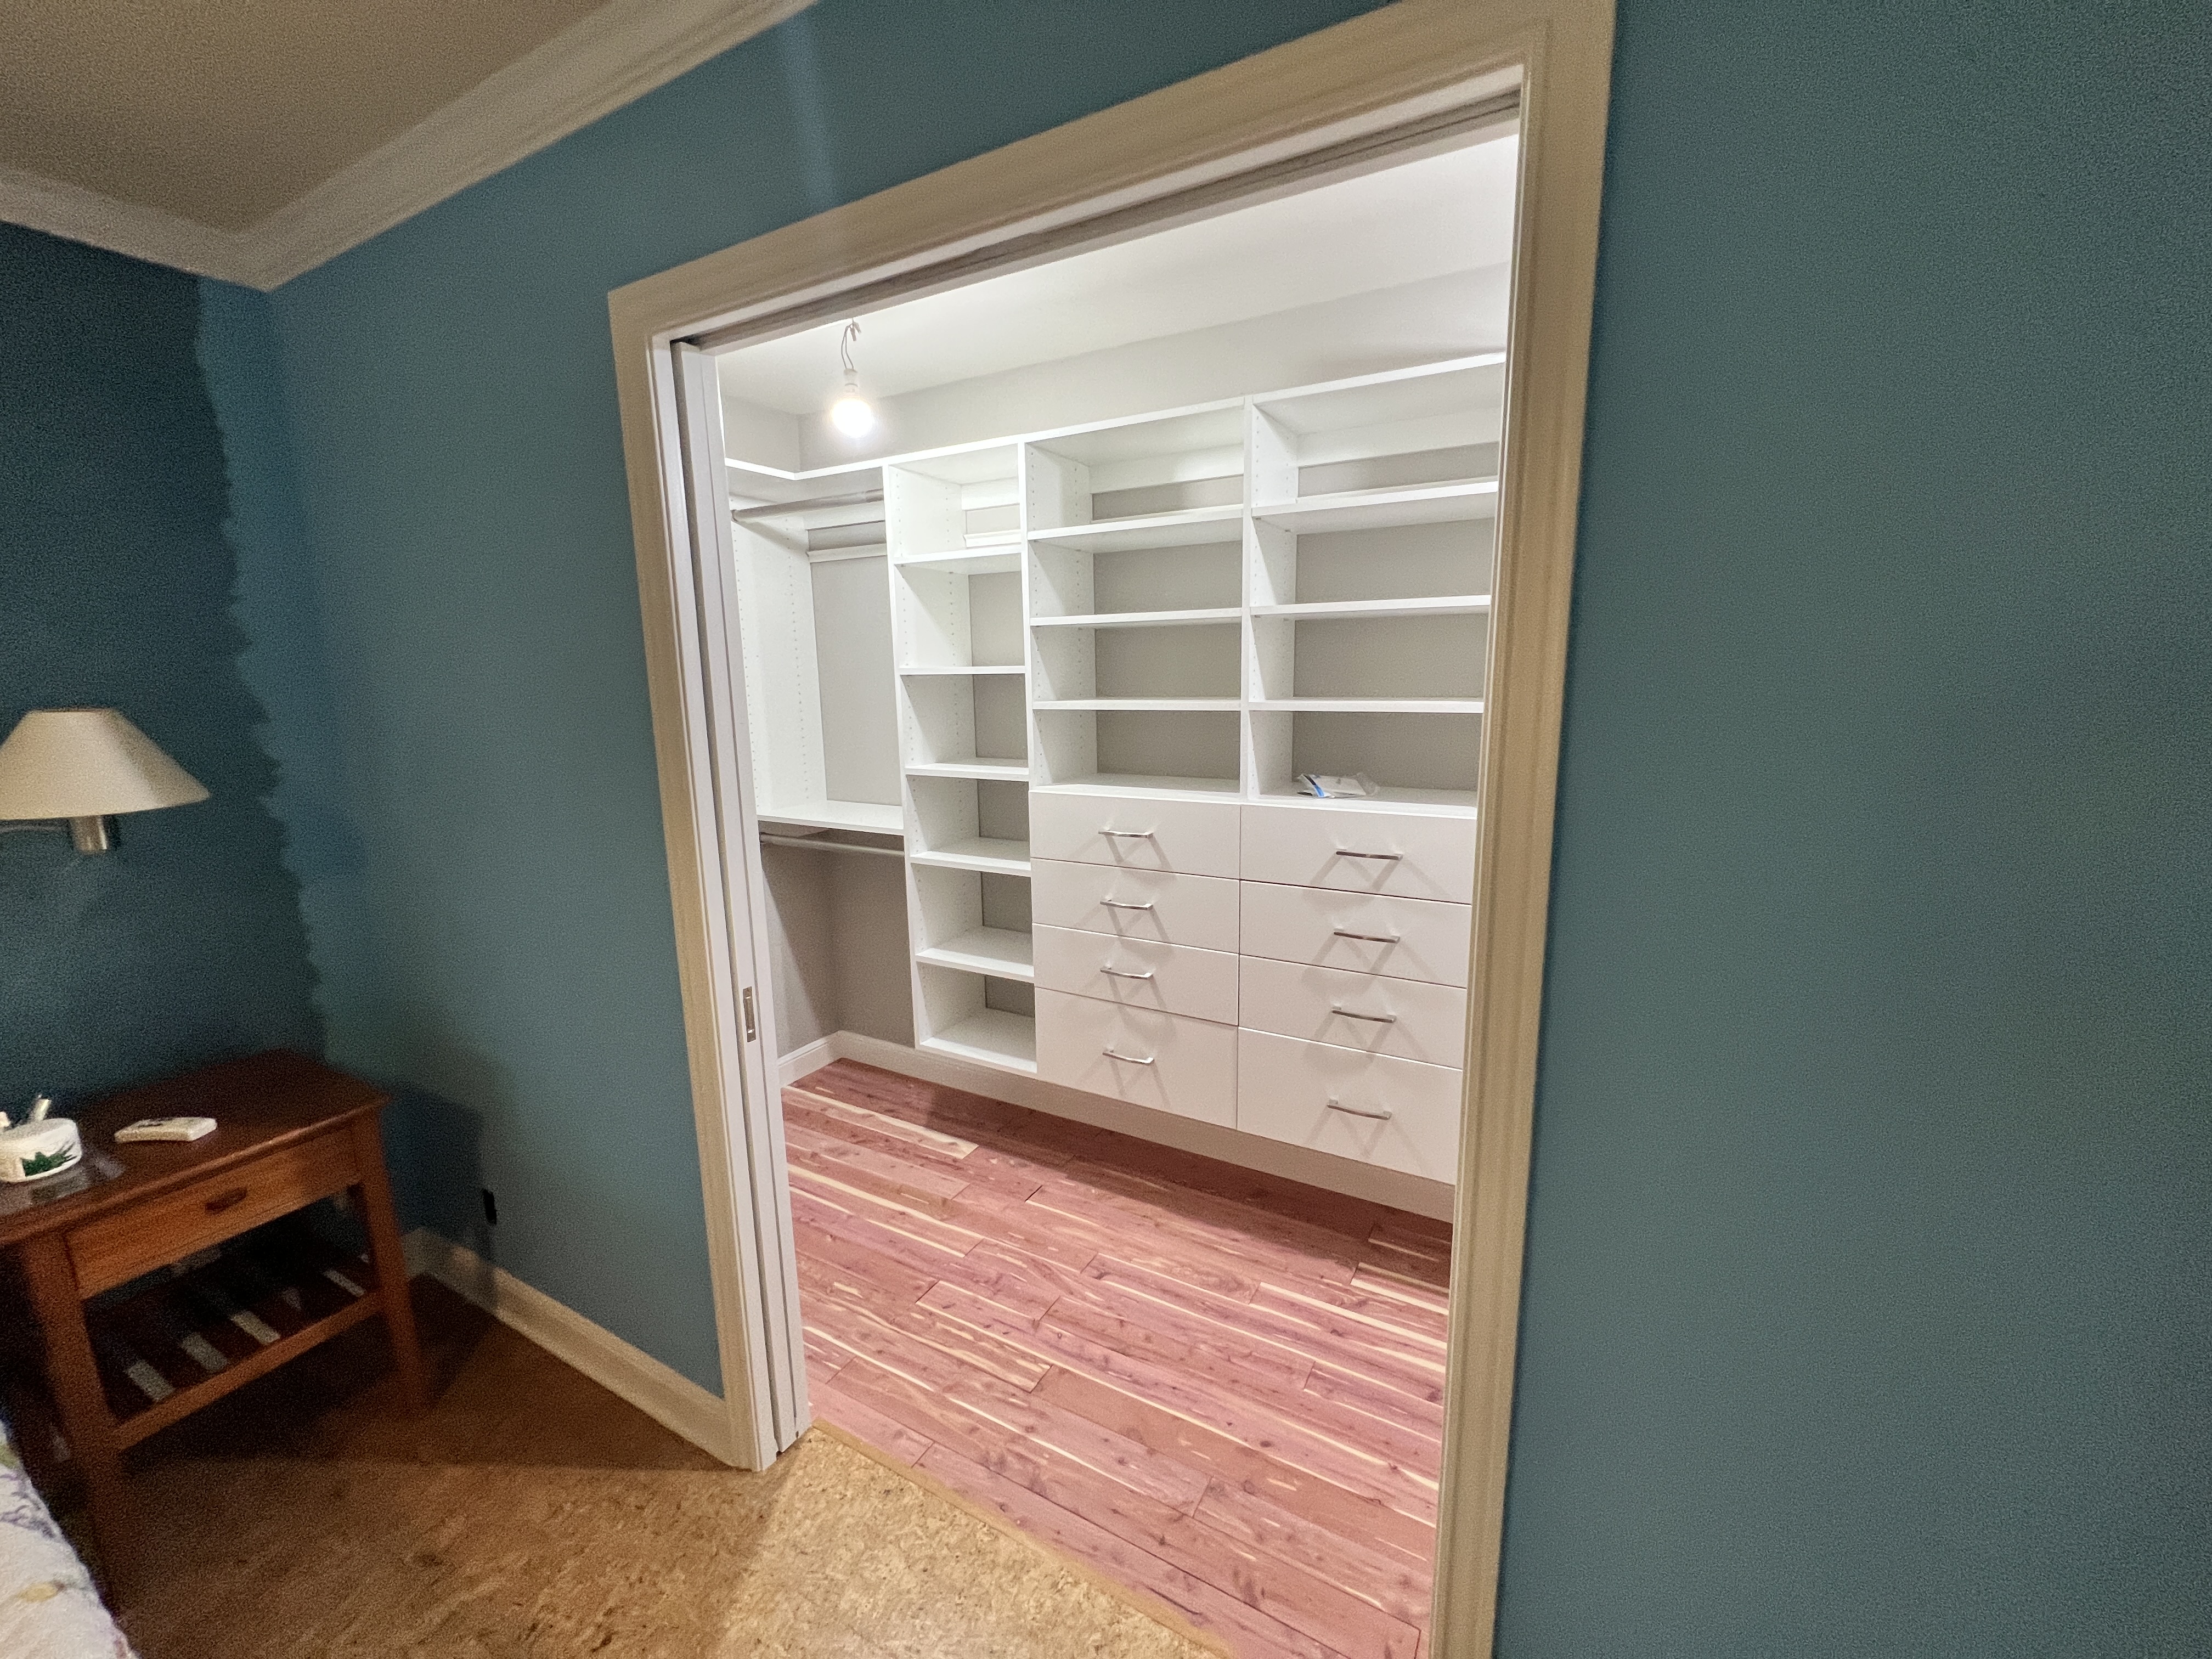
It is such a pleasure getting dressed in the morning. Putting away clean clothes is a breeze, and now all our clothes are in our new and improved closet, which feels more like a dressing room. I thought I would miss the mirrored closet doors, but I don’t. We added a full-length mirror to an opposing wall, and it’s all we need. The bureau went to a good home, as well as the lamp. I cozied up the closet floor with a long, blue runner.

The only remaining task is to have the painter return to retexture and paint the wall near the bed. The new framing and texture necessitated patching part of the wall. It’s not that noticeable, but it’s on the long list of things to do, and soon, I’ll be putting all my attention in the garden again.

I better get to it. And since I’ve been wanting to try the slider effect, I’ve used it below. The photos aren’t a perfect match, but I still had fun.

Closet exterior, before and after.

While I Was Away

Traveling is a wonderful treat.

So to is the homecoming.

While I ponder how much to share about my visits to Atlanta, Virginia, DC and New York (no one wants to plod through someone else’s holiday pics) I do want to share my garden’s amazing transformation while I was away.

Being gone for nearly two weeks as spring got under way gave me the unique opportunity to see everything with fresh eyes.  What a treat! Will you come have a look?

I’m gradually reading through your blogs, so please bear with me. I’m looking forward to catching up.


An Unexpected Treasure at the Nursery

On a recent visit to SummerWinds Nursery, I rounded the corner to find this:

potted ficus with do not move tage

Potted Ficus carefully tied to a cart

They’ve pushed a shopping cart against a sheltered exterior wall. Resting on top is a potted Ficus, attached to the cart with twine. The warning is clear: Do not move!

So what is all the fuss about?

Potted ficus

Potted Ficus

Come have a closer look.

nesting Anna's hummingbird

Nesting Anna’s hummingbird

It’s a nesting Anna’s hummingbird, native to this part of California. She must be resting on eggs, generally two. The eggs incubate for about two weeks, then the young spend another three weeks in the nest.

There is something about a mama bird in her nest that makes my heart sing. I wanted to linger, but her comfort outstripped my desire to pull up a chair and just sit there all afternoon. I took a non-flash snapshot with my phone from a distance, then zoomed in when I got home.

On the subject of nests and homes, my older son is home from college for spring break. I’m looking forward to the weekend ahead with all three of my “men” in the house.

Ah, spring. Thank you for all these gifts.

Save

Save

Save

Save

Frost Nipped Peas

Two days of a hard freeze were unkind to the garden peas.

frost damaged peas

Frost Damaged Peas

I gathered a handful this afternoon. There’s nothing to be gained at this point by leaving them on the vine. The vines are drooping as well.

The frost damaged the outer skin leaving it mottled.  The inner ‘pearls’ look surprisingly good though.

peas

Peas, unmasked

garden peas

The in and out of garden peas

It’s supposed to ‘warm up’ to a low of 38º F (3ºC) by Friday, but will drop back ten degrees  the following day.  With over two weeks to go before the winter solstice is upon us, I wonder what this means for the season ahead?

Organized at Heart

I’m posting a series of articles featuring organizing around the holidays this week on my blog Organized at Heart. If the subject interests you, please go take a peak.  Today’s blog offers some tips for creating new giving traditions for the holidays.

Frosty San Jose

frosty inflatable

My son’s prized inflatable, pretend snowing in San Jose

Still no rain, and certainly no snow, but we did get some frost last night.  This isn’t a big deal for everyone, but it’s a rare occurrence around here.  It’s December 4th after all.  The tomato plant had to go eventually.

DSC_0008

I have lots of frozen peas (and I never stepped foot in the freezer aisle). They look plump and juicy and, well, frozen. Since it’s a winter crop, I’m not sure what to think.  The plant doesn’t seem to mind, but it may take a few days for any damage to appear.  I’ll let you know.

frozen pea

Frozen peas, available now in your neighborhood garden

Last week I *finally* planted some beats. I soaked the seeds at the same time I planted the peas, but originally planned to put them in the veggie garden out back.  The tomato plant hung on and on in one bed, and the strawberries in the other, so I didn’t have room.  I planted the beats in the curb garden with the carrots and peas.  I hope they’re equally successful, and that I didn’t plant them too late.

plump pea

Plump and ready

I started my broccoli seeds indoors and all was going well. Somewhat foolishly I started hardening them off, the process of acclimatizing the seeds to their new outdoor home. It would have been better to wait till the holidays were over. I simply forgot about them.  They came back inside for water and a rest.  Hopefully enough of them will recover so I can make a go of it.

Next up, spring bulbs. My back just hasn’t been up to the task this year, so bags of bulbs sit in the garage waiting for my next move.

I think I’ll go make myself a hot cup of tea while I give this more thought. I hope you’re enjoying your day.

Frosty paw prints

Frosty paw prints

Organized at Heart

I’m posting a series of articles featuring organizing around the holidays this week on my blog Organized at Heart. If the subject interests you, please go take a peak.  Today’s blog has a few filing tips (boring) along with beautiful file folders (sweet) to inspire this mundane task.

The Giving Garden

One of the coolest things about our neighborhood is the general camaraderie.  Neighbors talk to neighbors.

On the surface, that sounds so simple, but time and again we hear from others how lucky we are to live on a street where all the neighbors know each other.  Over the years, we’ve covered for each other with emergency child-care, extra meals in times of poor health, emotional support and carrots.

Carrots?

Yes, even carrots.

The grandfather of one of the daycare kids walked by while I was curbside chatting with (yes) another neighbor.  I reached over to offer him a fresh garden pea, when he stopped me and asked if he could have ten.  More specifically, his granddaughter needed ten items to trade during Kindergarten class for a lesson on trade and Thanksgiving.

Our quick search didn’t  yield ten pea pods, but there were still plenty of carrots.  Not just any carrots, but the very carrots the wee kinder (gardener) planted herself.  He came back with his granddaughter later that day. Her brother gave her special permission to harvest his carrots as well in case she didn’t have enough.

Baggy in tow, she pulled up several carrots, bagged them and happily smiled for the camera.

harvesting carrots

Harvesting

Grandpa asked her to rinse the dirt from her hands in the fresh rain water, and then she wiped them on the grass.  I stepped in and dried her tiny hands on the inside of my jacket, because honestly, once a mom always a mom.  I scooped her into a hug and she was on her way.

harvested carrot

Harvested carrot

all smiles

All smiles

You reap what you sow .  I felt such a welling of emotion as I turned to come inside.  Ten little carrots were on their way to the classroom, and once again the giving garden filled me with joy.

Saucy Succulents

Succulents

I love that word.  Succulent conjures up something sweet and juicy, but it also refers to a type of plant.  Saucy, juicy, care-free succulents.

I met a succulent gardener last summer over a bunch of dirt.  Top soil to be exact.  Long story, but I ordered planting mix and received top soil instead.  The vendor offered a refund but would not come pick up the soil.  I offered the  top soil on Freecycle, and that’s how I met Amy.

Amy grows succulents in her beautiful garden.  I helped her unload the soil at her home and she gave me the nickel tour.  I hope to go back and take pictures to share with all of you.  Her garden is unique and perfectly suited to our semi-arid climate.

Amy sent home a few cuttings from her garden that day.

Amy succulent large pot

Cutting from Amy’s garden

Earlier this year, I planted Sedum in my tower of pots.  I simply pressed the cuttings directly into the soil and off they grew.  Amazing!  They’re doing great in a couple of pots on my deck.

tower of pots succulents

Tower of pots

succulent towe of pots

Amy’s cutting joins the tower of pots

Coincidentally, I bought a few succulents mid-July.  They came beautifully pre-planted and ready to hang.  I hung them on the side of the house near the deck.  They only need water about once a month.

assorted succulents

Assorted succulents hang on the side of the house

In early October, I moved the hanging planters to make room for Halloween decorations.  Turns out they look nice back-to-back on the center of the outdoor table.

succulent pots

Succulents relocated

succulent closeup

Closeup, with a joyful accent from Boomdee

These saucy succulents are a welcome addition to my garden ensemble. I’m looking forward to adding more next year.


Craft if Forward: Garden Journal

This month’s craft it forward goes to Emma at Greenhousing.   Emma is a fellow gardener, helping things grow in her own special garden in the UK.

She started Greenhousing: Big Plans for a Small Garden with her husband to:

plan and keep a record of our hard and not-so-hard work.

Luckily we have been hoarding lots of plant pots of various sizes, seed and drip trays, pot trays, seeds, weed suppressant fabric, vegetable and tomato fertiliser, etc. so we can make big plans without having to spend a lot of money.

The garden is an odd shape at the back of the house, with fencing on three sides and a corner of a neighbour’s garage jutting into it.  The big plan is to work around any obstacles and grow some tasty food and lovely flowers and plants.

She hasn’t posted for a while, so I’m hoping life simply got busy and that all is okay.

Garden Memories

I started by gathering garden-inspired paper and embellishments.  Oh how I tax myself [wink-wink]). I assembled an 8 x 8 book/album, small enough to carry into the garden to record notes on garden progress.  It can also be used to save photos of her garden successes or remembrances of her first year with a lovely greenhouse.

Here are a few sample pages:

garden journal page 1 garden journal page 2 garden journal page 3 garden journal page 4 garden journal page 5 garden journal page 6 garden journal back cover

What is Craft it Forward?

Here’s how it works. The first five people to comment on the original post receive a handmade item with the gardening nirvana touch. In return, they agree to pay it forward, crafting their own unique item for the first five people on their list. Craft it Forward encourages community, creative spirit and camaraderie. It also encourages flexibility, so I expanded my list from five to seven based on interest in the project. Isn’t it fun making your own rules?

Further, in the era of the internet, who doesn’t like ‘real’ mail? If you haven’t started your own Craft it Forward, today is a good day to get going.

Alliterating Peppers

There is something about peppers that invite alliteration. It all started when “Peter Piper picked a peck of pickled peppers…”

Personally I prefer my peppers un-pickled,

Enticingly edible, eatable and esculent,

Perfectly pleasant,

Pretty, pleasing and plump,

Effortlessly enjoyed and

Raw

How about you?

Fall bounty

Fall Bounty

peppers

You win some, you lose some,  Pepper Pests

How to Braid A Carrot

Note: I’ll have to put some thought into tagging this post.  I’m not sure anyone ever did a Google search using the term “braid carrot.”  Here goes:

Step one:

Purchase nursery six-packs of small, leafy carrot starters.  Make the following assumption: each cell contains one carrot plant.

Step two:

Plant accordingly.  Be sure to gather the neighbor’s day-care kids.  Turn tiny people into future gardeners.

Step three:

Wait 50 – 70 days.  Publicize your countdown in your blog sidebar.  This is an important step for those of us with “menopause brain.”

Step four:

Take the sage advice of a couple of bloggers who inquire “did you thin the plants?”  (Note: In my gardening defense, I know about thinning seeds.  I just ASSumed they were pre-thinned before I bought them.)

Step five:

Dig up a few ‘spare carrots’, in this case, the carrots planted on the other side of the curb garden as back ups in case the tiny gardener’s crop fails.  (One or two did and I was able to fill in accordingly) Realize, oh-oh…I didn’t thin the plants.  Thin one or two and watch them droop.  They didn’t like waking up early.

Step six:

Reset the countdown in the side-bar from 50 to 70 days and wait some more.

Step seven:

The most important step of all: Watch the tiny gardeners cute, wondrous faces as they dig up a carrot and realize what they’ve grown.  Picture me smiling from ear to ear.

carrot harvest 2

Tiny gardener harvesting carrots

carrot harvest 1

Carrot unearthed

And if you’ve read this far, here is the tutorial I promised.

How to braid a carrot:

  1. Refer to steps one through seven.

braided carrots

Braided Carrots