Decorating the Yellow Room

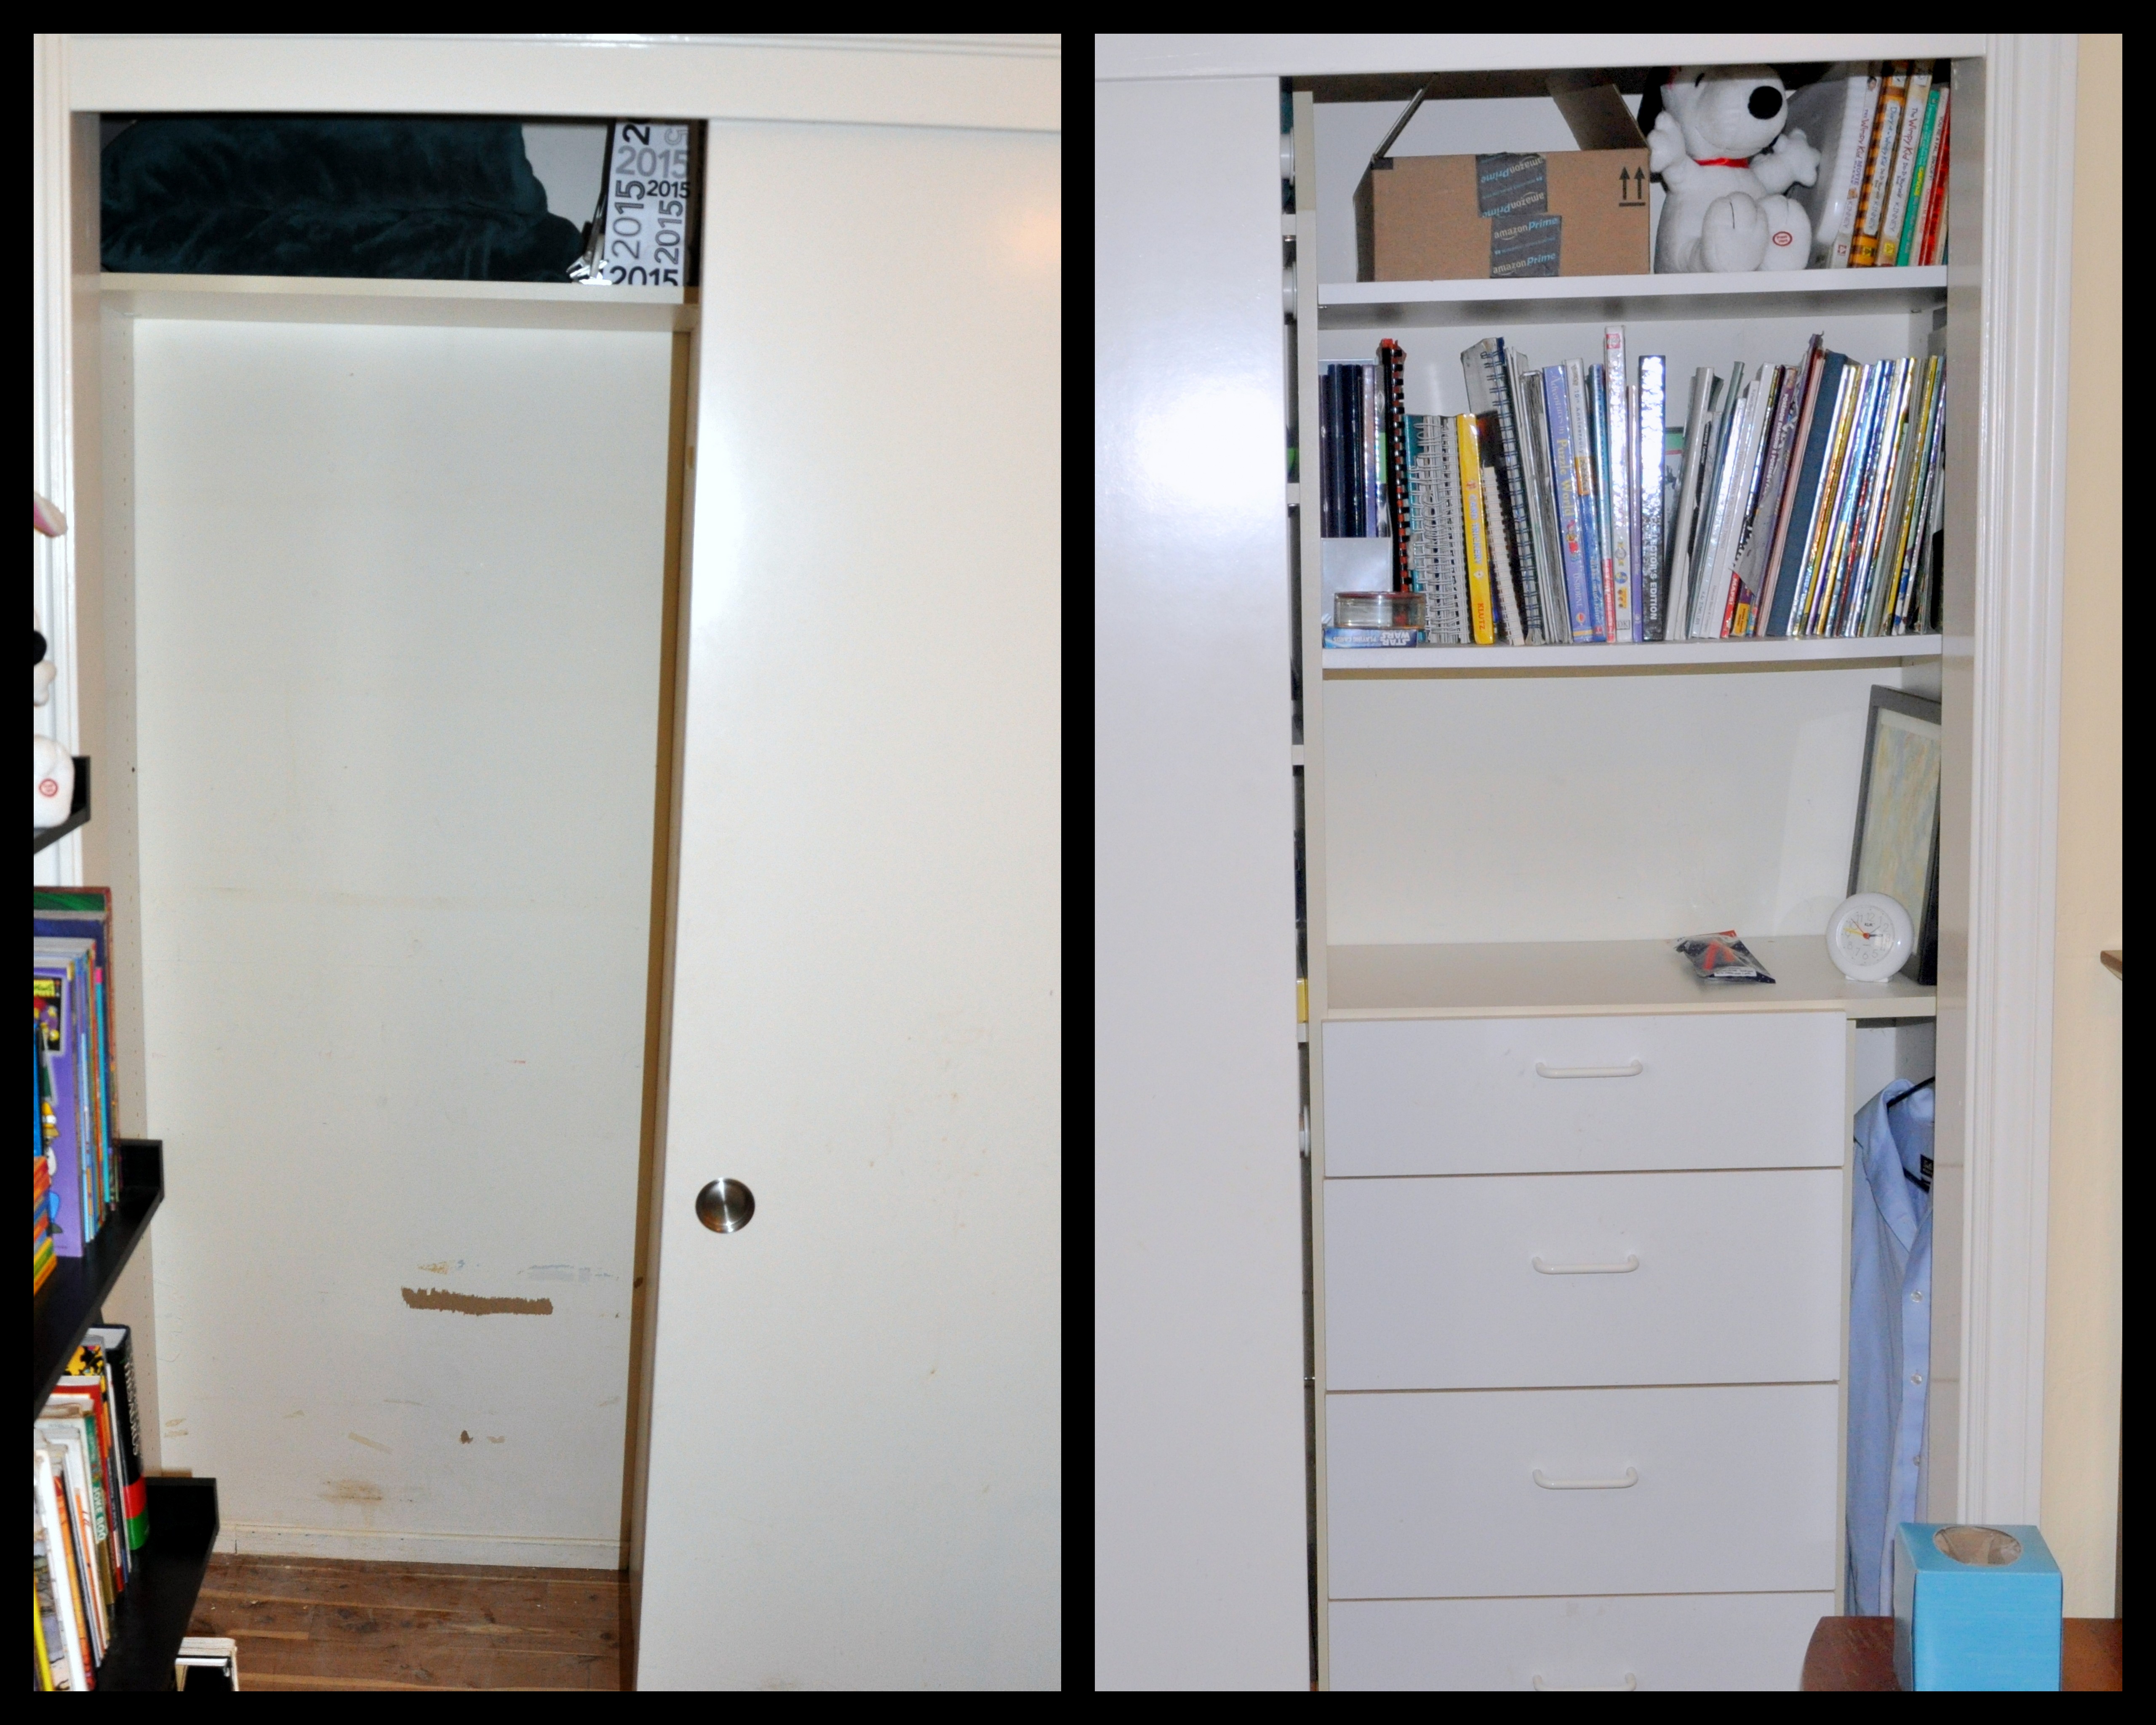
We’re calling it the yellow room.

When my oldest son moved into his condo in late 2021, he took his bed, a desk, and a small table. He’s a minimalist like his mom. My son takes comfort from the familiar, whereas I enjoy change, so it worked out beautifully for both of us.

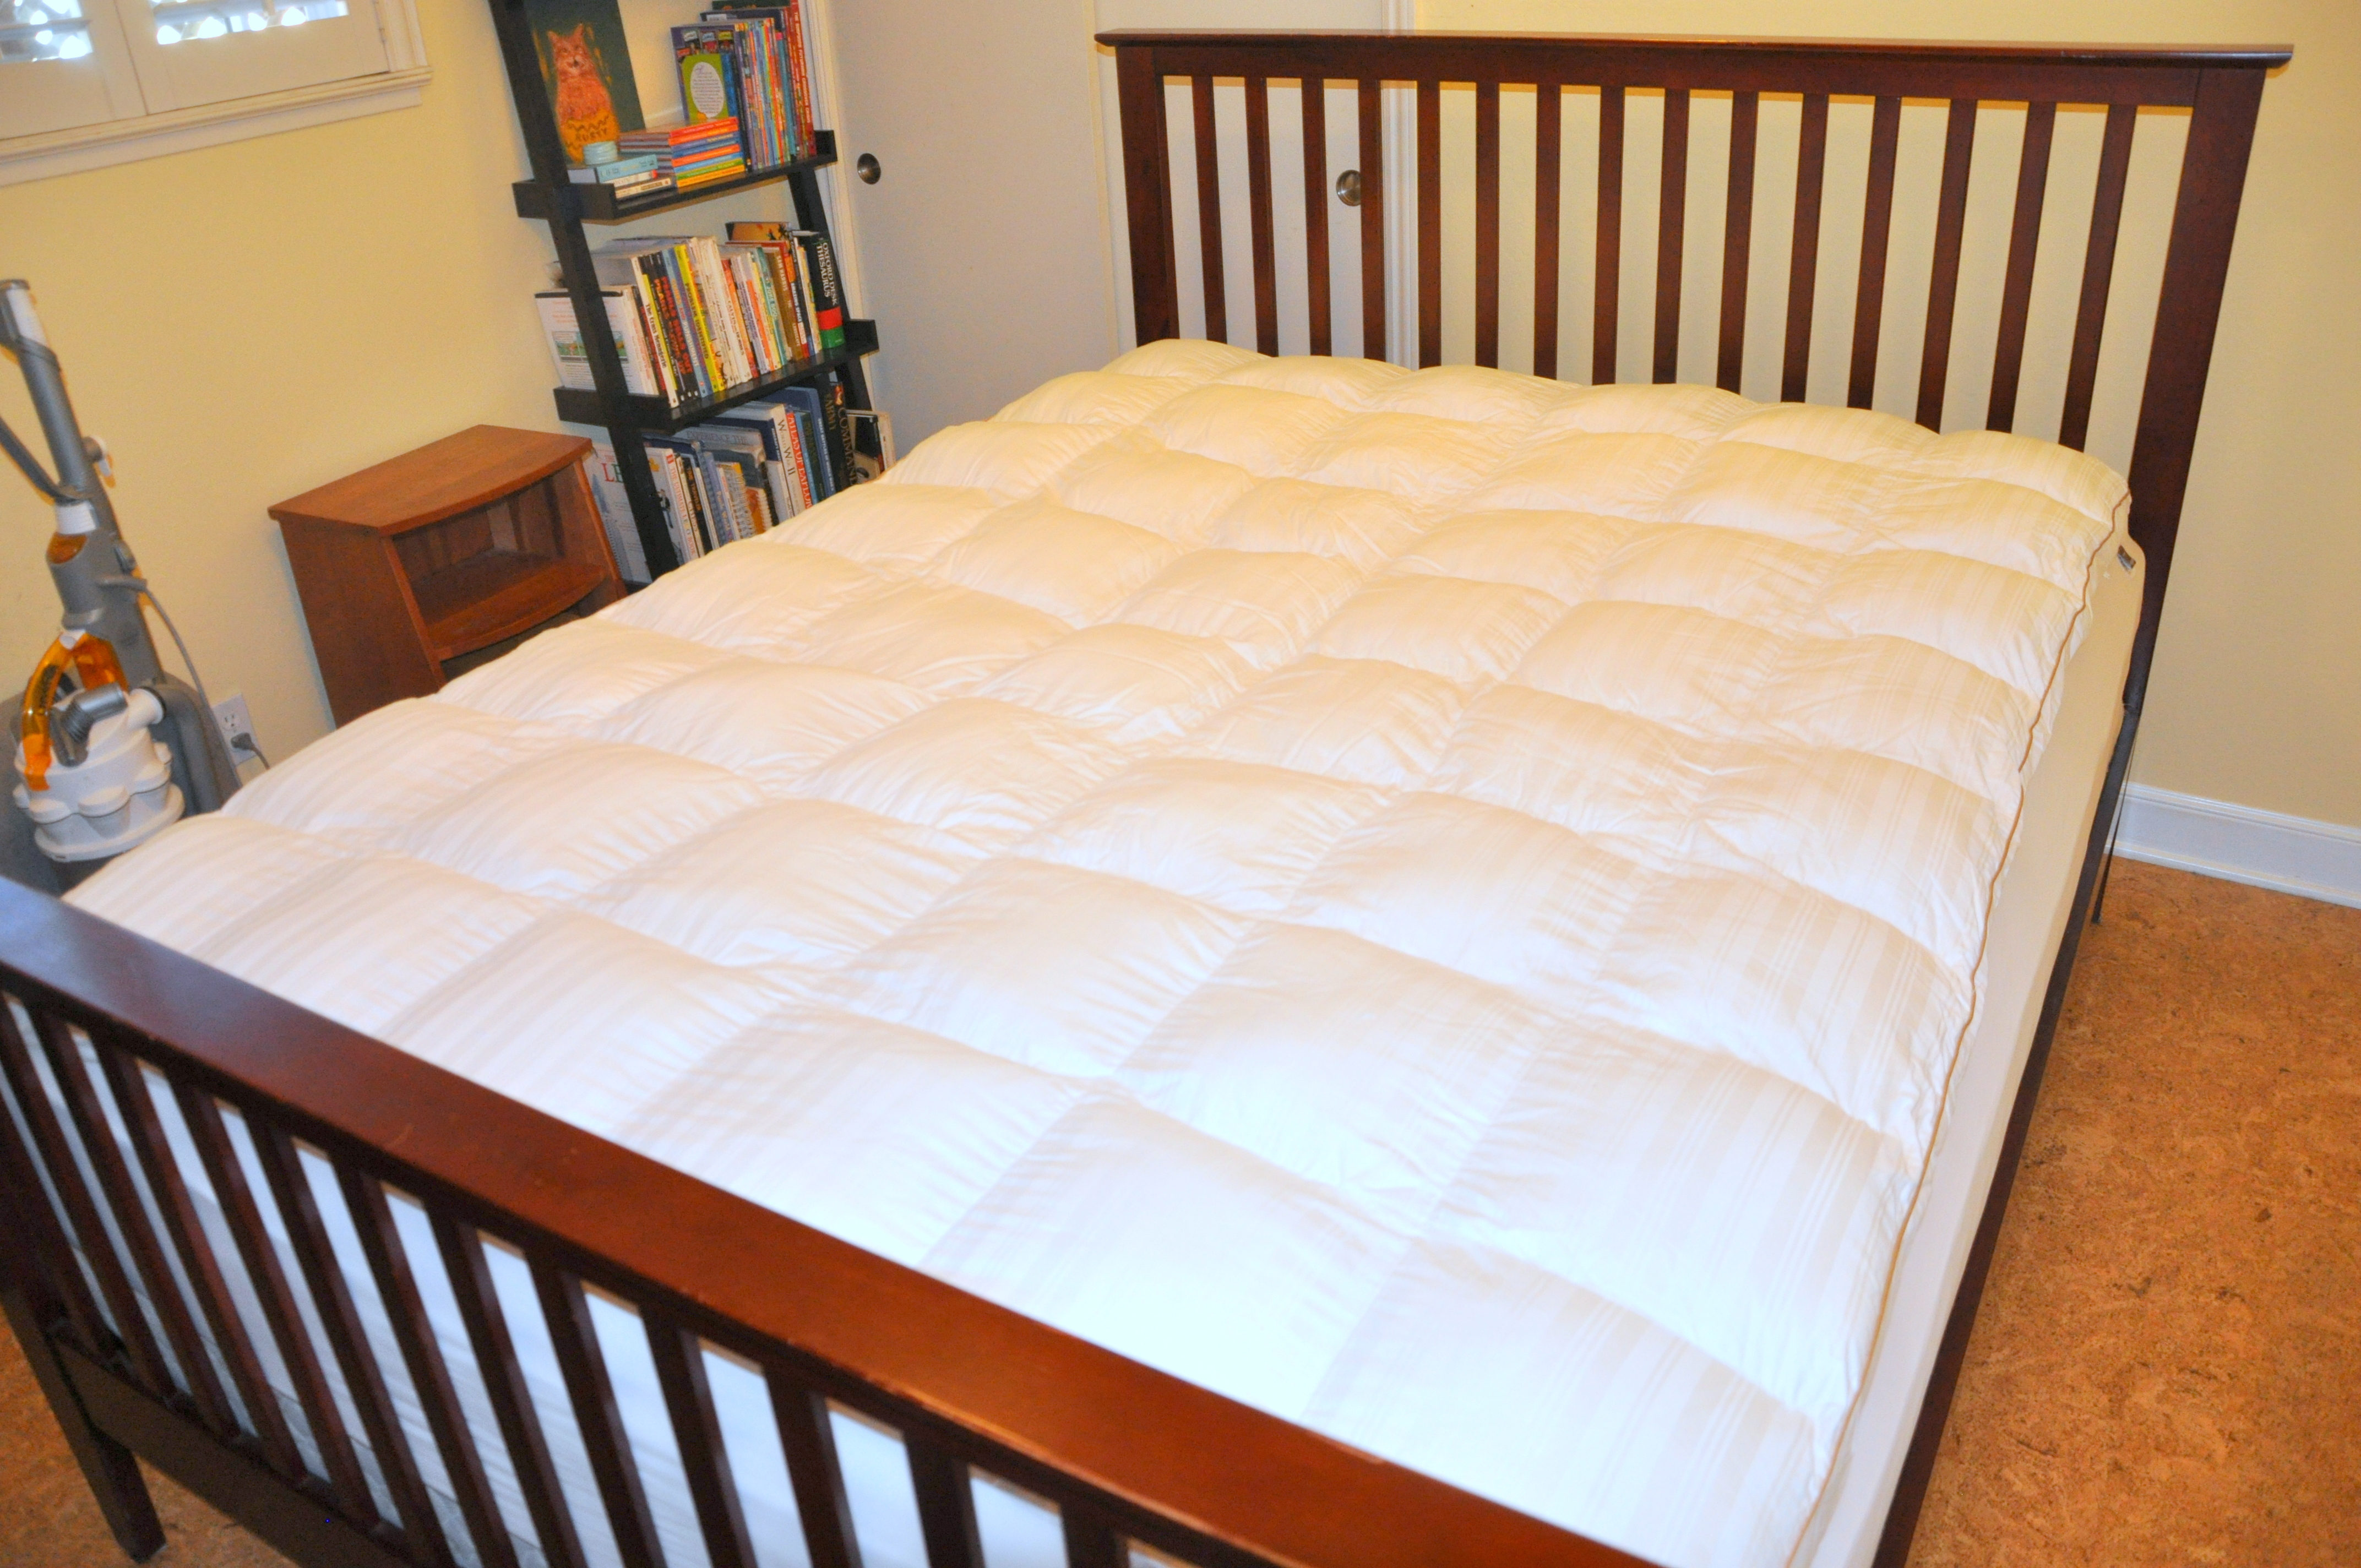
Mike and I bought a bed and a nightstand from Scandinavian Designs for the room, and that was it for a year. After that, I didn’t have the time or the energy to do more. I spent the last few months of last year researching assisted living for my younger sister, cleaning, clearing, packing, and organizing movers for a rainy December day. I set up her new space, hired a realtor, and cleared out what remained at the condo. Her place sold last month.

Between those hectic weeks, I made lists. Then, I spent evenings looking for unique bed coverings online.

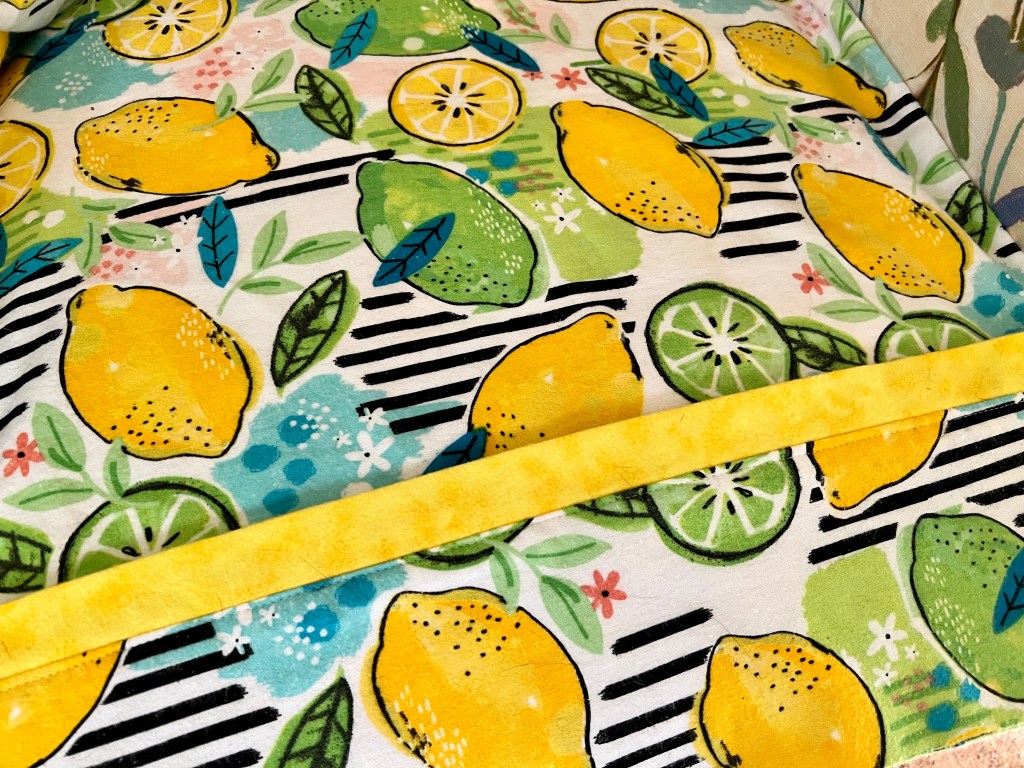
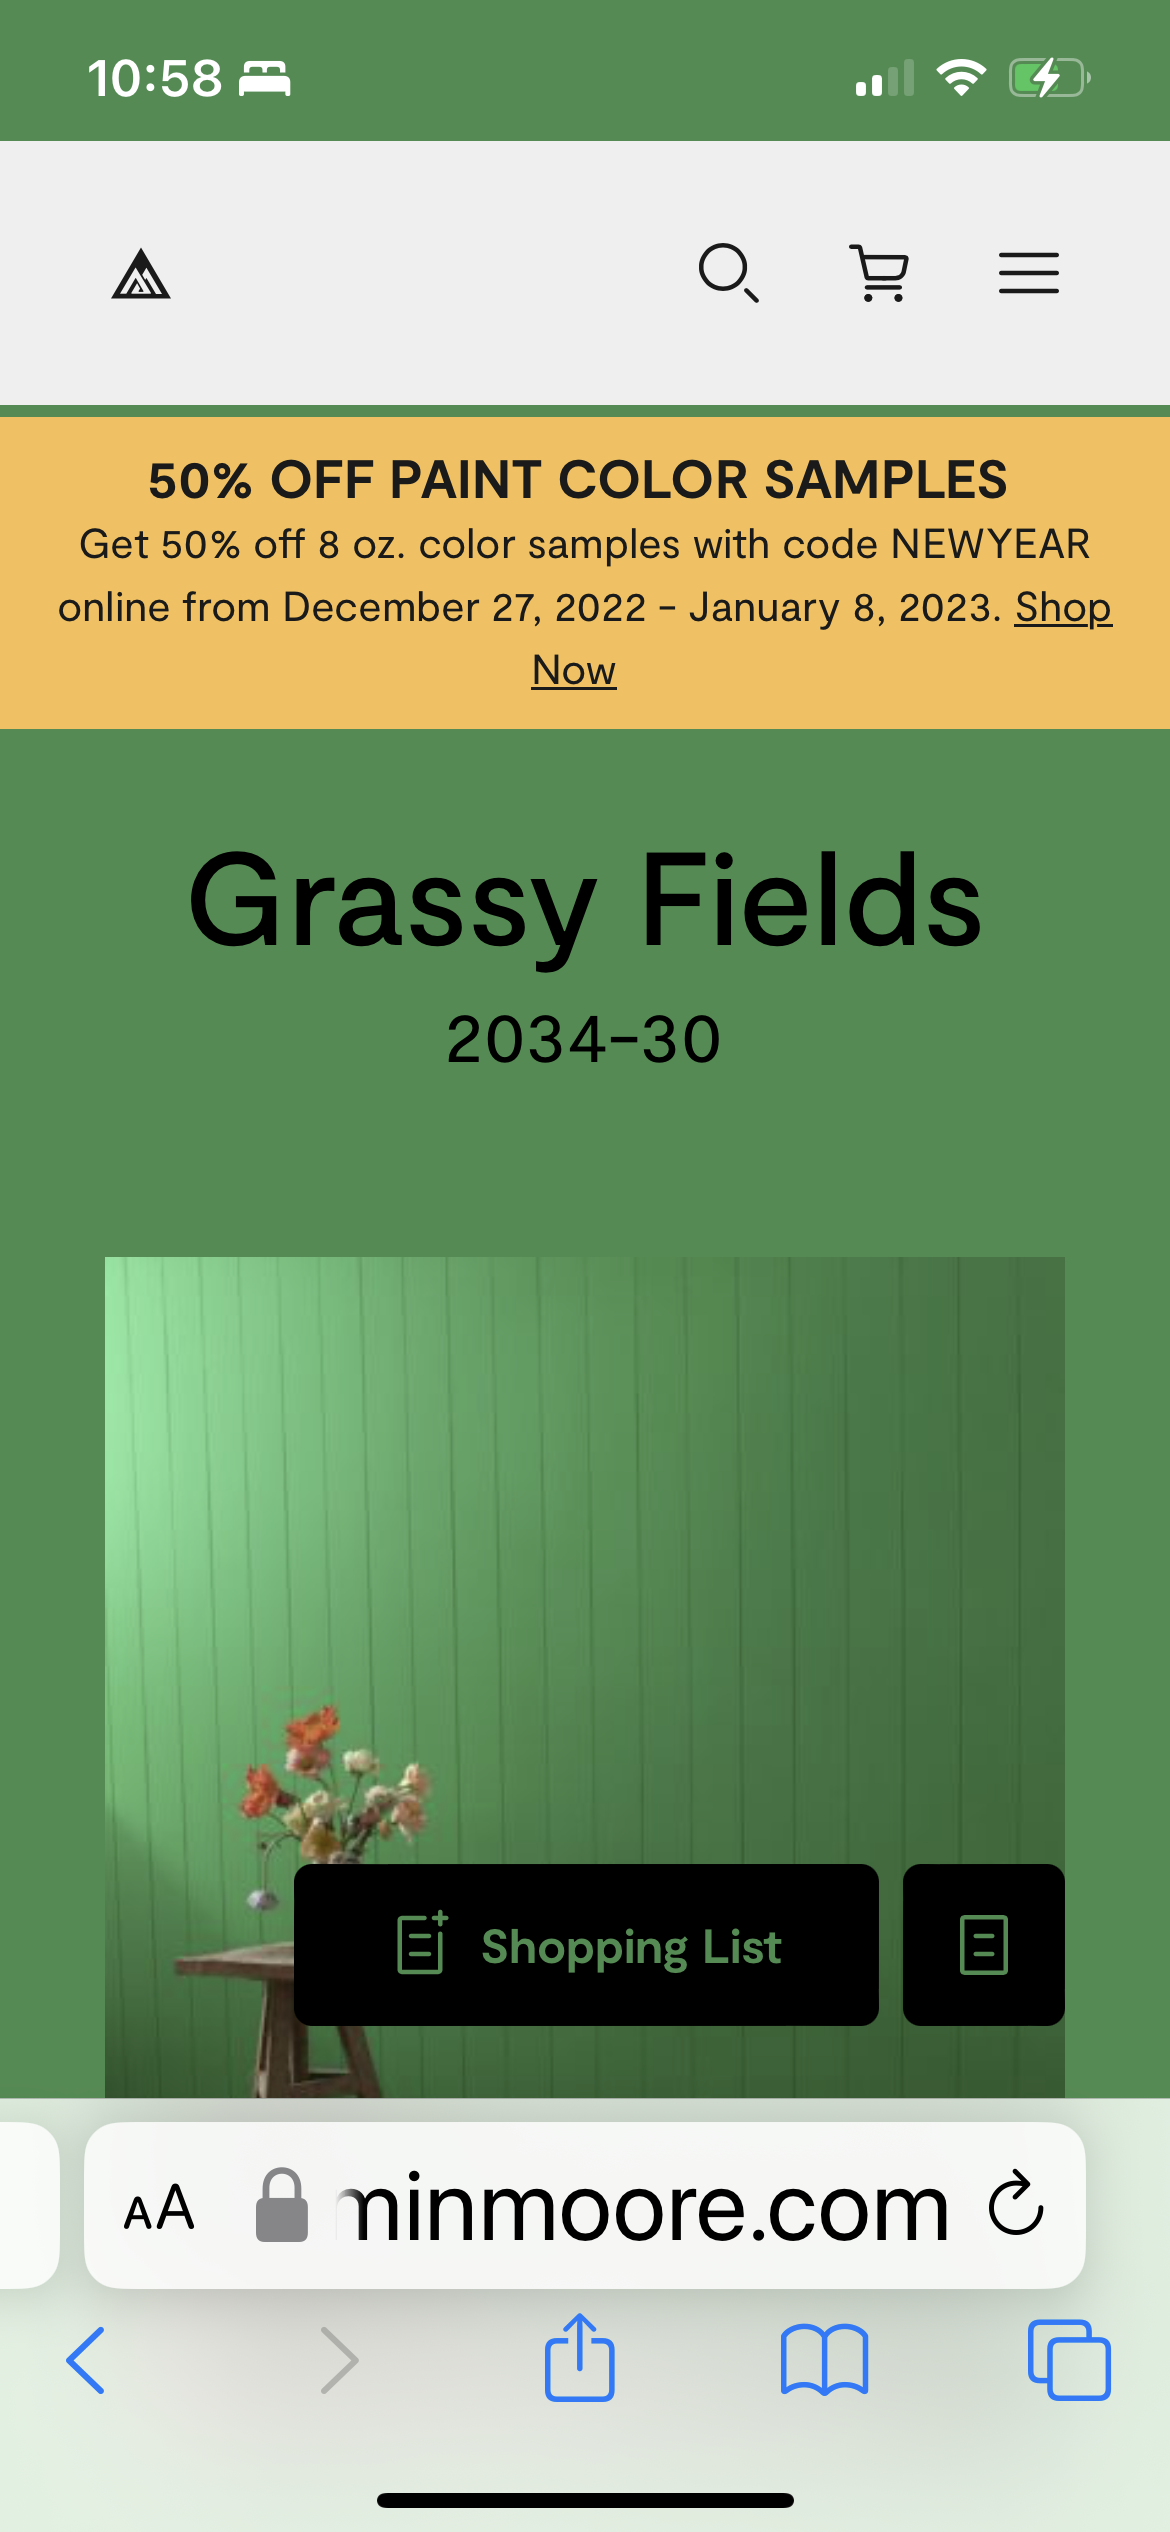
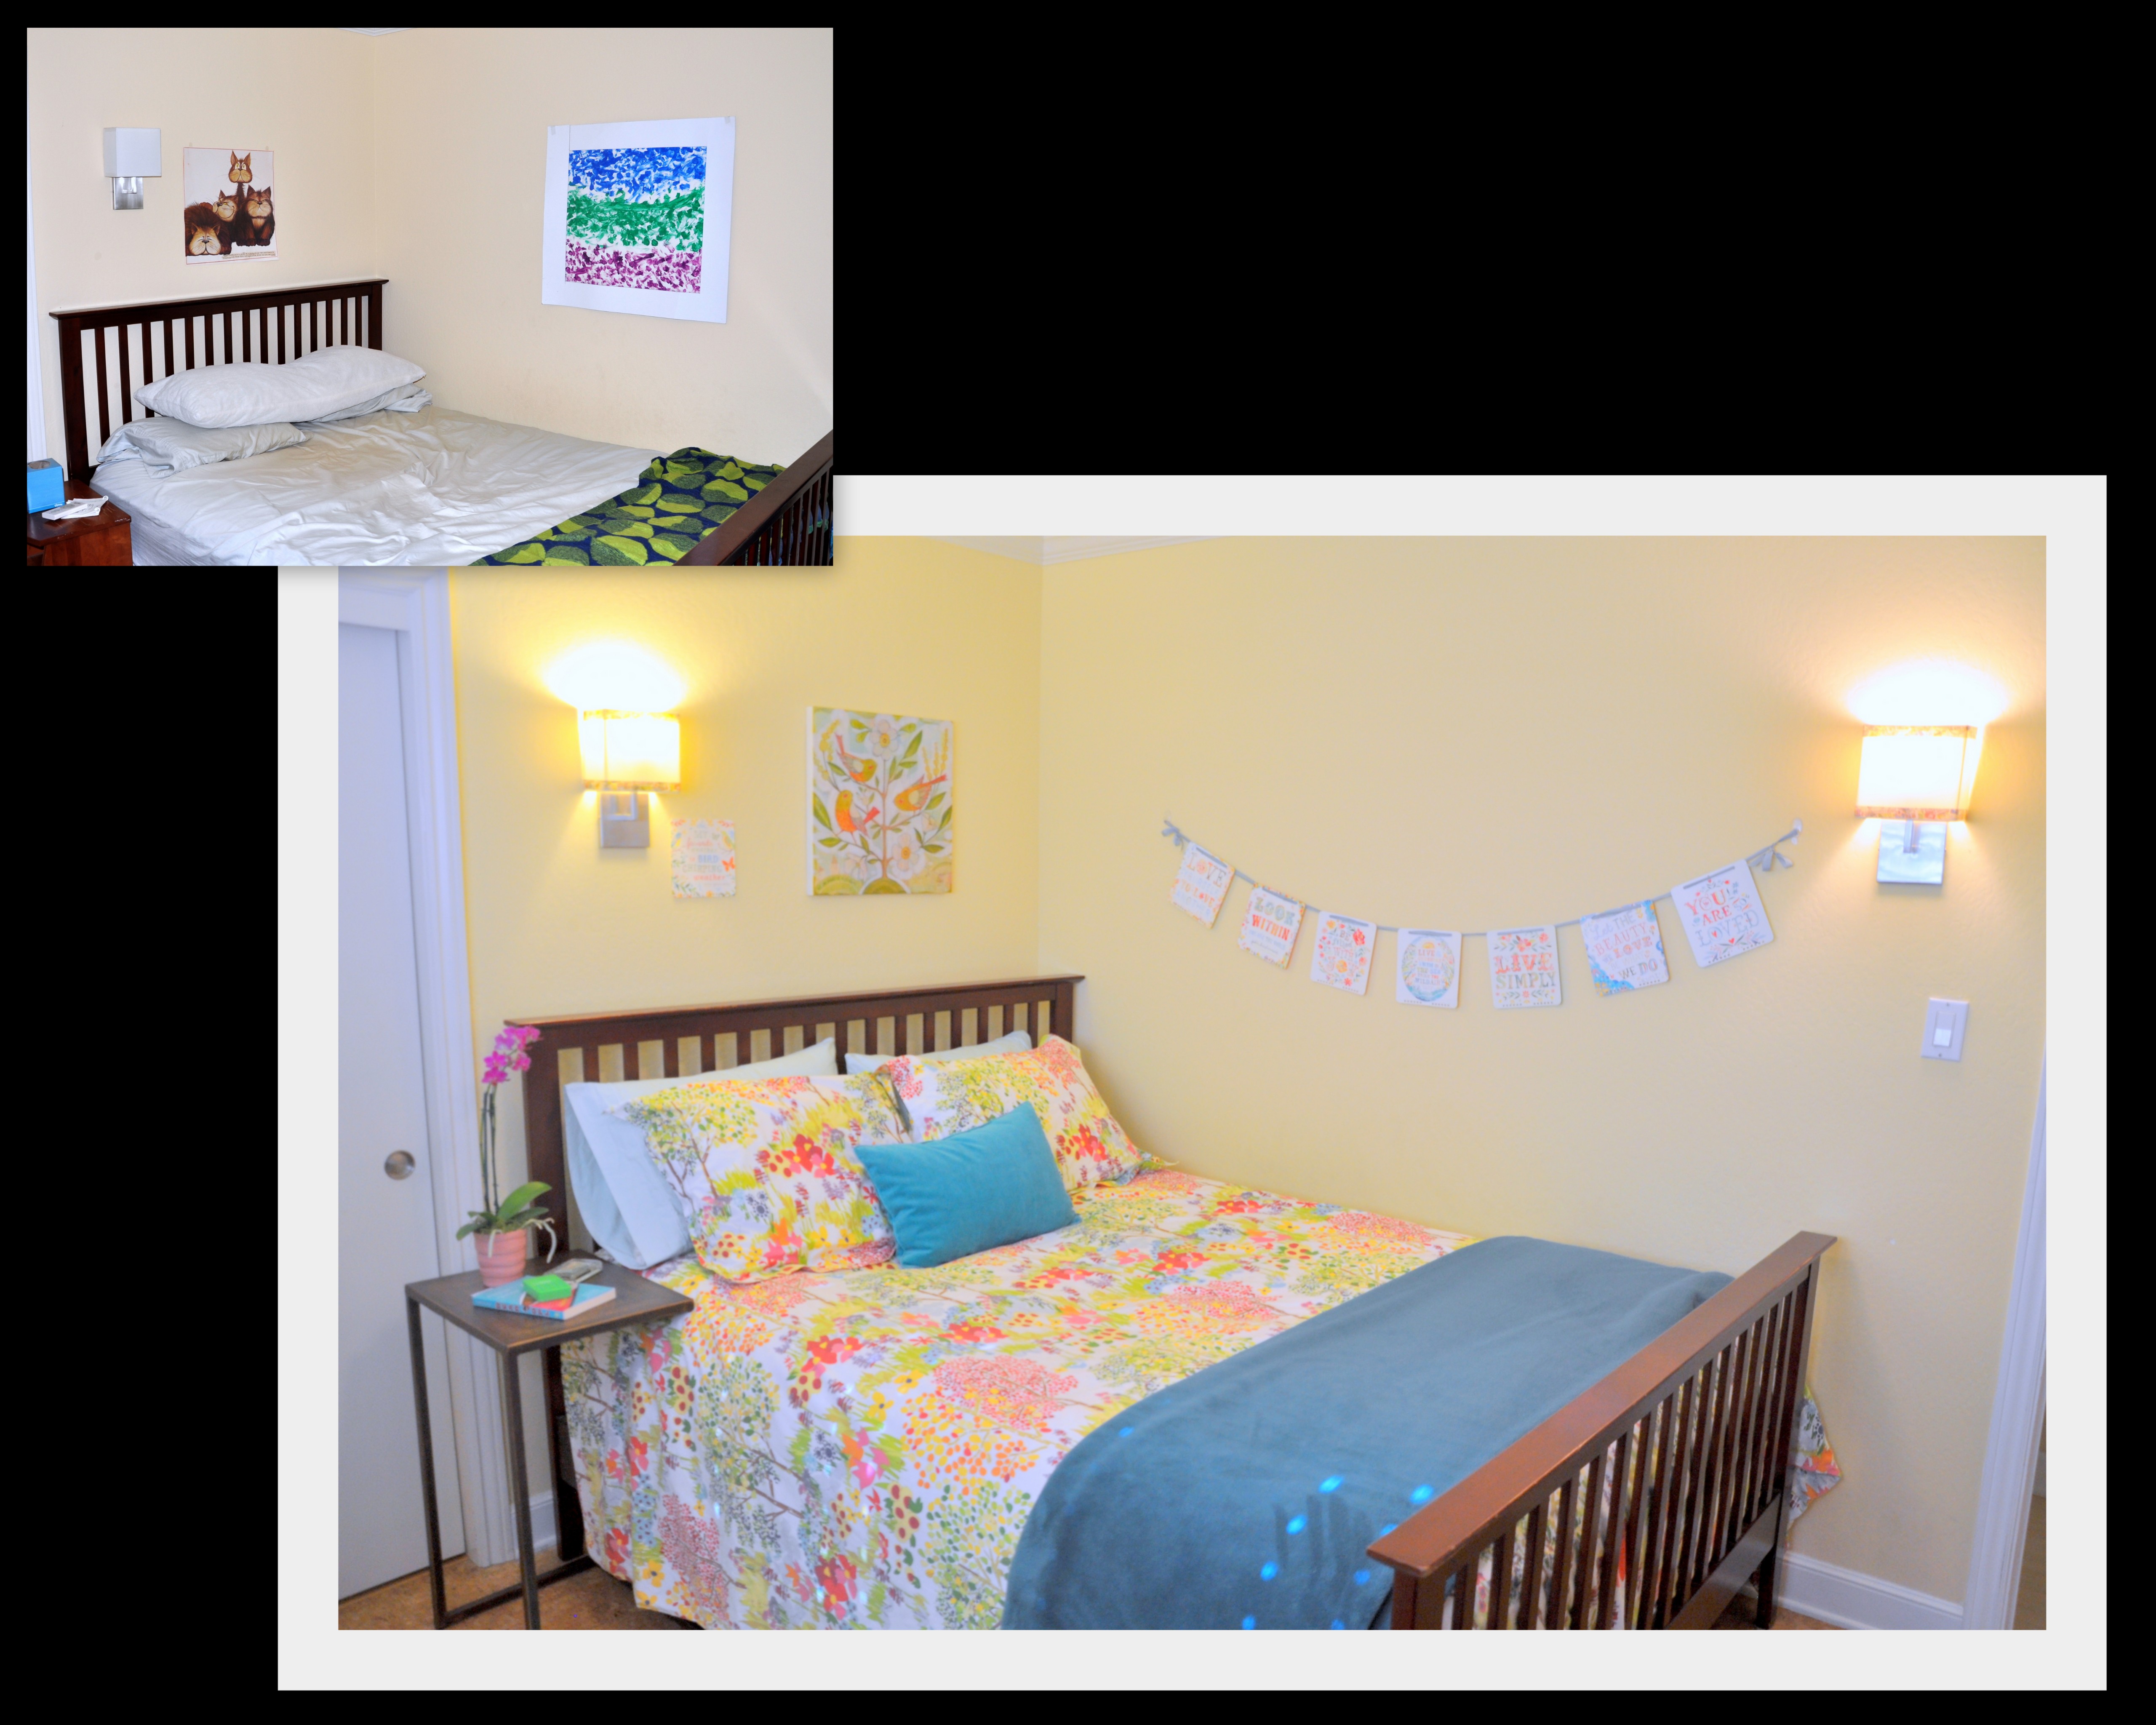
Now and then, I would flop down on the new bed and think about how the space should feel. Once you have a sense of the feel of the room, design features naturally follow. I wanted a botanical vibe, green, but not too much green, and the idea of lemons and sunflowers entered the mix.

Digital lemon artwork (Etsy), Original Sunflower (a gift from Kelly), and Original cat painting, (artist/friend Barbara Oertli)

I must have mentioned this to my friend and fellow volunteer, Claudia. She gifted me a pair of beautifully hand-sewn, lemon-themed flannel pillowcases on my last day downtown. That gift got me moving.

Lemon flannel pillow case, a gift from my friend Claudia

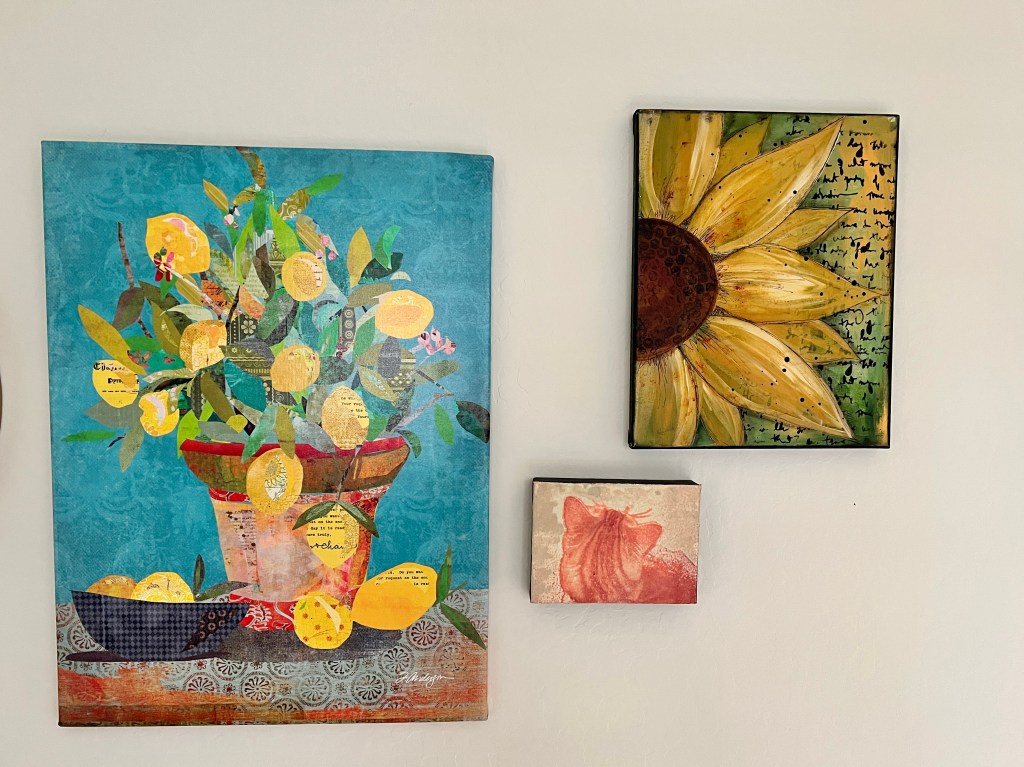
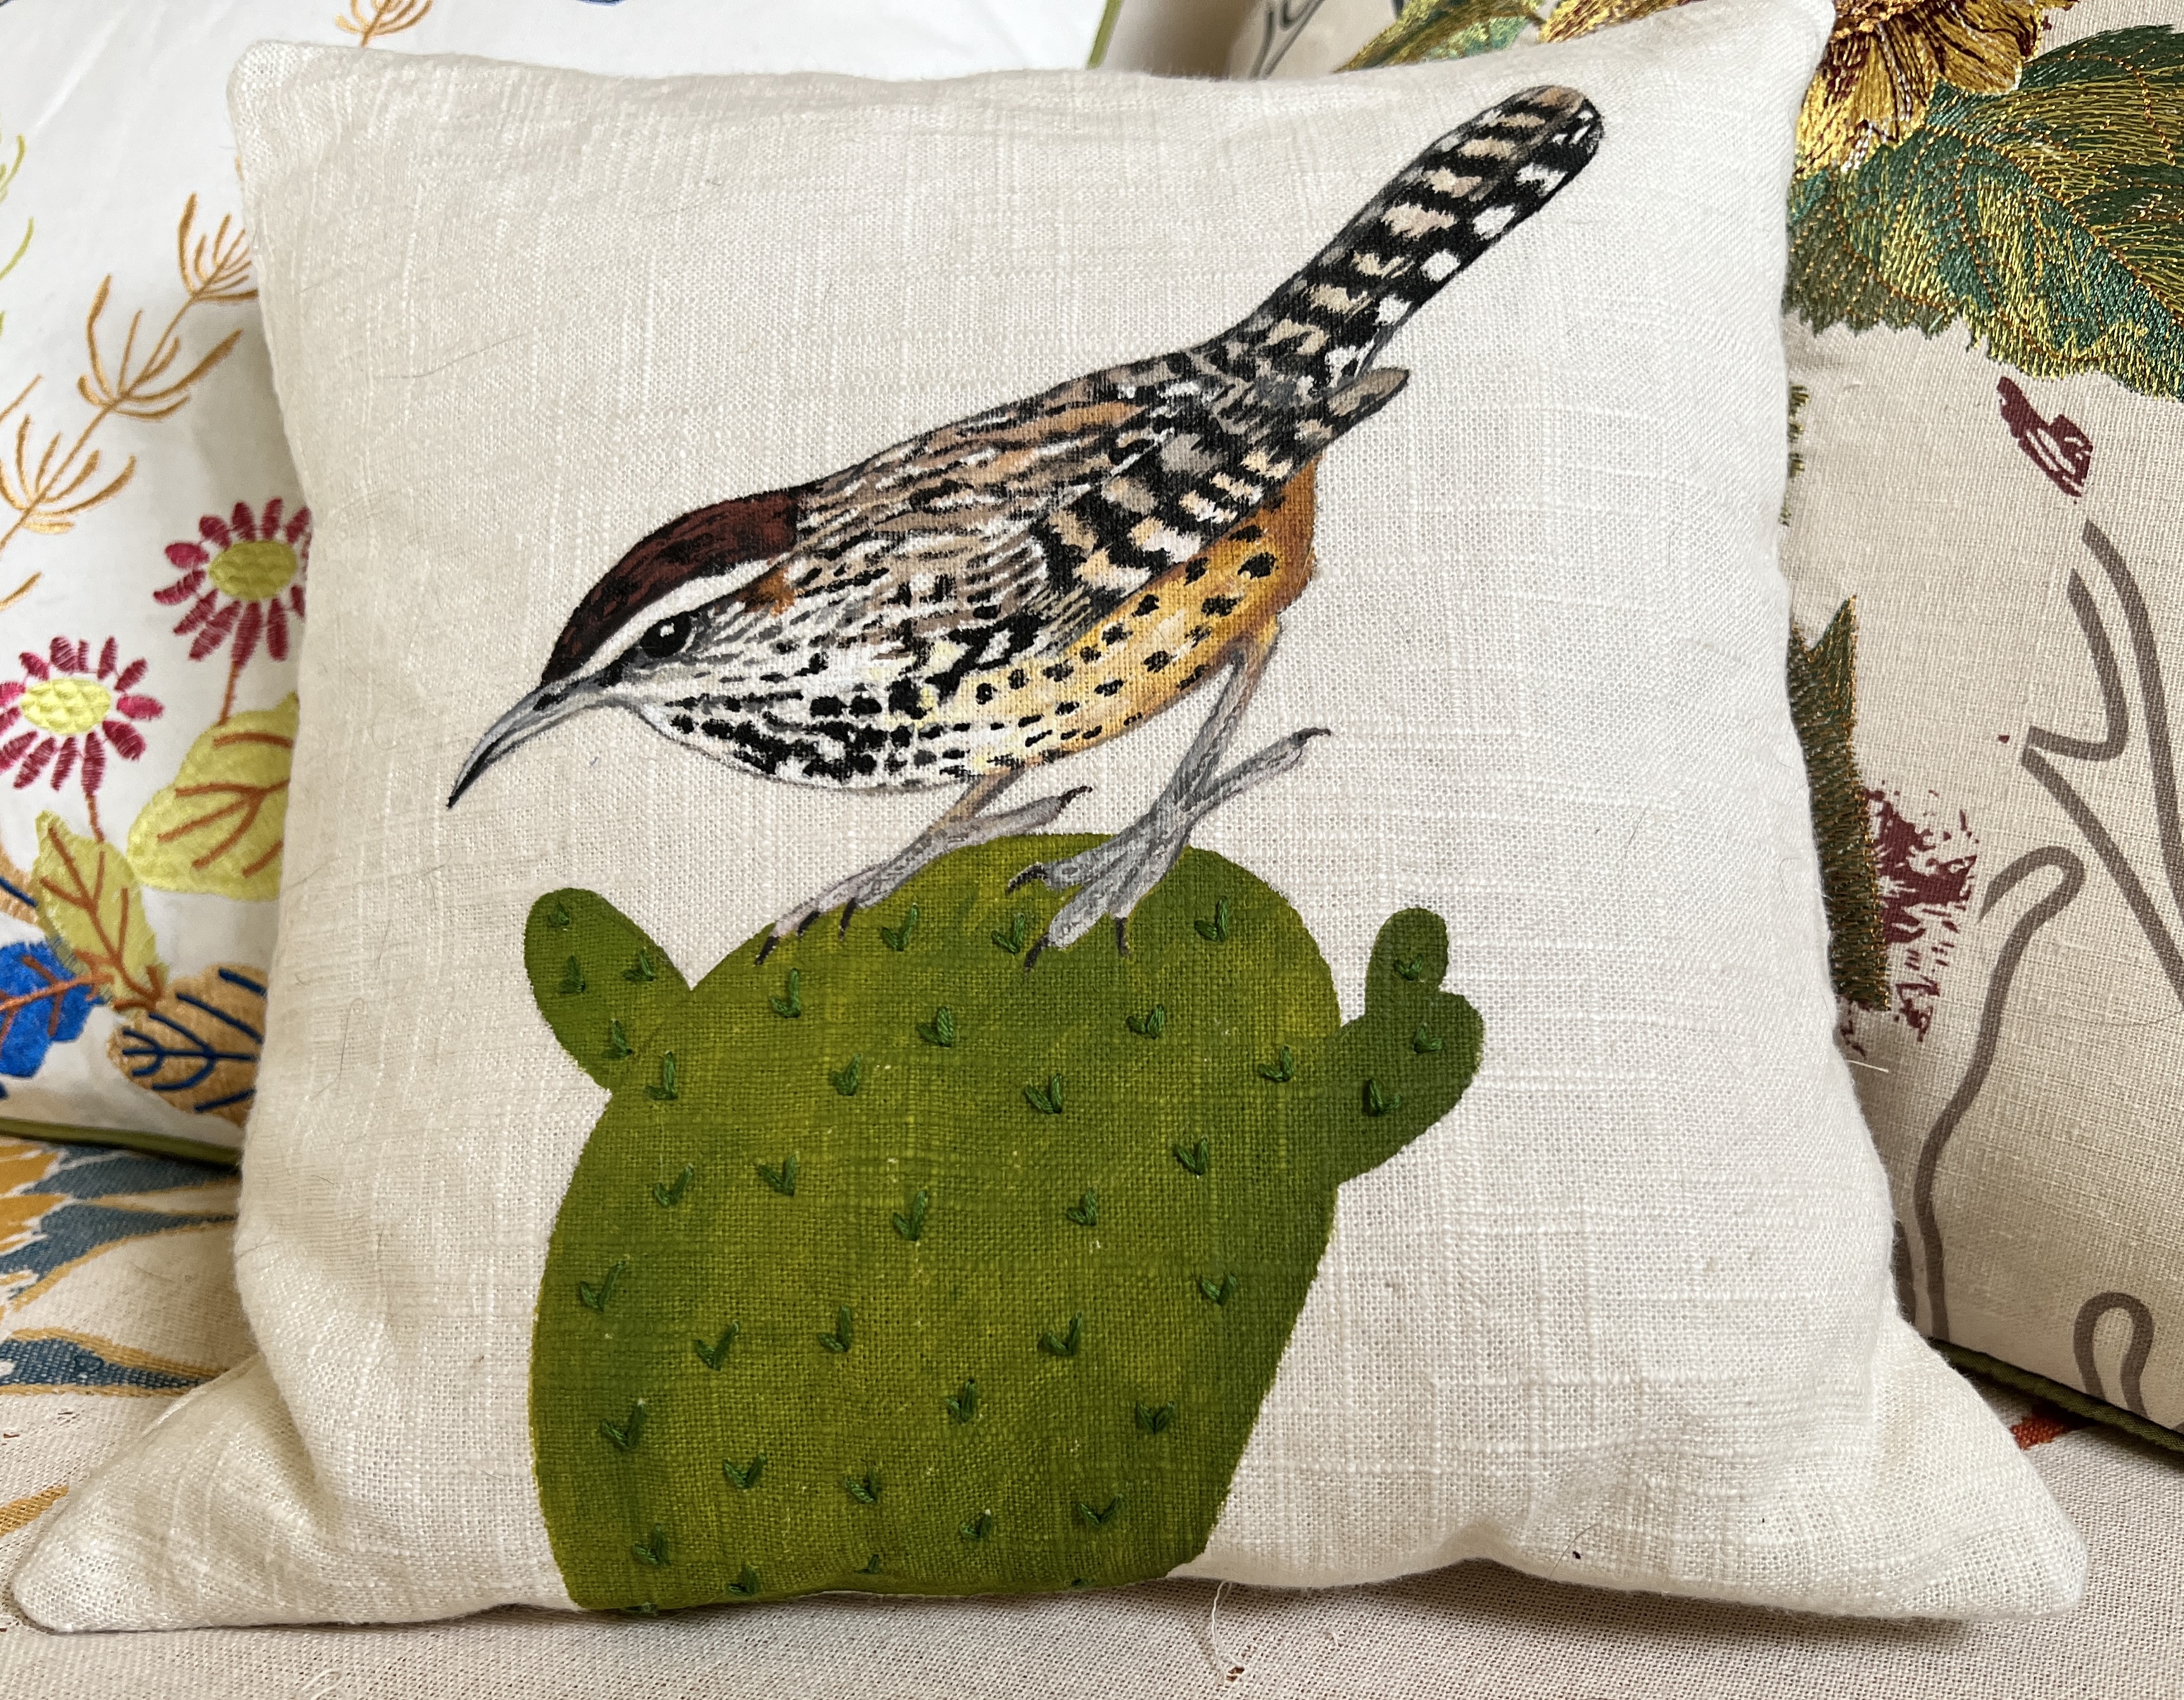
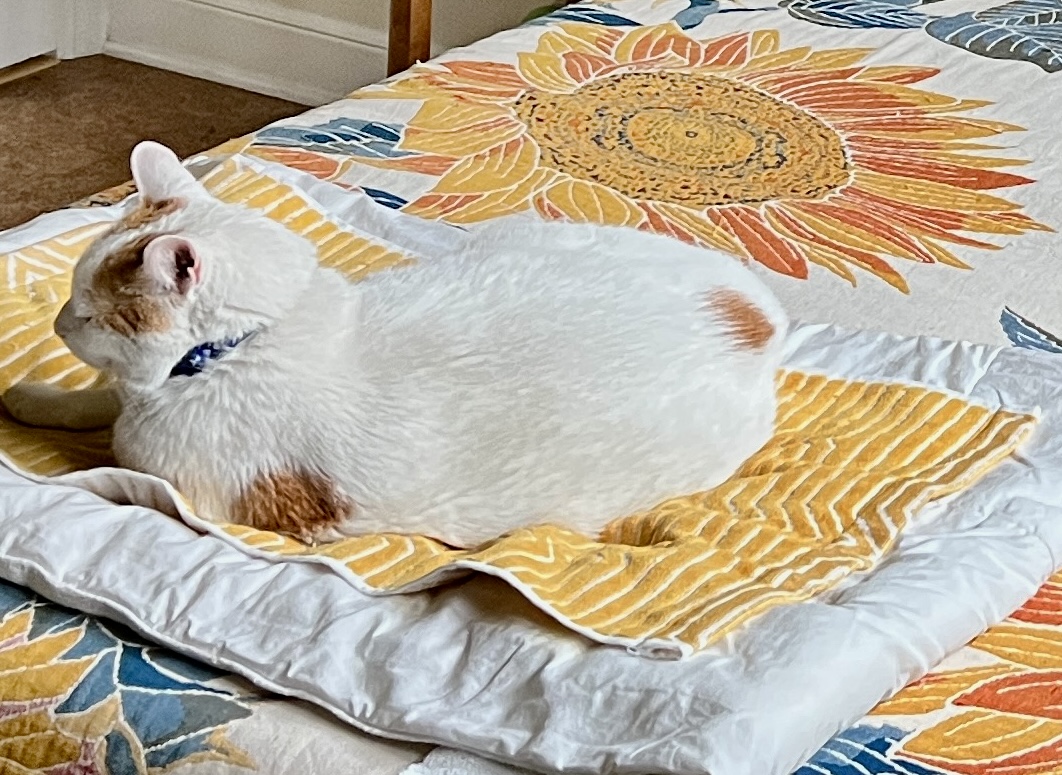
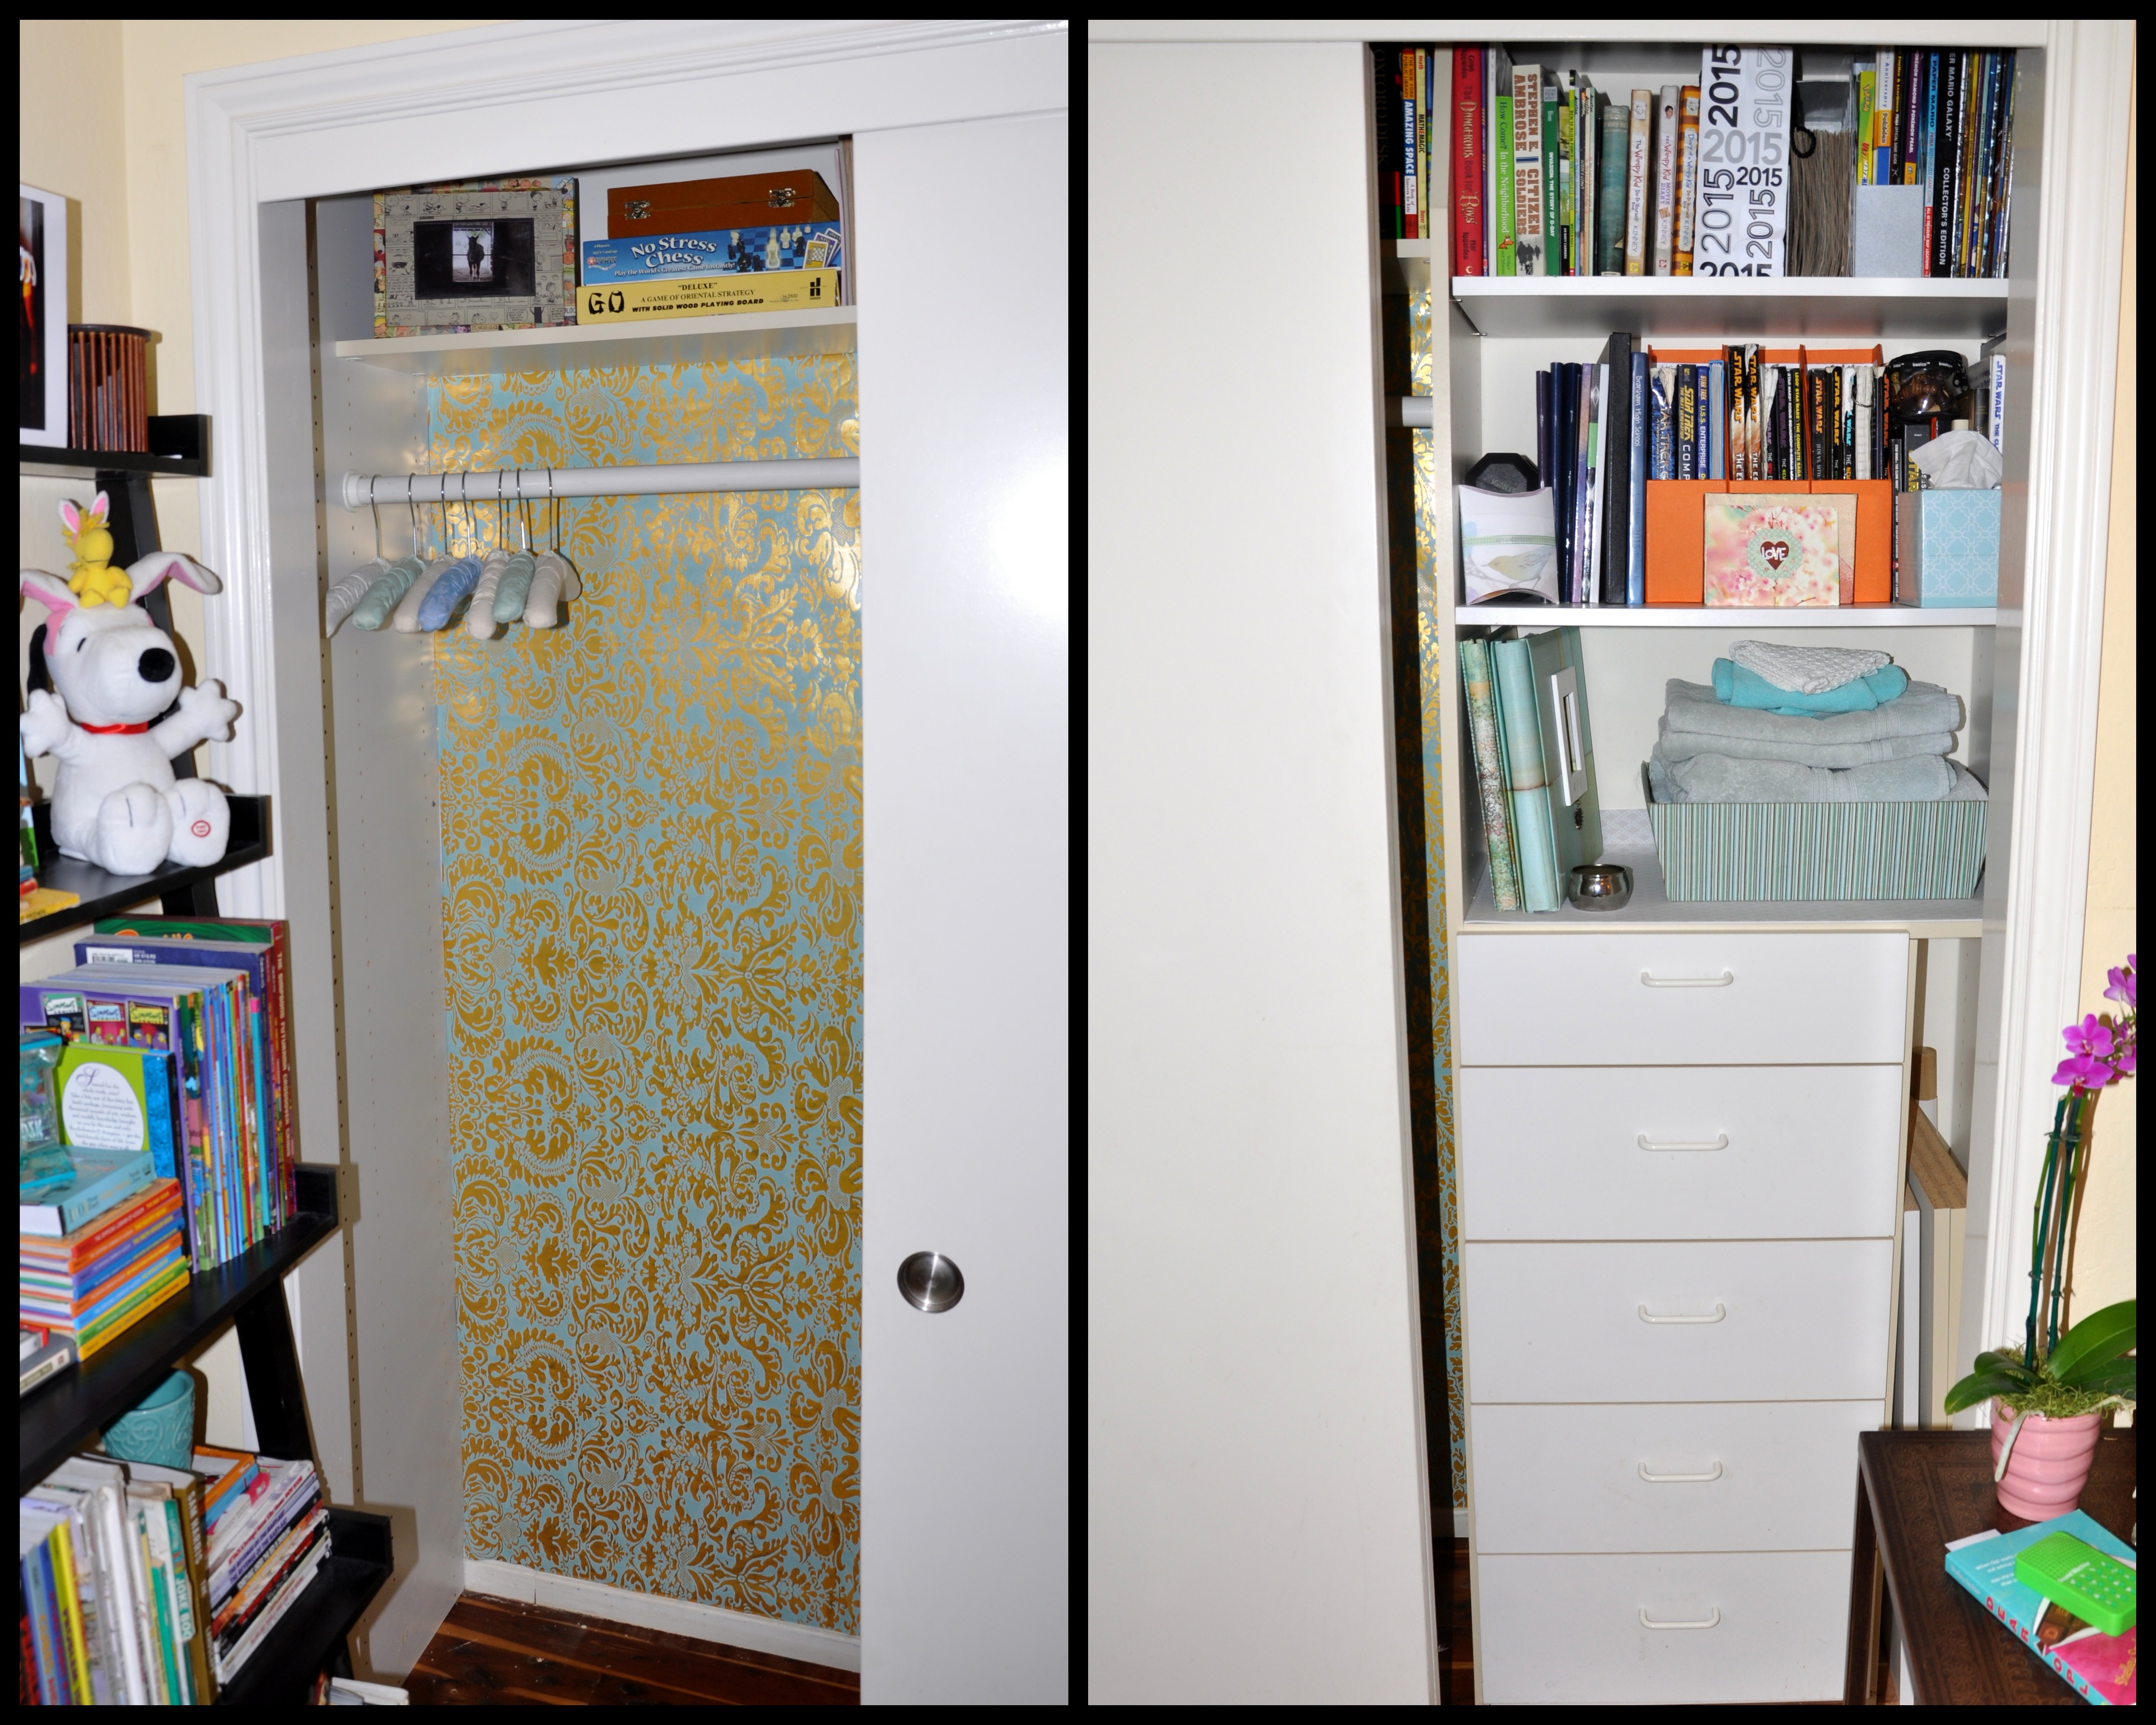
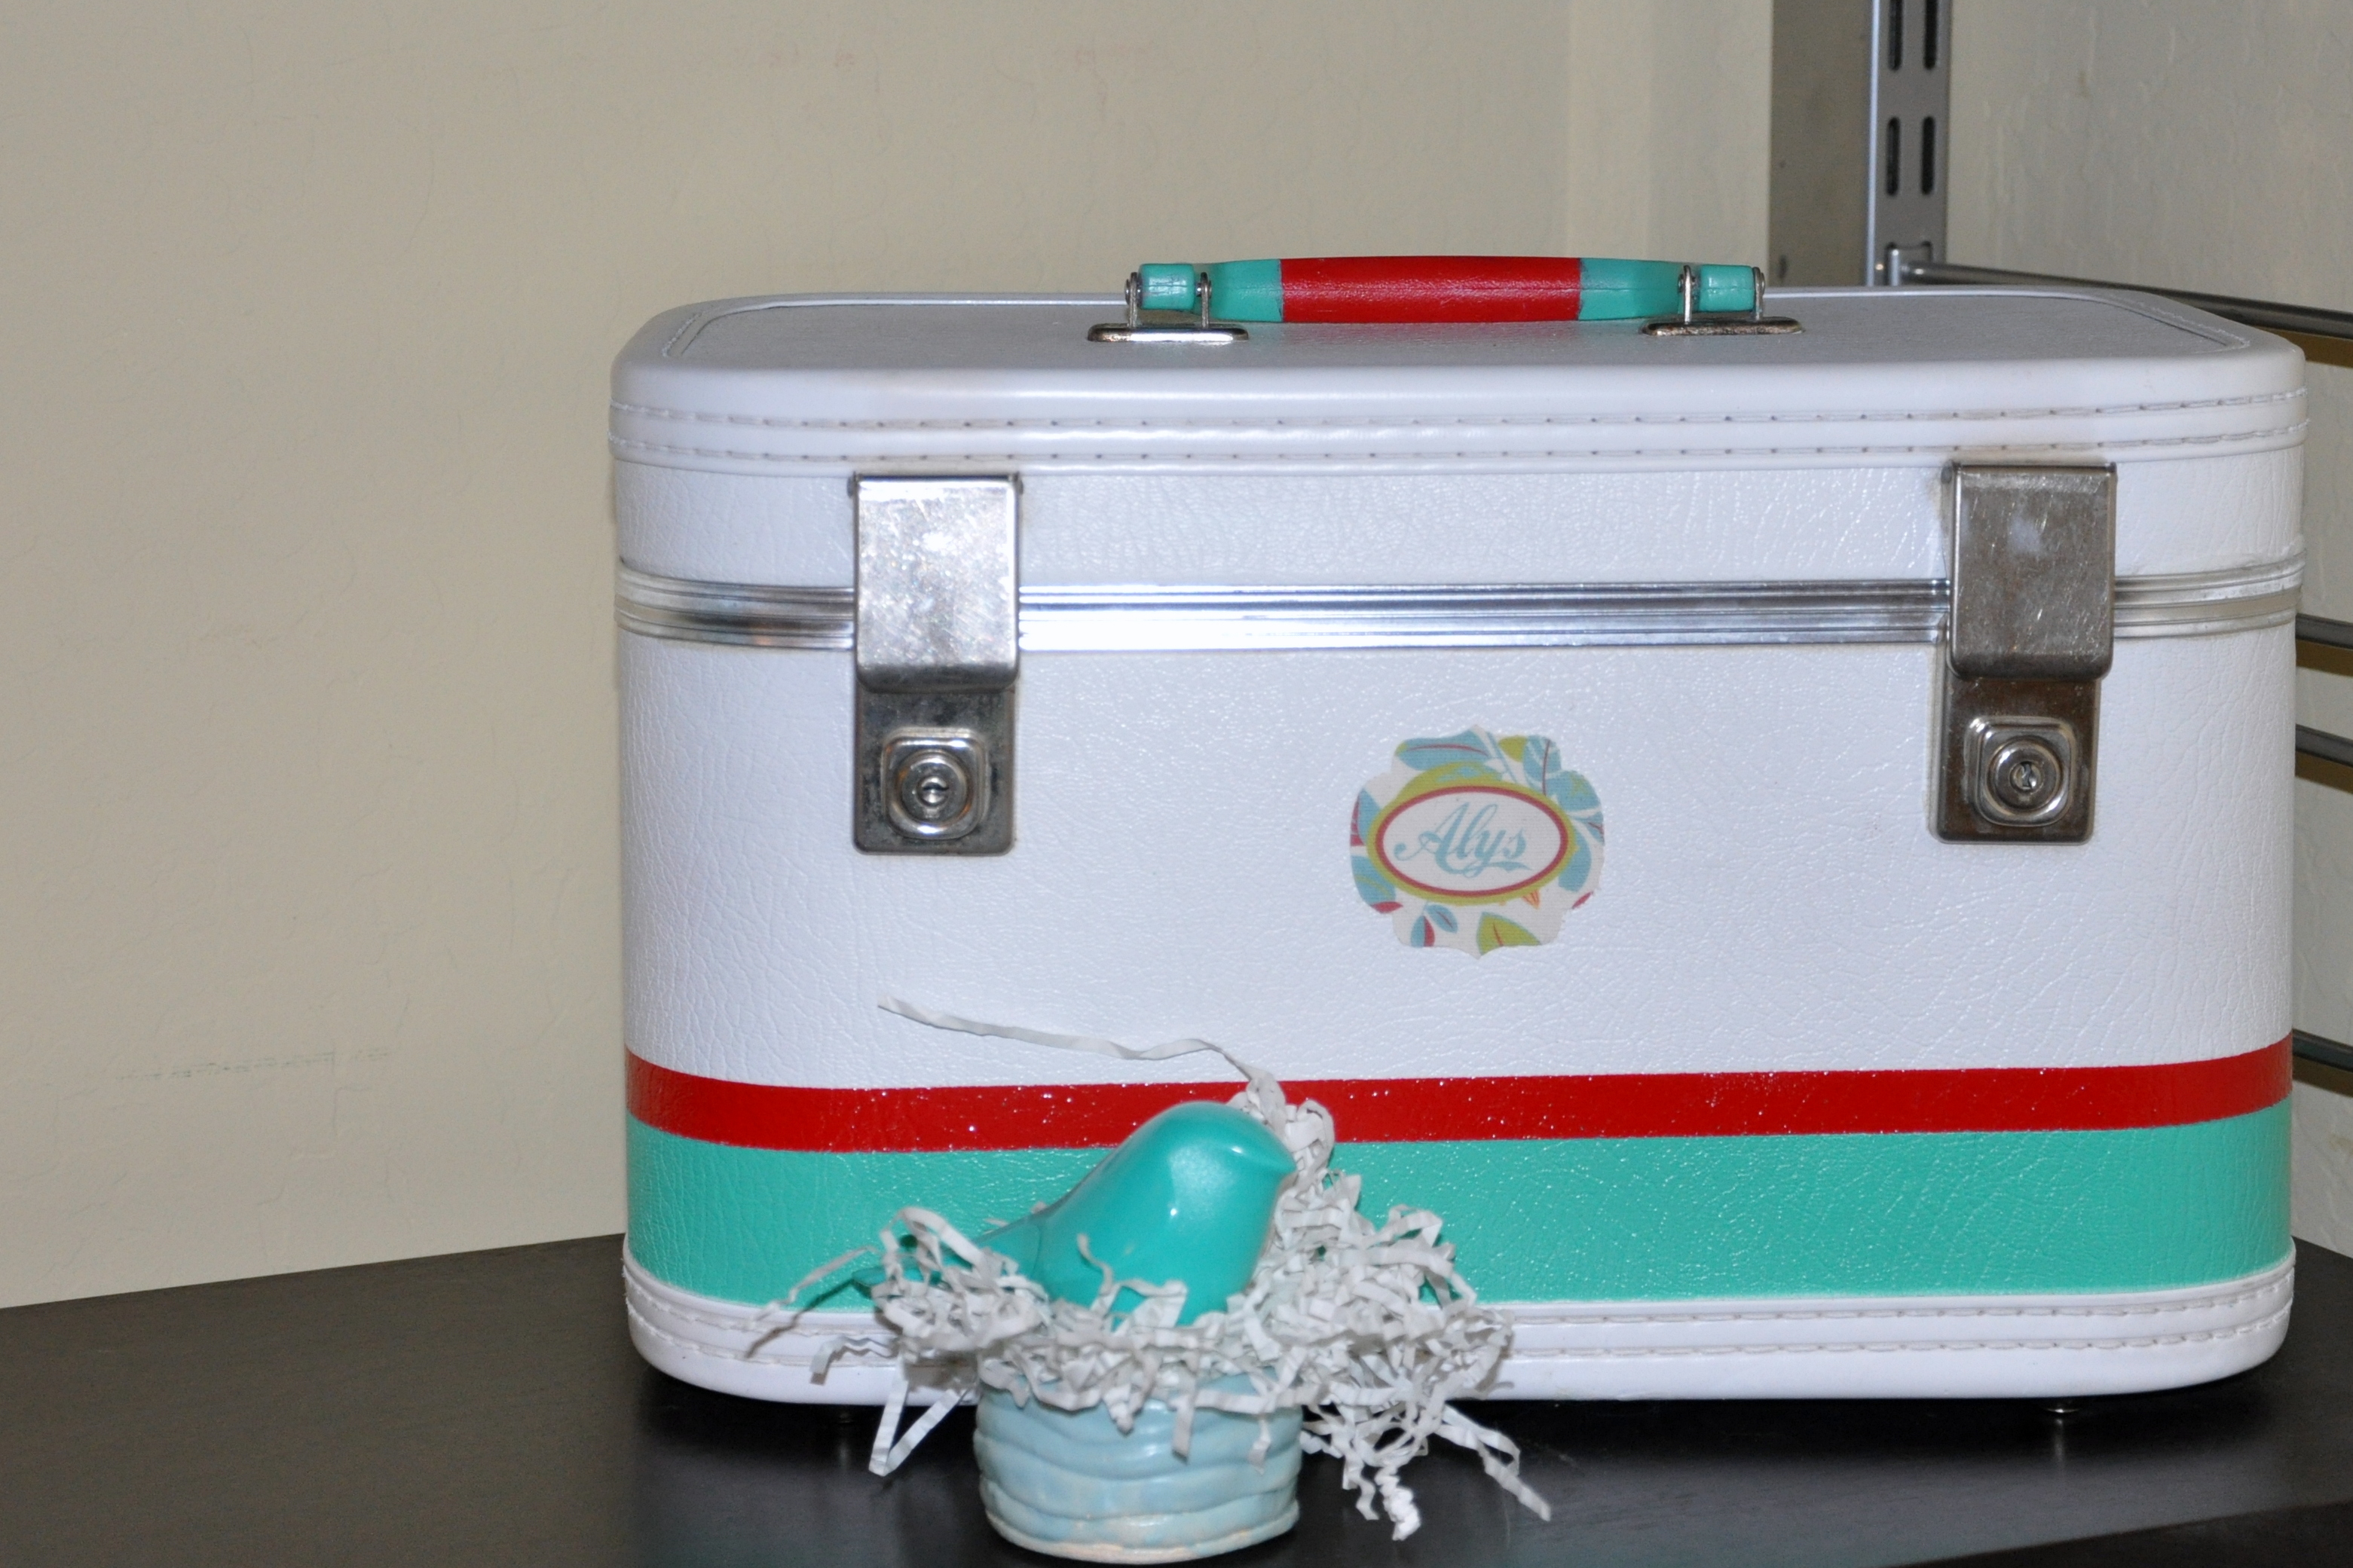
The yellow room features bargains and splurges, unique items from my home, and plenty of cat fur.

I bought a yellow towel for the cats, and most of the time they sleep on it (Mouse looking entitled)

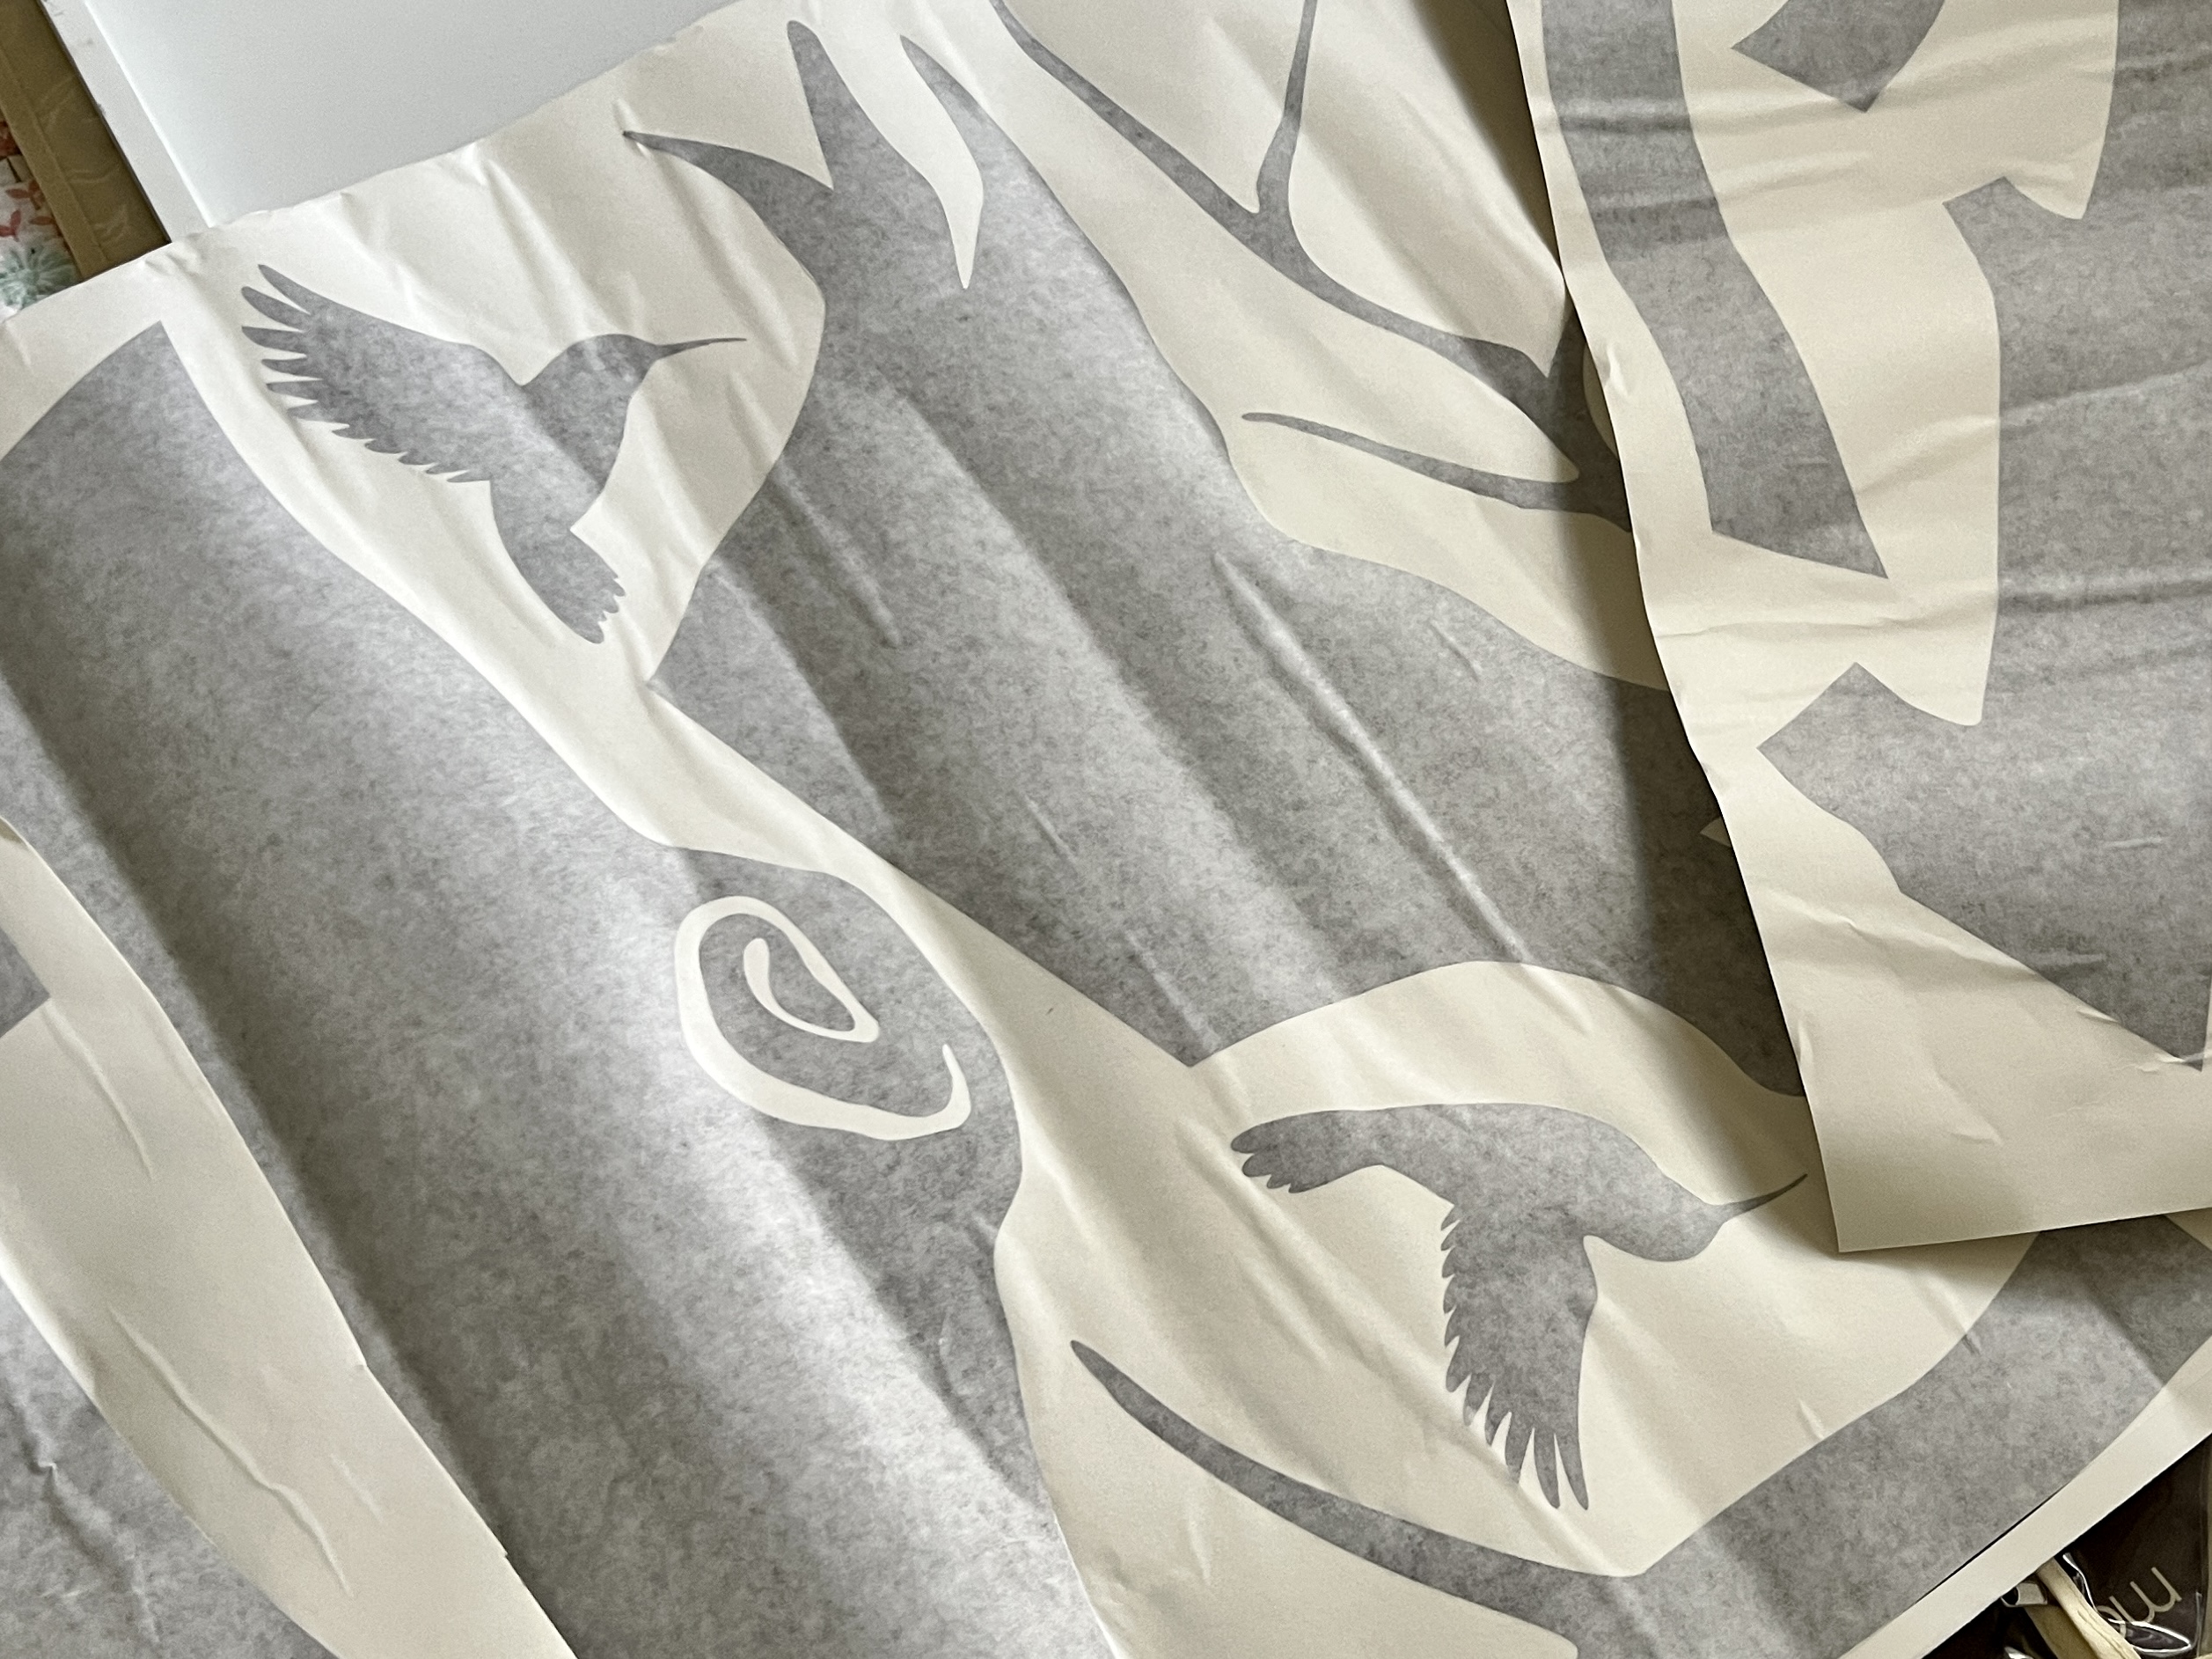
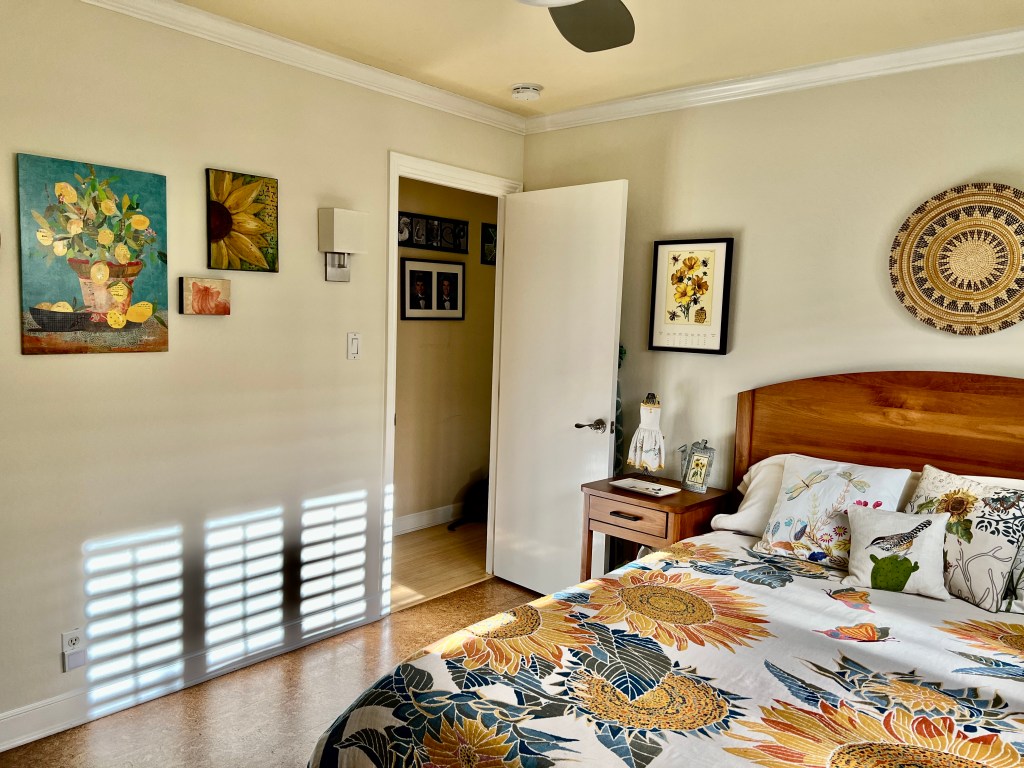
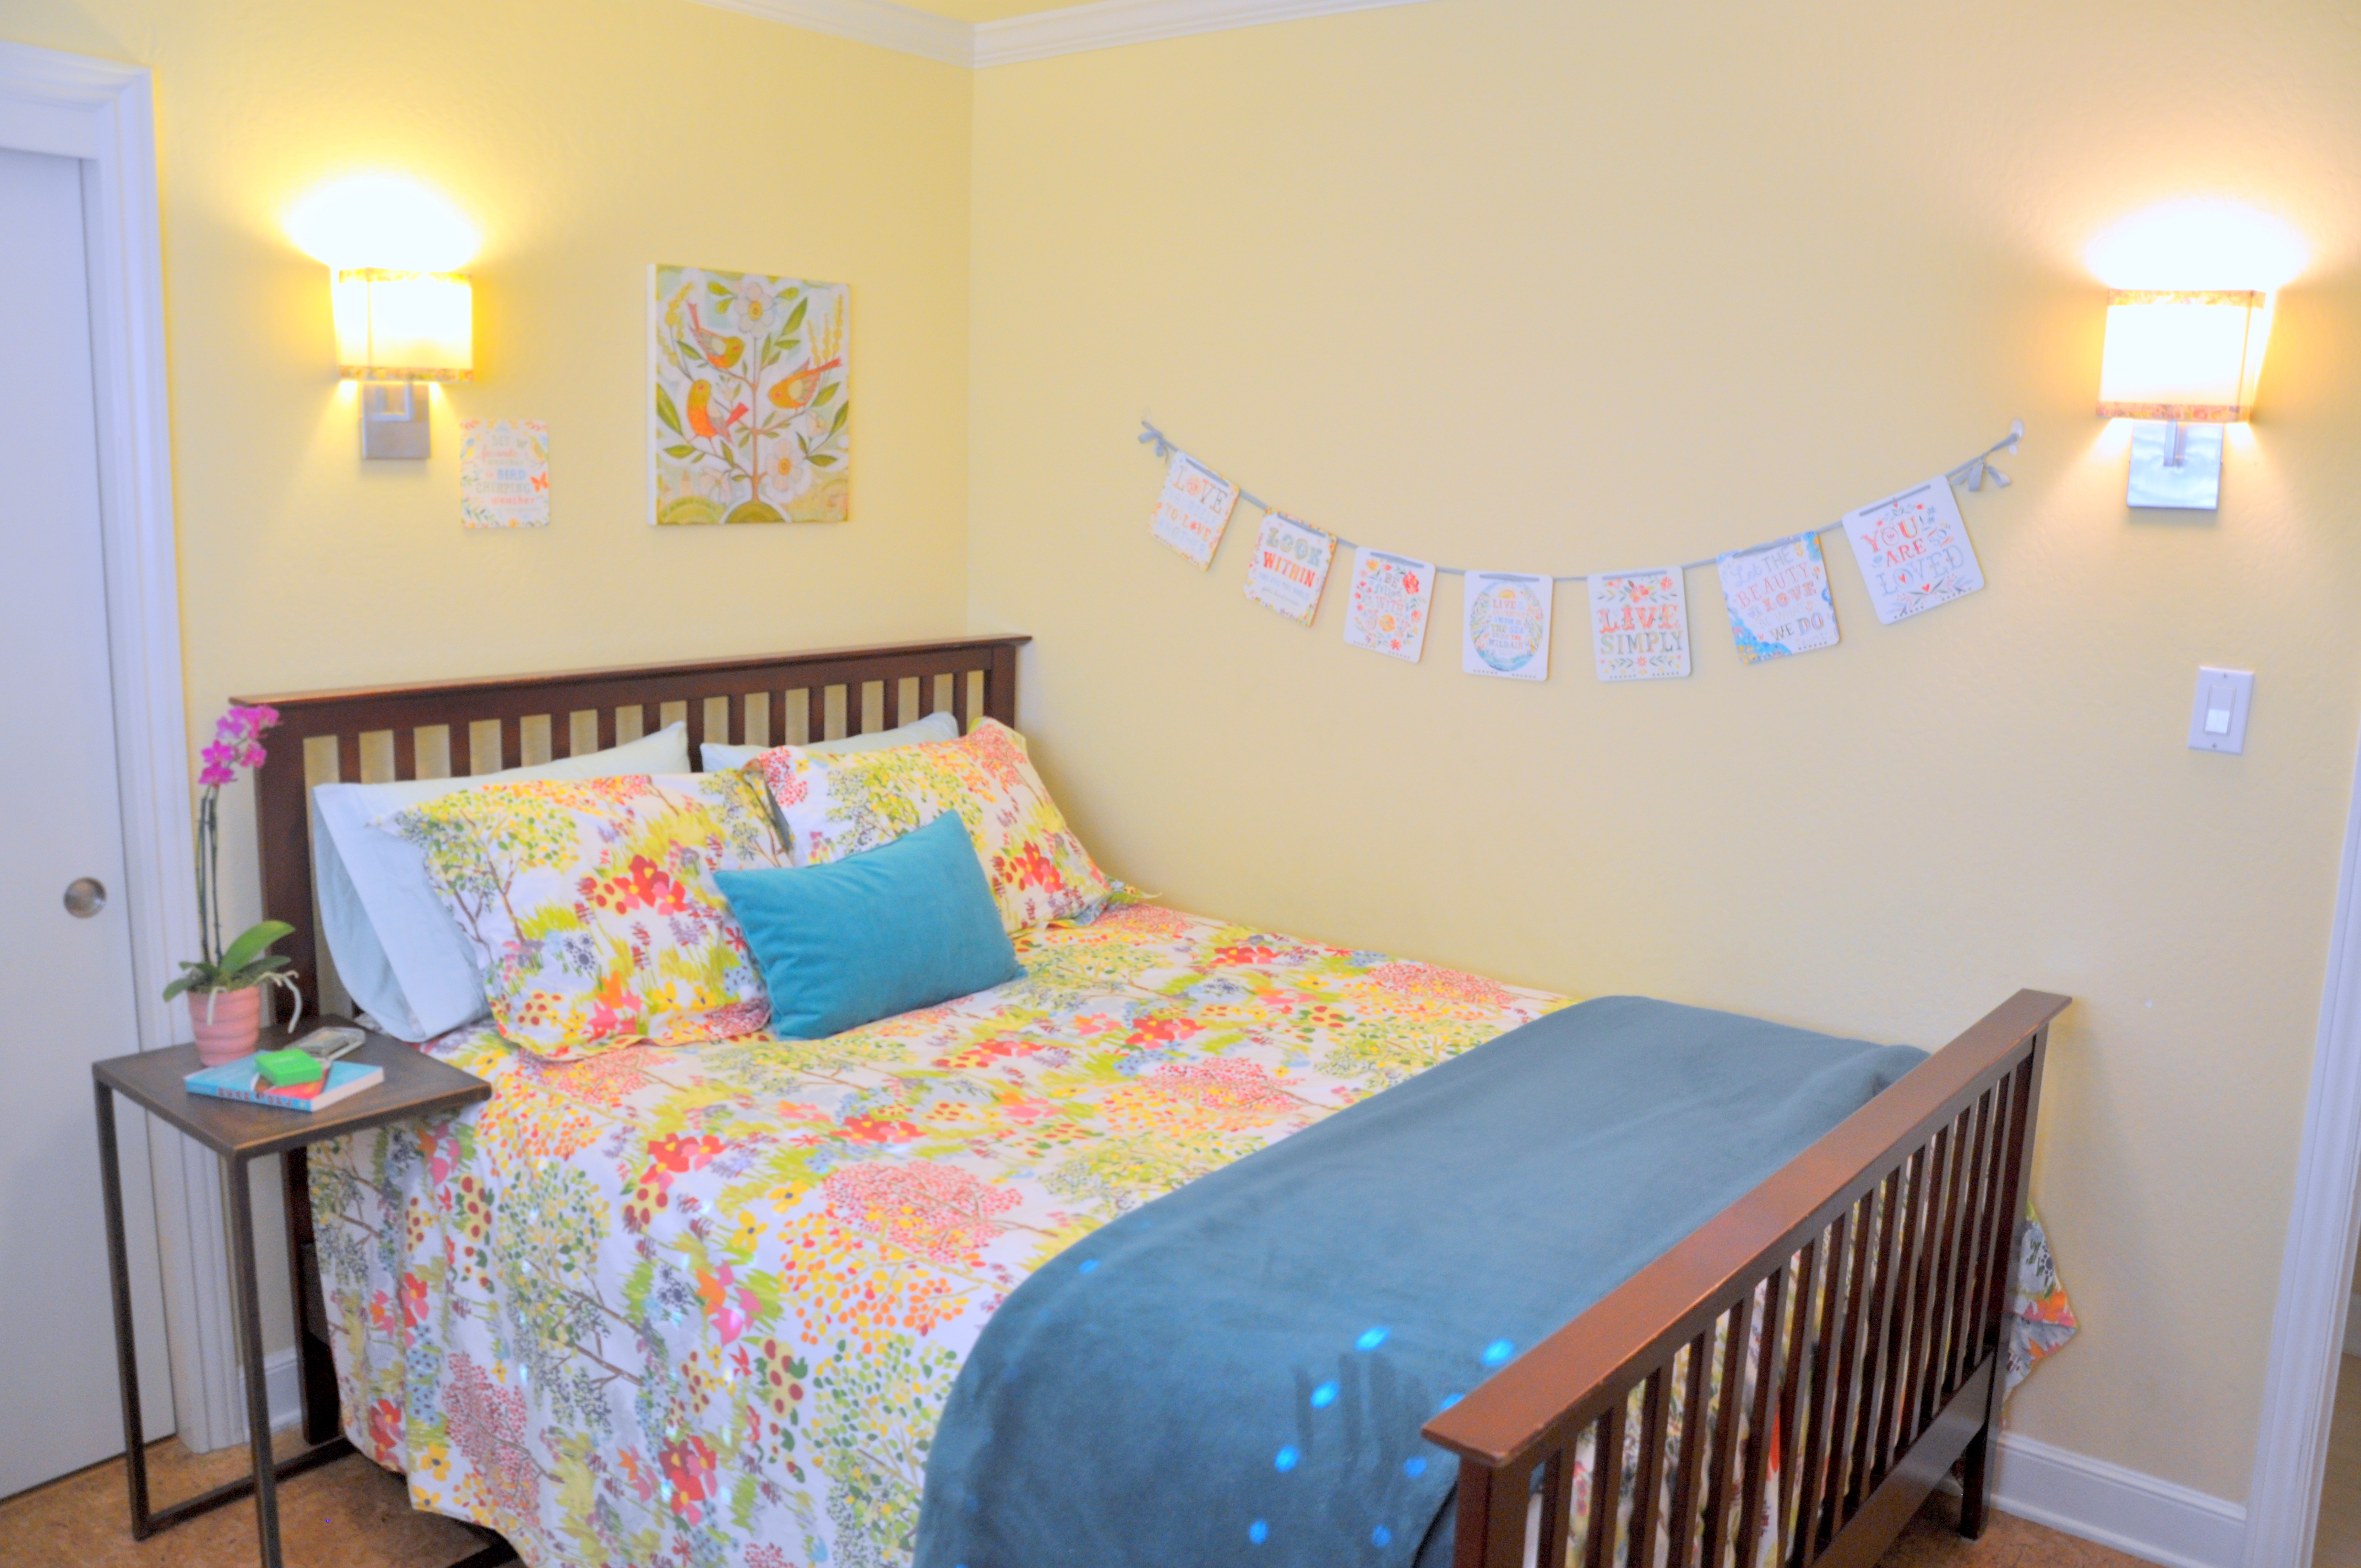
I found a package of decals online that assembled into a lemon tree. I wanted the tree to cover part of two walls, and after some thought, I decided to start the tree trunk along the baseboard. It worked! I spent a couple of afternoons adding clusters of leaves and then added the lemons as a finishing touch. The hummingbird decals came with the tree.

Completed lemon tree
Closeup of the tree decals

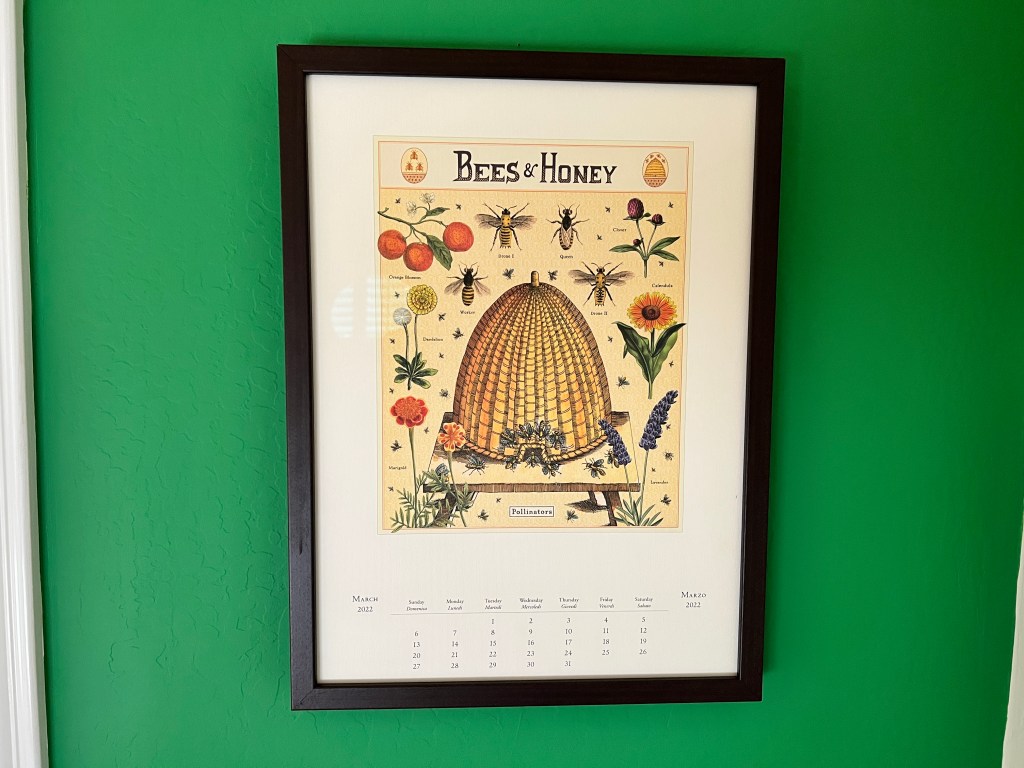
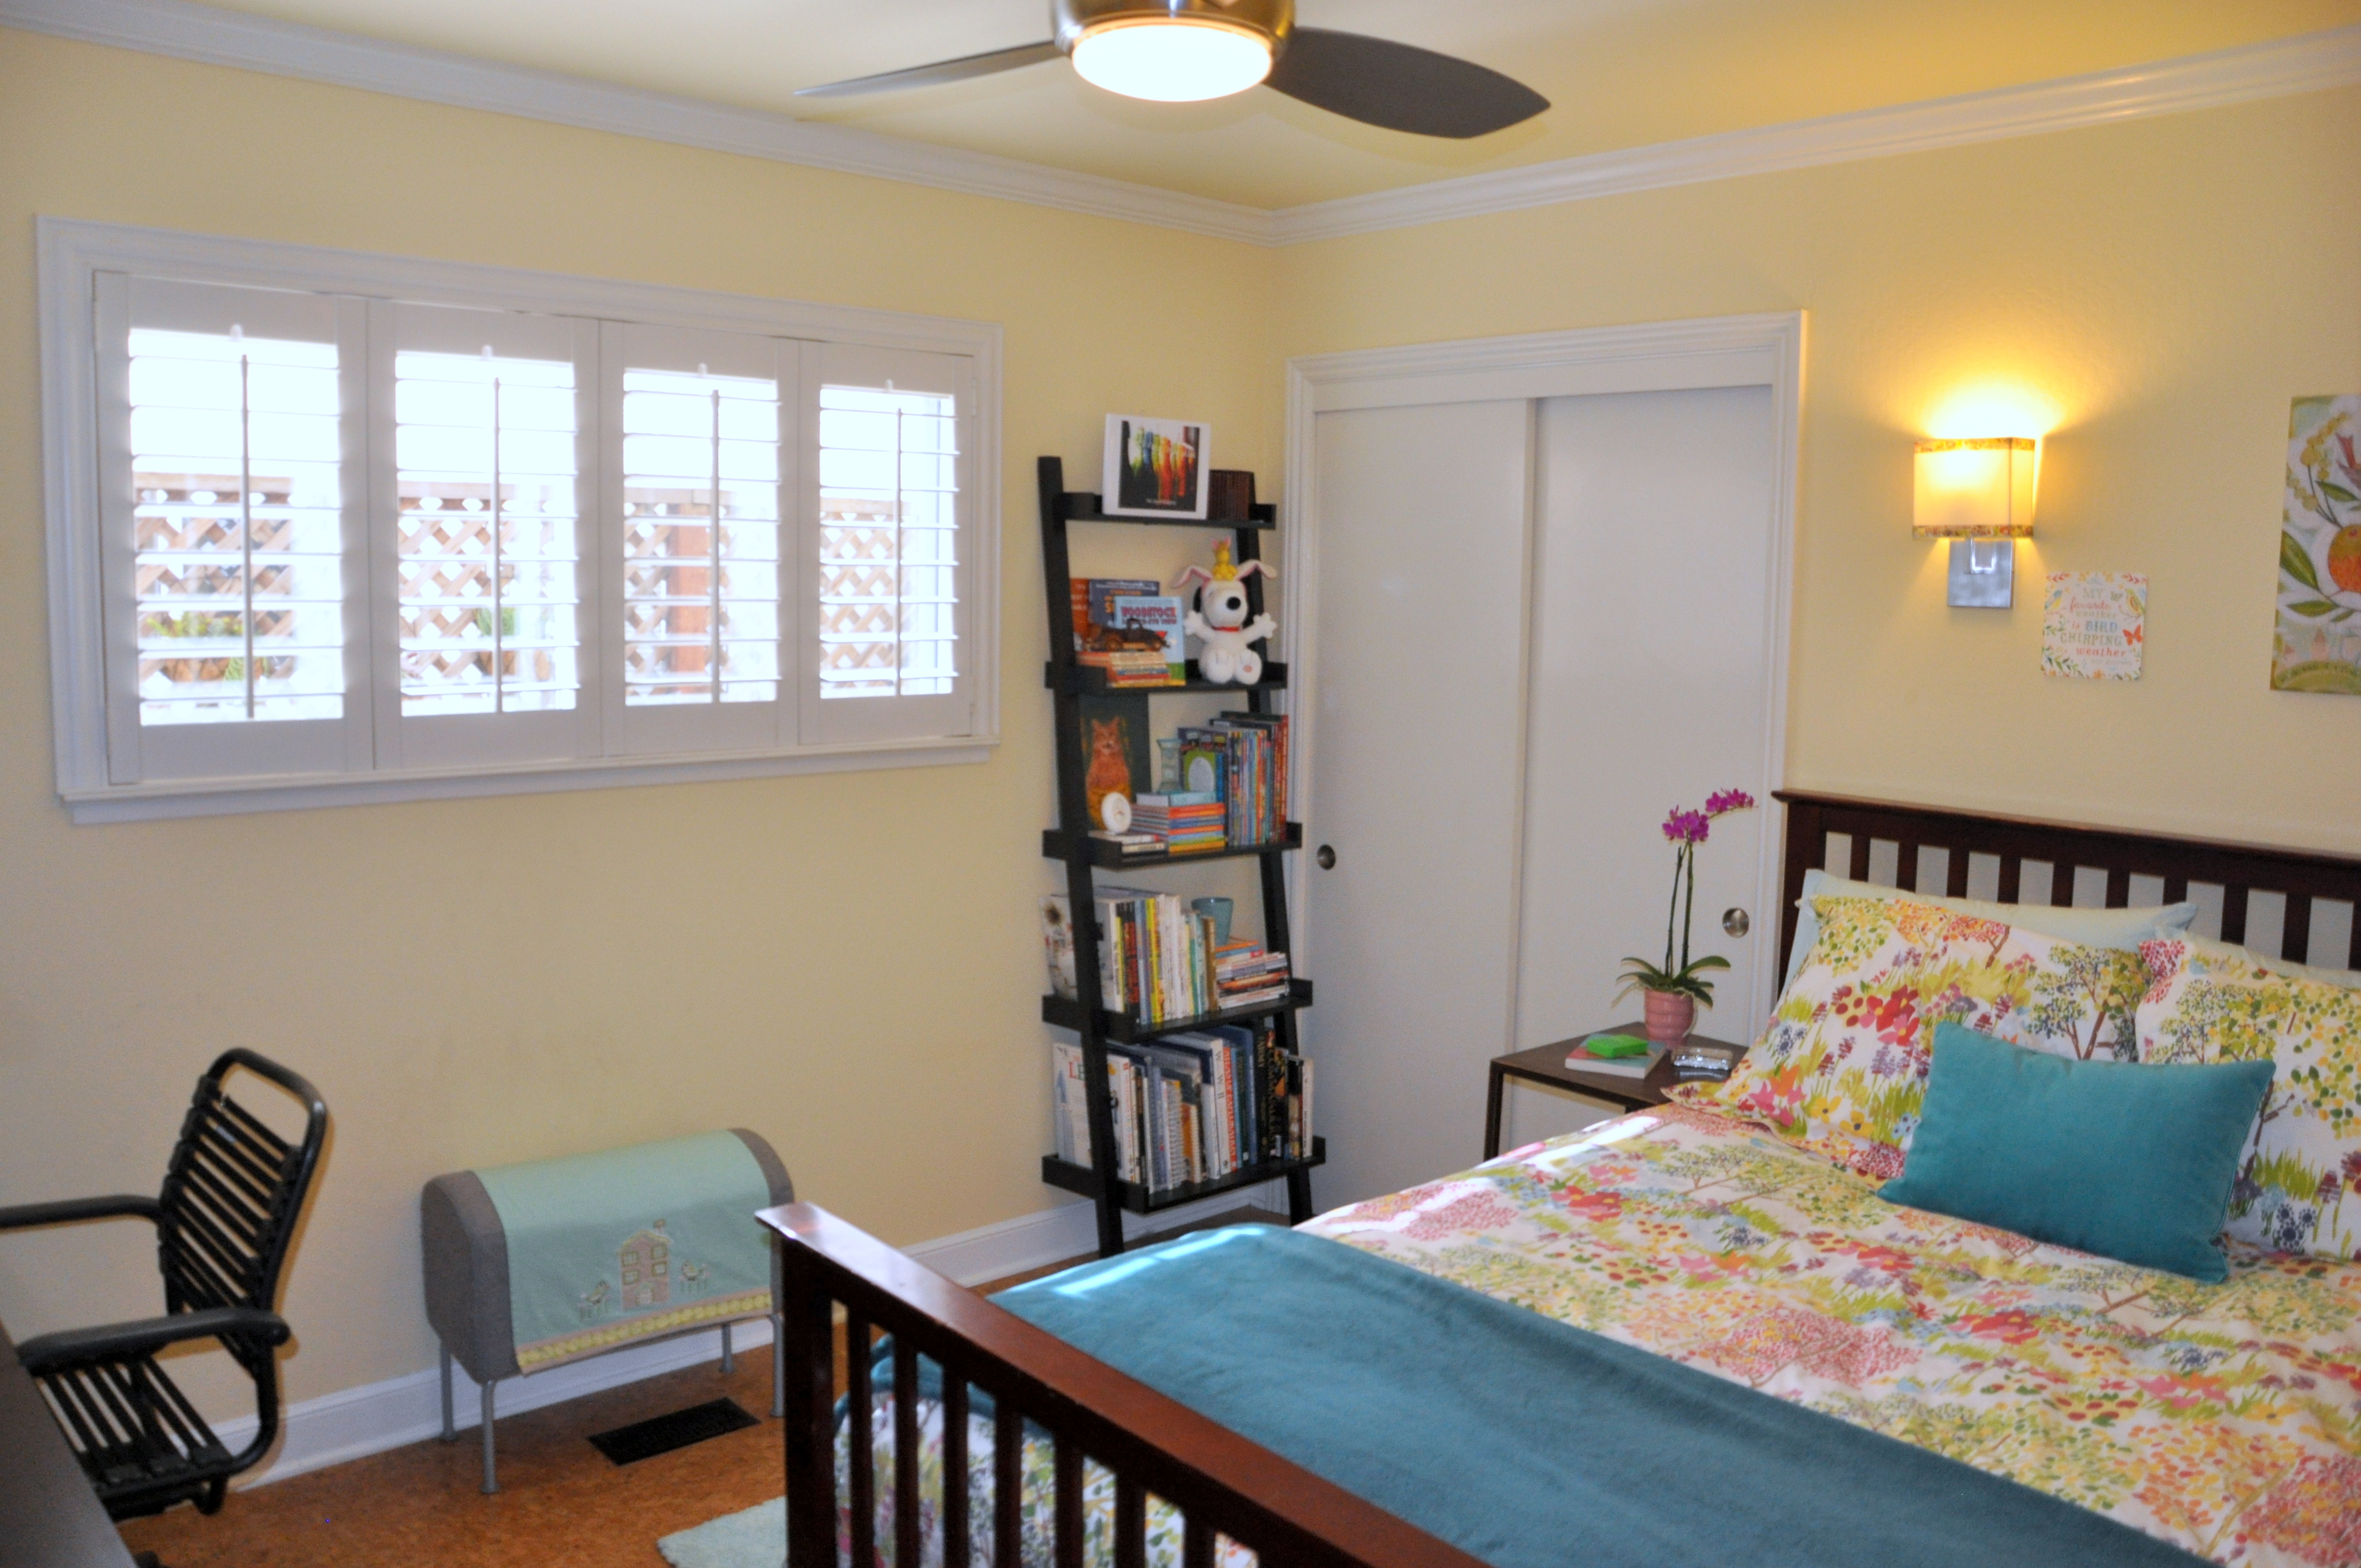
Our local Michael’s had a 90% off sale on custom framing, so I pounced. They framed three calendar pages from my 2022 wall calendar, and to my delight, they look fantastic. I hung the pictures for a few weeks before deciding to have the windowed wall painted green. Green walls made everything pop.

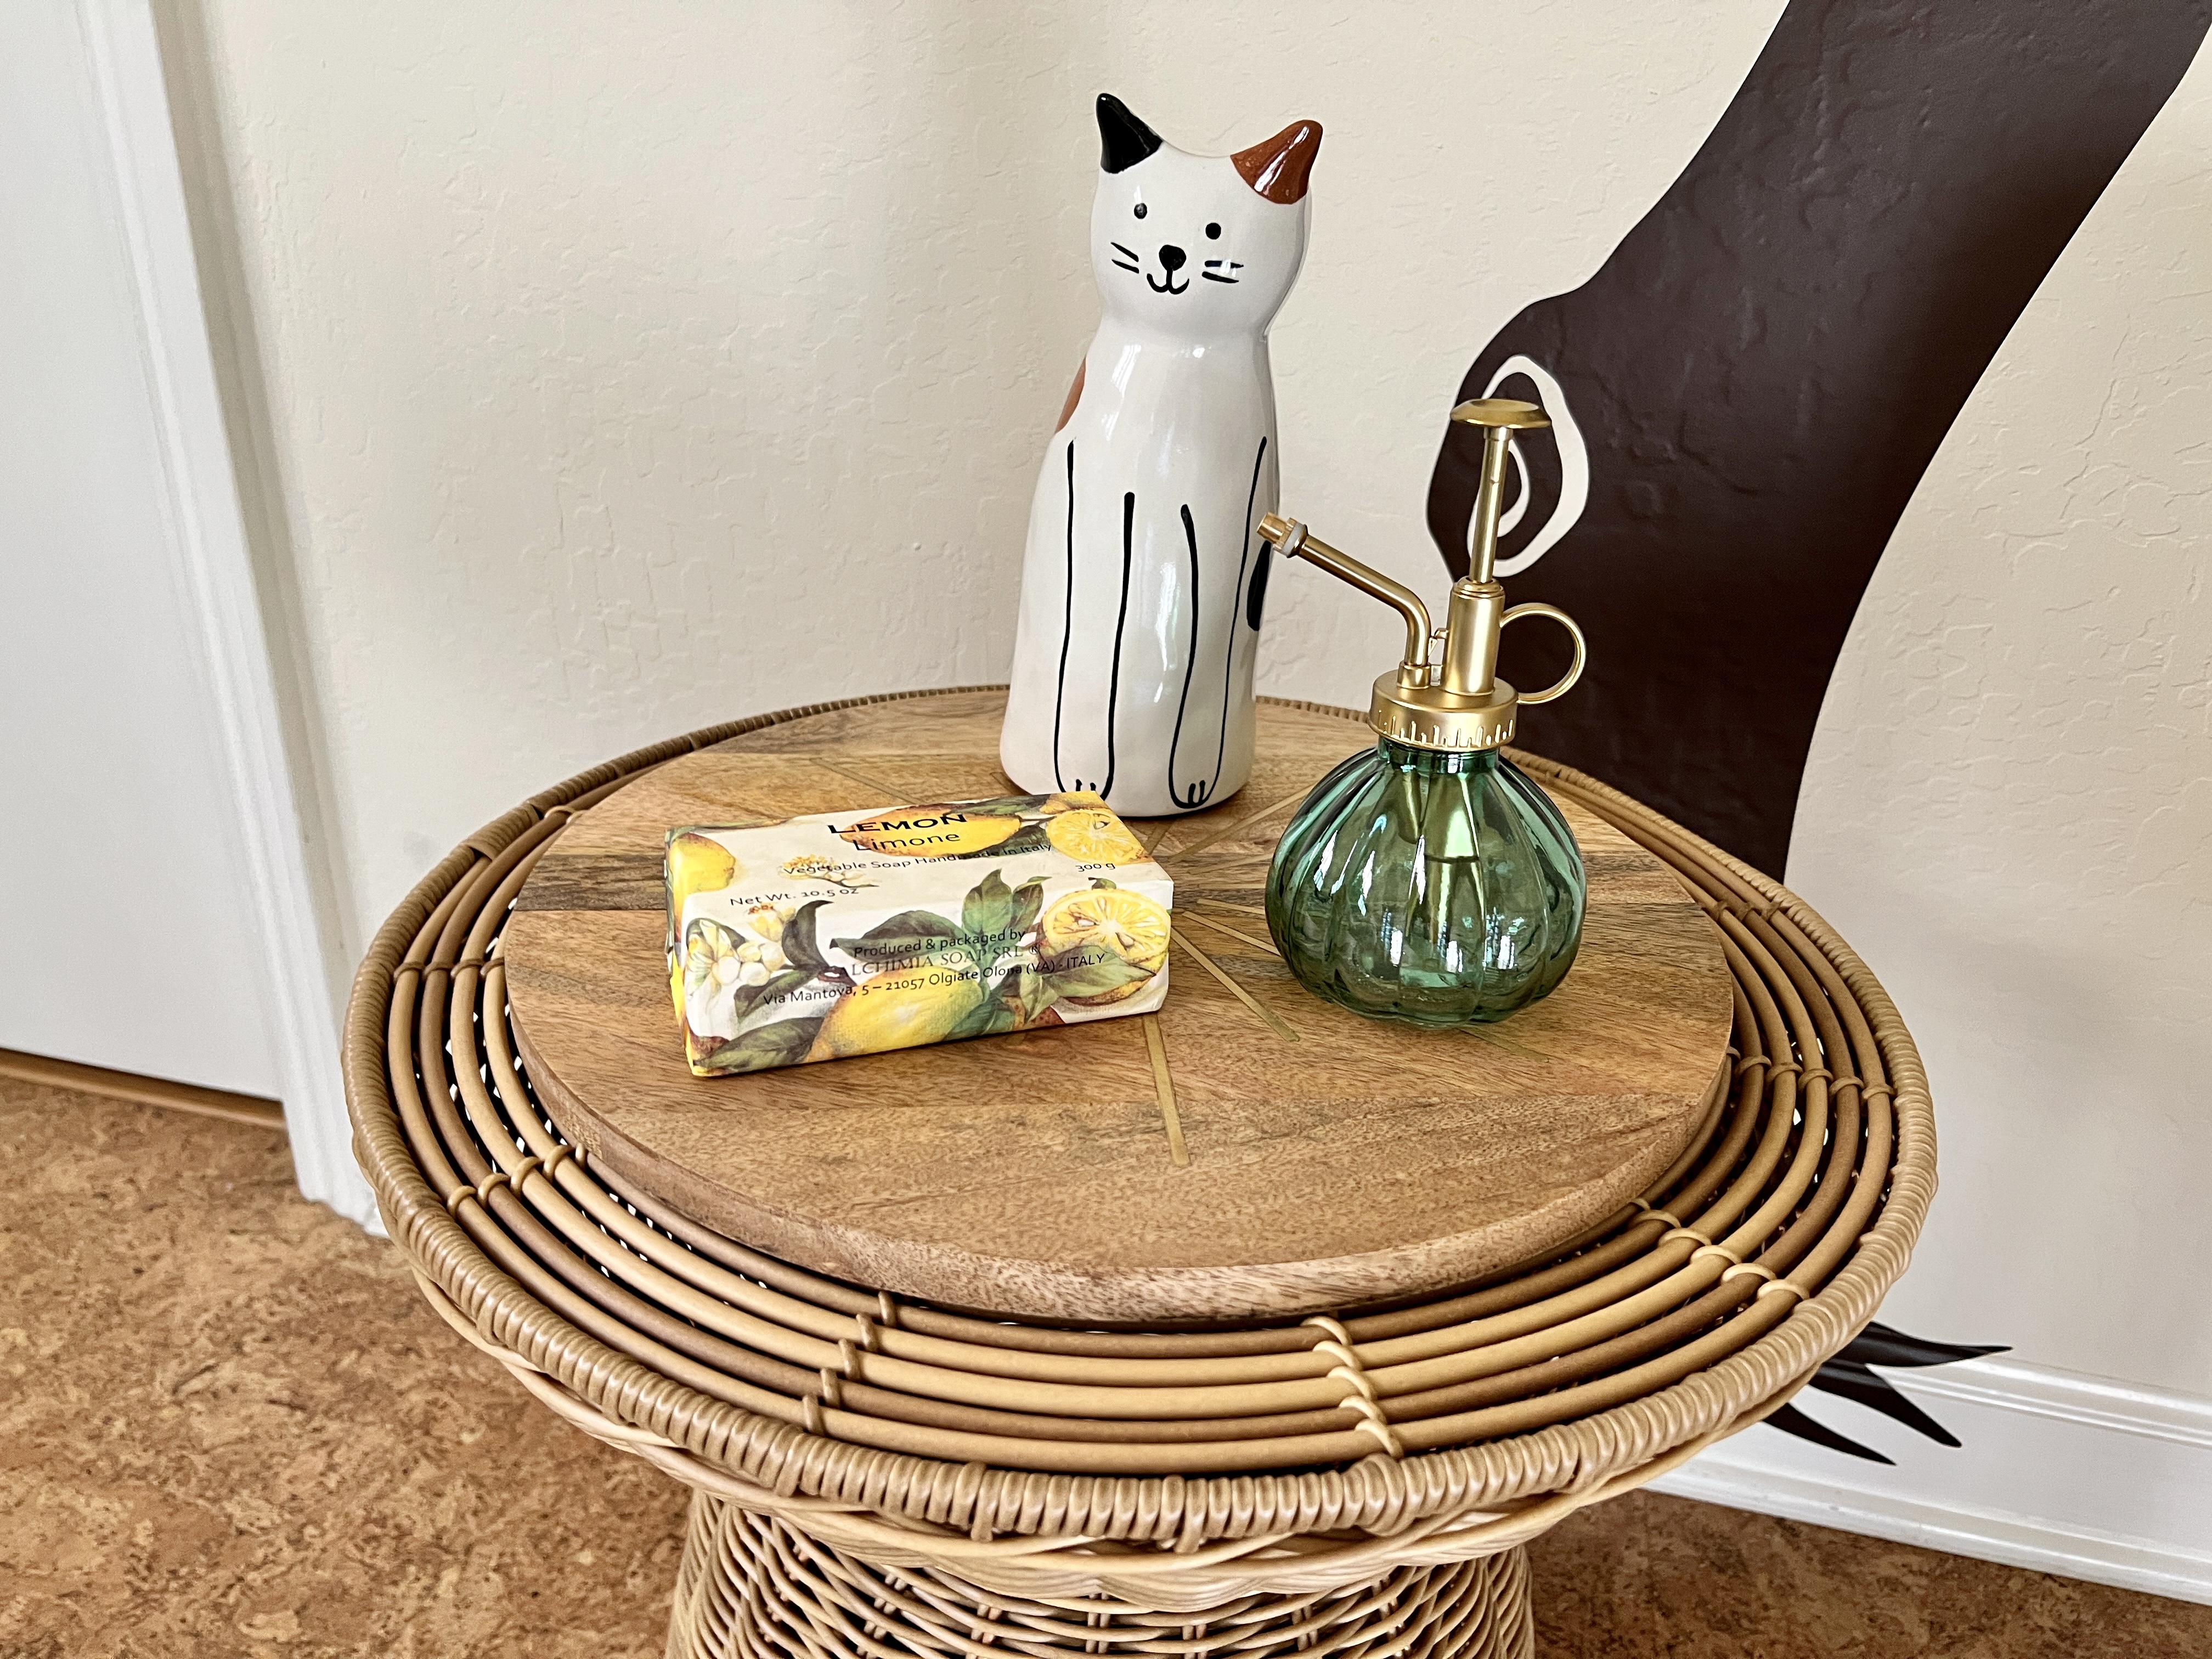
I found a few bargains at Cost Plus World Market:

  • A small wicker table
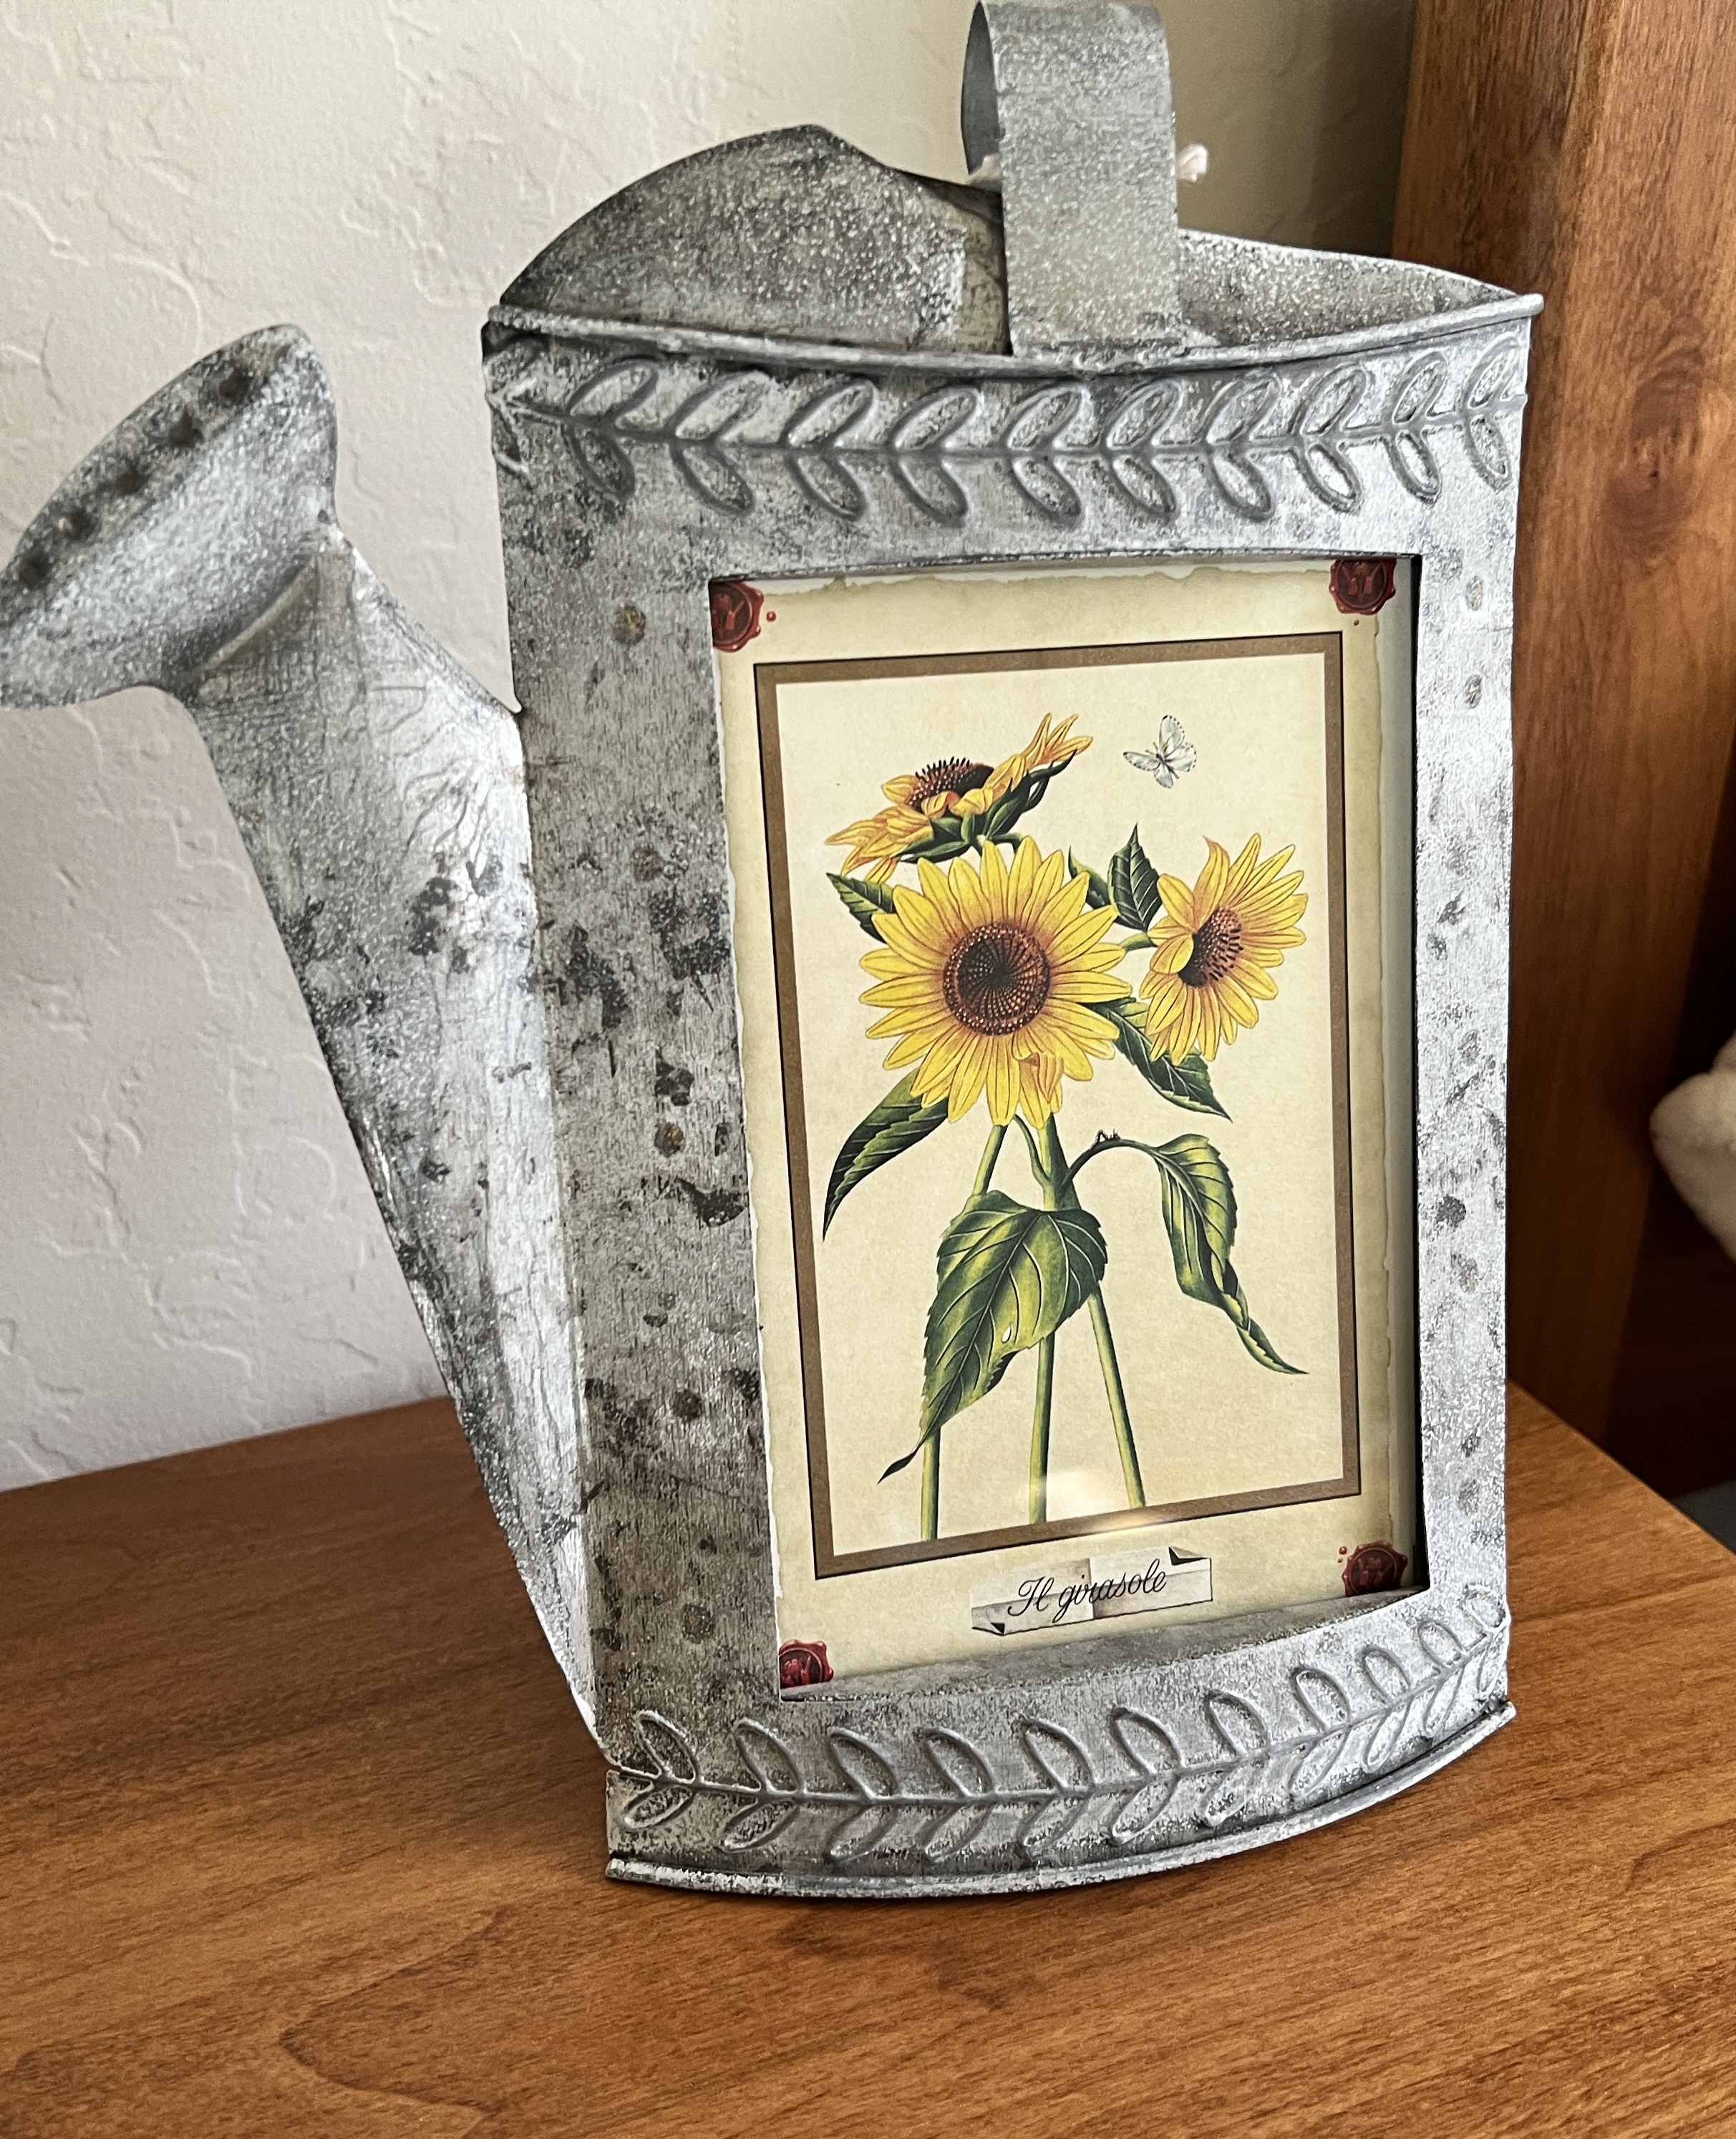
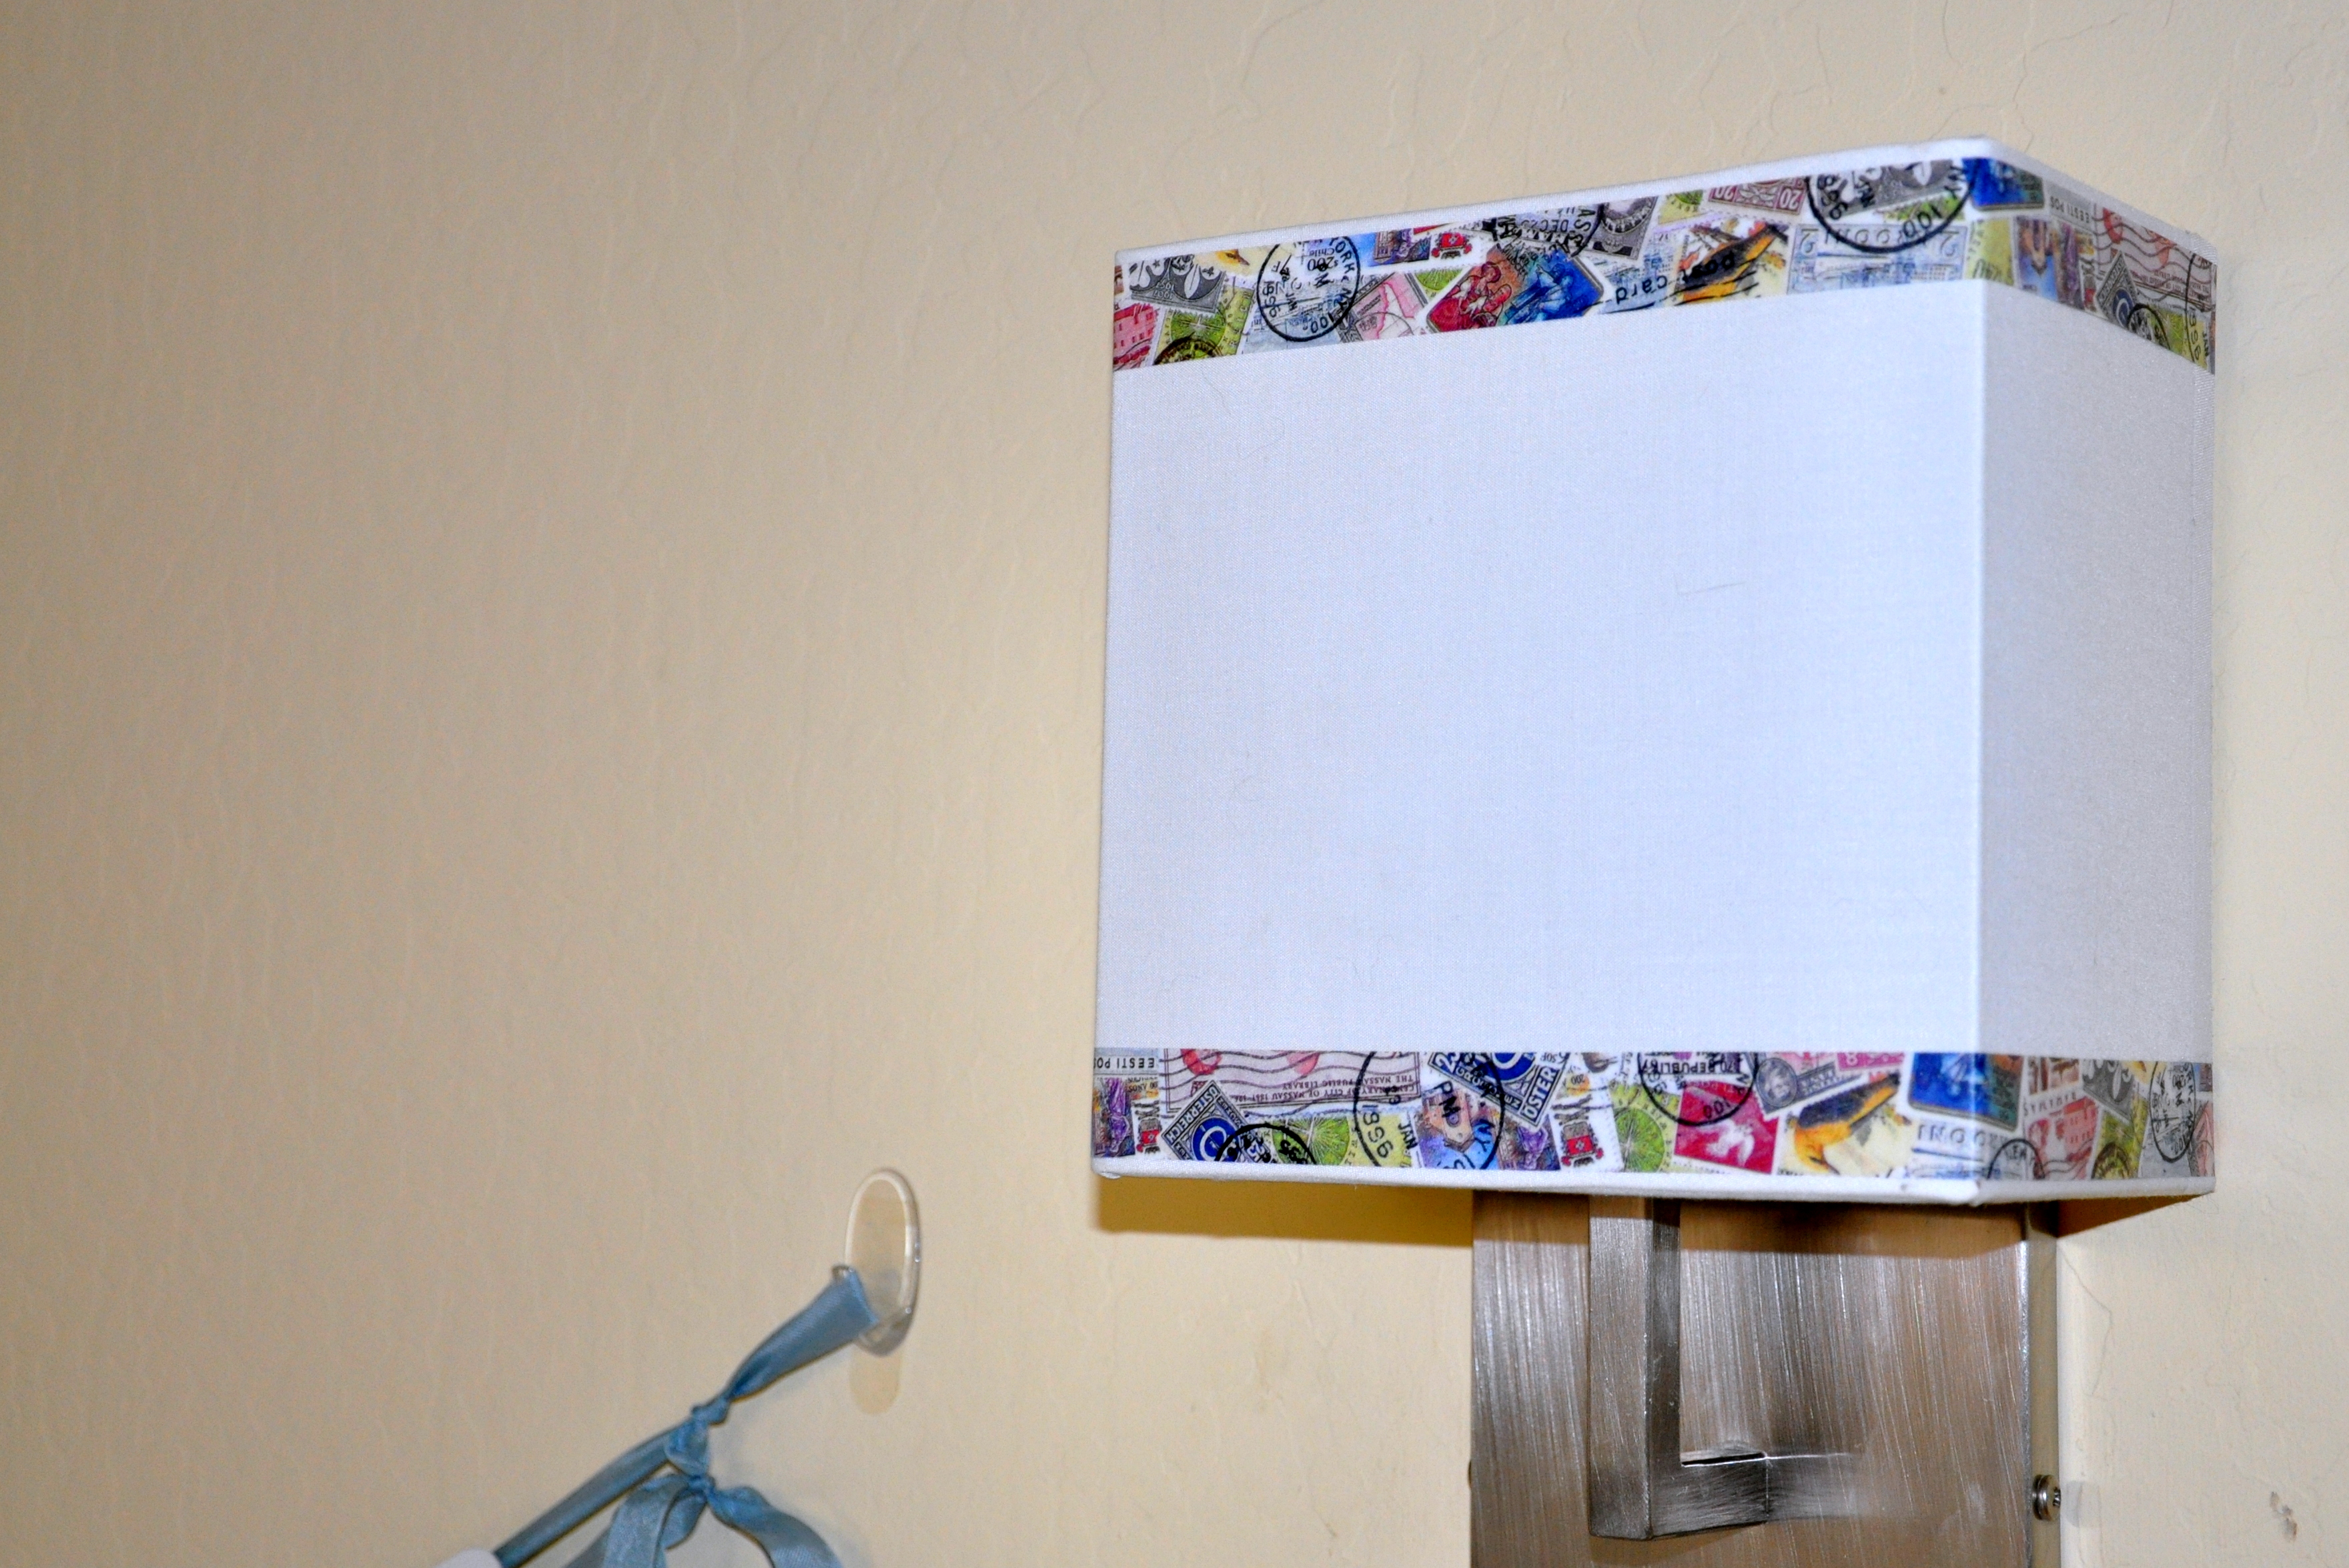
  • A decorative yet functional water sprayer
  • The round wicker piece over the bed
  • and that cute cat vase

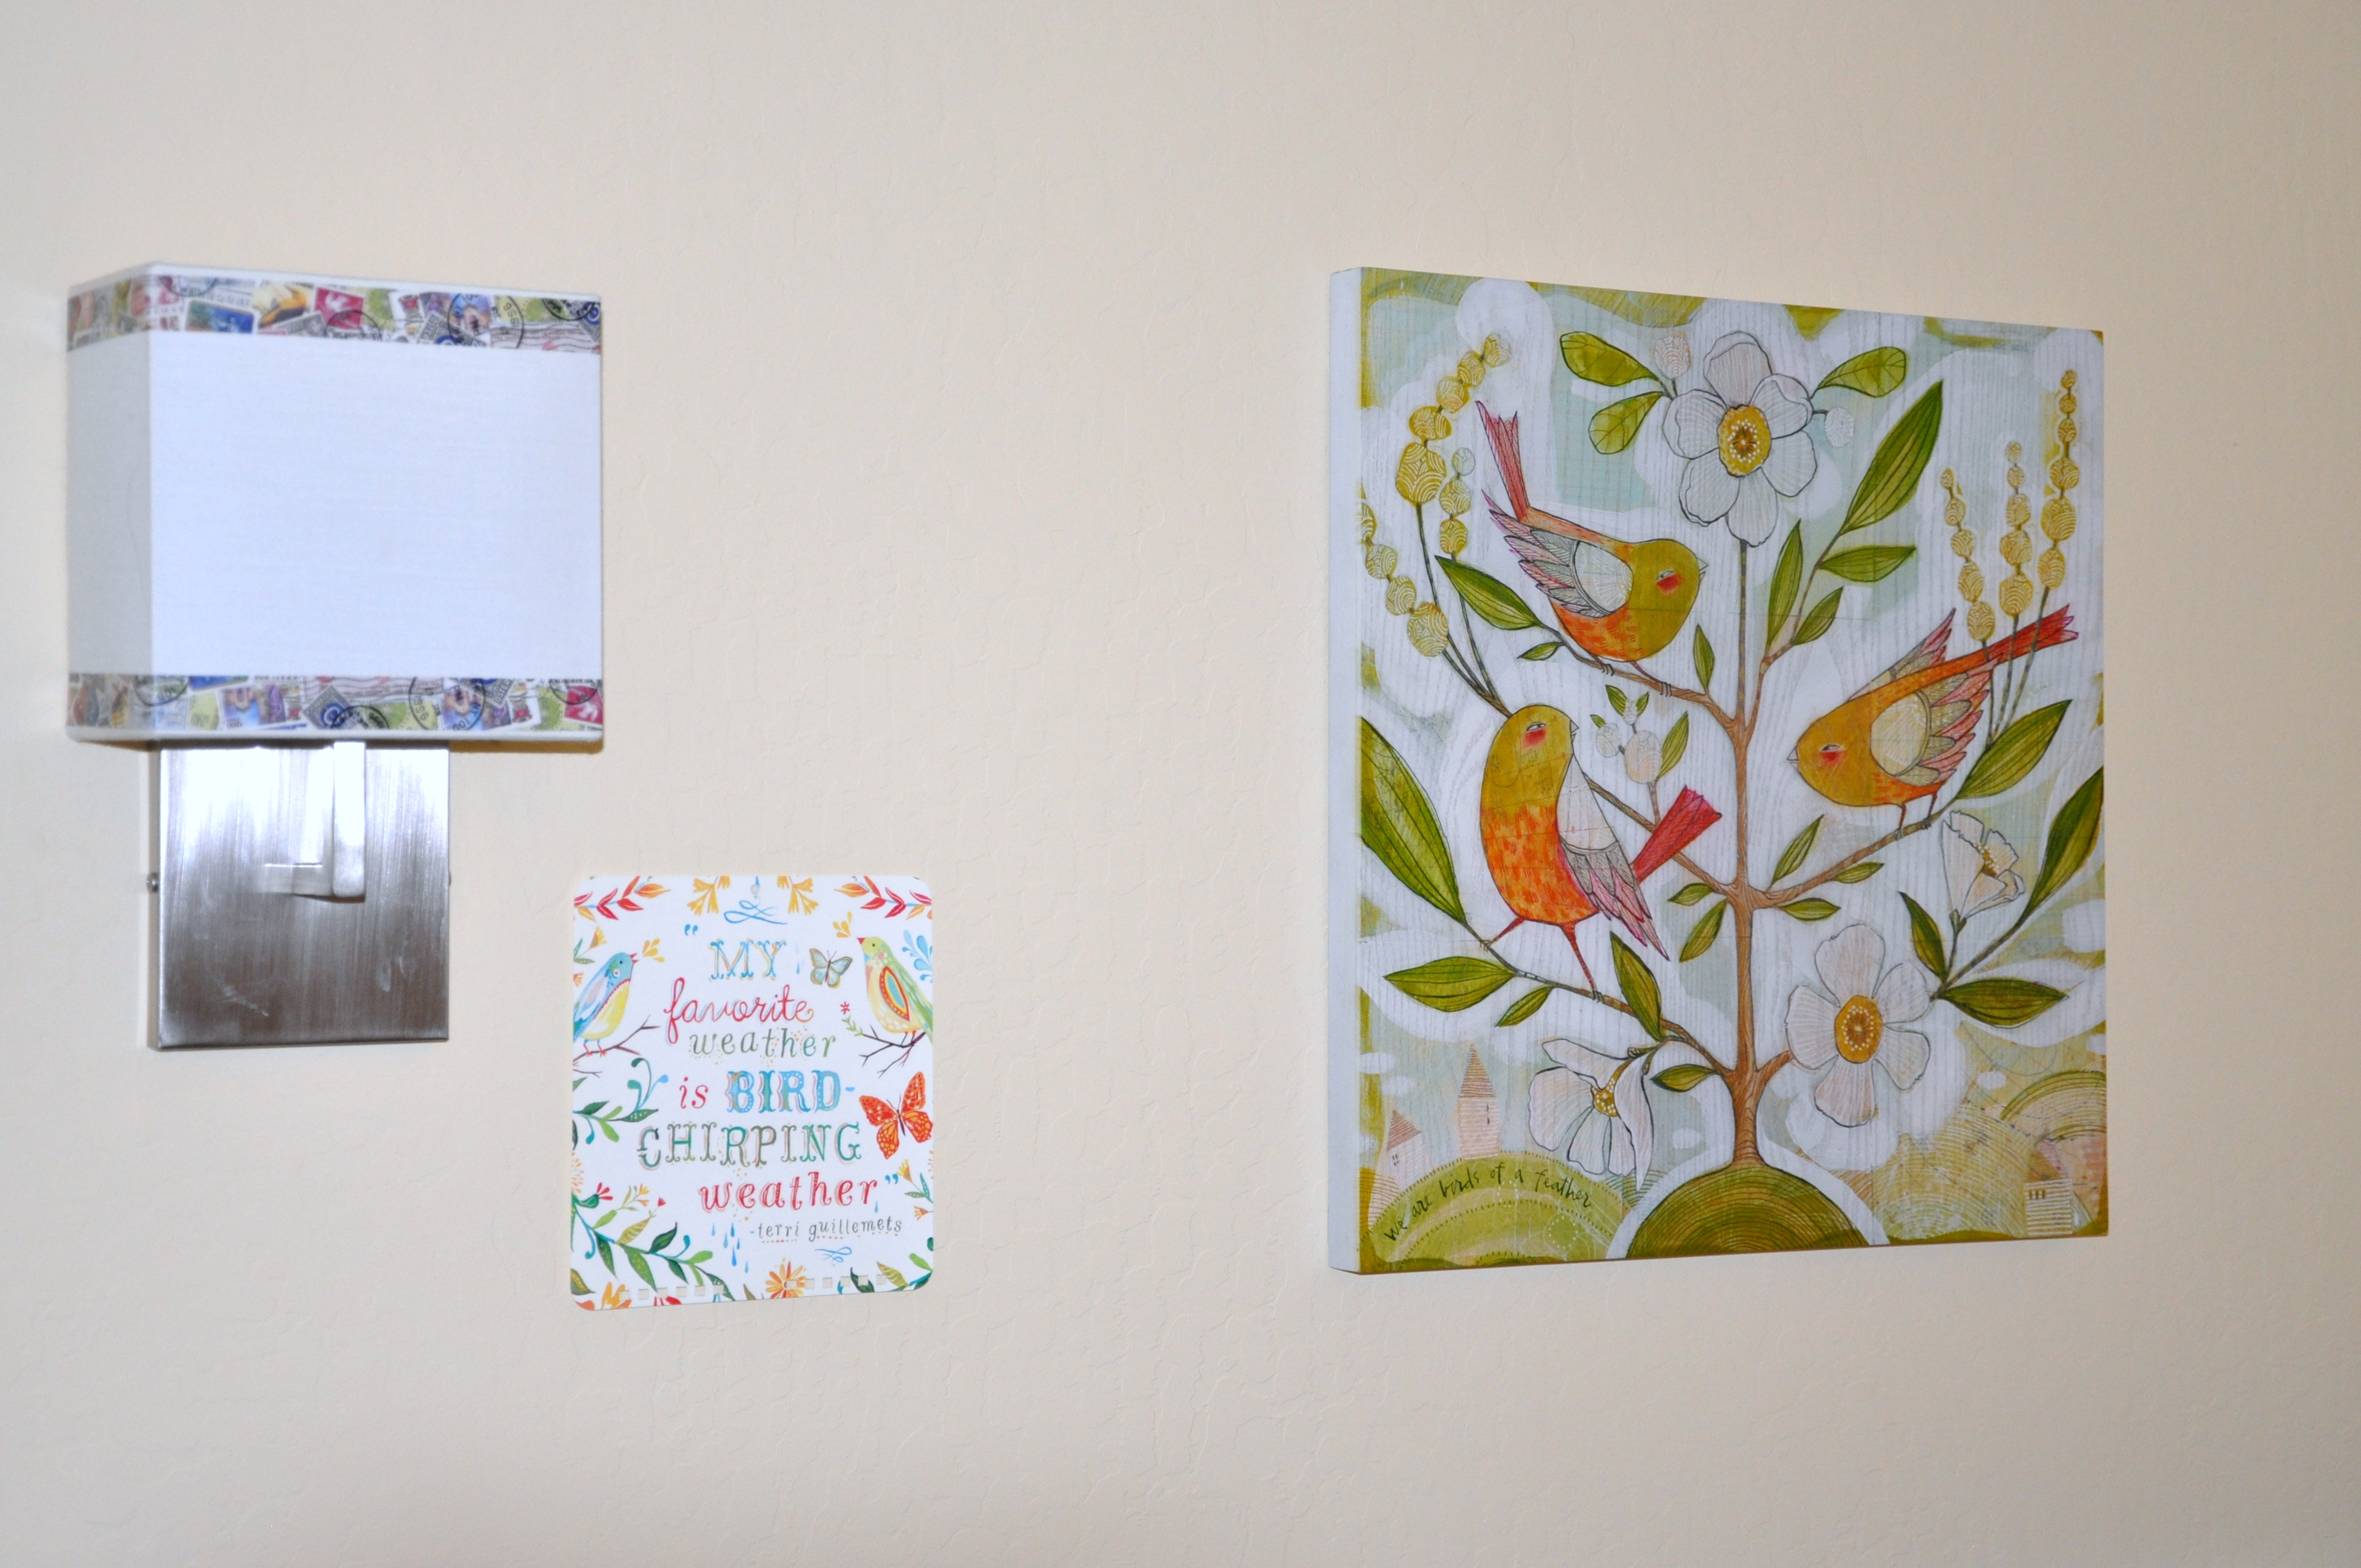
Given our earthquake penchant, I never put anything heavy or breakable over a bed.

The floral chair swivels, so it will work nicely with the desk. It was s splurge!

The room is almost done, except for two details. First, a narrow desk is on order and should arrive in April.

The desk will go along this wall, currently reflecting the shudders
Treasures on the nightstand: mini-apron, a gift from Marlene, watering can frame, a gift from Carrielin and a sunflower card, a souvenir from my son’s trip to Florence. The lemon tray traveled from the kitchen.
Organic cotton light-weight sunflower blanket and assorted cushions from Ownkoti. Painted cushion by krupa paranjape.
The ficus once lived in the corner

Sadly, the gorgeous Ficus I bought for the room dropped 80% of its leaves. I need to sort something else out for that corner. The room has very little natural light, so this was a one-plant test. I’ve moved the plant to a brighter location, hoping it will rebound.

The plant looked nice while it lasted

The guest room is officially open! Here are a few more pics. I’ll share an update when the desk arrives.

Our Beloved Village Mural

Our living room mural garnered lots of comments and interest when readers spotted it on my In A Vase on Monday post. I decided to write a little something about the artist and her process.

I met Donna through our mutual friend Roger. Bodywork By Roger is in a nondescript building owned by a credit union, but when you walk in the door the space is stunning. Donna designed and painted the lobby and all of the rooms. I asked Roger for her contact information, and started referring her to my organizing clients and a few friends. I loved being able to peek at some of her projects and enjoyed seeing the breadth of her work.

I’ve dreamed of a wall mural my whole life. I have magazine clippings of murals dating back to 1970, hoping one day the dream would become a reality. I came close once about twelve years ago, but I didn’t connect with the artist so the idea fizzled out.

It’s been five years since Donna painted our mural, and memory is sketchy, but at some point I approached Donna with an idea and it manifested as this:

Completed mural

Donna took inspiration from a canvas we loved, creating her own colors and glazes to bring it to life. She sketched the idea, then literally drew a simple outline on the wall using an overhead projector. It was magical watching her work. Click on any photo in the gallery below for a closer look.

She painted over the course of a week, fleshing out the mural as she added fence posts, buildings and the beautiful sky.  She even added a small cat to the stone wall at my request. See if you can spot the kitty.

cat in silhouette

Kitty in silhouette

cat in silhouette on stone wall

Kitty in silhouette on stone wall

We have an open space plan with our kitchen, dining area, entry way and living room all flowing into an L shape. This allows us to see the mural from many angles for maximum enjoyment. One of the things I love about the mural is the way the colors change with the seasons or simply with the time of day. The mural always feels alive.

Wall mural (living room) and textured wall (dining area) by Donna Pierre, Felted wool oval runner by Randi Adams of RanDisignFiberArts

It’s a tremendous privilege to have Donna’s work in my home. I’m glad so many of you asked.

Of Note: You may recognize Donna as the artist behind our revitalized Little Free Library. You can read more about that project on my post Our Little Free Library Becomes a Work of Art.

The Reveal: Teen Bedroom to Restful Guestroom in Ten Days

In case you missed yesterday’s post, you can catch up here.

I’ve been turning my teenage son’s bedroom into a guest room over the past ten days. He’s away at college and Boomdee is coming to town.

Boomdee’s needs are simple: coffee, toast, and a sea of aqua. I’m pretty sure she’ll love this room since she unwittingly helped decorate it. If you’re a regular around here, you’ll recognize several small touches as well. It’s a bit of a bloggers hall of fame.

Without further ado, here’s the reveal.

guest room doorway view

Completed Guest Room

guest room bed and banner after

Guest Room Alternate View

Touches of green, blue and pink worked well with the existing yellow walls. It’s a cheerful room. William Morris says “Have nothing in your house that you do not know to be useful, or believe to be beautiful.” I share this advice with my clients and try to live it day-to-day. As I pulled items from different rooms it all came together seamlessly.

The benefit of an adjustable closet system is that it’s easily reconfigured when needs change. Growing up, the boys needed shelves to store games, books and toys. To covert the closet for guests, I simply removed the shelves and reinstalled a hanging bar. The back of the closet needs a bit of TLC but I didn’t have time to paint. Instead I papered the damaged wall with a roll of gift wrap.

closet before

Closet: Shelves removed exposing damaged wall

guest room closet after collage

Transformed closet

This simple solution, though cheap, proved to be more challenging. The narrow opening of the closet and the cramped quarters inside made it a challenge. I used 3M spray adhesive and regret it. It’s too sticky to use on thin paper and made re-positioning nearly impossible. We used one roll for the top 80%, and an entire second roll just trying to align the pattern for the bottom 20%. Lessons learned. That said, I like the way it turned out. I just don’t think I’ll do it again.

blogger hall of fame

Blogger Hall of Fame

The spirit of blogging touches almost every room in our home. It was fun bringing all my treasures together in one room. Here’s the line up:

A: Photo album of our blogging trip to DC (Life on the Bike)
B: Dear Opl by Shelley Sackier
C: Play In the Garden by Sarah O’Neil and The Good Life, also by Sarah O’Neil (Sarah the Gardener)
D: Vintage mannequin a gift from Marlene at In Search of It All
E:  Craft it Forward heart pin from Diane at Garden Sunshine
F: Boomdee, Boomdee, Boomdee
G: Postcards of Pauline King’s original art (The Contented Crafter)
H: Postcard from Julia at Defeat Despair
I: Crafting goodness from Petals at Boomdeeadda
J: Creatively clever doodle art calendar by Robin Gott of The Forsyth Sagas

guest room before and after window view

Before and After view from the window

gurest room facing door view before and after

Before and after view from the closet

guest room closet after towels

Guest room closet details

guest room airmail letters

A bit of vintage

One of the many things we have in common is our love of vintage. I picked up a handful of vintage air mail envelopes from my friend Donna’s Greenhouse Supply booth at Antique Row. I wonder if Boomdee will write a letter and send it back in time?

DSC_0088-001

Shopping bag decor:  whimsical decorating for a song

I picked up a couple of aqua gift bags, then added photos and ephemera. The postcard is a gift from Julia at Defeat Despair. It’s a collage of photos from our blogging get-together earlier this year in DC.

DSC_0073-001

How could I resist? An aqua trash can in the shape of a petal.

An aqua-colored, petal shaped trash can. Be still my heart. The chess board does a great job hiding old phone lines that one day must go.

DSC_0059

Customized train case, a birthday gift from Boomdee.

The little bird is actually a pen, nesting in a small ceramic bowl a classroom art project from my youngest son.

Ikea bench covered with tea towel

Ikea bench covered with a charming tea towel, also a gift from Boomdee.

Another Boomdee Treasure: I covered this worn IKEA bench with a bird motif tea towel, then tacked the corners to keep it in place.

guest room washi tape lamp

I trimmed these IKEA lamp shades with postage stamp Washi tape from my stash. The stamps work well with the travel motif.

guest room floor after

Foot warmer

Never mind that the heat wave continues. The mornings are cool so a gal needs a place to warm her toes as she slips out of the bed to rustle up some coffee and toast.

DSC_0049

I added Washi tape to the top and bottom of the lamp shade. The bird quote is a page from the same calendar used for the bunting/banner

You guessed it: another gift from Boomdee.

nightstand

The perfect nightstand.

I found this table at an import store for under $90. It’s lightweight, easily movable and slides over the top of the bed, the perfect table for this cramped space.

wall decal

I’m hoping for a chance to dance in the rain this winter

I’m ready. I’m ready to dance in the rain. Truly.

guest room view plants

Room with a view: succulents line the fence

Boomdee arrives midday tomorrow. Her room is ready. Crazy fun times lie ahead.

Ten Day Challenge: Teen Room to Guest Room

I’m a fool for home redecorating and makeovers. For as long as I can remember I’ve enjoyed the “before and after” transformations offered up in magazines, home design shows and even in my neighborhood.  Then I joined the blogging world and found an even bigger neighborhood. Oh my goodness. I’m having so much fun.

What’s even more inspiring is seeing transformations unfold from do-it-yourself bloggers. In most cases they have a small budget, big ideas and a can-do attitude.

I discovered Serena’s blog through Leilani’s blog via Boomdee’s blog and so it goes around here. It’s like a never-ending game of telephone where someone whispers in your ear, then you turn and whisper in someone else’s ear, and before you know it you’re trying to keep up with dozens of amazing bloggers.

Serena and Leilani inspired me to dip my toe into a ten-day room challenge of my own.

The goal: Turn my son’s teen room into a guest room by the end of September.

The motivation: Boomdee’s coming to town.

The challenge: One cranky left foot (you can read about that here) and my busy life.

The catch:  Since my son’s move to the dorms is seasonal, I assured him that any changes would be temporary.

With that in mind, I’ve left the three main pieces of furniture in place. I can easily remove the decorative items and bring the room back to neutral.

I’ve been teary off and on since my son moved out. Spending time in his room is helping me connect to his youth, honoring it and letting go. I discovered forgotten treasures including photos, snippets of writing and a box of smashed pennies from family vacations. Lindy’s been keeping me company. I’m sure she’s wondering where he went.

First up, the big clean. Moving out is messy business. New items arrived for weeks, destined for the dorms: by mail a heavy box of textbooks and an extra-long mattress pad specific to dormitory beds. We picked up a desk lamp, laundry supplies, school supplies and extra socks for those busy weeks when he can’t do laundry. Here it is, piled up on moving day. It looks like cleaning my kitchen counter was a low priority that day.

makeover packing for college

My college-bound son left a pile of things he no longer wants, so I’ve been having fun passing them on through my Buy Nothing Cambrian group. One happy six-year-old is now the proud owner of a Star Wars wallet. I love that.

I sorted, cleaned and recycled my way through the room.

Mike flipped the mattress so I could vacuum the bed frame which also needed a quick repair. Once it was all back together, I added a mattress topper and covered the bed with our king-sized duvet cover.

Bed frame cleaned and repaired

Bed frame cleaned and repaired

The duvet cover has all the colors I wanted to feature in the room, and it’s large enough to act as a bed spread for the queen-sized bed. I found a turquoise pillow at an import shop on end-of-summer clearance. It’s the perfect color to pull together the blanket and spread.

Duvet cover and velveteen pillow

Duvet cover and velveteen pillow

My son is a minimalist, so his walls were spare; he had a piece of artwork from middle school and a poster passed on from a friend. I rolled them up, put them in the closet and pondered ideas for quick and affordable decor. Somehow it all fell in place. Serendipity!

I decorated all three walls for about forty dollars. The packet of decals came from our local Target. They were originally destined for the long wall next to the bed, but it wasn’t large enough to fill the space. Instead Mike carefully laid it out on the wall above the desk. This is wear the bum foot became a drag. I really wanted to put up that decal, but instead sat back and [impatiently] watched while he expertly put it on the wall. It looks shiny in the photo, but in person it looks great.

Wall decal from Target

Wall decal from Target

The bird print above the bed and to the right of the lamp was a happy find. While waiting out my phone repair appointment, I wandered into a little shop called Azuca. There it was: a lightweight, wood panel with this charming print and the quote We are birds of a feather.

Washi tape, wall calendar page and wooden art

Washi tape, wall calendar page and wooden art

Before I fully realized it, the room was taking shape. It has a sense of travel and flight, with birds figuring prominently. The colors complement my premier guest, the delightful and sophisticated Edmonton blogger nicknamed Boomdee. Little did she know that so many of her gifts would later help decorate a future guest room. Wait till you see all the treasures!

Which brings me to the third wall. I’ve been saving my gorgeous 2014 wall calendar, featuring the artwork of Katie Daisy. I love turning calendars into new treasures. After removing the coils with a pair of tin snips, I punched holes in the top of the pages and threaded them with vintage seam binding. The colors work beautifully in the room and each saying warms and uplifts. I used one of the pages as a compliment to the bird panel.

Katie Daisy calendar wall bunting/banner

Katie Daisy calendar wall bunting/banner

Please stop by tomorrow for the  “reveal.” Gosh that’s fun to say.

Meanwhile, if you love makeovers as much as I do, then you’re in for a treat. Check out:

A Nesting We Will Go

What do garden swing covers and shower curtains have in common?

Give up?

They’re almost exactly the same size. Serendipity!

After a nesting squirrel did this

squirrel ard at work

Squirrel hard at work

and this

damaged cording, exposed batting

The squirrels have a field day

I knew the swing cover I’d sewn was beyond repair. Eventually I brought in the tattered cover, washed it, and put it in a bag in the car. I planned to use it as a pattern when I got around to making a new one.

The soft cord inside the piping of the cover seemed to be the prize. I cut a strand of leftover cording and draped it on the back of the swing to test my theory. Sure enough, I returned home to find it gone. I took the rest of the cord, cut it into strips, and placed it at the scene of the crime.

There the cord sat. It sat and sat. No more squirrels. Perhaps nesting was complete for the season. Eventually I brought in indoors, figuring I would put it out again next spring.  I don’t want to put the time and effort into a new swing cover, only to have it shredded once again.

Sigh. I acted too soon.

A few weeks ago, an anonymous squirrel was at it again. The swing looked bad enough without the cover when this happened.

shredding the original cover

Shredding the original cover

fluff inside garden swing

Fluff and stuff

It was demoralizing staring at the swing in its damaged state, but I couldn’t muster the energy to do much about it.

Well, this past weekend the husband of a friend came to call, all the way from Australia. We planned a coffee and catch up in the garden, and I wanted a quick fix for the unsightly swing.

Backing up a bit, three years ago I bought a brightly colored shower curtain to use as a patio tablecloth. I couldn’t find a cheerful tablecloth at the time nor did I have the time to sew one.  Twenty-dollars later a tablecloth was born.

Now it’s getting a second life as an impromptu swing cover. Serendipity!

shower curtain swing cover

Quick shower curtain fix

shower curtain swing cover

Shower curtain, side and back. I eventually added binder clips to hold it in place.

Although I can’t speak with authority, I expect to see a dray of baby squirrels traversing the wires any day now.

Wreathiness

Earlier today, ‘Selfie’ was named Word of the Year by the Oxford Dictionaries.  It brought to mind an earlier Word of the Year back in 2005 coined by Stephen Colbert of the Colbert Report: truthiness.

Truthiness  is “the quality of stating concepts one wishes or believes to be true, rather than the facts.”  That is how I feel about my garden wreath.

In concept I wish it were beautiful.  If  you look at a small corner of  the wreath it’s pretty.

wreath detail

Closeups are deceiving

If I was going for truthiness I could call it a day.  Alas,  I’m a gardener that likes to keep it real.

The wreath had potential:

  • A  sturdy, but unobtrusive green metal base from a craft store
  • Lovely hydrangeas, dried to a soft purple gray
  • Long strands of velvety, purple sage
  • Snippets of lavender here and there
  • Bits of ribbon and a hair pin, no longer in use.

I wrapped strands of  sage along the edges of the wreath, then placed three hydrangeas in a loose triangle.  I added a small ribbon and a hair pin.  It just wasn’t enough.  I gathered lavender and added sprigs of that, then hung the wreath on the door, scattering dried flowers  as I went.

The wreath lacks volume.  Adding lavender made it smell nice, but it didn’t really help my cause.  Every time I tried to ‘fluff it up,’ I made it worse. I found a few more hydrangeas, smaller and still green.  Still not enough.  Now I have dried petals all over the front porch. They continue to drop  every time I close the door.

wreath of shame

Wreath of shame

balding wreath

Balding wreath

So, crafty friends, what’s a gardener to do?  Should I hide my wreath of shame?  I ordered a Christmas wreath from the local Boy Scouts.  Maybe I should just wait for it to arrive.

Is there still hope for my garden wreath?

Suggestions welcome in the comments below.

Rolling Out the (Soda Pop) Carpet

As the weather warms up and the days grow longer, I look forward to setting up the outdoor furniture. We bought a cute little set from an import store a few years ago when we added a front deck. The furniture is comfy, cozy and easy to keep clean. Setting it up feels like playing house. I’m not sure I ever really grew up. 😉

At the time we bought the set, we also picked up a grass-styled mat to unify the pieces. After three summers of outdoor-living, the mat is looking tired. We could certainly make do for one more year, but while shopping for summer dresses I found this:

striped garden mat

Outdoor Rug by Gaiam

The mats are hand-woven from strands made with recycled plastic. They’re reversible, too! The materials mean they are rot and mildew-resistant. Simply clean them with a hose.

The all-weather ‘rugs’  come in five different styles and two sizes. I hemmed and hawed over two of them, but finally settled on Tropical Stripe. Woodland Forest was the first-runner up.

Unexpectedly, the mat arrived with a burlap storage bag. I have a thing about bags, so it tickled my knees when it slid out of the box. It really is the little things that make our day, don’t you think?

I can’t wait to roll out the soda-pop mat, then gather our furniture around it. All summer long friends and neighbors stop by. I linger on the deck to open the mail or to read my book. We sit out there in the evening with a glass of wine or tea.

Counting the days…

What symbolizes the changing season for you?

Flower Tower in (a Few) Hour (s)

Terracotta stack

Terracotta Stack after gold leaf finish

We had the most glorious weather today! Our highs reached 75 F ( 24 C). Can you believe it? The temps should start dropping tomorrow, with much-needed rain in the forecast but today was lovely.

It was also the perfect, no-excuses day to take on my two-tiered challenge. I wrote at Crafts and Plants: My Winning Combination that I wanted to finally get around to planting a flower tower of terracotta pots. I found the idea back in 2008 in a magazine called Do It Yourself.  Today, I finally did. I also challenged myself to try something new; in this case, applying gold leaf.

As it turns out, it was really easy to do and a lot of fun. Like many things you try for the first time, there are things I would do differently. Overall though, not bad for a rookie.

Here’s what I did:

Clay Pots and Gold Leaf

Clay Pots and Gold Leaf

I picked up three clay/terracotta pots in graduating circumferences (12″, 10″ and 8″ inches) from the garden center, along with a saucer and some potting soil.

I bought a metal leaf starter kit at our local craft store. It included six pages of gold leaf, adhesive size, sealer and antiquing glaze. I had a couple of small paint brushes on hand.

I read the directions (twice) then jumped in.  Using a small paintbrush, I spread the sizing across the side of each pot, using a swirling pattern to create an organic shape. Once the sizing/glue was tacky to the touch, I applied the first sheet of leaf, brushing it into place with a soft, dry paint brush. (That was my favorite part!)

Antique finish detail

Antique finish detail

The leaf is super light and fly away, so I learned that you better have a plan. There are no second chances once it hits the adhesive. As small pieces tore off, I applied them to places with sizing. That was it!

Since the effect is as shiny as a new gold coin, I went ahead and brushed on a coat of antiquing (after sealing the gold first). I like the color but didn’t expect the brush strokes to be so apparent after it dried. The Mona Lisa Art Products Starter Kit came with enough product to complete one side of all three pots. You would need three or four kits to get enough coverage for all of them.

Stacked pots filled with soil

Stacked pots filled with soil

I raced back to the garden center late this afternoon and picked up a few cell packs. All that fresh dirt was simply begging for plants.

I planted:

  • 6 penny White Violas
  • 6 Penny Denim Jump-Up Violas
  • 6 Alyssum
  • 1 ‘Bluebird’ Nemesia fruticans

What do you think?

Flower Tower

Cranberry Hydrangea: A Lovely Bloom to See in the New Year

Cranberry Colored Hydrangea

Cranberry Colored Hydrangea

My ever-changing Hydrangeas are now a brilliant shade of cranberry. I love their ruddy complexion. They’ve set buds for spring, but the pom-pom like blooms linger.

It’s a challenge pulling together a flower arrangement from the garden this time of year.  That said, I wanted to come up with a creative way to use what I had, including these lovely flowers.

Here’s what I did:

I removed the bloom above the last set of buds, leaving a short but sturdy stem to work with.

I filled one small jar with leftover florist’s foam.  I filled a second, slightly wider jar with a handful of crystal beads.  Together they create the illusion of a tall vase, even though the stem itself is less than three inches long.

Hydrangea blossom

Hydrangea blossom with short stem, supported with florist foam

florist foam

Florist foam…or volcanic rock?

stacked jars

Glass jars, stacked and slightly nested

Hydrangea blossom

Do they make a crayon this color? I would name it “Spectacular”

Bacopa Cordata

Bacopa Cordata

Winter Flower Arrangement

Winter Flower Arrangement

And there you have it.  Simple and festive and ready to see in the new year.

How will you celebrate the start of a new year?

An Apple a Day, Plus a Candle You Say?

Cutting the tea light opening

Candle Cutter in Process

It’s fun decorating with consumables. Creating centerpieces from seasonal fruit, ensures a uniquely fresh and original setting at your holiday table. I was delighted to learn how to make a Clementine Candle yesterday. It was easy to do and smelled…well…good enough to eat. Pictures and a DIY video can be found here.

Making candles from fruit reminded me of my clever Candle Carver™.  It’s a gadget that carves the perfect, tea-light sized opening in the top of an apple.  Since you only remove the top portion, you can eat the rest of the apple centerpiece when you’re done.

I think Granny Smith would be proud.

Here’s what you do:

  1. Select three to five apples with flat, level bottoms.  They’ll need to stand firm, so nothing tipsy or top heavy.
  2. Insert the candle carver at the top (or bottom) of the apple, and twist till the base sits level with the opening.
  3. Remove and compost apple top.
  4. Insert tea lights into each apple, light and enjoy

Candle Cutter

Candle Cutter


Carved Opening

Carved opening, sized for a tea light


Apples, start to finish

I used three apples stem side up and two, stem-side down for variety


Apple Candles

Apple Candles (or genetically modified Pimiento Olives?)

This also works with pears, oranges, or any other fruit with a firm, supportive center.

Resources: