Crafty?

What do you think of my crafty idea? Should I enter it in the county fair?

squirrel nesting wreath

What am I?

It’s part mutant octopus, part over the top wreath. It might even show up on a Pinterest board entitled “Crafts Gone Terribly Wrong.”

So, can you guess what it is?

.

.

.

.

.

.

.

Give up?

It’s part of my squirrel nesting experiment.  After destroying the slipcover in July, the squirrels returned to hand-pick the stuffing from the lining of the swing. I disguised the damage with a cotton shower curtain which only slowed them down. Now they carefully fold back the edge of the cover and continue to pluck the stuffing.

garden swing exposed stuffing

My sorry-looking garden swing

My experiment

I smoothed the curtain/cover over the exposed stuffing and placed two things on top:

The soft, exposed lining of the sunflower…

sunflower fluff

Exhibit A: Sunflower Fluff

The idea came to me this morning when I found a shredded sunflower head in the middle of the lawn. I couldn’t believe how soft it was. Maybe they’ll use the pulp for nesting.

…and my octopus wreath.

squirrel wreath

Exhibit B: Octopus wreath

My ‘wreath’ will not be entering any craft fairs, but with luck it will serve its purpose: Lining the squirrel’s nest.

Stay tuned.

Sunflowers in Art

Yesterday, Val at Nikitaland said “I love that flower painting on the glass as it makes a nice statement in the backyard, not to mention, I love how it adds instant color! I bet it looks beautiful when the sun hits it!” Thanks Val!

I tried capturing the light this morning with mixed success, but you can see why I hung the painting over the back of a trellis instead of the fence or wall. The sun pours through the glass window around ten in the morning. If I’m lucky enough to be home, I get to enjoy it.

sunlight through the window

Whitney Pintello: Reverse painted sunflower on salvaged window

Garden Wreath Redux

Wonderful things happen when you write a blog. Here are my top three:

Community, community and community.

Last week I posted photos of my attempt at a garden wreath. The wreath had a lot going for it, but it lacked volume and charm.

Garden Wreath Version 1.0

Garden Wreath Version 1.0

I asked for suggestions and received a tremendous outpouring of support.

The Contented Crafter had this to say:  Just this very morning I was discussing my art work with a friend and related how something Jane Davenport once said made a big impression on me and changed the way I viewed my creations.

Jane said [and I paraphrase] ‘Every creation goes through an ugly stage. Do not be put off, do not throw it out, do not walk away. Keep working at it until it becomes beautiful again’.

Not that I’m calling your wreath ugly – it isn’t. It is actually really pretty, and while still in development, shows enormous potential – it just needs more.

Which brings me to my second great life lesson – if a little is good, a lot is better 🙂 Bling it up Alys, bling it up!

In summary, don’t be discouraged.  Add some bling. Borrow seeds from the squirrels.
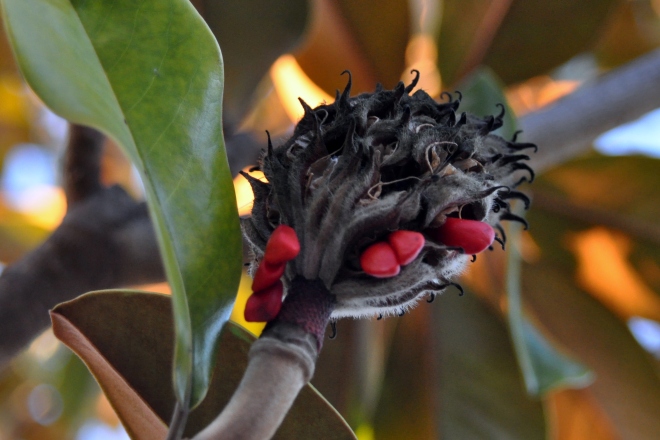
flowes and seeds

Flowers and seeds

Boomdeeadda added:

I would say you’ve got a lot of beautiful dried flowers but need a sturdier base to build upon. I especially love the hair pin, it’s a pretty detail and unexpected 😀 I also like that you used a loose triangle in your design. The rule of three always works best for arranging flowers. It’s going to be so awesome and I bet it smells really wonderful too.

  • Do you have any thin gauge wire? Here’s what a florist might do.
  • Take everything off and sort.
  • Spray Hydrangea with a bit of hair spray to lessen shedding.
  • make three mixed posies with your remaining dried flowers by wrapping stems with a bit of wire. Vary the sizes (S, M, L). Leave a length of wire to make a small loop.
  • Now, stuff the entire wreath with green sheet moss. Available from gardening stores. Winding thin wire around the wreath as you go. You hardly see it with the moss.

After reading Boomdee’s professional advice, it was tempting to box it up and send it to her with a thank you note.  Instead I behaved myself and took notes.

I took apart the wreath, salvaging the lavender, the ribbon and the hair pin. The hydrangeas were toast so I tossed what remained in the compost bin.

I dragged myself to a craft store (hee!) and picked up a bag of Spanish moss, floral wire and a roll of dusty silver tulle.  I bought purple ribbon as well, but didn’t use it.

garden wreath collage

Starting from scratch

Cindy Knoke cheered me on as did Tami and Marlene, of In Search of it All. Marlene and LB both agreed that moss would give it some oomph.  Where the Journey Takes Me suggested the great and powerful Google for dried wreath inspiration.  Additional thanks to Sheryl at Flowery Prose.

Anne Lawson said: bling it up! When I paint there is often a point where I despair and think “it’s not working!” That’s the time to keep going, as many times it does come together.

I gathered lavender and sage in twice the quantities to allow for natural shrinkage when dried.  The hydrangeas were un-salvageable.  I used three of the flowers from a vase in my room.  I sprayed them first with hairspray to prevent shedding.  I added dried seeds from the Bachelor Buttons, and then stuffed all the gaps with moss.  The wire helped keep everything in place.

I dug out my Christmas ornaments early, remembering this cute set of watering cans, a gift from my sister-in-law many years ago.  The size and color worked well.  I added tulle to the original ribbon for a larger bow, placed dried lavender in the watering can and added the hair clip.

Garden Wreath Details

Garden Wreath Details

2nd wreath

Wreath Version 2.0

It’s still a bit lopsided, but overall I like it so much better. I’ve dubbed it the Village Wreath, as I couldn’t have done it without all of you.

XOX

Wreathiness

Earlier today, ‘Selfie’ was named Word of the Year by the Oxford Dictionaries.  It brought to mind an earlier Word of the Year back in 2005 coined by Stephen Colbert of the Colbert Report: truthiness.

Truthiness  is “the quality of stating concepts one wishes or believes to be true, rather than the facts.”  That is how I feel about my garden wreath.

In concept I wish it were beautiful.  If  you look at a small corner of  the wreath it’s pretty.

wreath detail

Closeups are deceiving

If I was going for truthiness I could call it a day.  Alas,  I’m a gardener that likes to keep it real.

The wreath had potential:

  • A  sturdy, but unobtrusive green metal base from a craft store
  • Lovely hydrangeas, dried to a soft purple gray
  • Long strands of velvety, purple sage
  • Snippets of lavender here and there
  • Bits of ribbon and a hair pin, no longer in use.

I wrapped strands of  sage along the edges of the wreath, then placed three hydrangeas in a loose triangle.  I added a small ribbon and a hair pin.  It just wasn’t enough.  I gathered lavender and added sprigs of that, then hung the wreath on the door, scattering dried flowers  as I went.

The wreath lacks volume.  Adding lavender made it smell nice, but it didn’t really help my cause.  Every time I tried to ‘fluff it up,’ I made it worse. I found a few more hydrangeas, smaller and still green.  Still not enough.  Now I have dried petals all over the front porch. They continue to drop  every time I close the door.

wreath of shame

Wreath of shame

balding wreath

Balding wreath

So, crafty friends, what’s a gardener to do?  Should I hide my wreath of shame?  I ordered a Christmas wreath from the local Boy Scouts.  Maybe I should just wait for it to arrive.

Is there still hope for my garden wreath?

Suggestions welcome in the comments below.

DIY Nesting Wreath

I stopped by  Los Gatos Birdwatcher last week and saw the coolest idea: a wreath made from  nesting materials.  They covered the wreath with soft wool, feathers and other natural material.

For a few years I’ve saved my laundry lint, then tied it to a tree in a mesh bag.  Making a wreath looked like way more fun.

I picked up a frame at the craft store for a few dollars and got to work.  I wrapped the entire wreath with soft, oatmeal-colored yarn.  I pulled the yarn taught to prevent entanglement.  It also gave me a base to push bits of lint, string and wool into the frame.

Wire Wreath Frame

Wire Wreath Frame

Wrapping Frame with yarn

Wrapping Frame with yarn

Small pieces of laundry lint

Small pieces of laundry lint

inserting lint

I pushed the lint through the taut yarn with the round end of a small paintbrush

Having nesting material on hand is a great way to attract birds to your yard.  Spring’s coming.  Start making those wreaths and stashing them throughout the yard.

Materials:

  • Wire wreath frame (any size)  I used a 6 inch frame.
  • Neutral colored yarn or string
  • Laundry lint (neutral)  Birds build nests in subtle colors that blend with the environment
  • Scraps of yarn, or string, cut into short lengths no longer than one or two inches (to avoid bird entanglement.)

I found the cutest hook to hang it from at our local fabric store for just $3.  It’s a bird (of course).  Let me know what you think.

Nesting Wreath

Nesting Wreath

Bird hook

Bird hook

Seeing Red: Seeds, Buds and Blooms

There is no shortage of red this time of year.  Nothing shouts Christmas like a rich, vibrant unadorned red.  My favorite shades of crimson come straight from the garden.

The Magnolia seed pods opened in the past few weeks revealing brilliant red seeds. They’re smooth and shiny and perfectly formed. I saw a crow perched in the Magnolia tree earlier this week. They usually prefer the much taller, denser trees in the neighborhood.  I often see them feeding on the ground, usually helping themselves to worms in the grass.  Now that I know they’re omnivores it makes sense. I hope I get a chance to take a picture of the shiny black birds with a bright red seed in their beak.

Magnolia Seed Pod

Magnolia Seed Pod

The miniature cyclamen continue to thrive in the fairy garden. Unlike me, they love the cold weather. Don’t they look happy?

Miniature Red Cyclamen

Miniature Red Cyclamen, thriving in the cooler temps

The viburnum shrubs had a rough year.  Thrips took hold, infesting the lower third of all the plants lining our front deck.  We bought lacewing eggs to help combat the problem.  I heavily pruned the damaged leaves as well. My son spotted a praying mantis on the window just above the plants last week.  It’s good to have reinforcements.

Viburnum tinus

Viburnum tinus: Tiny buds

The Abutilon are a modest red. Their heads our bowed, requiring one to look up into the skirt-like bloom to get the full effect of their beauty. Our neighborhood hummingbirds are big fans. It’s fun to see their long beaks disappear into the bent flower.

Abutilion bud

Abutilon: Today’s bud, tomorrow’s bloom

Abutilion opens up

Abutilon opens up

When it’s too cold or wet or dark to play in the garden, I’ve been keeping my hands busy making this wreath.  I bought a steel form at a craft store, but everything else is up-cycled.  I used a simple Larks Head knot to attach four layers of paper and plastic.  The outer layer uses strips of green plastic bags that come wrapped around our newspaper.  The second row includes clear dry-cleaning bags, filled in with old bits of tissue paper.  The tissue paper is on its third life: first as gift wrap, then protection for Christmas decorations and now part of the wreath. You may recognize the bow. It’s a recycled See’s Candy wrapper. It was so relaxing working on the wreath, that I’m a little sorry it’s done.

Recycled Wreath

Recycled Wreath

Recycled Wreath Closeup

Recycled Wreath Closeup

Are you seeing red this time of year?