A Craft Space of My Own

I’ve been looking forward to a dedicated craft space to call my own for years. When our boys were young, Mike and I used our fourth bedroom as a home office. During the grade-school years, we added a pair of desks for the boys. They completed homework in that room and used the computer under my watchful eye. I crafted in a small area on my desk, or I joined friends once a year for a weekend away to work on our scrapbooks.

When my oldest left for university, I planned to reclaim part of this space for my sewing machine. My younger son quickly spread out using all the available surfaces. The room morphed again as a place to hang out with his friends.

In 2018, my youngest son left for university, and at long last, I had a dedicated craft space of my own.

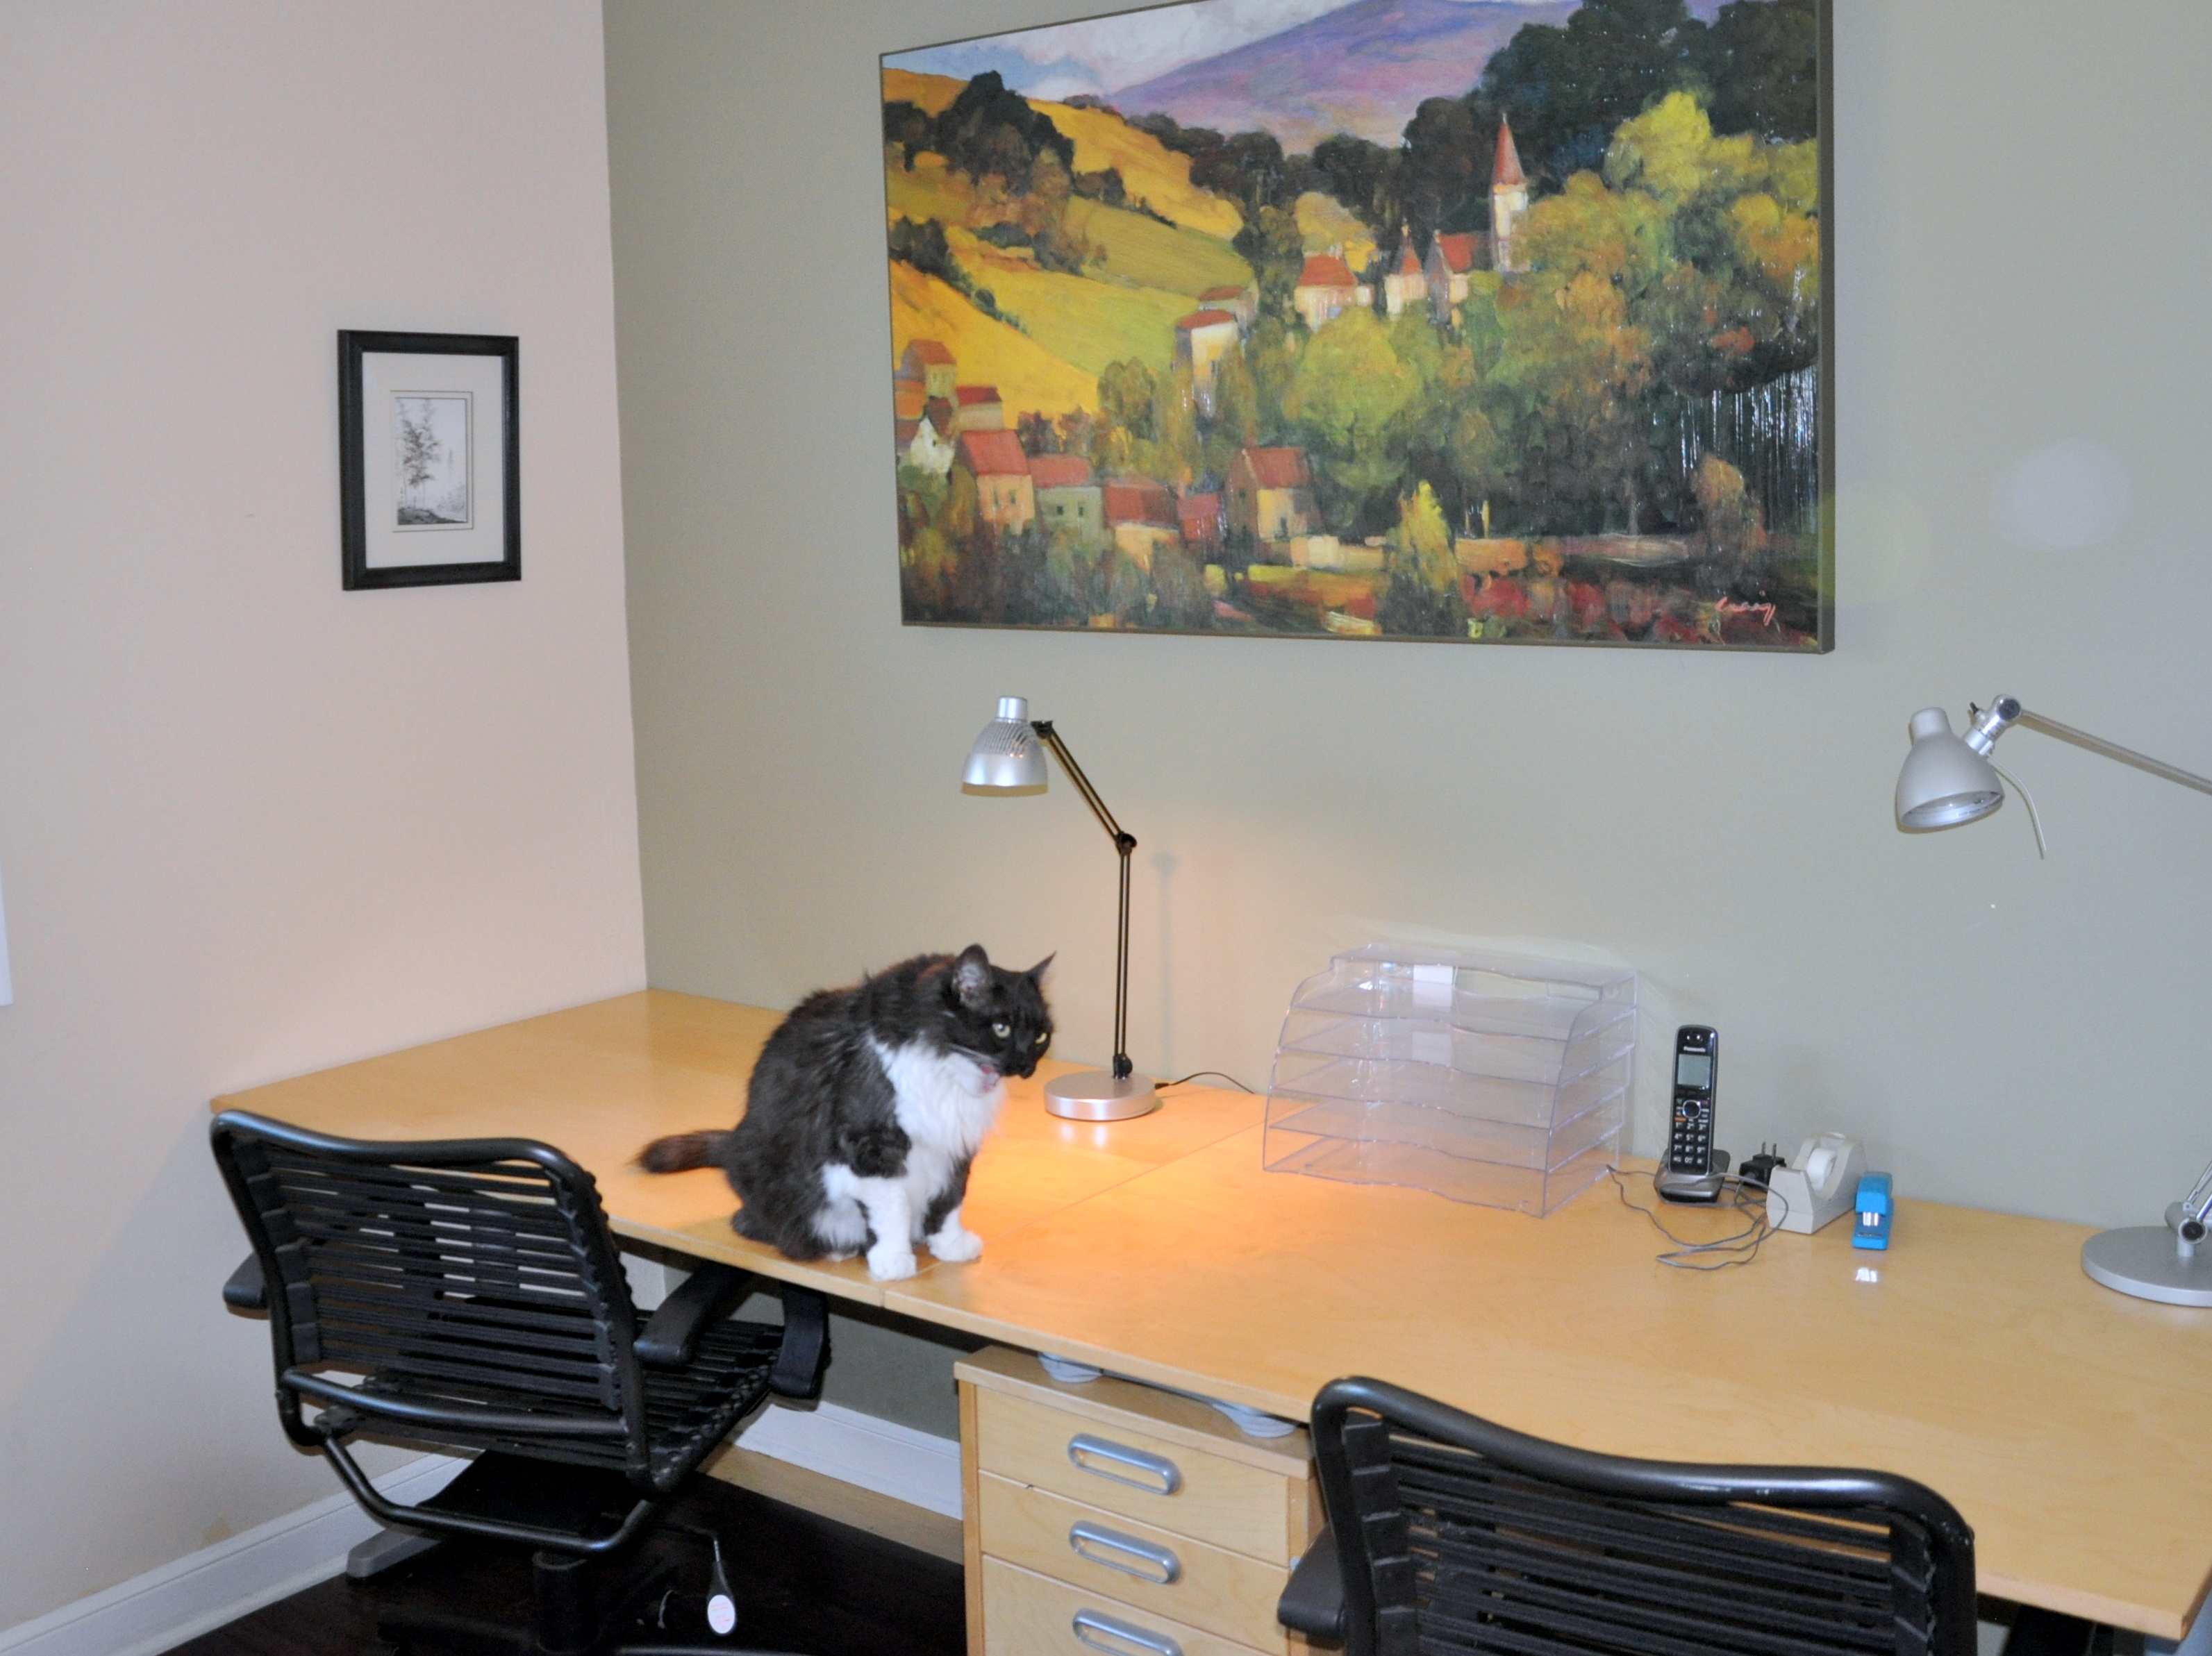
Lindy marveling at the cleared surface

I started organizing my craft space that year, but a few months later, I found myself fully immersed in my volunteer work with Lifted Spirits and started spending a lot of my time downtown.

I put some structure in place at the time, and what a treat its been to have everything I need at my fingertips!

Now that we’re “sheltering in place” in Santa Clara County, I’ve finally put the finishing touches on this room.

My original plan was to set up a sewing area on one desk and a paper-crafting area on the other one.

The table is too deep for my machine and my foot pedal to work well together. Since I like spreading out when I sew, I decided to convert both sides into paper crafting. I can use my dining table when I sew.

Now I have a place for my Silhouette Cameo cutting machines and more surface area for work.

Cameo die cutting machine (a Christmas gift from Mike)

Cleaning up and reorganizing the space didn’t take long, and what a difference it’s made. I enjoy working on cards and assembling craft kits for the curb, and it is a pleasure working with a clean and uncluttered (for now) desk.

My reorganized crafting space

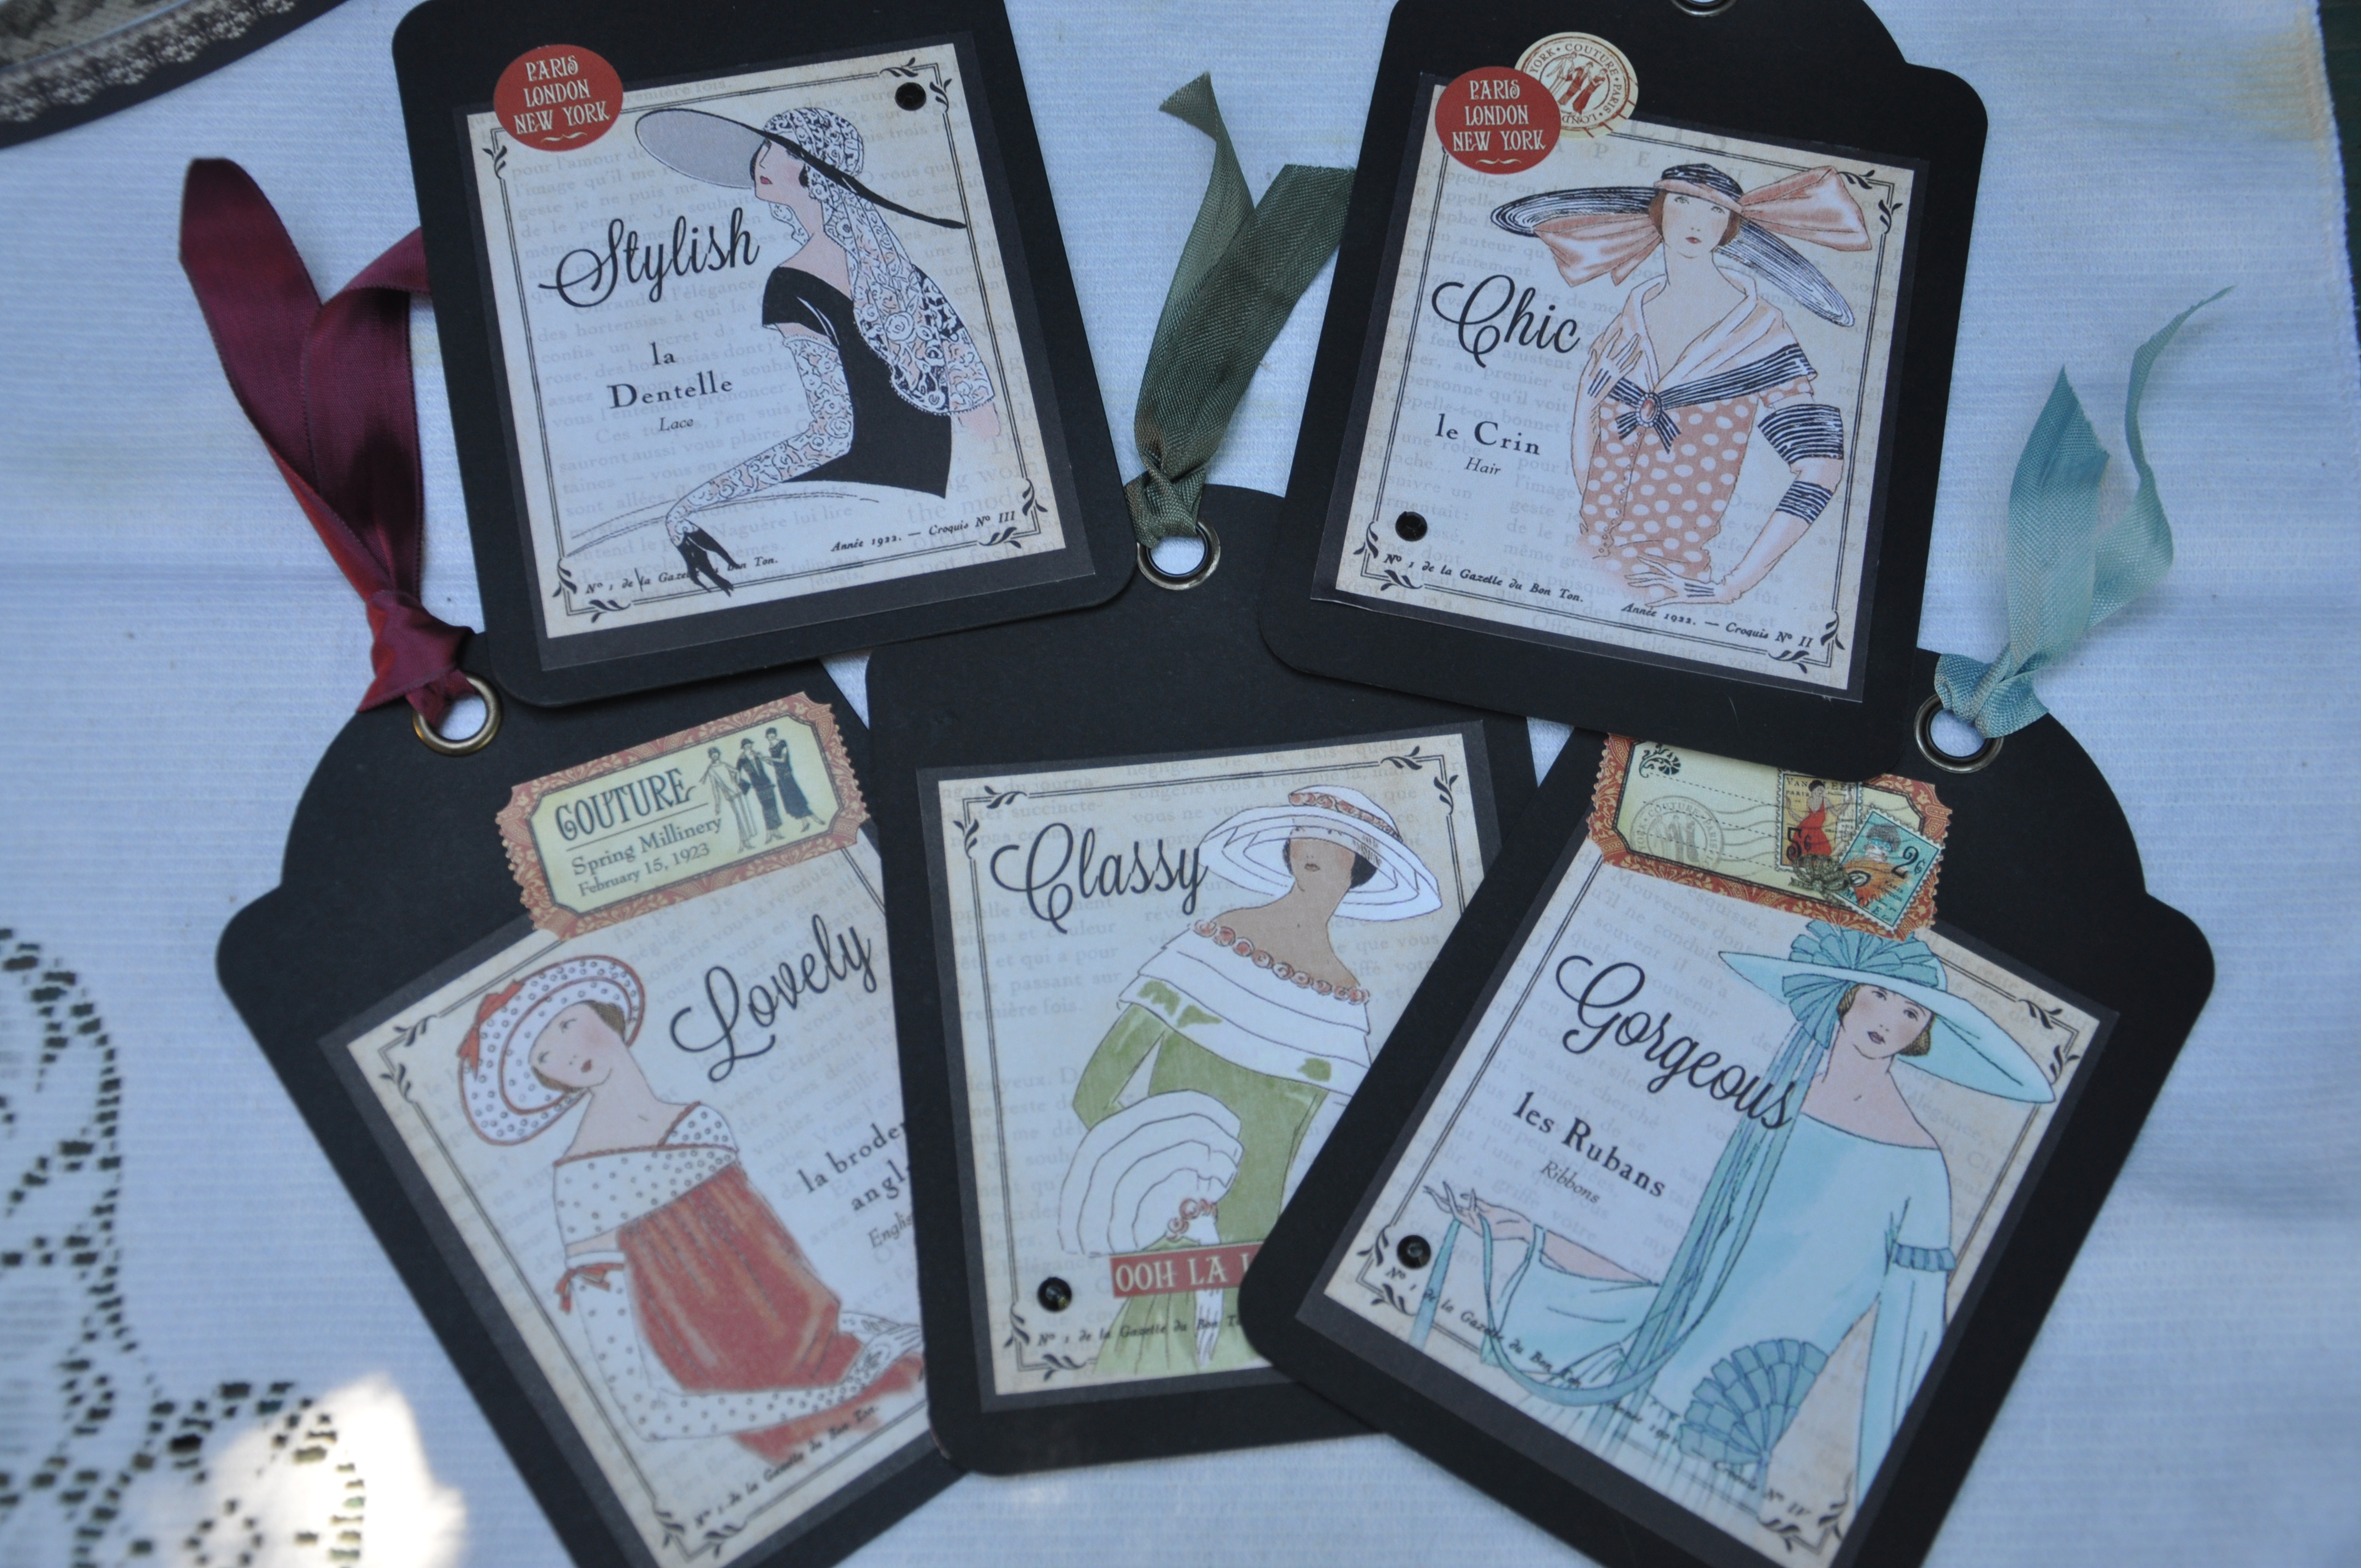
I enjoyed gathering inspirational art for the wall. It’s a collection of mixed-media, watercolor, collage, embroidery, and fiber arts from friends and family. I love having it gathered together and displayed in my creativity corner. I have several pieces from fellow bloggers, including Anne, Kelly, Marlene, Pauline, and Wilma, representing Australia, Canada, the US, and New Zealand.

I’m now surrounded by art created by family and friends.

On the pale yellow wall, the green heart is a gift from my friend, Carrielin. We met in college doing a play together, and we’ve remained friends all these years.

The custom-died monkey sitting on the heart is a gift from my self-described hippy friend, Laura.

All three read hearts we’re machine-embroidered by the talented Marlene, who blogs at insearchofitall.

From Canada, a mixed-media tag by artist Wilma Millette. You can find her gorgeous work on Instagram @creartful-dodger. To the right of Wilma’s piece is another mixed-media creation by the talented Kelly Daye. We met through blogging and have become the best of friends.

On the green wall, I hung Dad’s wooden painter’s palette. It’s a cherished memento. Oil painting was one of Dad’s many hobbies. I affixed three black and white photos to the pallette: My dad in the center, a picture of his completed model of the Golden Hinde, and the storefront of my parent’s flower shop in Seaforth, Canada. They’re all treasures. The Bay Bridge oil painting is also my dad’s work.

Below the palette is a mixed-media piece by Pauline King, a treasured gift for my 60th birthday. Pauline is known in the blogging world at The Contented Crafter.

Next to Pauline’s work are a pair of watercolor teapots by Anne Lawson. Anne is a Melbourne Artist who “captures the beauty of the #naturalworld in watercolour or ink.” You’ll find more of her work @annelawson54 on Instagram.

My father’s wooden oil painting palette

Repurposed wine crate stores stamps and punches

I like being able to see everything at a glance. Assorted cat mugs store my pens and tools. See-through bins store craft ribbon, dies, and acrylic stamps.

I removed the sliding doors to the room’s closet several years ago. It now houses our printer, most of my sewing supplies, extra baskets, and a few other crafting tools. Here’s what it looked like before re-organizing the shelves.

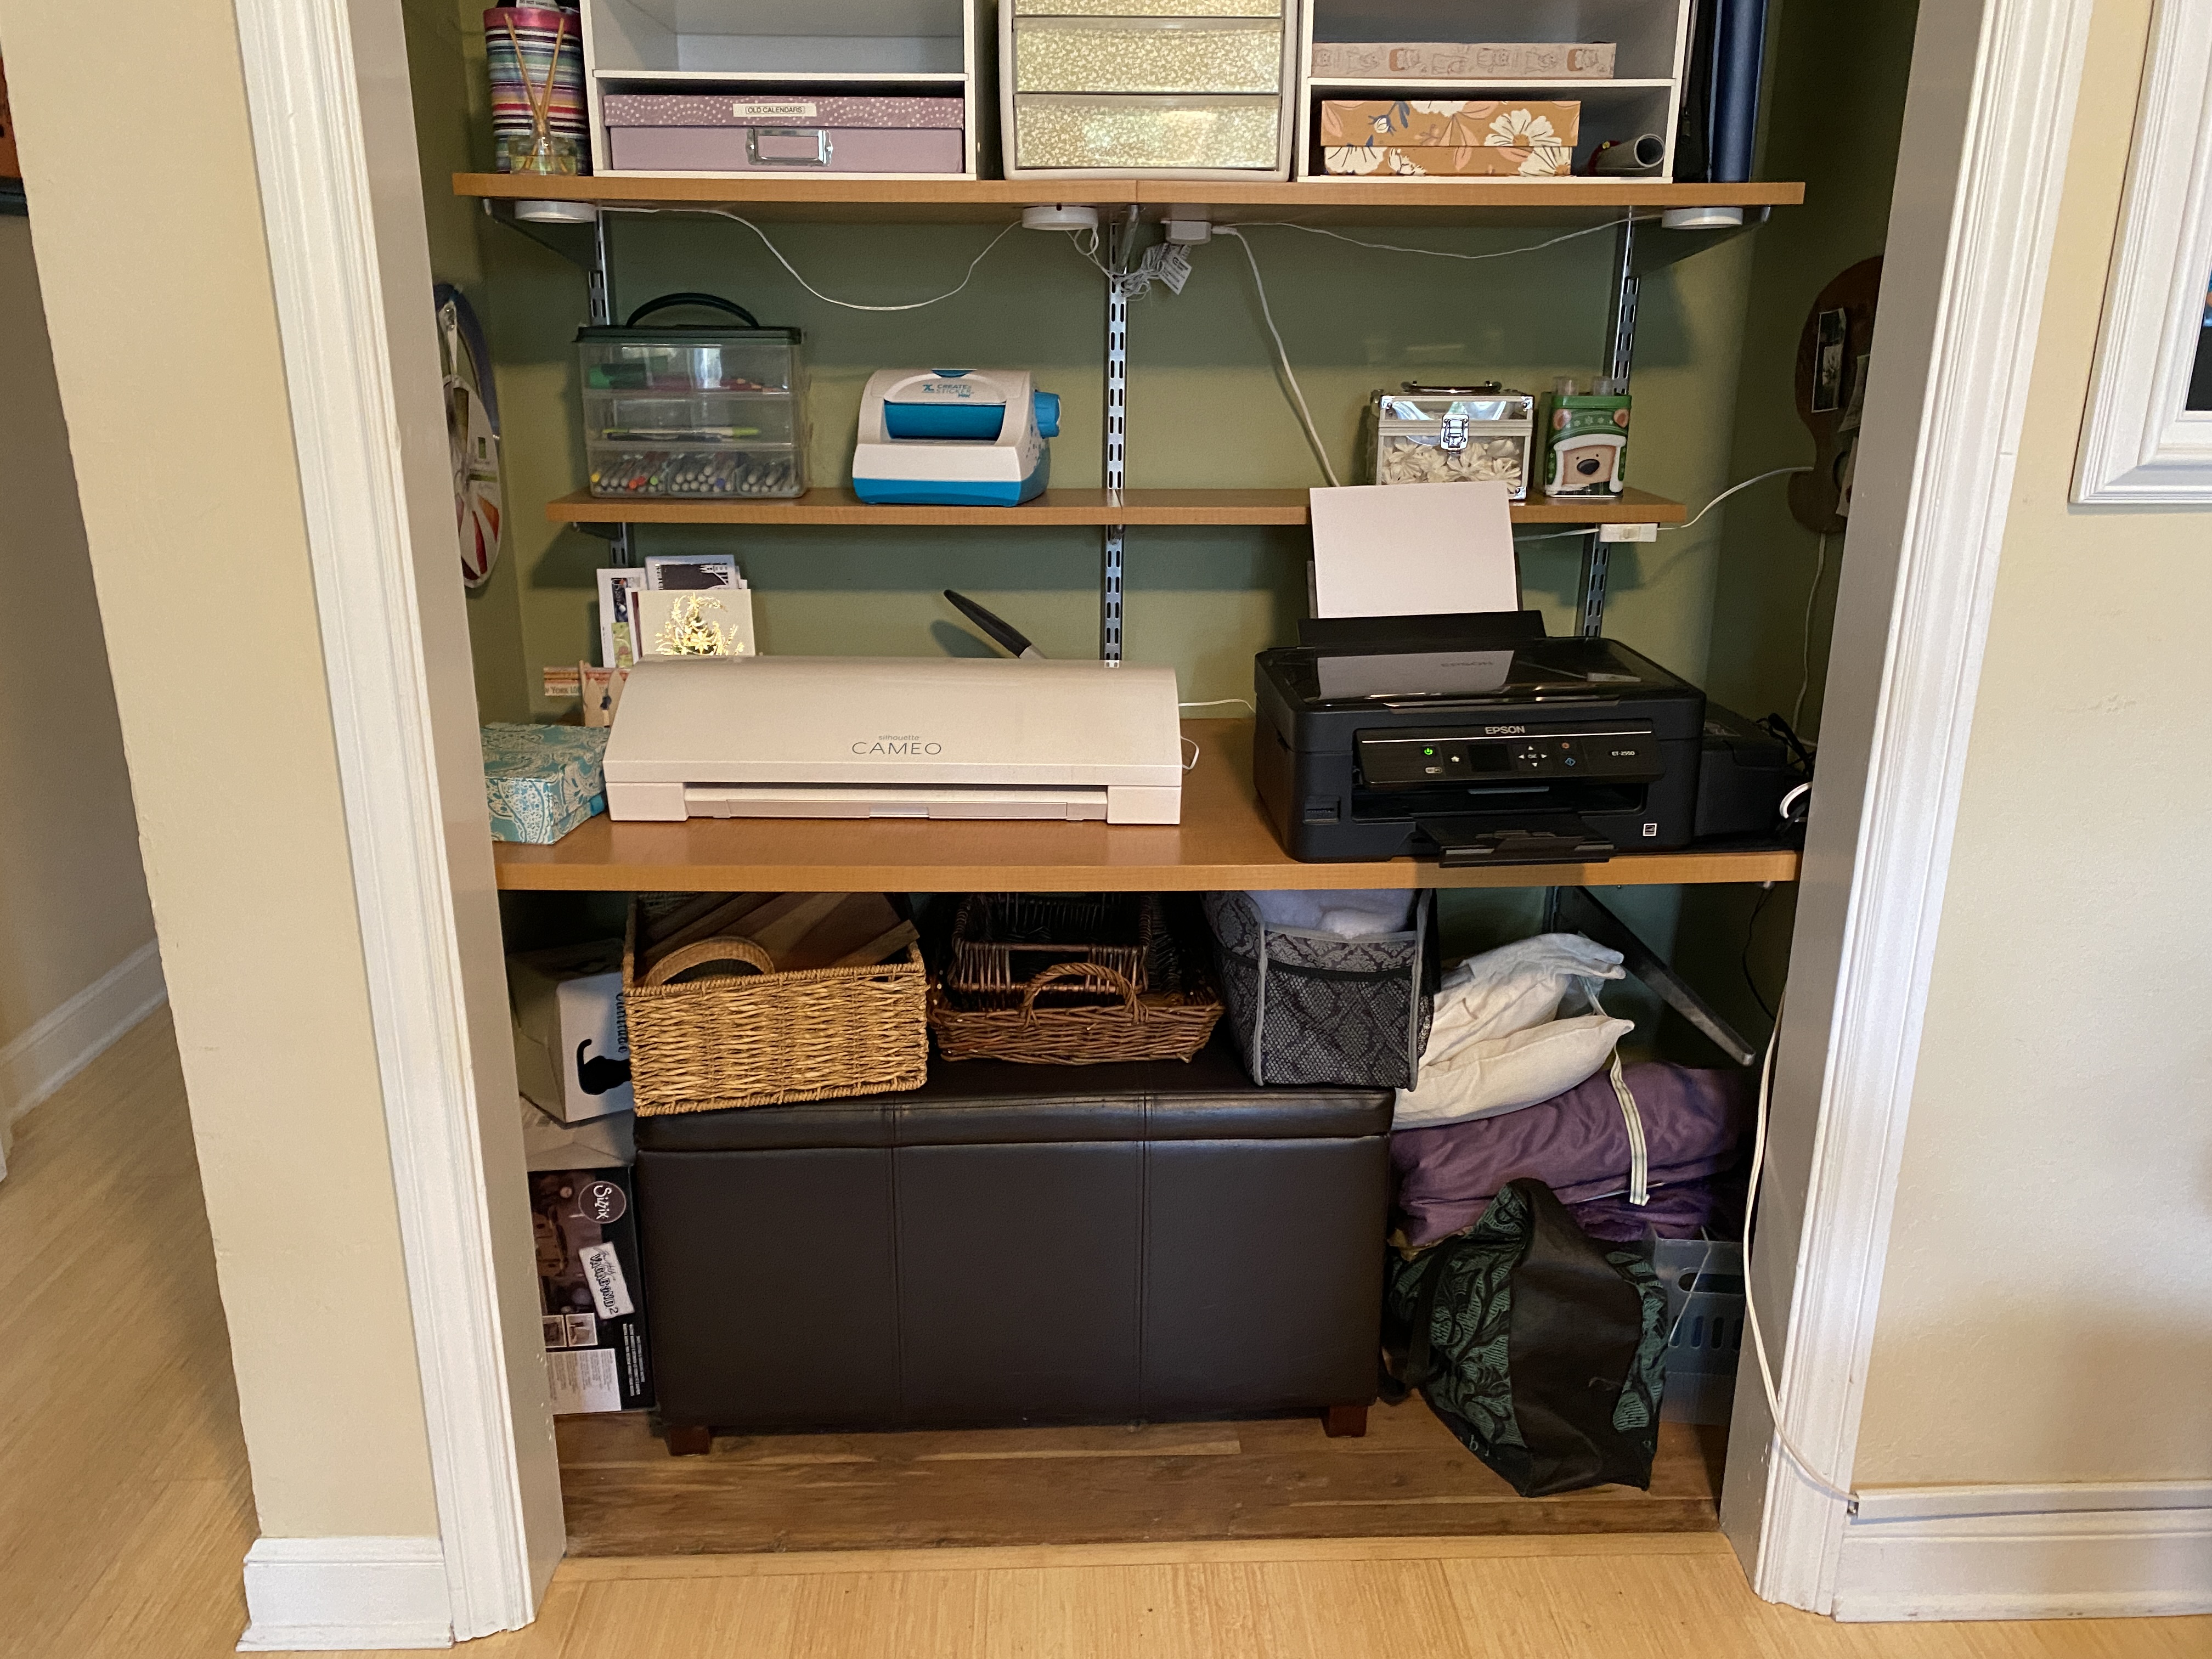
Starting Point: A four-foot closet in the same room stores craft materials, our printer, sewing projects and my Cameo cutting machine

This is what it looks like now.

After: craft room closet sorted with room for a chair.

Have you tackled an organizing project during your time in quarantine?

A Crafty October So Far

You should see my desk. It looks like a Whirling Dervish came through. I’ve hauled out paper and pens, circle cutters and glue, rubber stamps, ink pads and ribbon. It’s been a crafty October so far.

Crafting and a tidy work space do not go hand-in-hand. Unfortunately I do not have a dedicated craft space so I make do. I’m crafting using the corner of my desk, a small pop up table and my in box. Since Mike is out of the country for ten days, I called squatters rights on his side of our shared desk as well.  After repeatedly misplacing, then later unearthing my reading glasses, I’ve added “granny chain” to my shopping list. In the midst of all this chaos I’m having a blast.

Earlier this month, I took a class with my sister at The Island Creative Escapes. During the four-hour class, we learned a variety of mixed-media techniques while creating a “Haunted Pumpkin Patch”. You know me and pumpkins.

halloween-mixed-media

“Haunted Pumpkin Patch” mixed media class by Richele Christensen

Designer and blogger, Richele Christensen, lead the class. She’s a project manager and designer for Tim Holtz. All of the products are available through an assortment of Tim Holtz products. They provided a kit for all of the attendees, and then we shared a basket of inks and other tools.

halloween-mixed-media-tim-holtz-richele-christensen-001

Mixed media detail (top half)

halloween-mixed-media-tim-holtz-richele-christensen-002

Mixed media detail (bottom half)

We came home with a cute mixed media canvas and a variety of ideas along with a leftover sheet of rub-on decals and a packets of paper ephemera. Those leftovers were my starting point for a rainy day afternoon of card-making. Yes…it rained!

When our boys were young, I hosted a Halloween party every year for the neighborhood children. It went on for nearly a decade. So in addition to the leftover ephemera pack from class, I have Halloween-themed rubber stamps, materials from a teacher’s supply store, and an assortment of paper from the make-and-take crafts.

Decorated pumpkins: Halloween 2008

Decorated pumpkins: Halloween 2008

I used these over-sized shapes for the inside of the tri-fold cards:

cards-with-large-shapes

Leftover Halloween shapes from the teachers supply store, scored, cut and placed on the inside of a tri-fold card

This is what the cards look like when closed:

tri-fold halloween cards

Tri-fold cards: Black card stock, spider web Washi tape, Tim Holtz vintage cat ephemera

I had fun making my own envelopes.

halloween-card-envelopes-from-template

Leftover bat shapes and assorted paper get a new life as envelopes for some of the cards

I like the way the scrap of lace looks over the purple paper. I had just enough for one card.

purple-and-lace-halloween-card

This scrap of black lace was a bow on our class supply kit. I wrapped it around a scrap of purple paper, added a dangling spider charm and attached it to a black card. Scraps of the same paper decorate the envelope. The ghost is inside.

There is something to be said for loosening up on a practice card or two. I often have a hard time getting started, then an equally challenging time stopping. Who wants to fold laundry when a role of Washi tape is calling your name?

I moved from idea to idea, using the supplies and tools that I have on hand. At last I was in the zone.

Check out some of these beautiful creations:

Dawn at Petals. Paper. Simple Thyme

Kelly at Kelly’s Korner

Pauline at The Contented Crafter

Monday Musings

We’ve been dusting off the garden furniture and hanging our shade sails.  Summer is on the way. Temps shot up overnight, with a high of 90 degrees (32C) in the forecast. There’s a dry wind blowing as well, making if feel more like July than April. It’s a bit strange.

I (mostly) played hooky today, enjoying lunch on the patio of  The Left Bank with my friend Laura. I made phone calls in between our get together, but overall had a relaxing day.

left bank april 2015

The Left Bank, Santana Row

Yesterday I put the finishing touches on Laura’s birthday gift, a set of greeting cards and gift tags made using the Couture line of paper by Graphic 45.

Now that the birthday girl’s opened her gift, I can give you a little peek.

DSC_0007

Graphic 45 cards, vintage trim

DSC_0010

These shoes aren’t made for walking: Jet rhinestones by Kaiser Scrapbook, Couture paper by Graphic 45, vintage red seam binding from Green House Supply

Graphic 45 gift tags

Gift tags: Graphic 45 Couture paper and tags, vintage seam binding, Kaiser Scrapbook rhinestones

I trimmed the box and some of the cards with vintage seam binding from my friend Donna’s Antique Row booth. She sells a variety of ephemera with a changing selection, so it’s always fun to go look (and buy).

DSC_0002

Box trimmed with vintage seam binding, topped with Graphic 45 Couture

box detail

Box detail

In other garden news, I’m still trying to decide what to do with our garden swing. It’s in a sorry state thanks to the nest-building squirrels. I’ll share more about that in another post.

I hope your week is off to a terrific start.

Little Free Bookmarks

If you do all your reading on a Kindle, please carry on. If you’re like me though and still enjoy the feel and smell of an actual book in your hands, you’ll appreciate the need for bookmarks.

I know some people ‘dog ear’ the page of a book, but we grew up reading books from the library and book mobile. Dog-earing a book was akin to graffiti. It just wasn’t done.

Now that we have a Little Free Library (LFL) at the curb, I’ve found a built-in excuse to make bookmarks. I made several out of postcards for our LFL dedication and they were a hit. There are only three left.

Postcard bookmarks

Postcard bookmarks

Using leftover scraps from card-making and other paper crafts I made another handful of bookmarks. I added stickers I had on hand, punched the curvy top with my tag-maker and voila, instant bookmarks.

paper scrap bookmarks

Bookmarks made from leftover paper scraps

If your busy and yearning for a quick crafting project, give it a try. You can create a small, functional craft in a short amount of time using minimal tools.  I’ve made bookmarks from the old pages of a wall calendar, glossy fashion magazines, postcards and paper scraps. I made one earlier this year using a seed packet.  Let your imagination be your guide.

realtor's calendar bookmark

Bookmark and an envelope made from a realtor’s calendar

calendar bookmark

Paper piecing calendar bookmark

What to do with your surplus:

  • Tuck extras in your favorite places to read. I keep several in my nightstand drawer
  • Use them for stocking stuffers at Christmas
  • Set them out as place-markers at a dinner party. Add your guests initial with stickers or fancy lettering
  • Give them to your child’s teacher as a small thank you gift
  • Drop them off at a LFL in your community
book and bookmarks

Bookmarks and a recent book donation to the LFL

Green Friday: Repurposing in and out of the Garden

Re-purposing was common practice during the Depression era.  It’s still common in developing countries where nothing goes to waste.  I’m a huge fan of giving new life to items that might otherwise be discarded.  There is an entire movement afoot, people reusing items in clever and original ways.

So, in honor of Green Friday, check out these fun ideas.

Greenhouse-Made-from-Windows

Greenhouse Made from old windows
Between Naps on the Porch

sweet magnolia chair

Lovely old chair breathes new life
Sweet Magnolia Farm

umbrellabeantrellis upcycle

Umbrella Bean Trellis from Dirt du Jour

bird bath light fixture

Light fixture bird bath from Indulgy

I wish I had 100 hours a week to read all the fascinating blogs out there. Here’s a small sample:

Dishfunctional Designs: Creative Things To Make With Old (I love the clever title)

Indulgy.com: Light fixtures live again

Denim Do Over: giving new life to old denim

Pinterest: Set the timer or you’ll never get anything done.

Facebook: Re-purposed, Recycled, Reused, Reclaimed, Restored

I like to re-purpose my wall calendar each year.  I reuse the pages to make envelopes, bookmarks, gift tags, small stickers, gift-card holders and other small paper items.

Last year I made a wreath for our front door using scraps of tissue paper, candy wrappers (ahem) , a dry-cleaning bag and the plastic sleeve from the newspaper.

Katherine, over at Pillows a-la- Mode recently refashioned an old sweater into the most adorable teddy bear you’ve ever seen.

Diary of a Mad Woman uses a similar sweater to make Christmas stockings. 

I hope you have as much fun as I did, visiting all these fun sites.  Please share your own re-fashions, links or blogs in the comments below.

Craft if Forward: Garden Journal

This month’s craft it forward goes to Emma at Greenhousing.   Emma is a fellow gardener, helping things grow in her own special garden in the UK.

She started Greenhousing: Big Plans for a Small Garden with her husband to:

plan and keep a record of our hard and not-so-hard work.

Luckily we have been hoarding lots of plant pots of various sizes, seed and drip trays, pot trays, seeds, weed suppressant fabric, vegetable and tomato fertiliser, etc. so we can make big plans without having to spend a lot of money.

The garden is an odd shape at the back of the house, with fencing on three sides and a corner of a neighbour’s garage jutting into it.  The big plan is to work around any obstacles and grow some tasty food and lovely flowers and plants.

She hasn’t posted for a while, so I’m hoping life simply got busy and that all is okay.

Garden Memories

I started by gathering garden-inspired paper and embellishments.  Oh how I tax myself [wink-wink]). I assembled an 8 x 8 book/album, small enough to carry into the garden to record notes on garden progress.  It can also be used to save photos of her garden successes or remembrances of her first year with a lovely greenhouse.

Here are a few sample pages:

garden journal page 1 garden journal page 2 garden journal page 3 garden journal page 4 garden journal page 5 garden journal page 6 garden journal back cover

What is Craft it Forward?

Here’s how it works. The first five people to comment on the original post receive a handmade item with the gardening nirvana touch. In return, they agree to pay it forward, crafting their own unique item for the first five people on their list. Craft it Forward encourages community, creative spirit and camaraderie. It also encourages flexibility, so I expanded my list from five to seven based on interest in the project. Isn’t it fun making your own rules?

Further, in the era of the internet, who doesn’t like ‘real’ mail? If you haven’t started your own Craft it Forward, today is a good day to get going.

My Secret Garden

secret garden girlThe Secret Garden, published in 1910 by Frances Hodgson Burnett, is noted as ‘one of the best children’s books of the twentieth century.’  I don’t know if I actually read it as a child, but the idea of a secret garden has stayed with me always. Who doesn’t like a good mystery?  Throw in a secret key and a beautiful garden and you’ve got the makings of a rich childhood fantasy.

Earlier this year I discovered a beautiful line of crafting paper by graphic 45 based on Burnett’s book.  While I was purchasing my own sheaf of paper in California, Boomdee was doing the same in Edmonton, Canada.  I just know they were thinking of us when they designed this nostalgic product line.

Secret Garden Quote

Secret Garden

Paper intended for scrapbooks doesn’t usually end up in the garden.  For a variety of reasons (well one really) paper and water don’t mix.  I decided to buck the trend, however, and figure out a way to combine my love of tiny gardens, secret gardens, crafting paper and children’s lit.

Using a plastic tray and a generous amount of cello-tape, I waterproofed the paper for the background as well as the sign.  I purchased a small wooden frame for a dollar at our local craft store and painted it a soothing garden green.  Touches of moss and dirt gave it a woodsy touch, as well as the Sedum and petrified wood nearby.  A small gravel path leads to the heart-shaped entrance.  Stairs (made from leftover tile pieces) sit on small wooden blocks.  Just follow the colorful path.

Secret Garden Entrance

Secret Garden Entrance

Please follow the path

Please follow the path

Garden Steps

Garden Steps

tiny dear secret garden

Please come this way…

Paper design by graphic 45

Paper design by graphic 45

You’ll be seeing more of this lovely paper in a craft-it-forward project later this year.

For additional inspiration, check out the links below:

Craft it Forward: Living Journal

Craft it Forward Button

Craft it Forward Button: Grab it for your own blog

In early February, I launched my first Craft it Forward.  Here’s how it works.  The first five people to comment on the original post receive something handmade with the gardening nirvana touch.  In return, they agree to pay it forward, crafting their own unique item for the first five people on their list.  Craft it Forward encourages community, creative spirit and camaraderie.  It also encourages flexibility, so I expanded my list from five to seven based on interest in the project. Isn’t it fun making your own rules?

Further, in the era of the internet, who doesn’t like ‘real’ mail?  If you haven’t started your own Craft it Forward, today is a good day to get one going.

First up: A Living Journal

This manilla-covered journal has heavy-duty art paper, appropriate for ink, paint and pencil.  You can see the original, unadorned journal here.  Recipient #1 is a talented artist in her own right.  She paints, sketches, sculpts fabric ‘dolls,’ along with myriad other projects.  I’ve been on the receiving end of her own talents, including a set of tie-dye tea towels and a hand-felted, one-of-a kind, purse.

I crafted the cover, using as assortment of ribbon in rainbow order, with some peace signs thrown in (her favorite) for additional interest.

Ribbon Journal: Craft it Forward

Peace and a rainbow of ribbons

Ribbon Journal Closeup

Closeup

An attached, expandable envelope lines the inside cover, great for collecting bits of inspiration.  For now, I’ve tucked in a few seeds she can plant in her garden.

Journal Interior

A Peak Inside…

The journal came wrapped in a sleeve of silky-strong paper too nice to toss, so I fashioned it into a simple bookmark, using other scraps on the face of the envelope.

Creative Journal

Creative Journal by Dyan Reaveien of dylusions

Packaging Bookmark

I trimmed the wrapper and used it as a bookmark

Personalization, gardeningnirvana style

Personalization, gardeningnirvana style

Finishing touches include her first initial made from a balsa wood letter, then covered in paper and inked along the edges.  It’s embellished with flowers (of course)!

I hope she enjoys filling it as much as I enjoyed crafting it. Perhaps a year from now she’ll let us take a peak into a few pages and I can feature her work on gardeningnirvana.

Life is art, live yours in colour!

Life is art, live yours in colour!

What's inside?

What’s inside?

Are you Crafting it Forward?

For additional Craft it Forward inspiration: