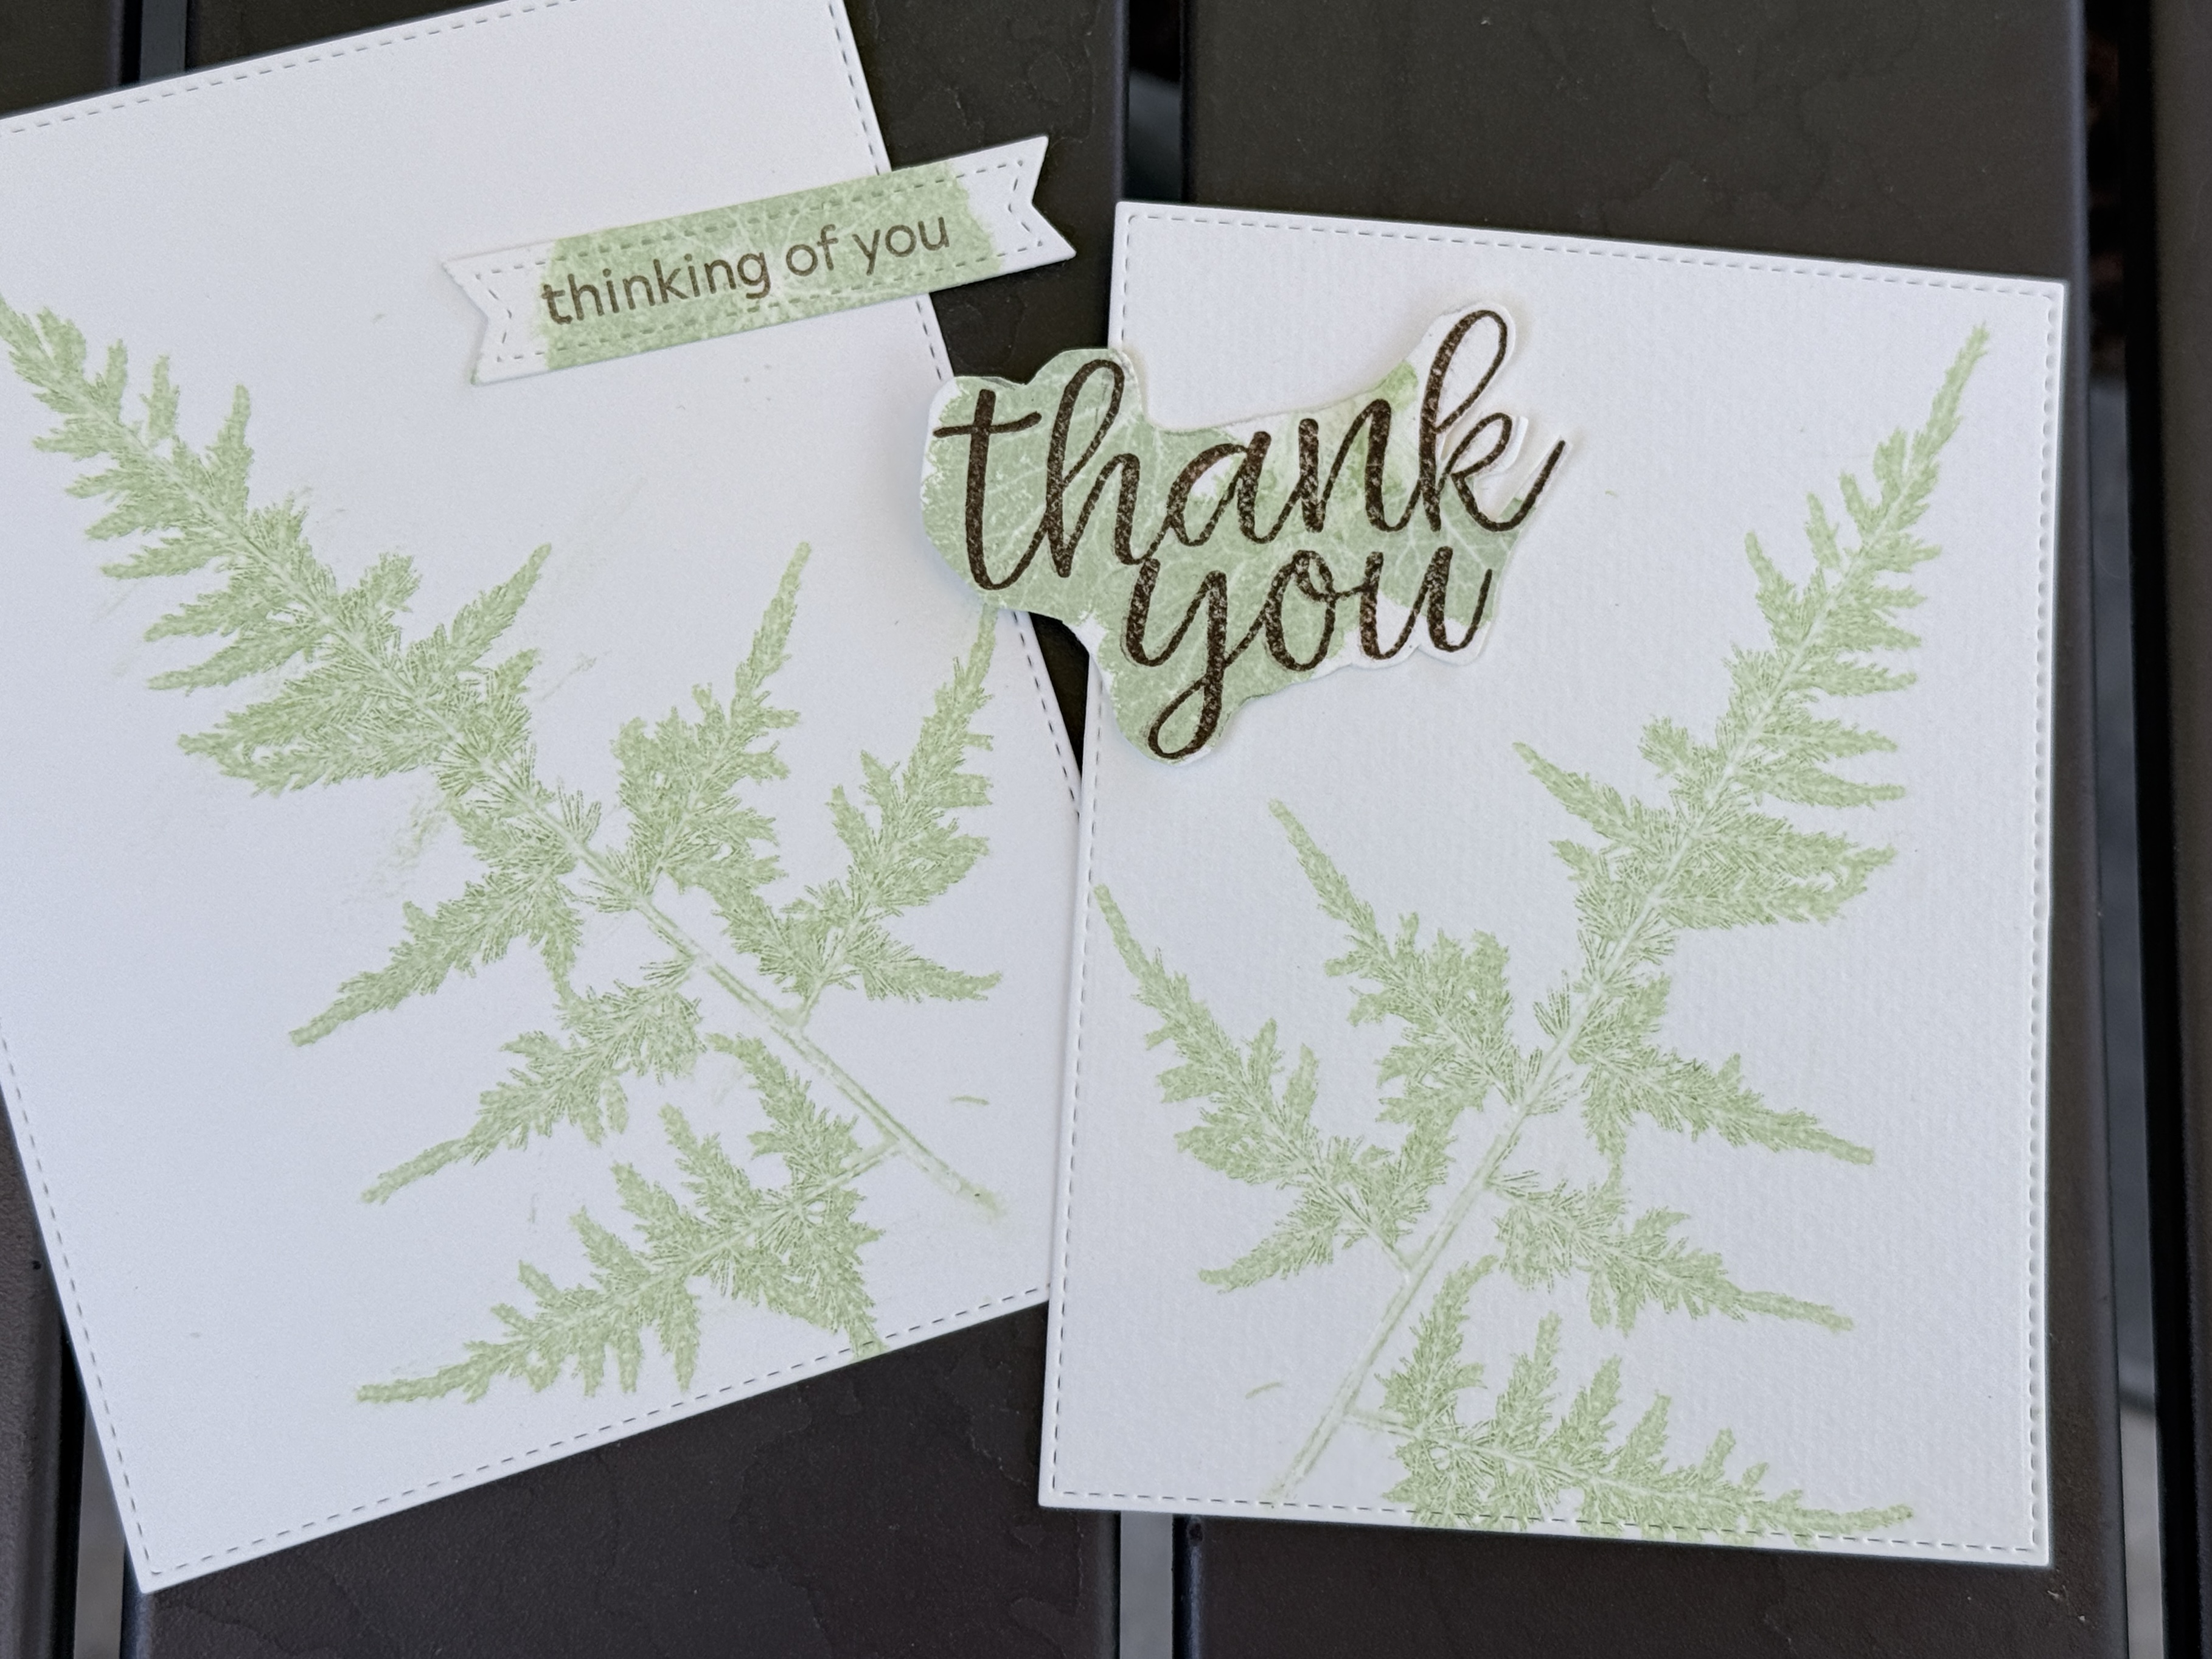
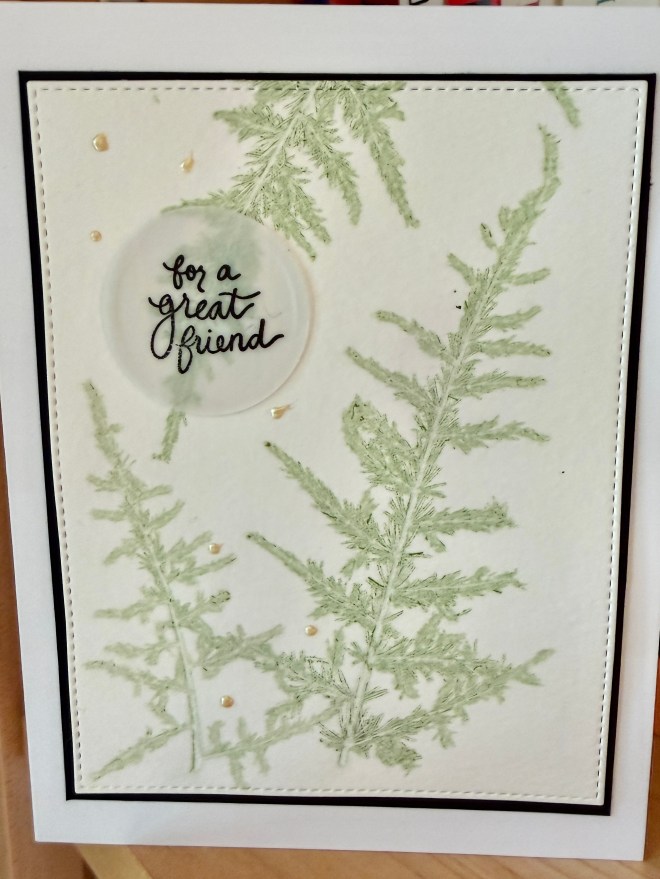
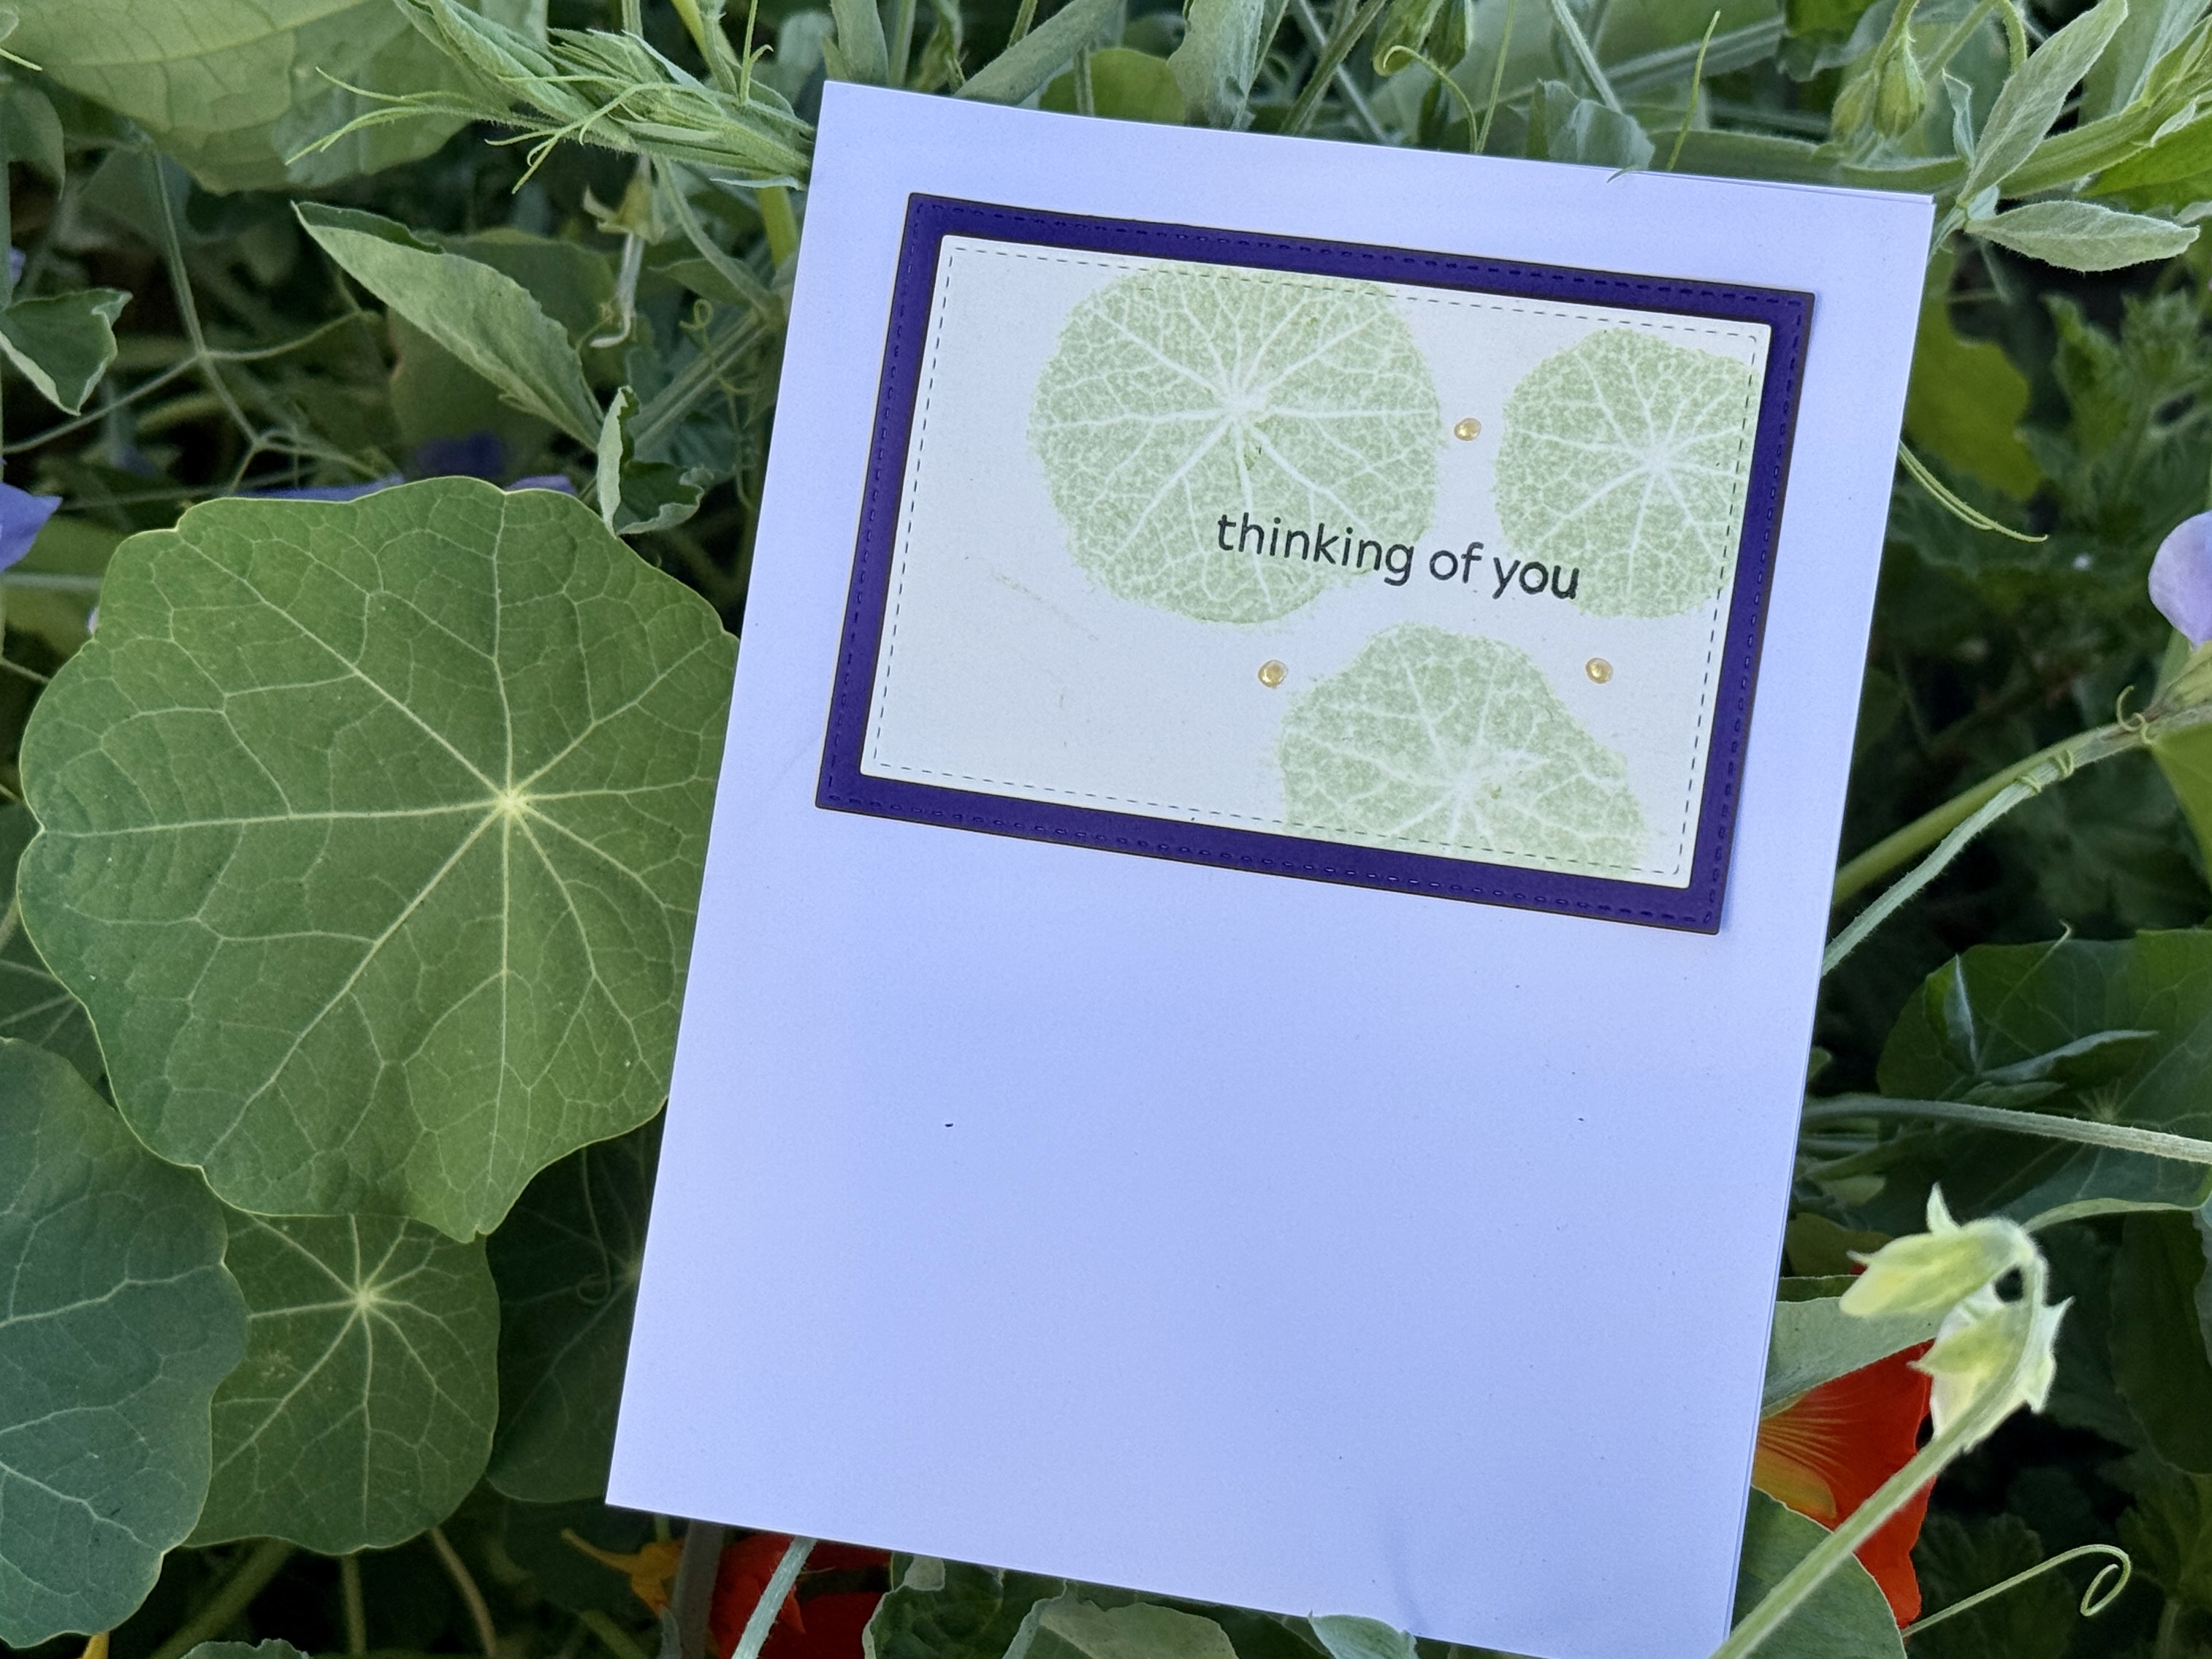
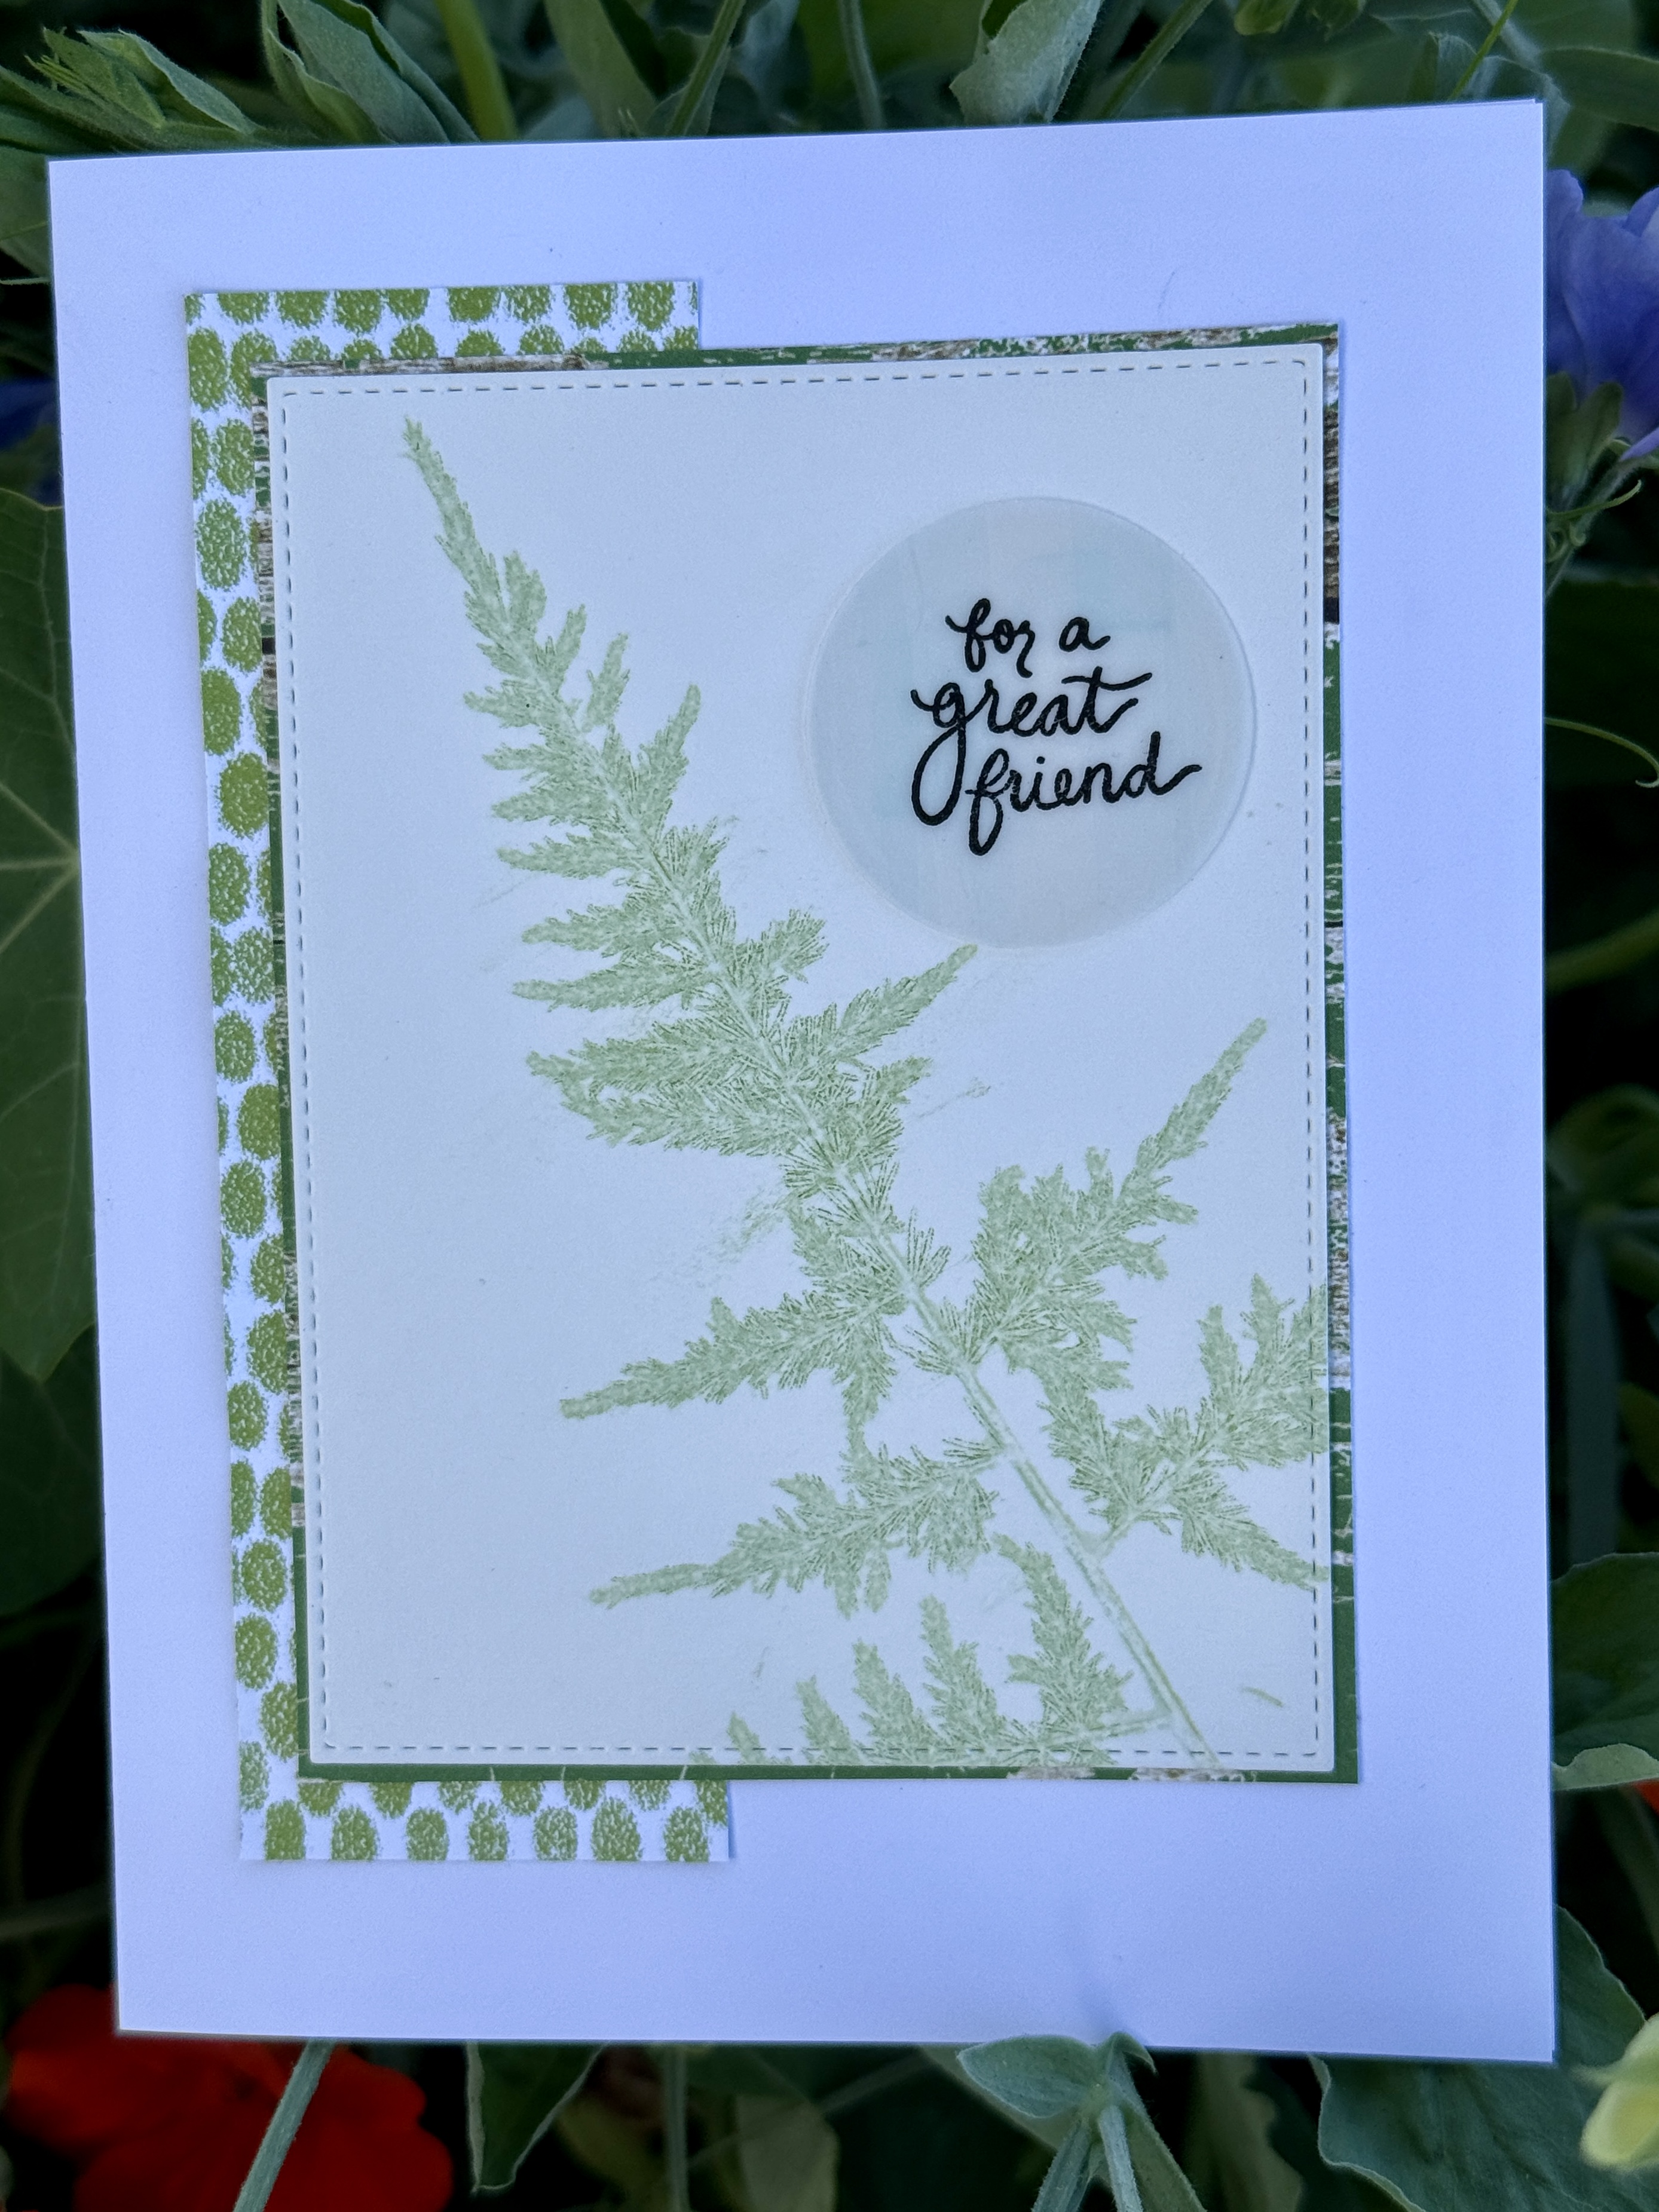
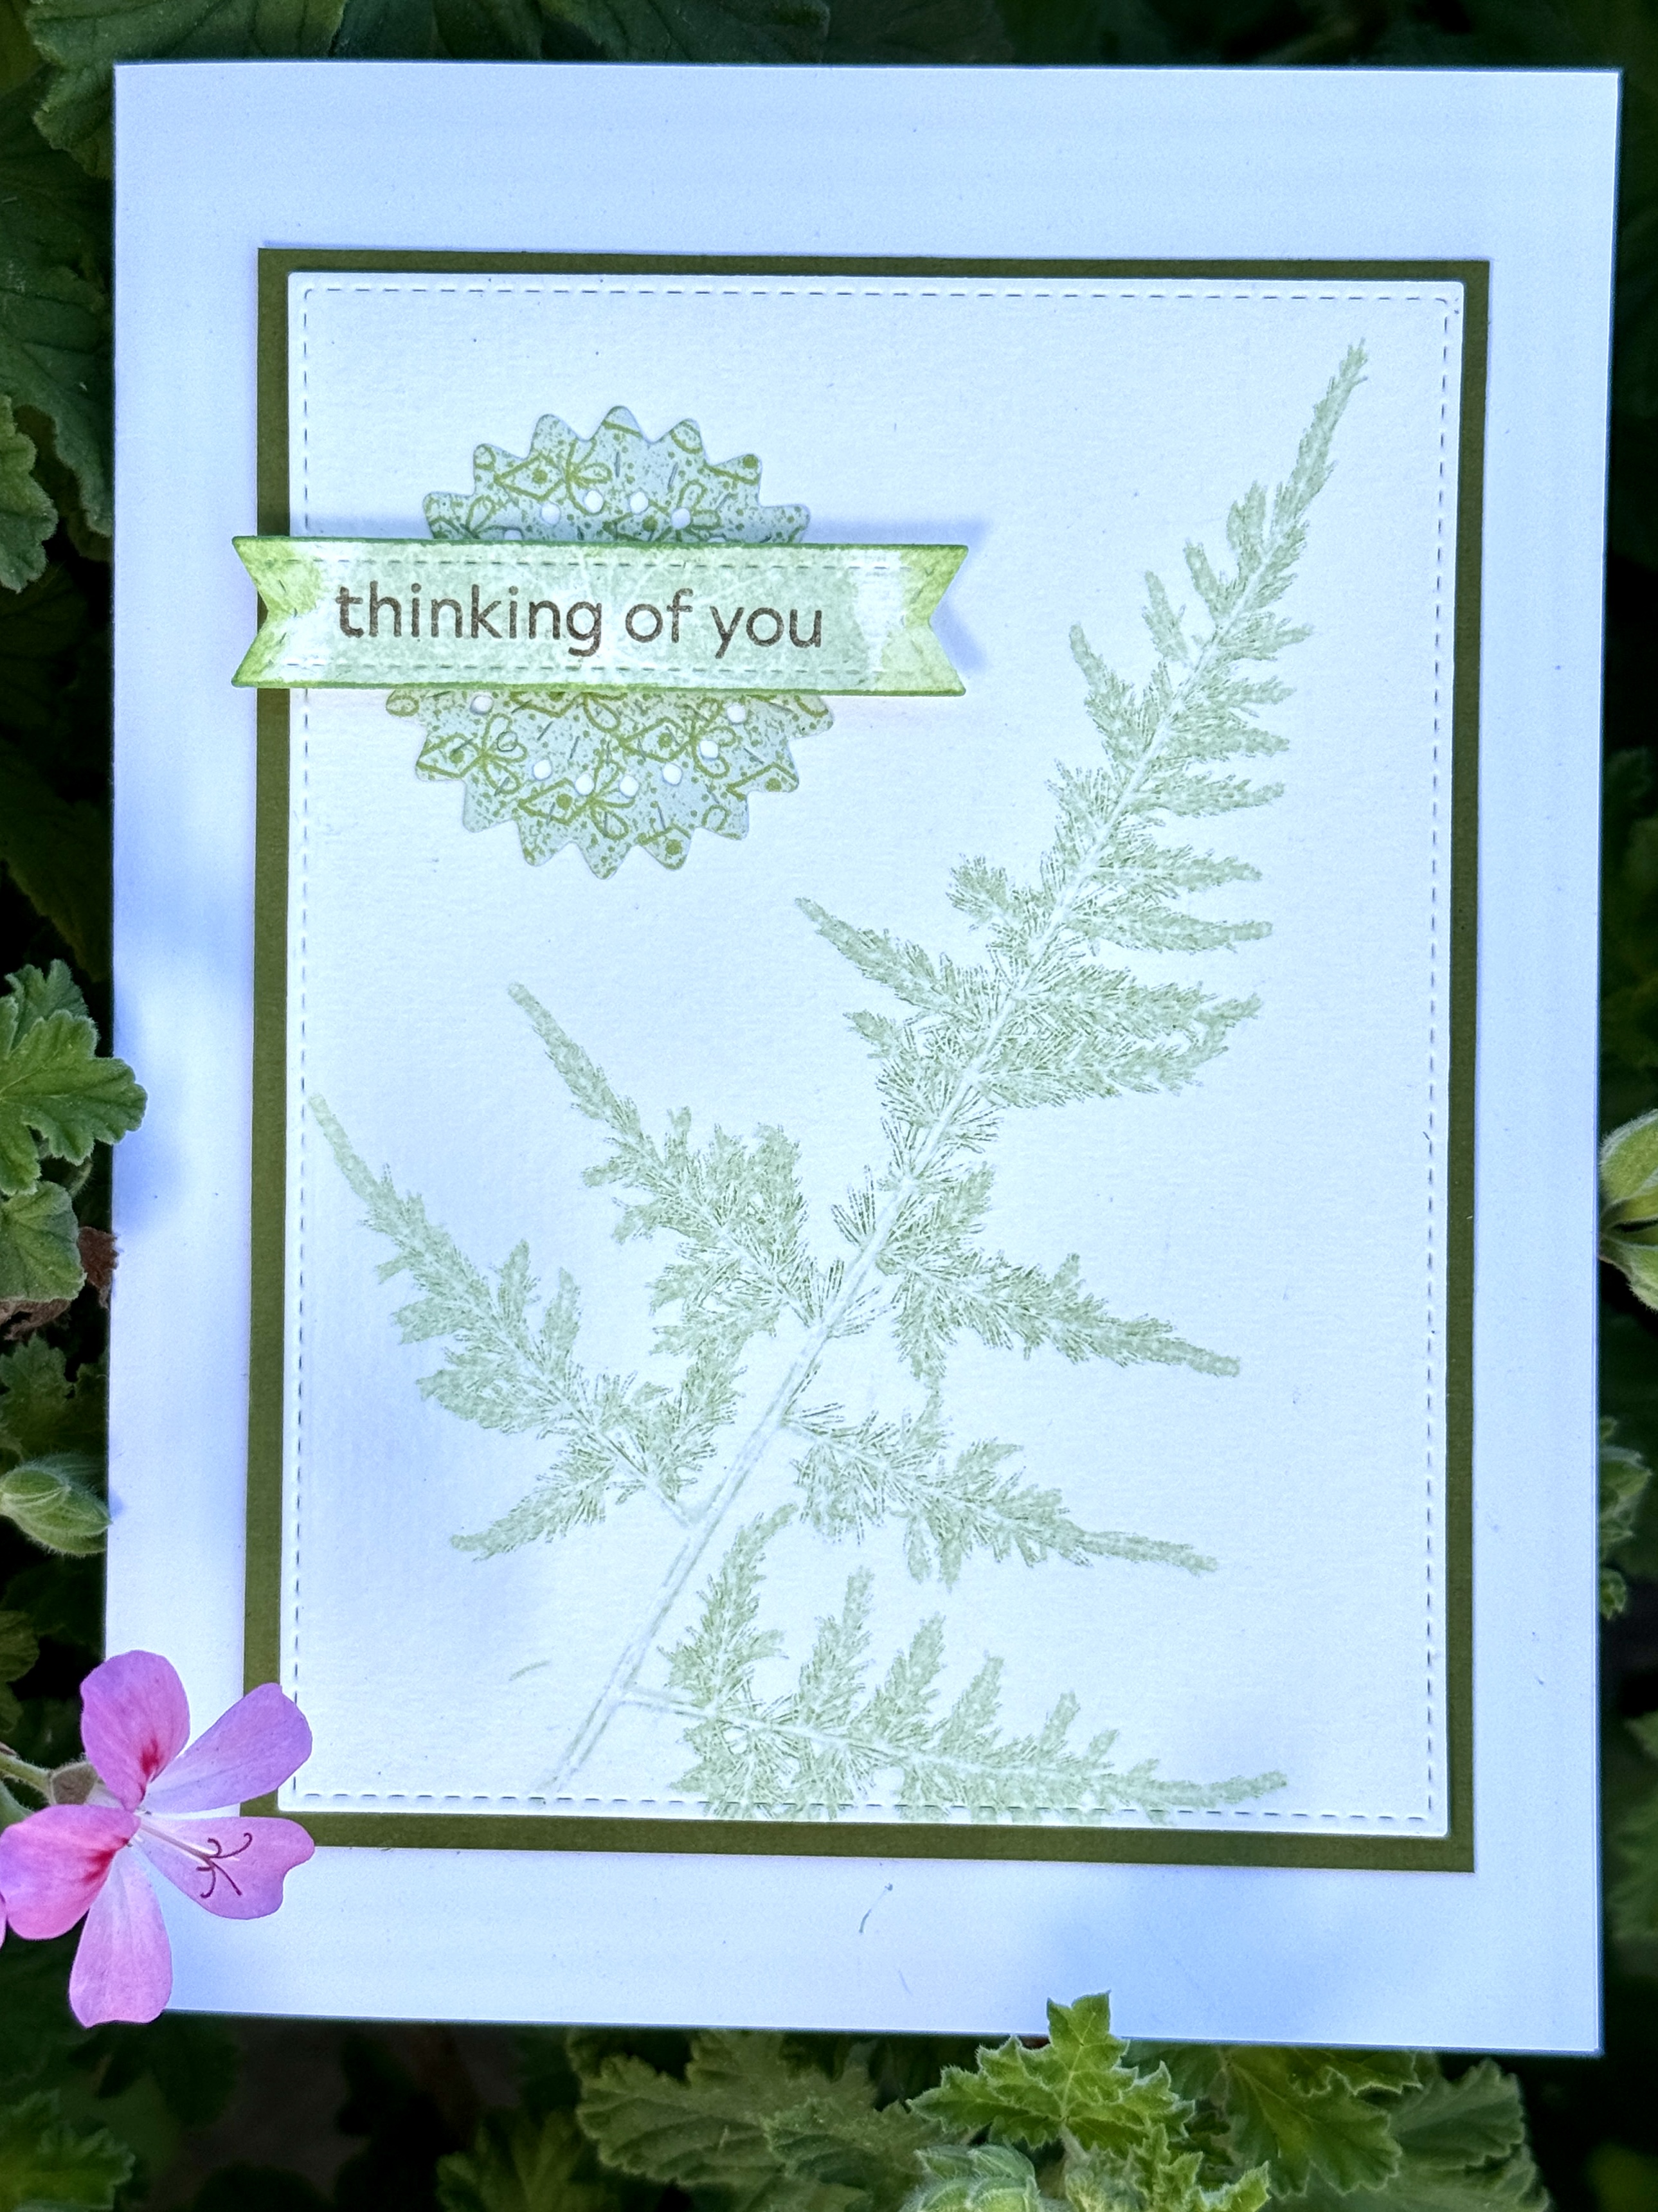
I’ve been enjoying the process of creating imprints from some of our vibrant garden greens. In turn, I’ve cut those prints into panels or used dies to cut sentiments, before making them into cards.
I experimented with this technique nearly ten years ago. At the time, I tried different papers, including an old file folder, watercolor paper, craft paper, and vellum. I learned that not all paper is created equal, and the same goes for flowers and leaves. Some transferred beautifully, while others looked more like mud.
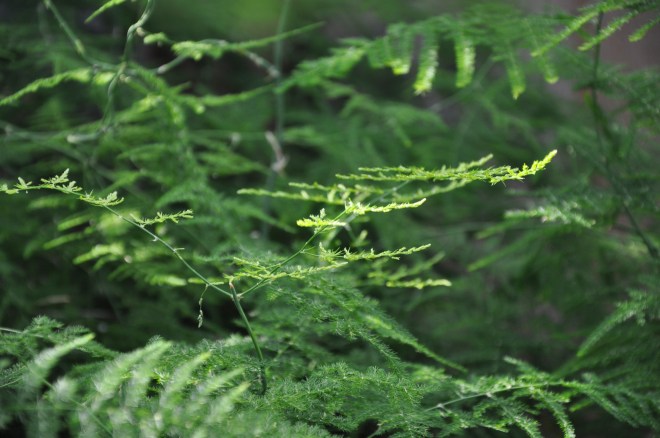
It was a pleasant surprise going through my sample booklet, seeing plumosa fern (Asparagus setaceus) and the catmint or catnip (Nepeta) prints still retained a lovely shade of green.
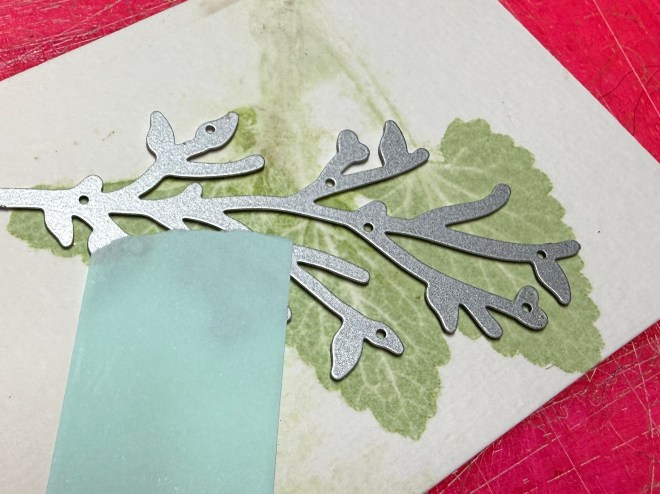
Using a die to cut from Nepeta imprint
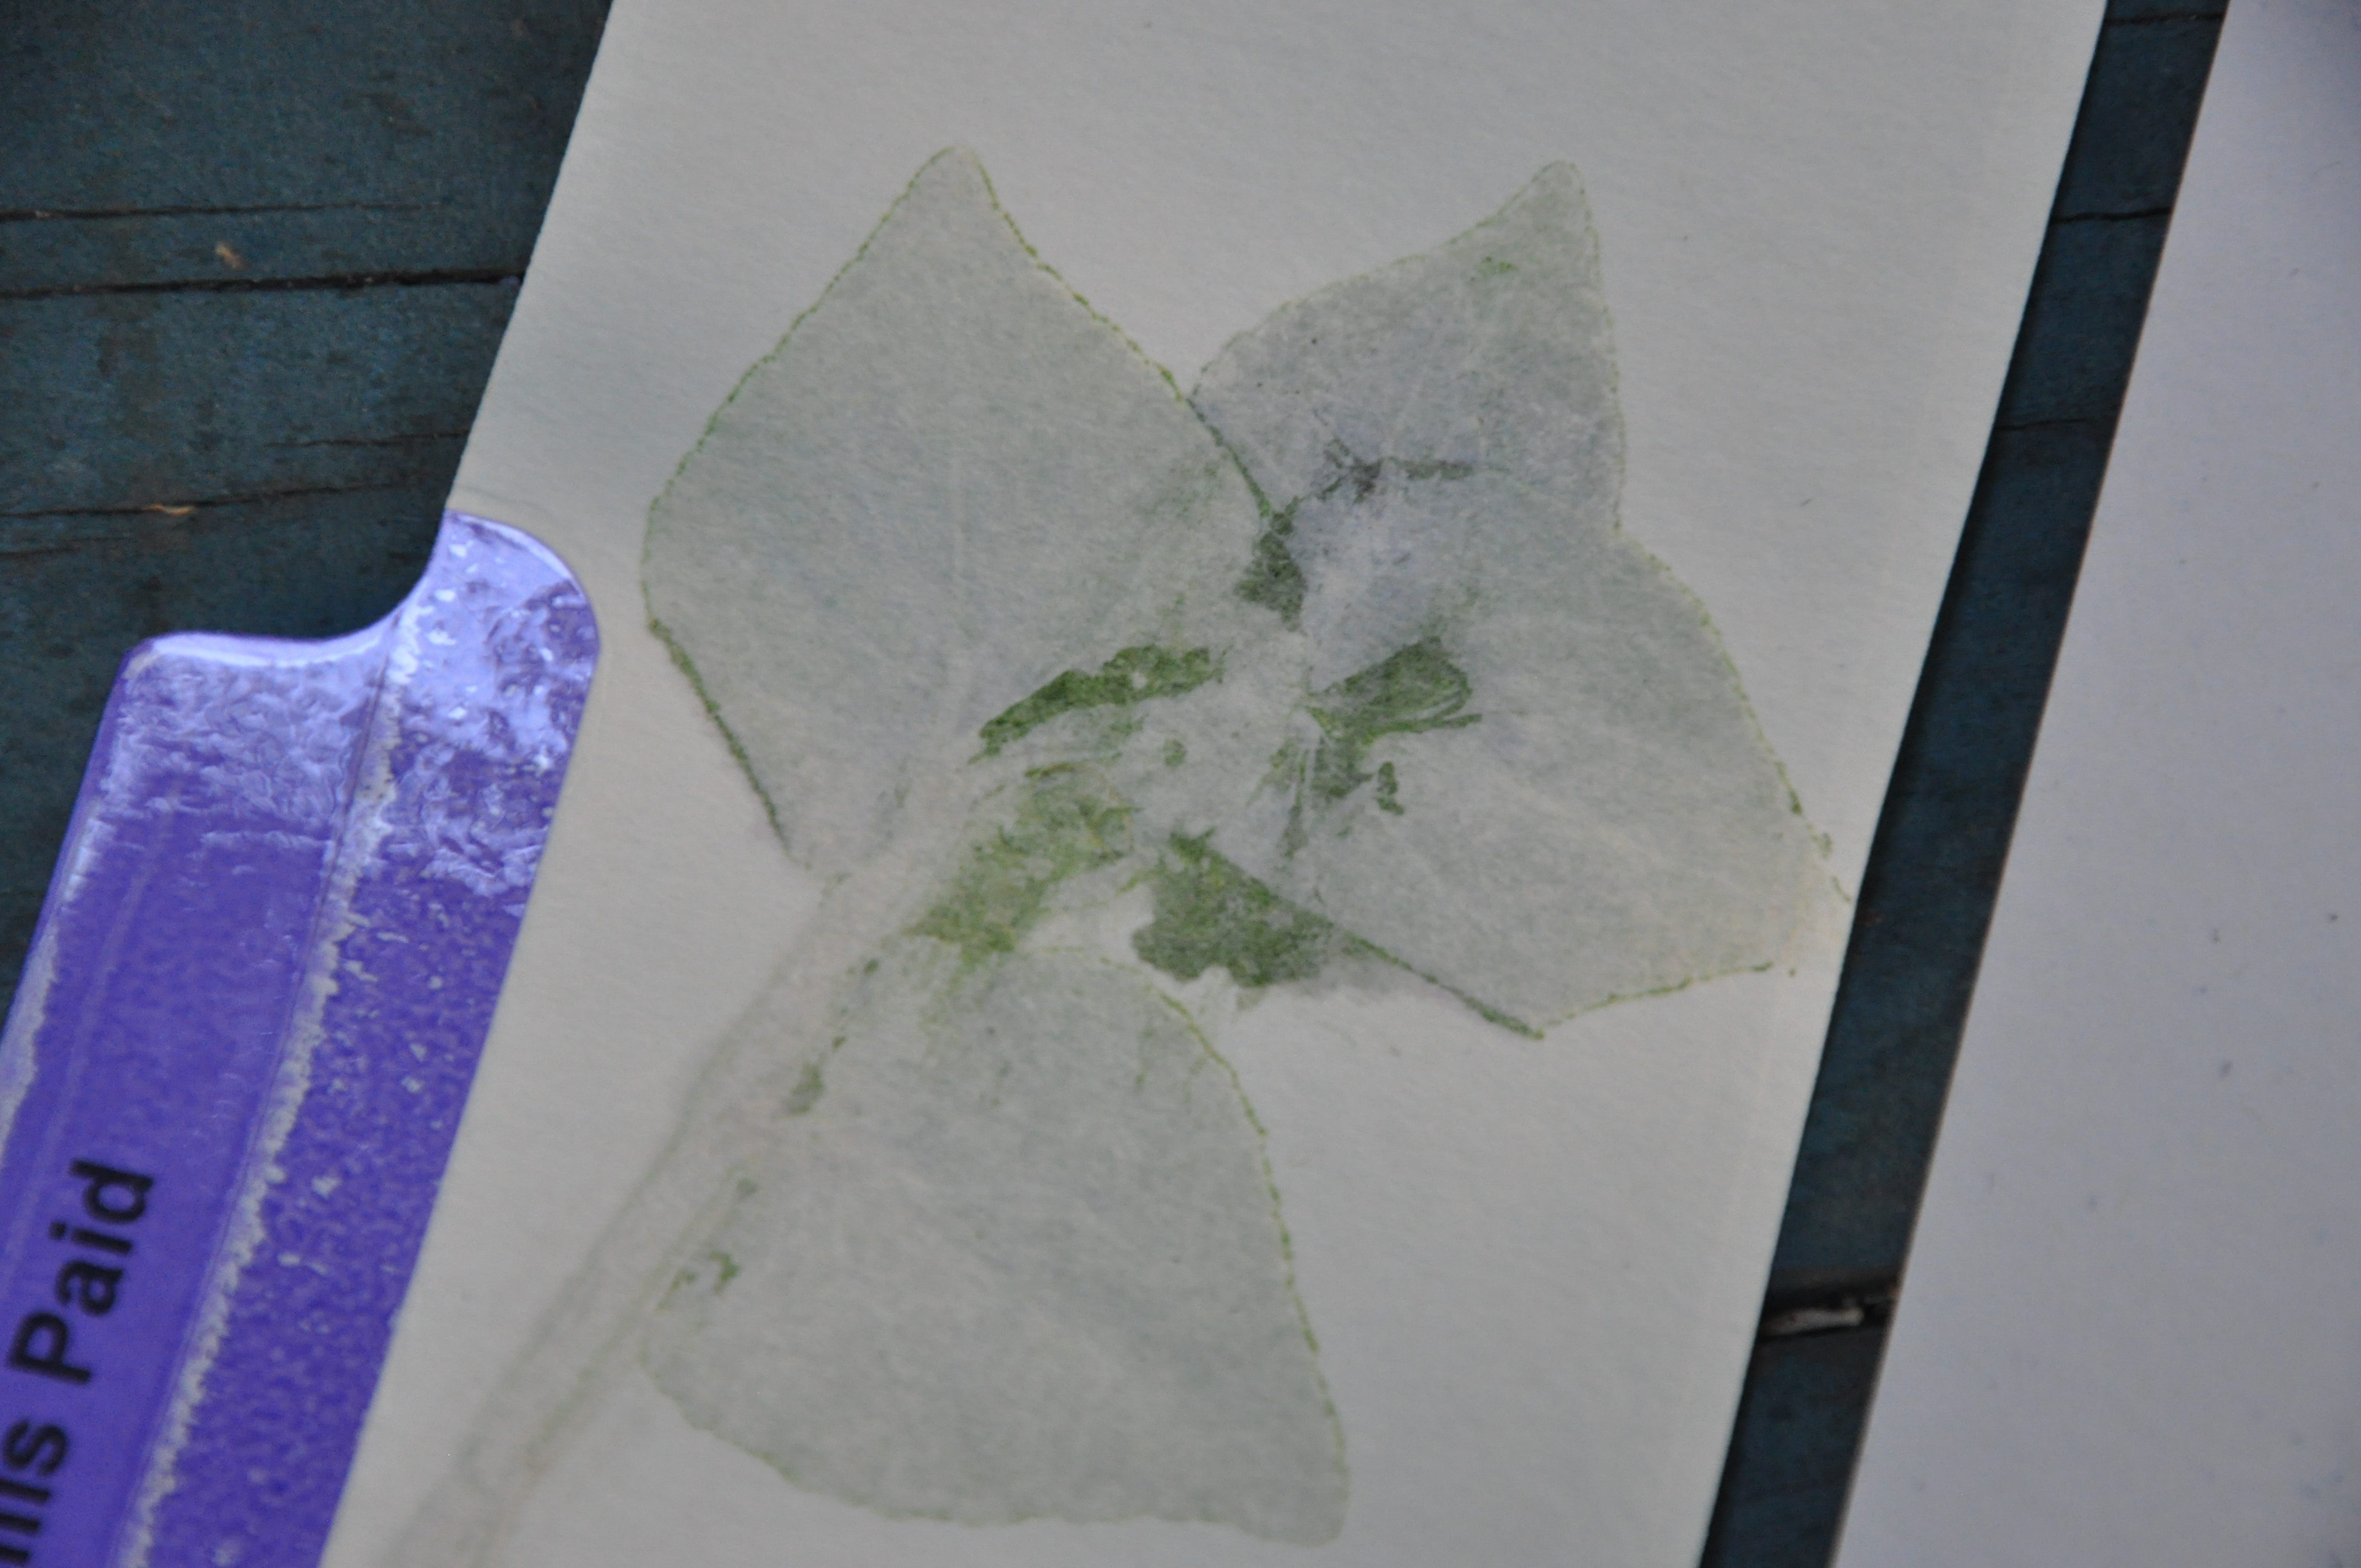
The subtle, earthy scent remains on the watercolor paper, at least initially. In some of the images, you can see the impression of the stems.
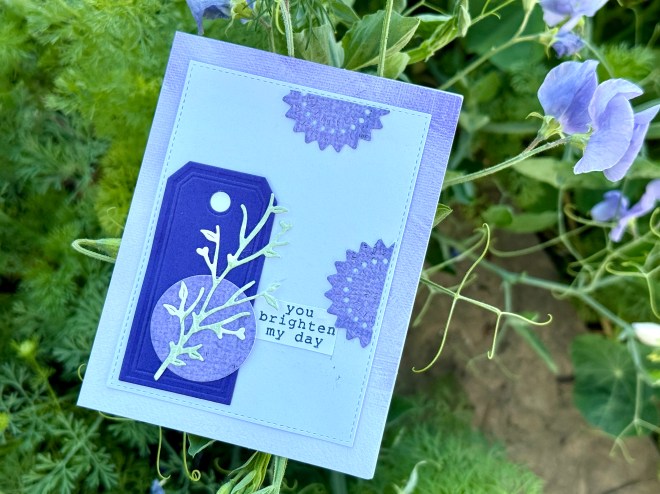
Poor lighting, but if you look closely you can see the green imprint cut into a leafy shape.
When I first tried this technique, our cat Mouse jumped on the desk, enticed by the lovely Nepeta, also known as catmint. I miss this sweet boy.
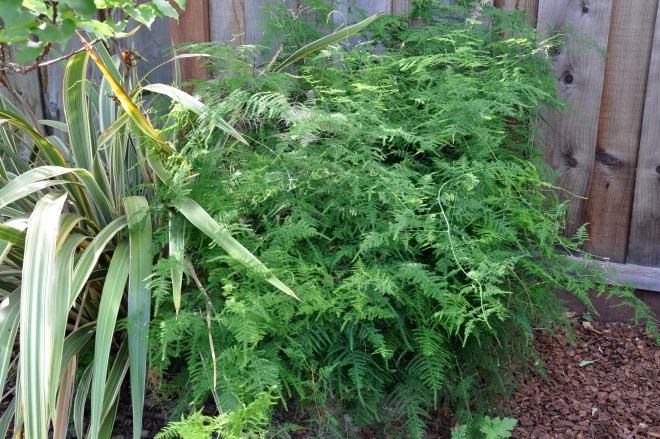
The fern in these prints has been with me since 1988, when I bought it for seventy-nine cents at a now-defunct nursery. I rented an apartment in those days, where the fern lived on my nightstand next to the bed. The plant followed me everywhere, and by the time we bought this house, it was huge. We finally planted it in the ground, and it’s done well in that spot for nearly thirty years.
It’s fun blending two hobbies into one.
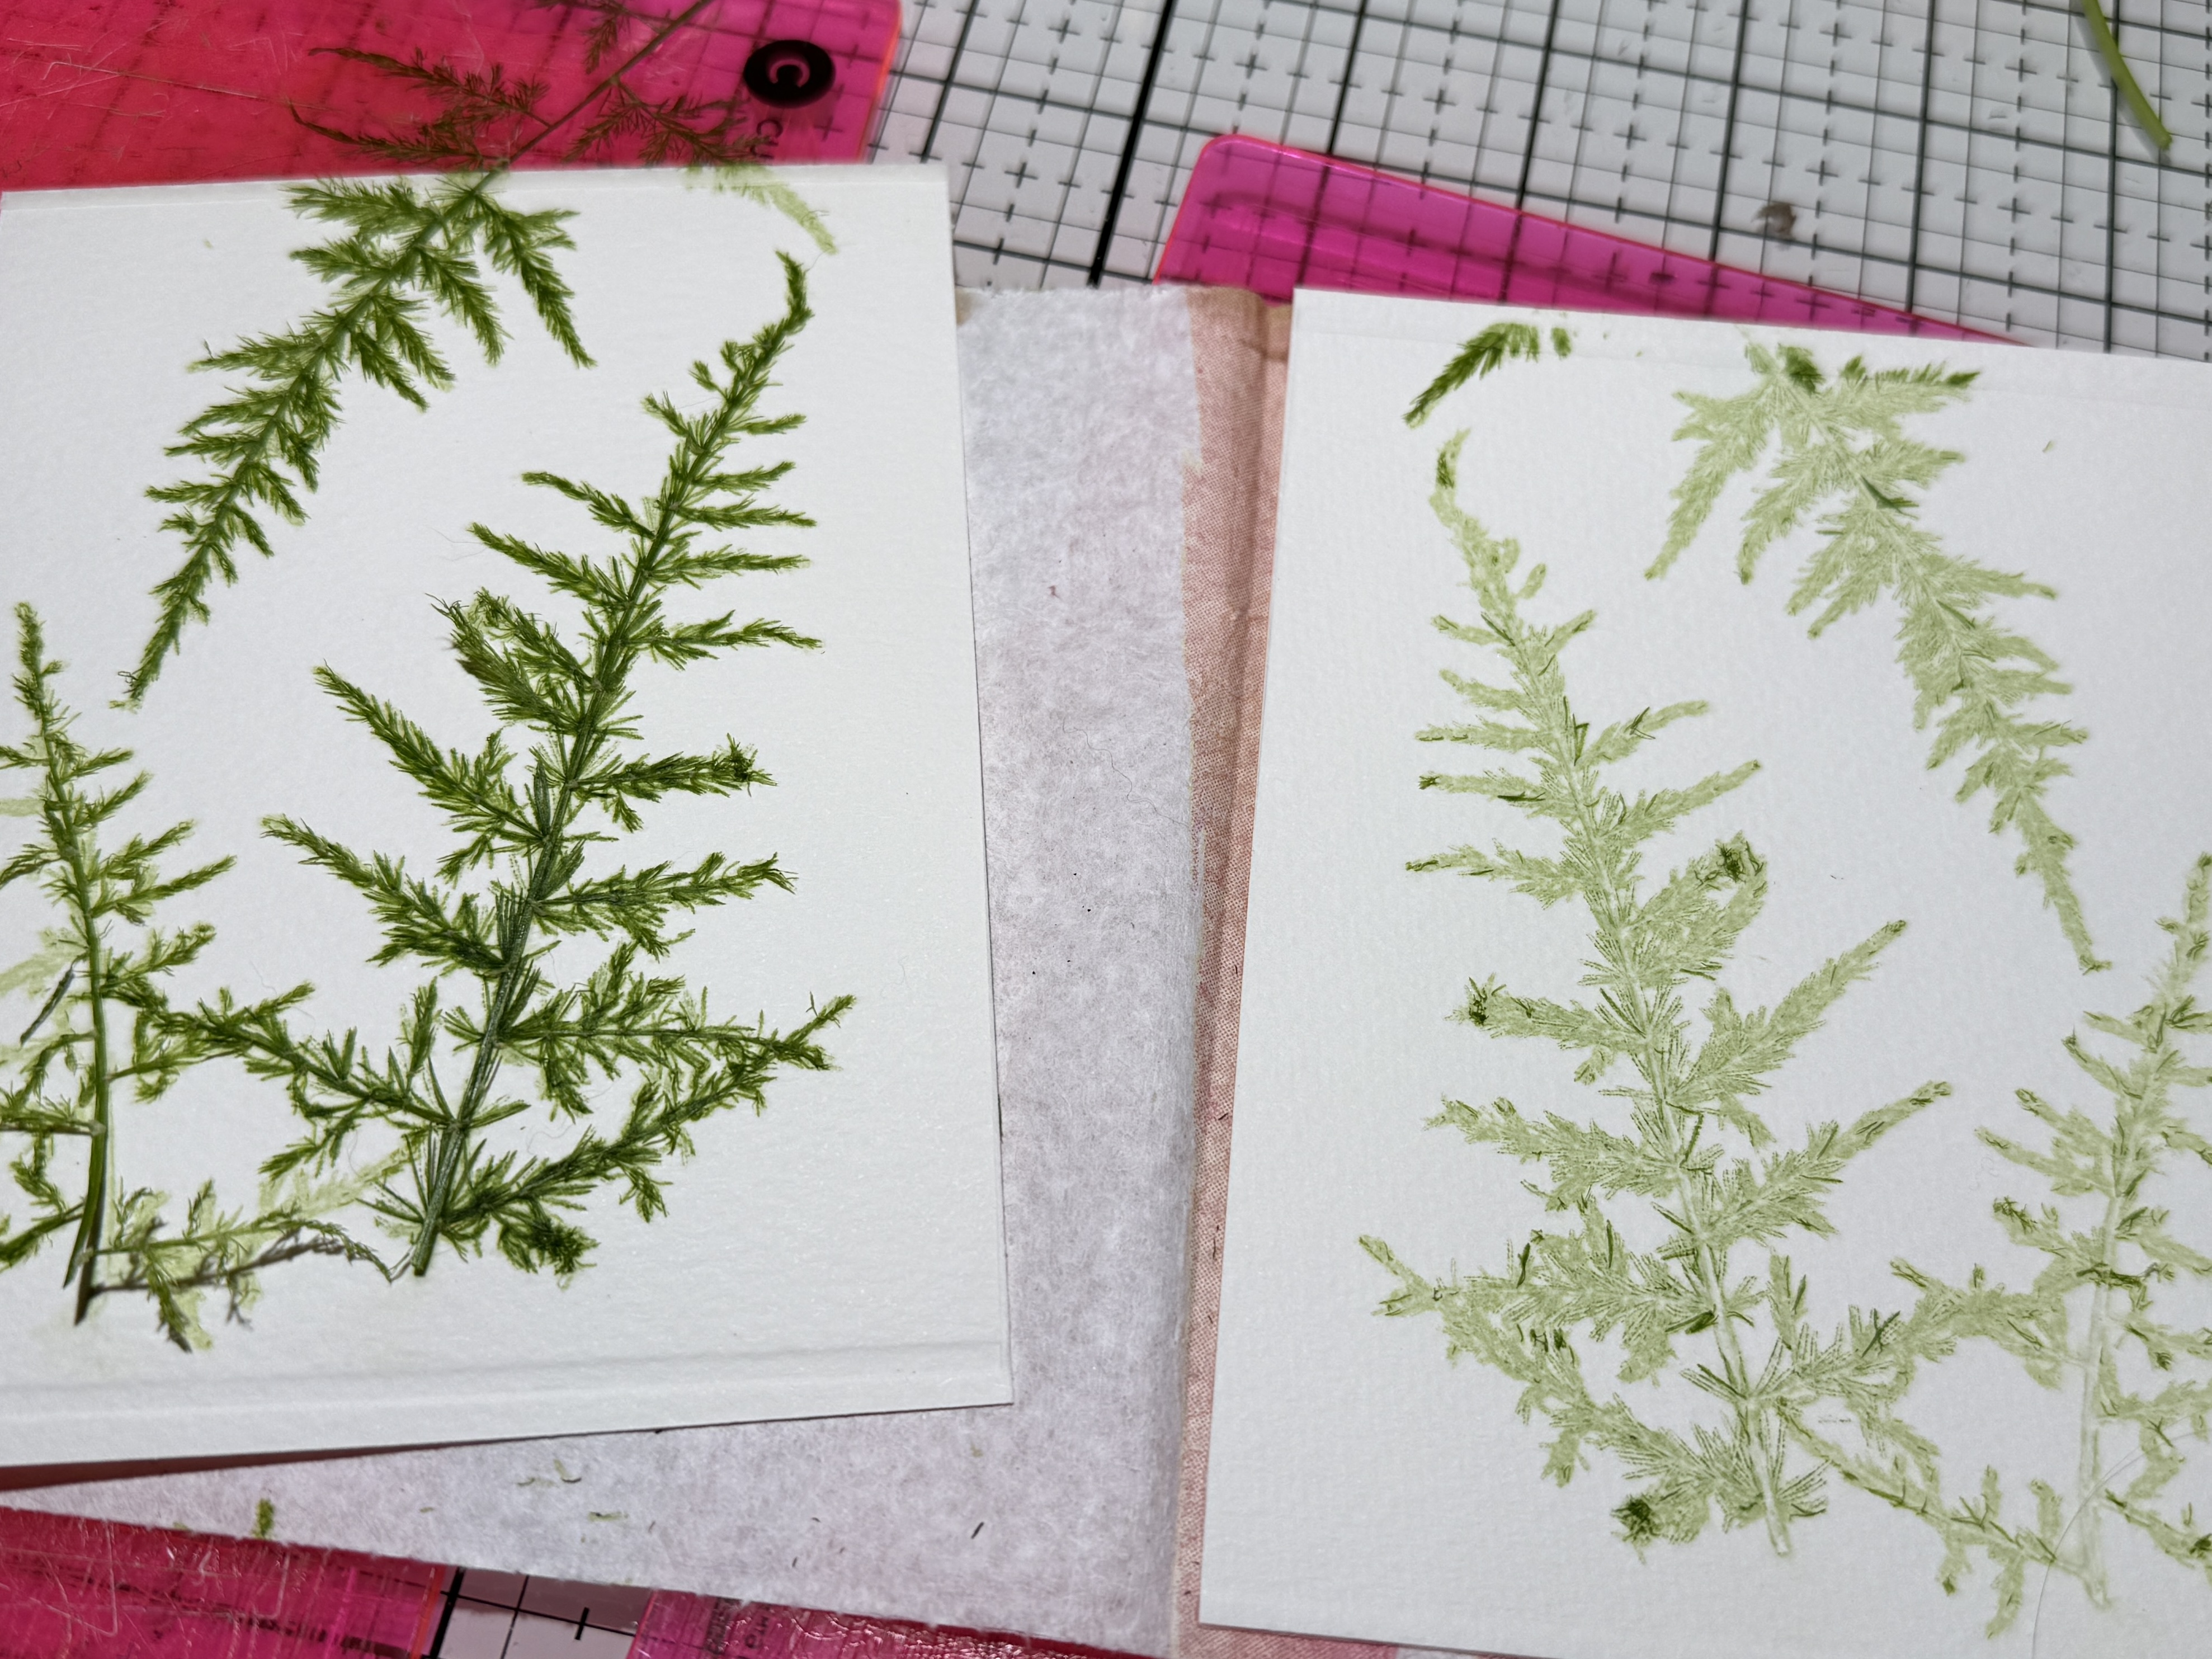
Mirrored images: one fern frond pressed between two pieces of watercolor paper.
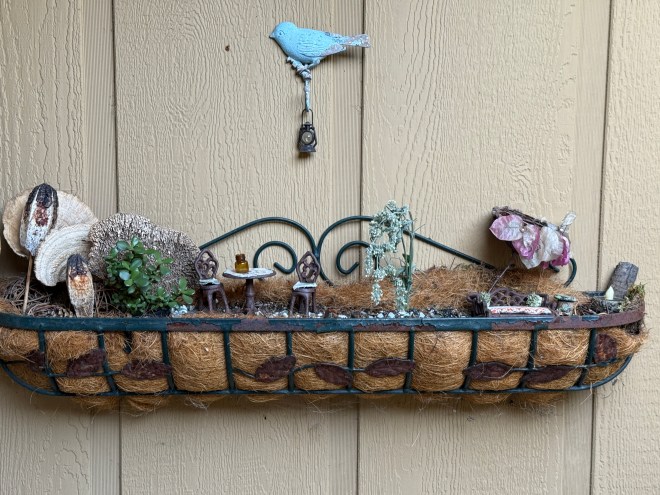
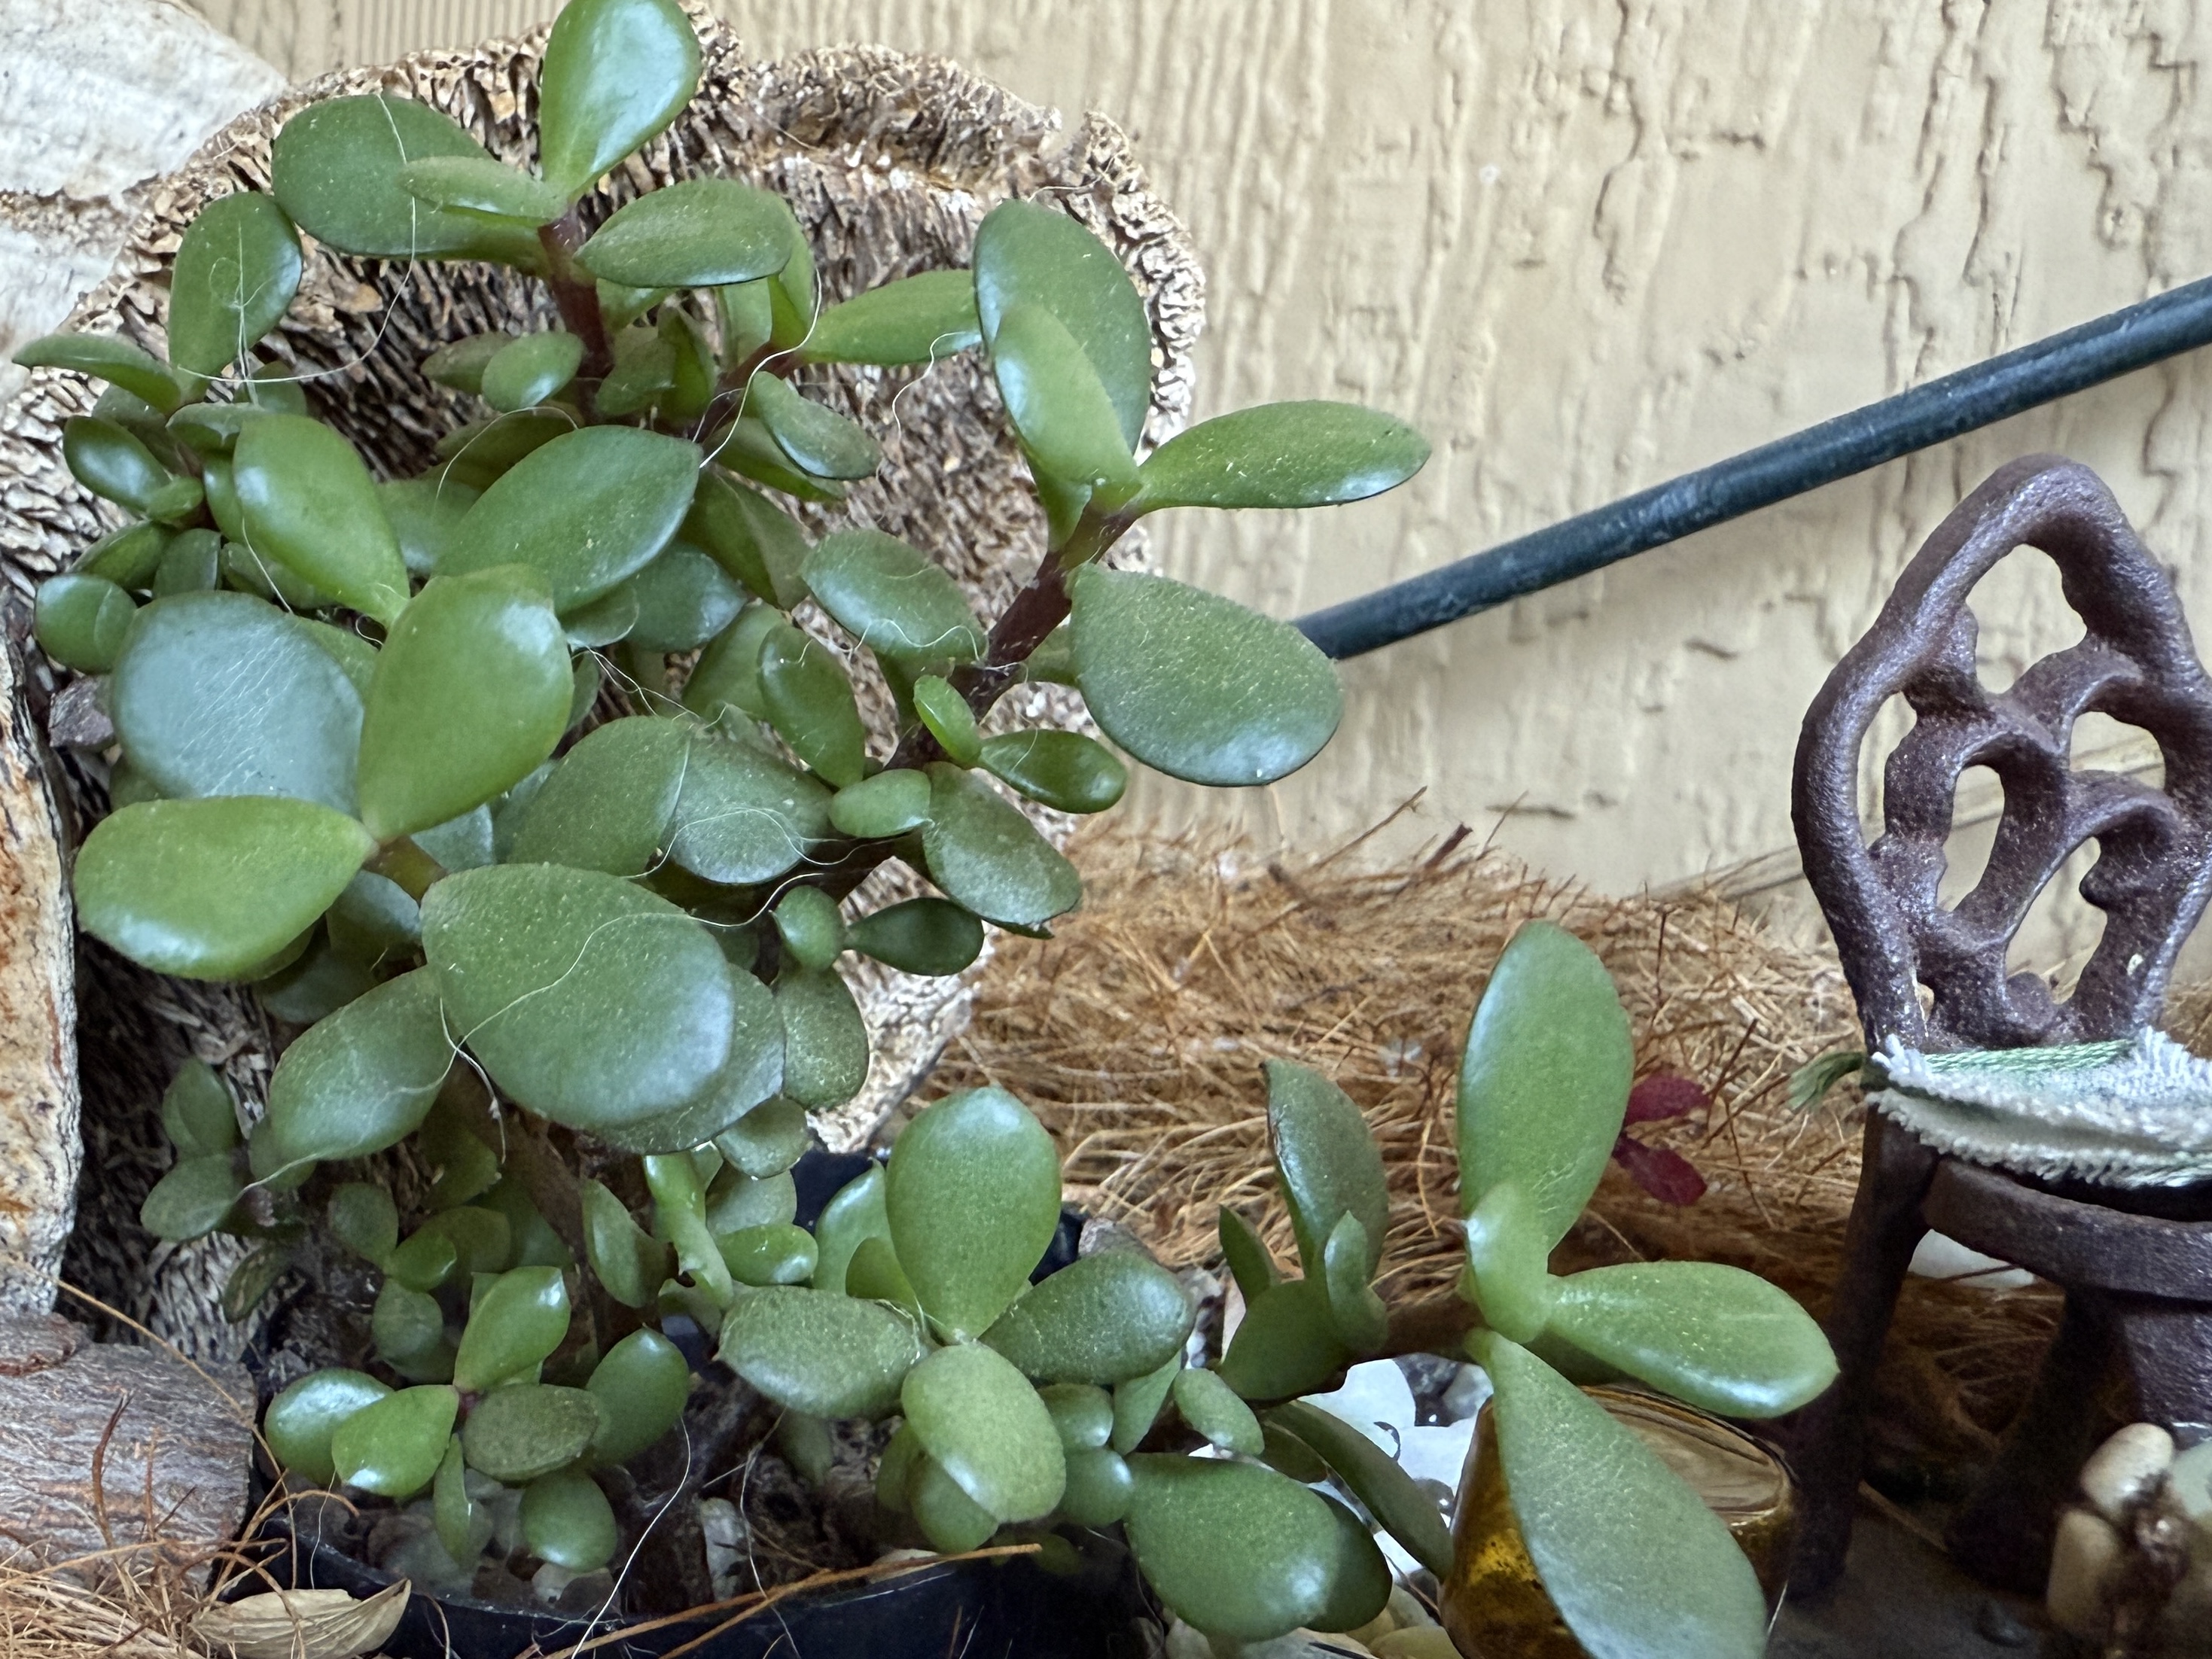
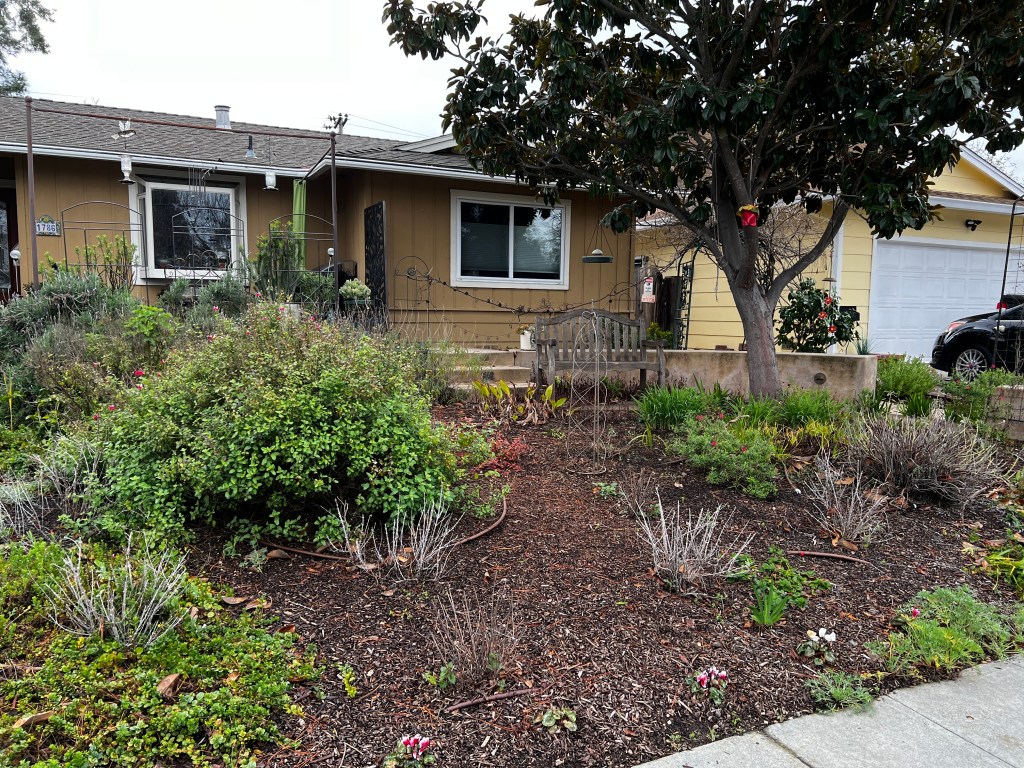
One of my fairy gardens is just outside our back door, mounted on the side of the house at eye level. It’s a daily reminder to stay in touch with my inner child, my muse, and lately, my sanity. Puttering in the tiny garden draws my attention away from reality for a few hours.
When we were young girls, my sister Sharon and I loved rearranging the furniture. It was a way to change our environment and to surprise our mother when she came home from work, and it didn’t cost us anything. We still laugh about it.
This week, I decided to rearrange the elevated fairy garden. I’ve had two small succulents planted there, but one has been struggling for a while.
They’re only a few inches apart, but one is getting too much sun. I transplanted it to a shady spot, considered buying another one, but in the spirit of rearranging the furniture, I opted for the assorted treasures I already had.
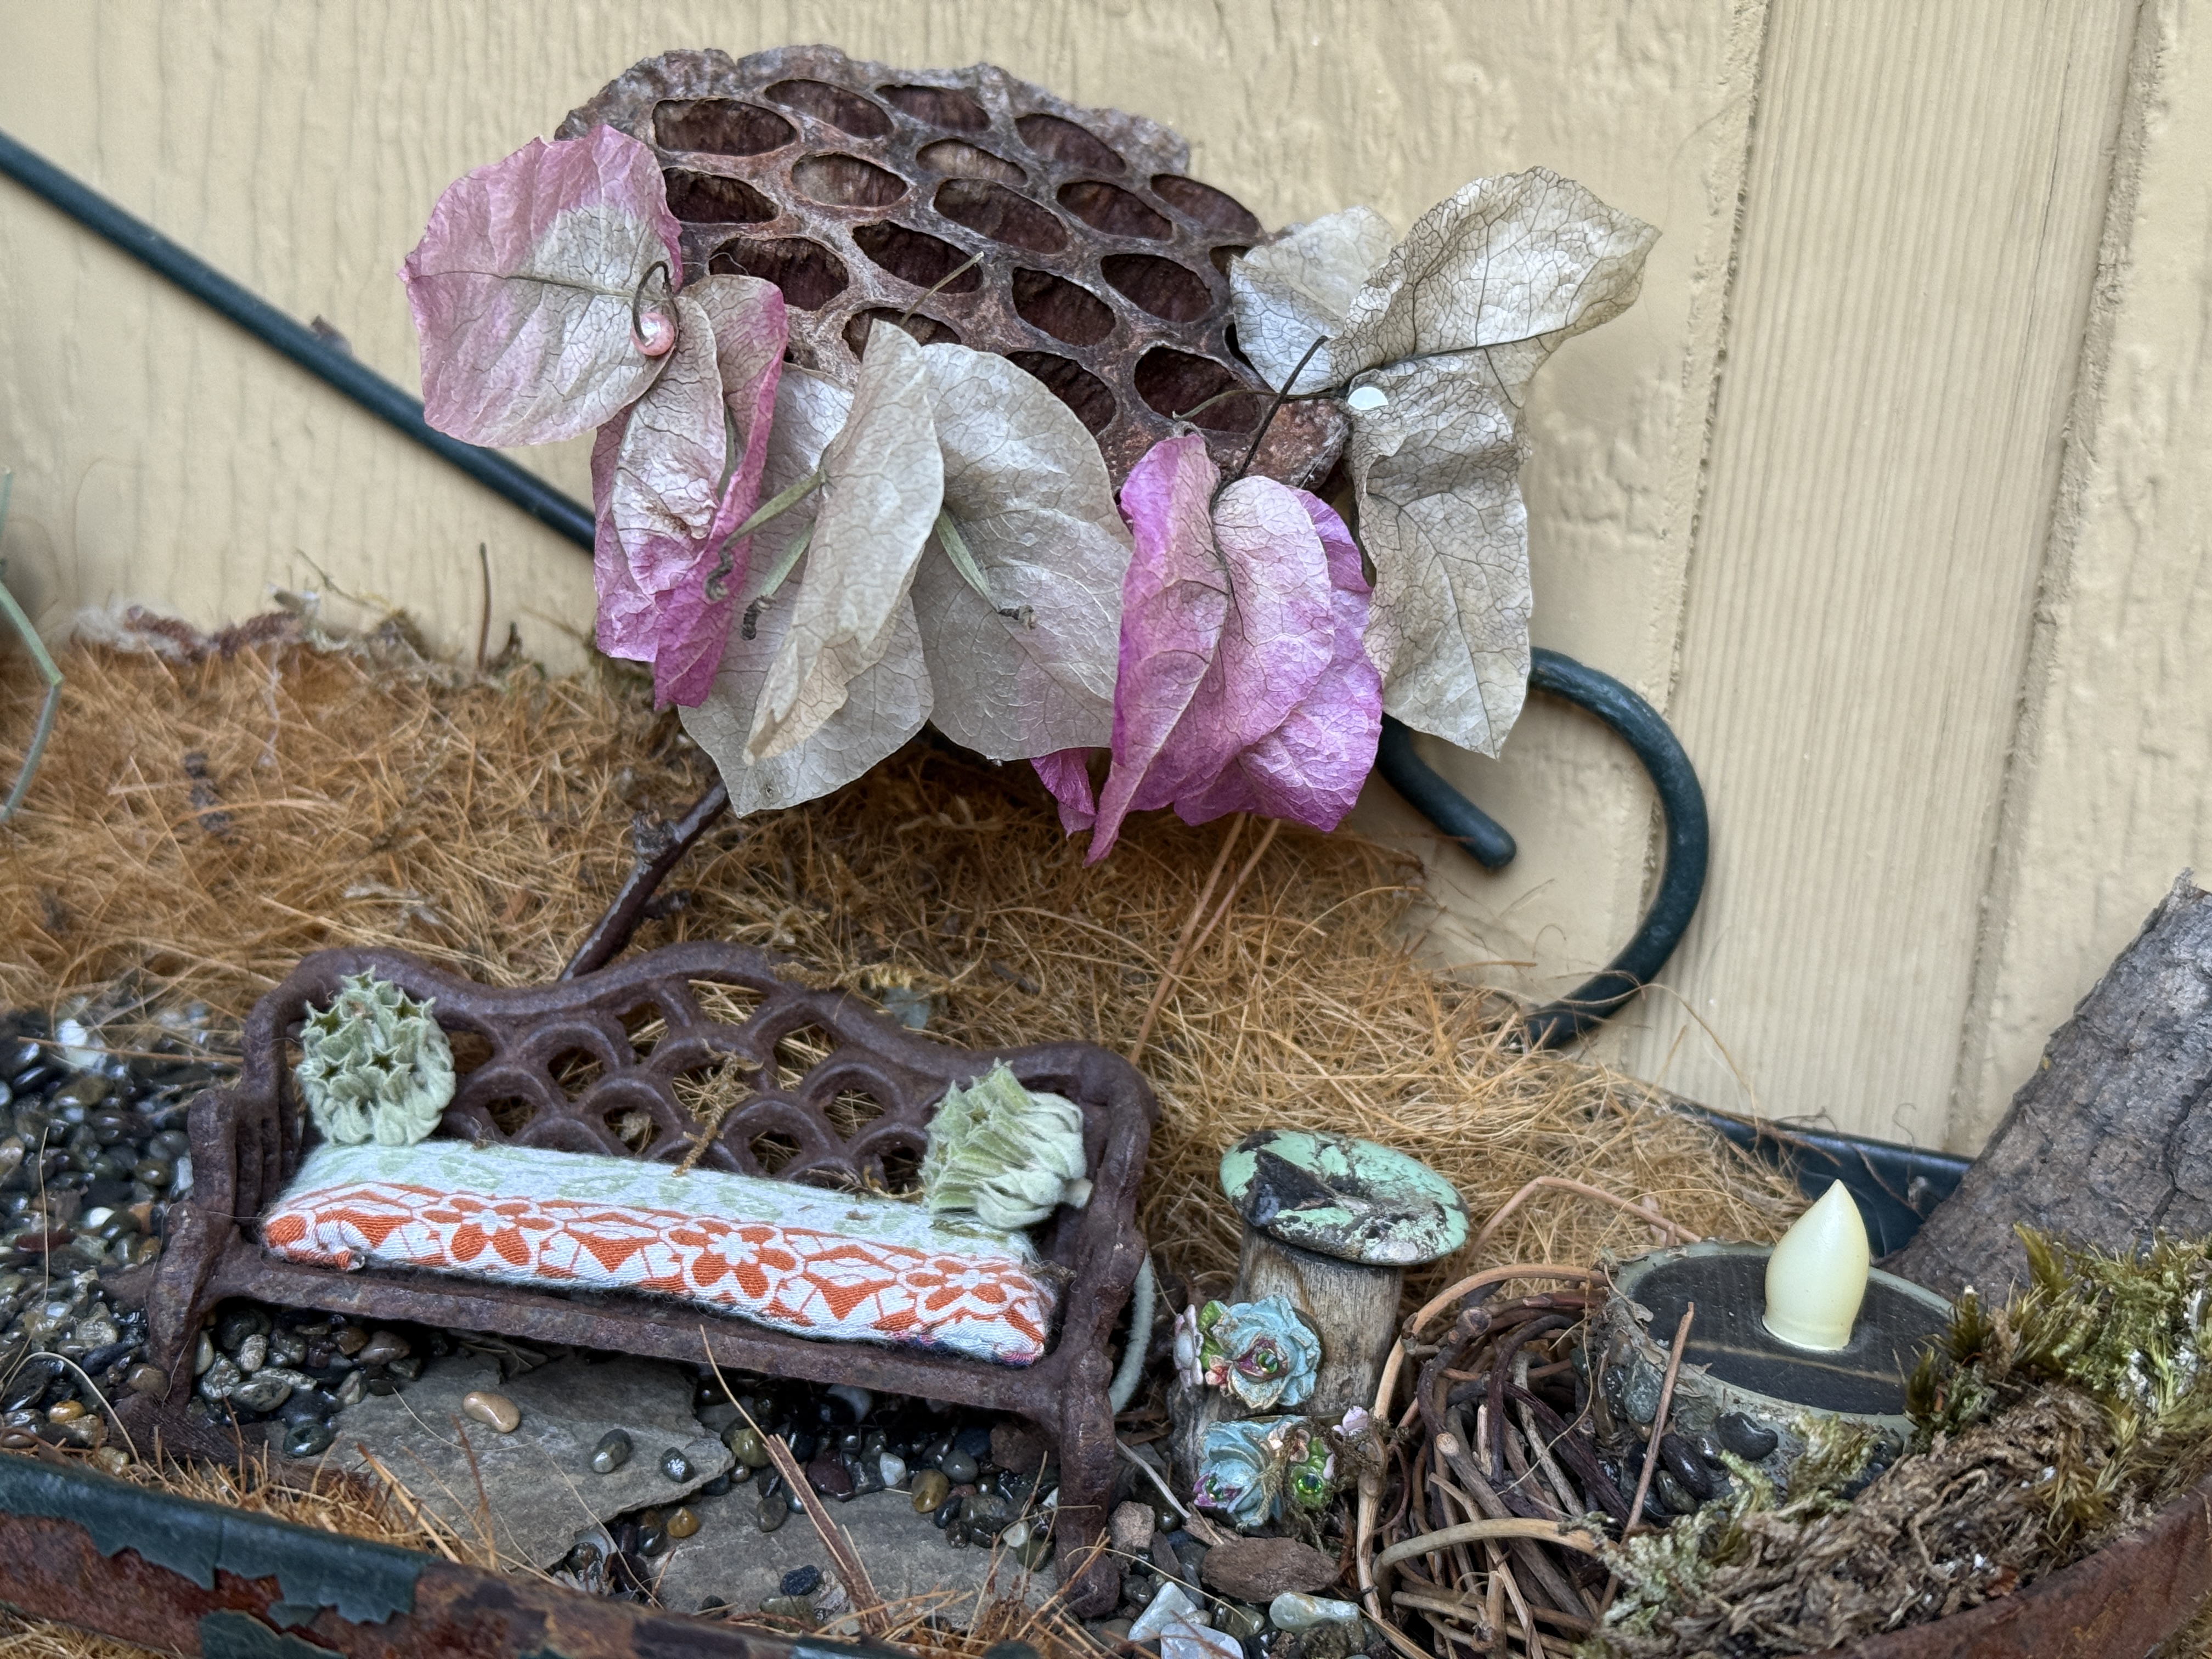
I moved the tiny garden bench to the spot vacated by the plant. Shade is essential during San Jose summers, so I crafted a wee sun umbrella. The umbrella’s structure is a lotus pod rescued from a floral arrangement sent to me as a thank you a few years ago. It’s been in the background of the fairy garden for a while. It’s now the base of the umbrella, with dried bracts from the bougainvillea held in place with sewing pins. I replaced the too-short stick with a twig from the fruit tree. Ah, shade.
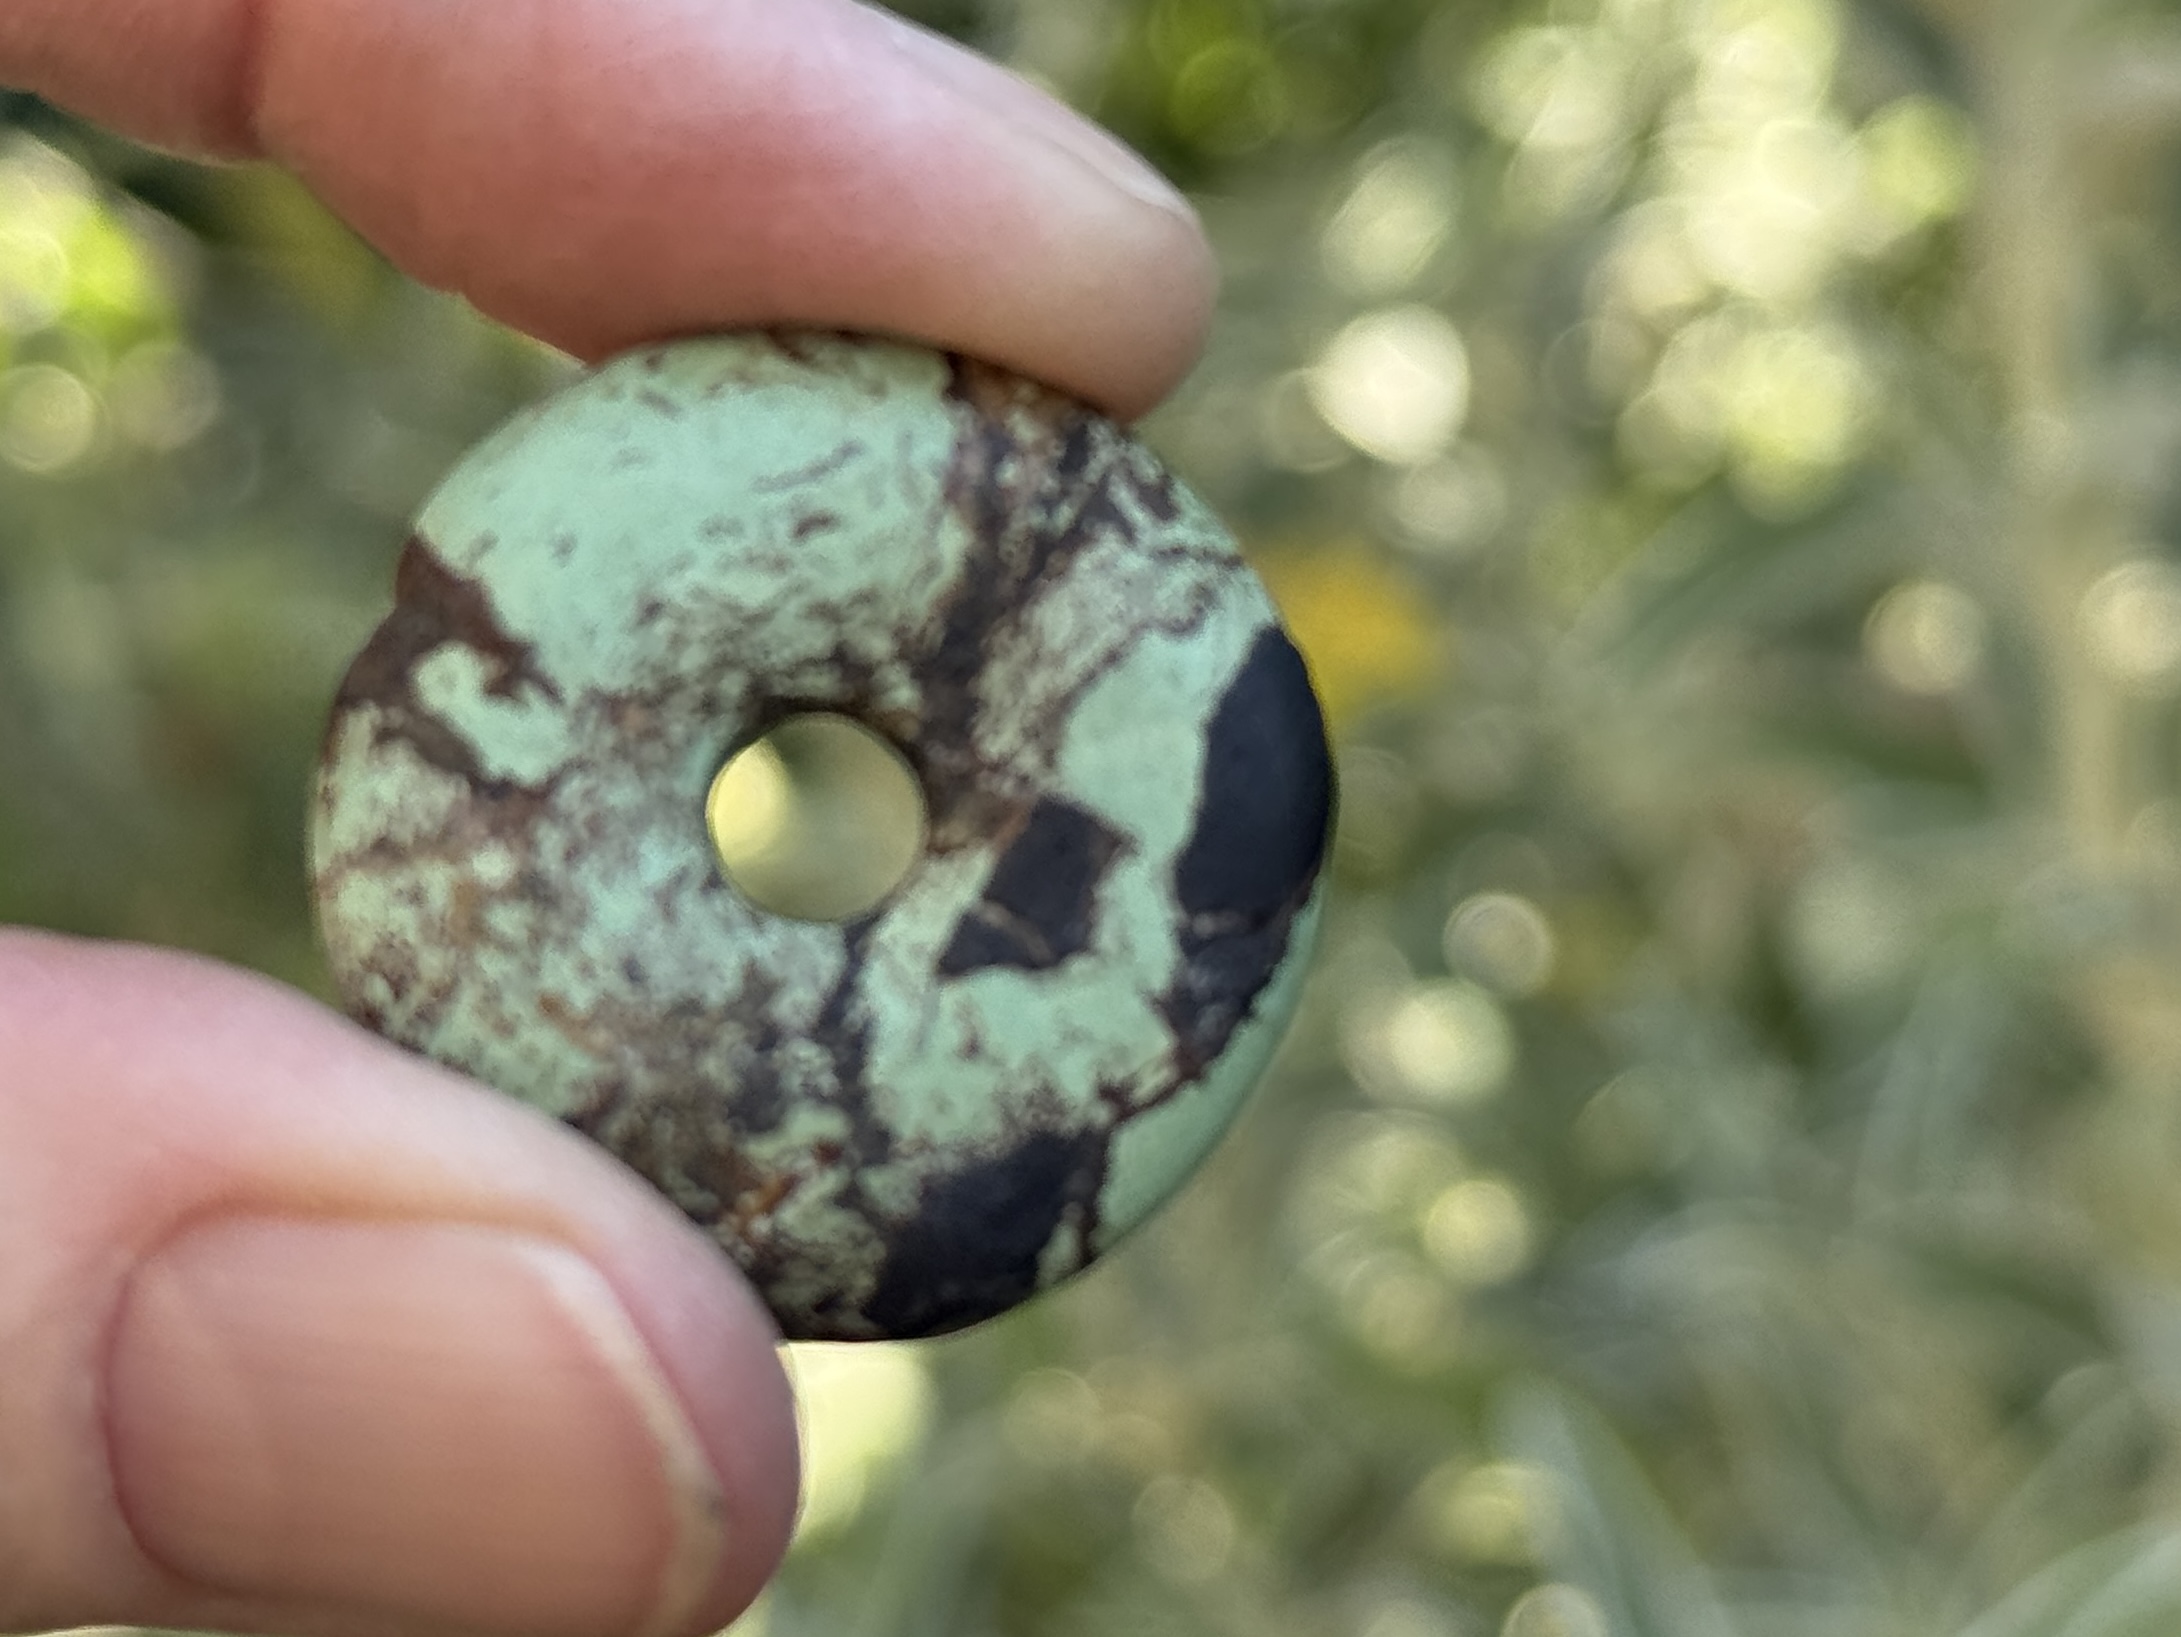
A couple of small seed pods were the perfect size for tiny toss cushions, creating a relaxing resting spot for imaginary visitors with wings. Next to the garden bench, I’ve improvised a side table from a small bit of garden debris, topped with a green finding from my button jar. I wrapped the base of the table with a ring purchased in Victoria, Canada, a few years ago. I loved the look of the ring, but it is so uncomfortable that I never wore it. It works well in this miniature garden, and I can enjoy it in a different way.
Mike suggested a solar light for the garden and I happily agreed. I wrapped the light with sticky tape, then rolled it in dirt and gravel to help it blend in. It’s nestled in the remains of twigs that once covered hanging lights.
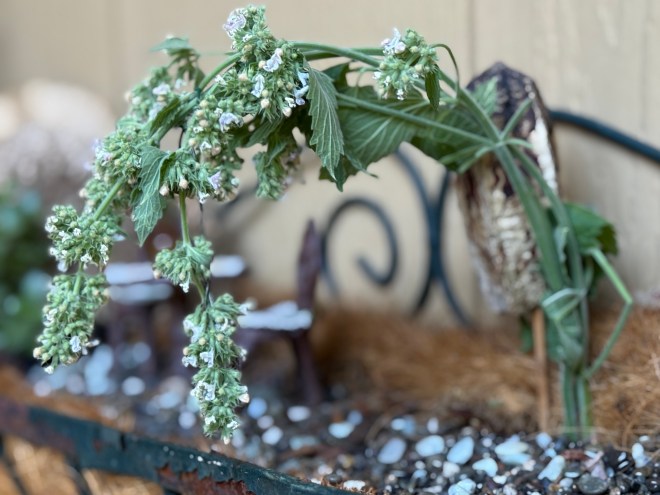
Next up, I added a garden arch that now separates the table and chairs from the lounge.
I braided three lengths of Nepeta, also known as catmint, while it was still soft, gently bending them into an arch and holding them in place with a length of florist wire. It’s drying nicely into a scented and wispy arch.
I invite you to close your eyes and imagine yourself in flight with gossamer wings and a light heart. The garden is ready for you. All are welcome.
We spent an hour at a local garden center this morning, filling our cart with various lovelies. After checkout, we stopped at a Burmese restaurant for lunch before returning home.
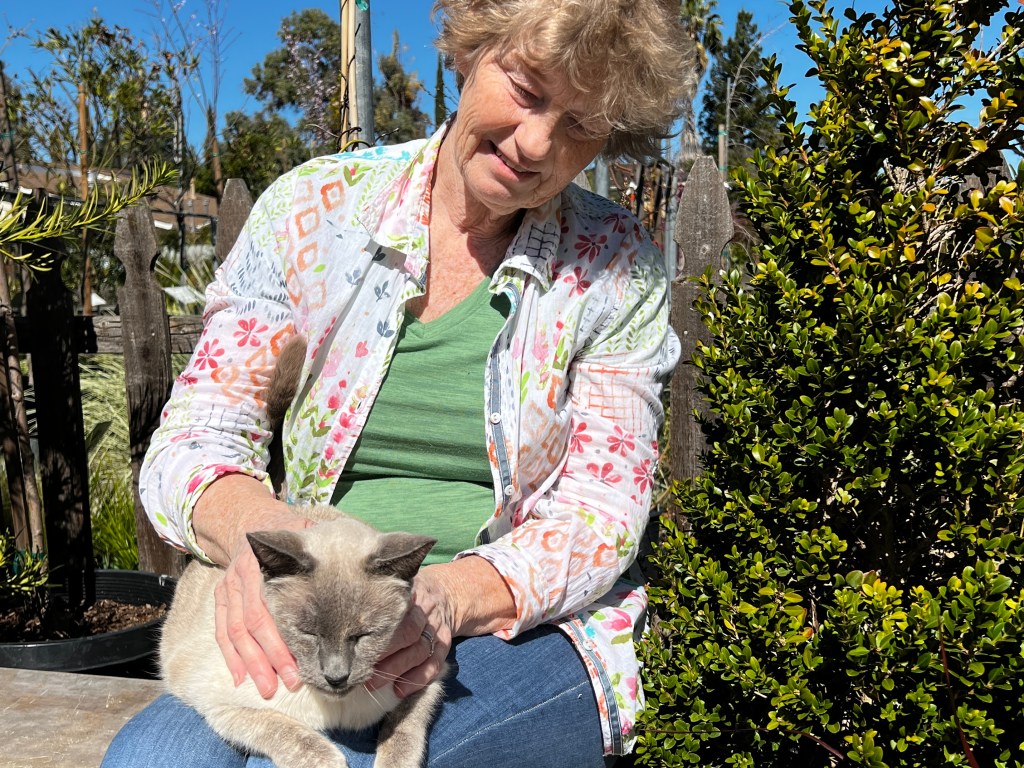
Almaden Nursery: Having a moment with the resident cat
I unloaded the car, placing each plant in an approximate location for its new home. We’ve planted several new perennials, and by we, I mean Mike. He’s happy to dig the necessary holes and repair the irrigation along the way.
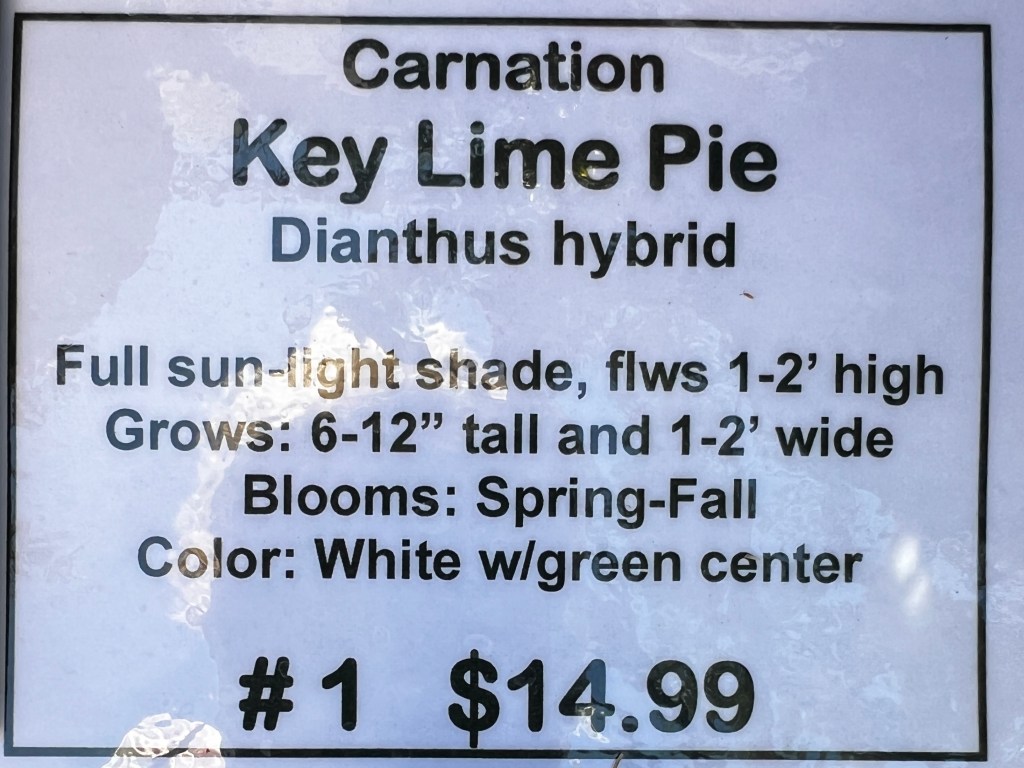
I’m most excited about the peach, lime, and red carnations, not just because they’re named after pies. I’ve never grown them before. There is nothing quite like the promise of a new gardening season.
I asked Mike to remove an overgrown salvia to restore balance to the front garden’s planting scheme. The shrub grew taller and broader than expected, and even after heavy pruning, it seemed out of place.
Overgrown salvia
We planted three purple African Daisies along the front path and have yet to plant the lamb’s ear and yarrow, both needing full sun. I have a spot for them in the back garden. I’ll take pictures soon.
While Mike dug holes in the front garden, I dug up several self-sown nepetas, aka catnip, for our neighbors. After last year’s heavy rains, I had a bumper crop of catnip. It’s nice to share it with fellow cat lovers and the cats that love them.
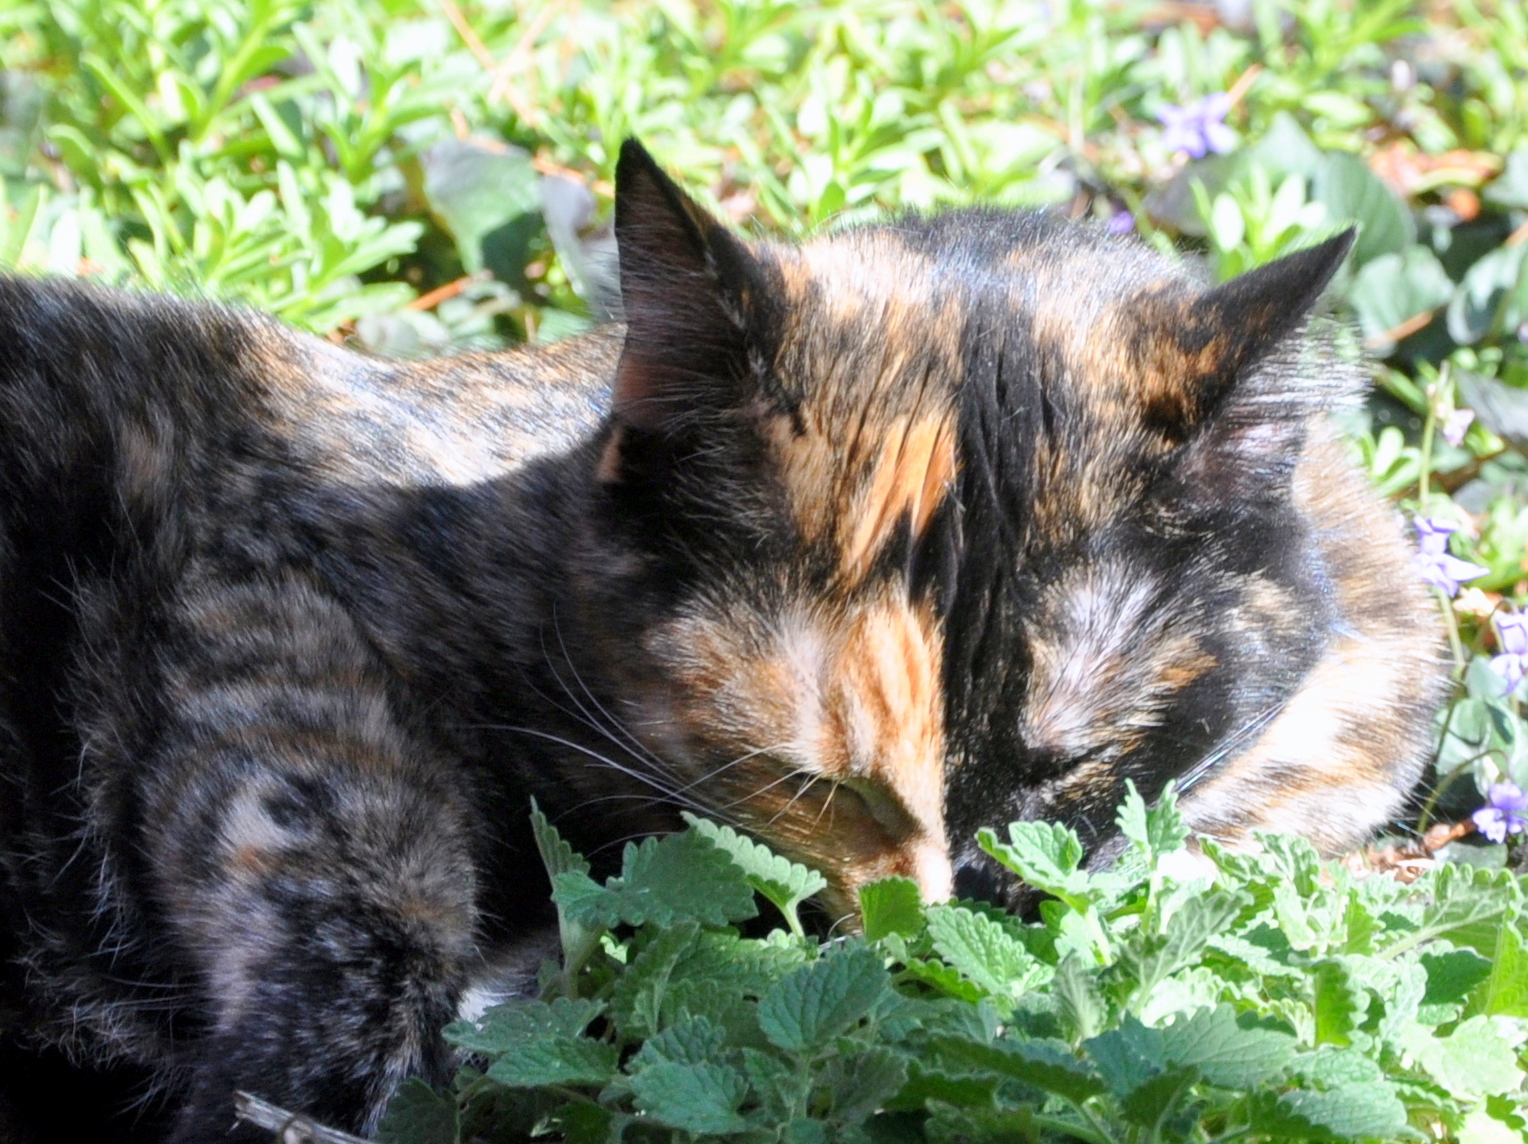
Tessa enjoying the nepeta
Elsewhere in the garden, the freesias continue producing fragrant clusters in abundance. I’ve been bringing bunches of them indoors.
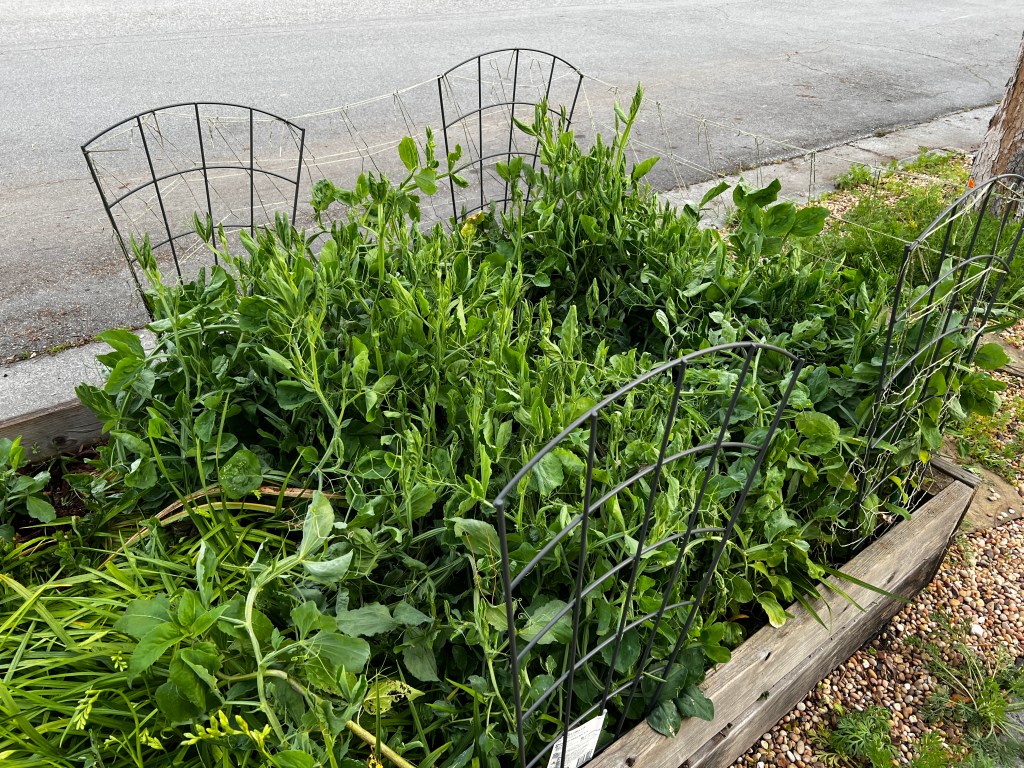
A couple of weekends ago, I placed netting around the edges of the planter box to support the emerging sweet peas. Today, I spotted the first sign of color.
The unexpected winter crop of mammoth sunflowers towers over the curb garden, but the flowers are fading, leaving behind a bird and squirrel smorgasbord. I will cut the stocks down to a meter or so, leaving them in place to support the crop of sweet peas moving in that direction.
I tucked a dozen gladiola bulbs in the space between all that growing. They should emerge sometime in June.
This week’s forecast is warm and dry, with a chance of rain on Friday. I hope that comes to pass, as it would be an excellent way to settle the garden.
Meanwhile, we have foraging birds and squirrels taking advantage of the abundance of seeds.
When I’m indoors looking out the window, the birds and squirrels strike delightful poses, but my camera phone can’t quite capture them. This afternoon, I looked up and spotted a squirrel dead center in the garden, standing up and appearing to look right at me. I’m sharing the photo even though it could be sharper.
Here’s another shot from the sideyard of a well-fed California Grey.
This pair of mourning doves spent an afternoon out back, but they’ve relocated to parts unknown. I don’t miss that mournful cooing, but I love watching them. Ana’s hummingbirds are enjoying the fountain along with an assortment of small songbirds.
This is my time of year!
“When the world wearies and society fails to satisfy, there is always the garden.” – Minnie Aumonier
It’s the autumn equinox here in the northern hemisphere, or in simpler terms, the first day of fall. It’s also our wedding anniversary.
Today (September 23) sees the 2019 autumn equinox, the moment when the planet’s northern hemisphere swaps with the southern hemisphere to become the one furthest from the sun.
Autumn is a good time to reflect, especially in the garden. While the perennials remain robust year-round, summer annuals are closing up shop.
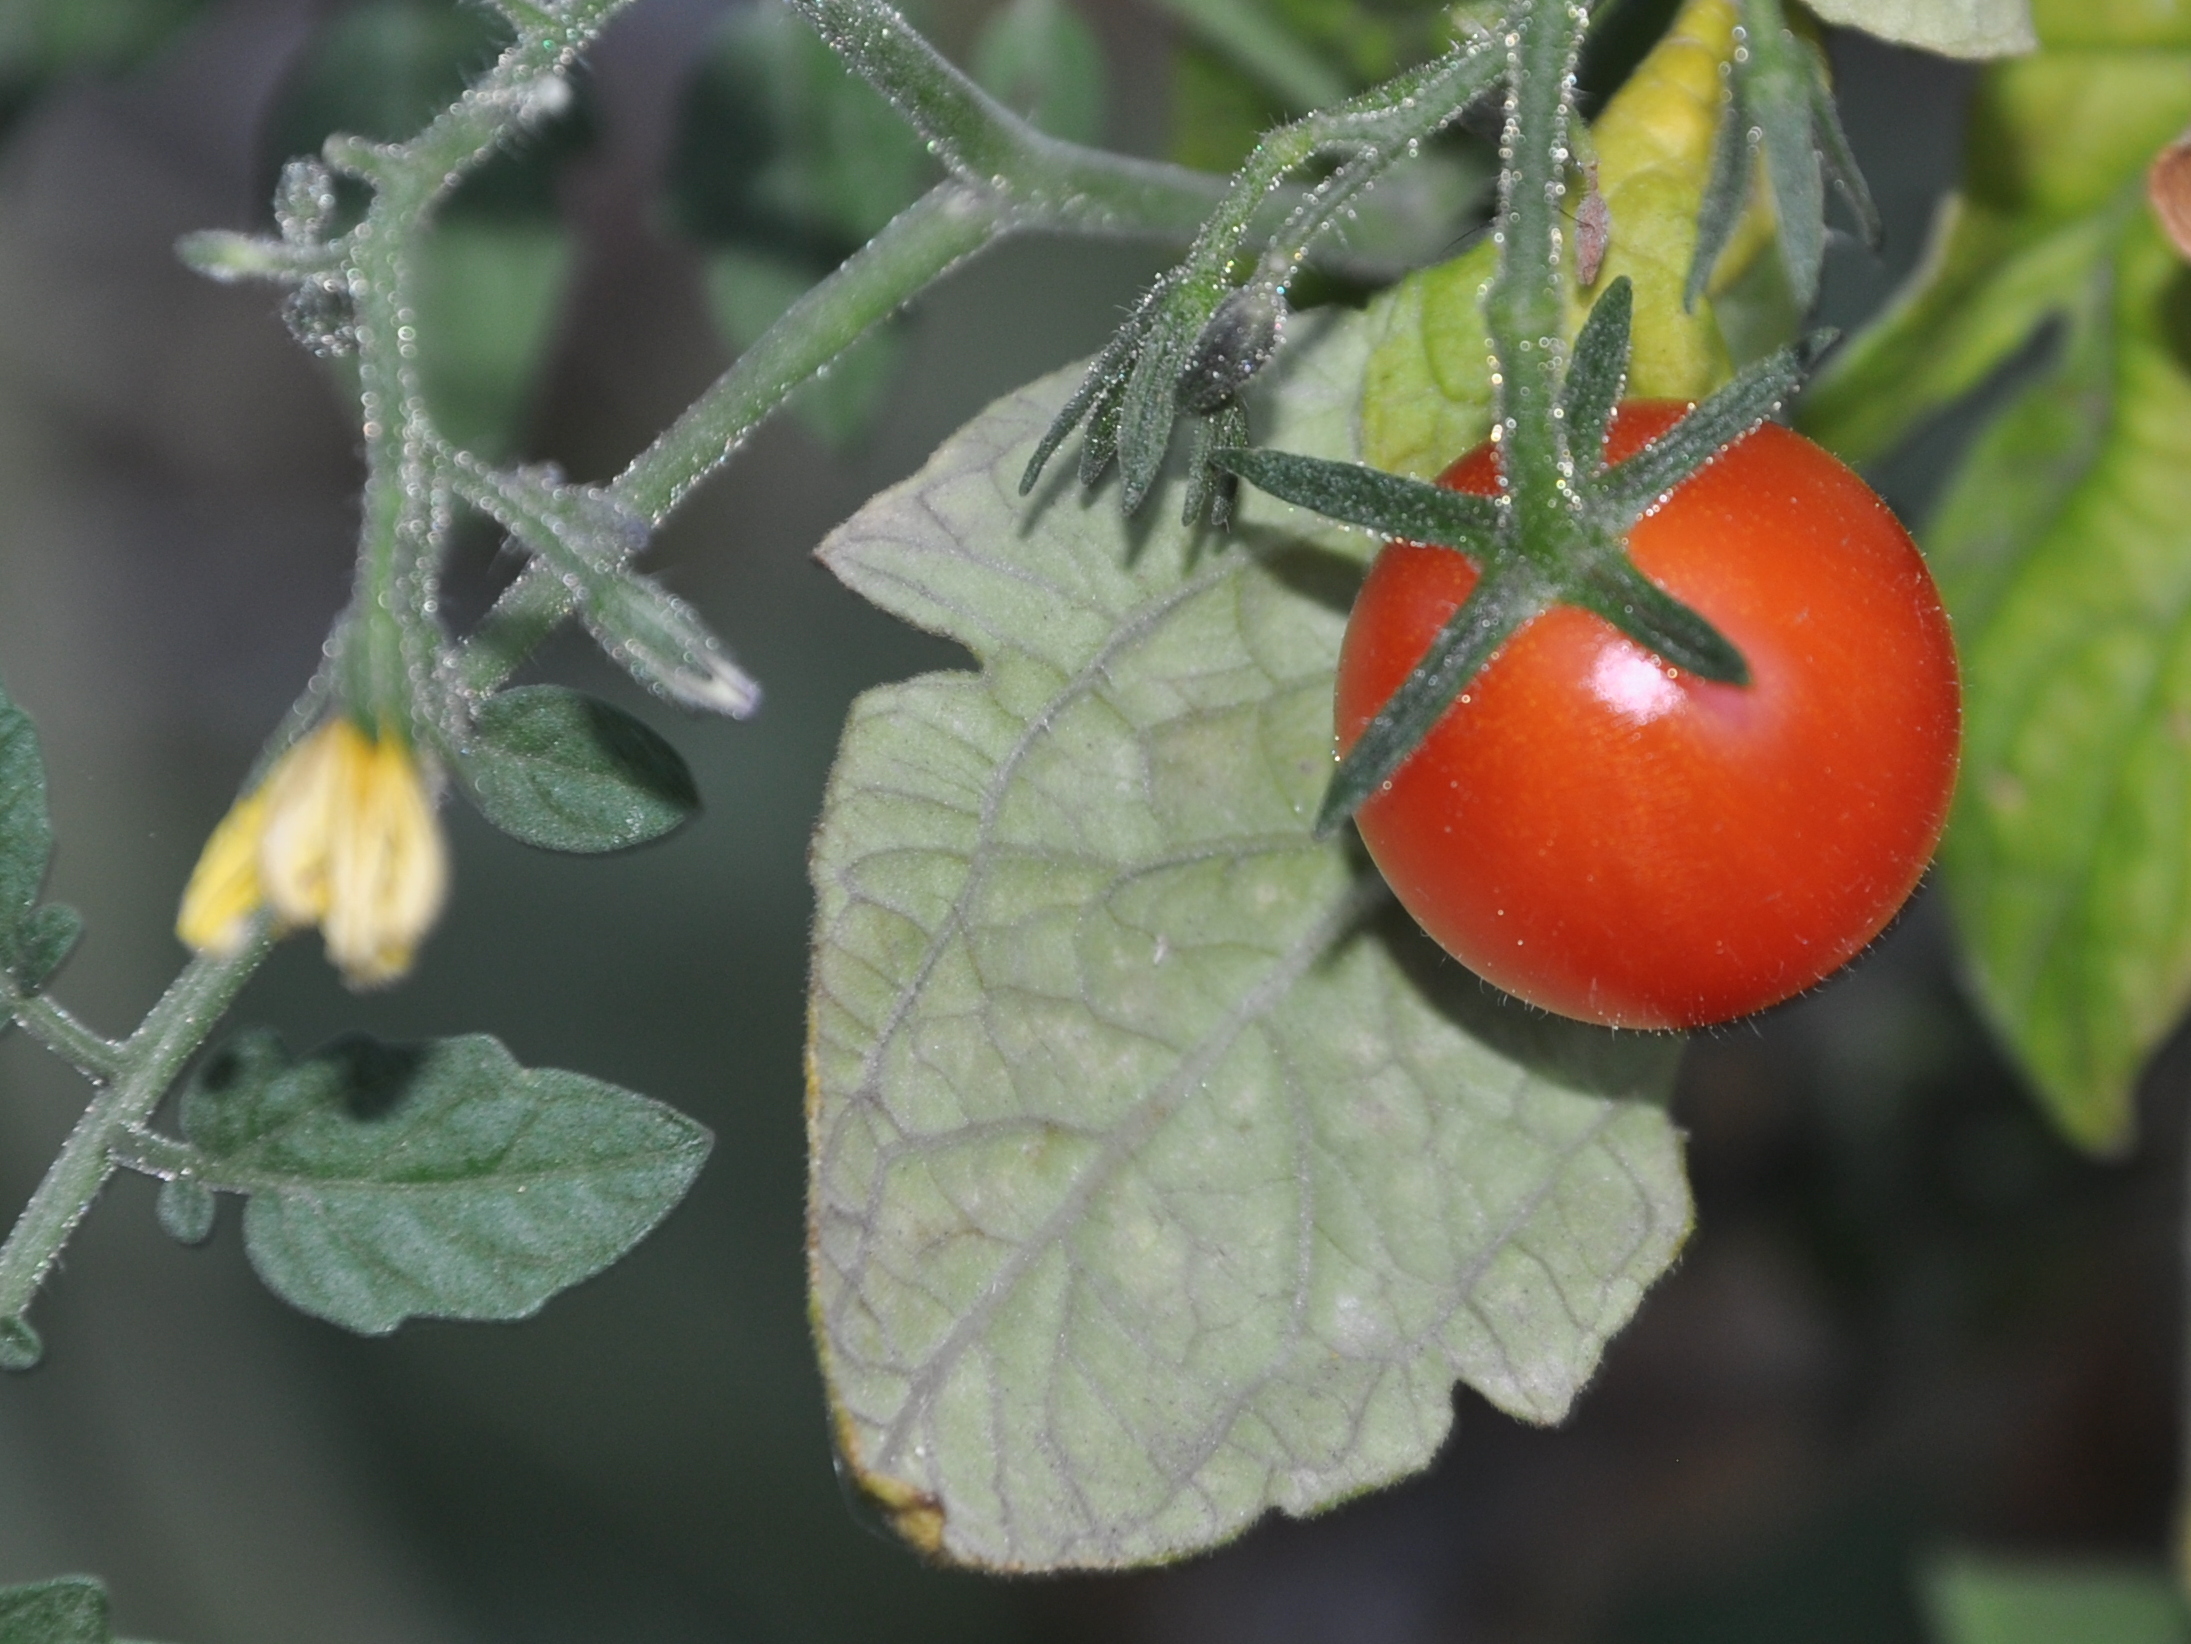
We had a second year of disappointing tomatoes. Despite my best efforts planting the EarthBoxes with fresh soil and fertilizer, moving them to a new location and ensuring they got full sun, production was blah. My garden mojo took a hit.
Don’t be fooled. It looks juicy, but the sweetness has gone.
This stripey variety took months to set fruit. While they look interesting, I didn’t care for the thicker texture. All in all, one plant produced half a dozen tomatoes. Sigh.
A trio of Stripey Tomatoes
This was also my first season without pumpkins. We’ve relied entirely on the squirrels to plant them each year, even if their planting methods are unconventional. By the time I fully noticed, it was too late to plant on my own.
I had brief hope. After amending the mix in a planting box with heavy, sandy soil, a few pumpkin plants appeared. It seemed unlikely that they would amount to much, but while I was traveling in July they took hold. Alas, they didn’t establish in time. Although the plants became vines and proffered a few blooms, there was no time for setting fruit.
Spent pumpkin flowers and vines along with other pruning debris
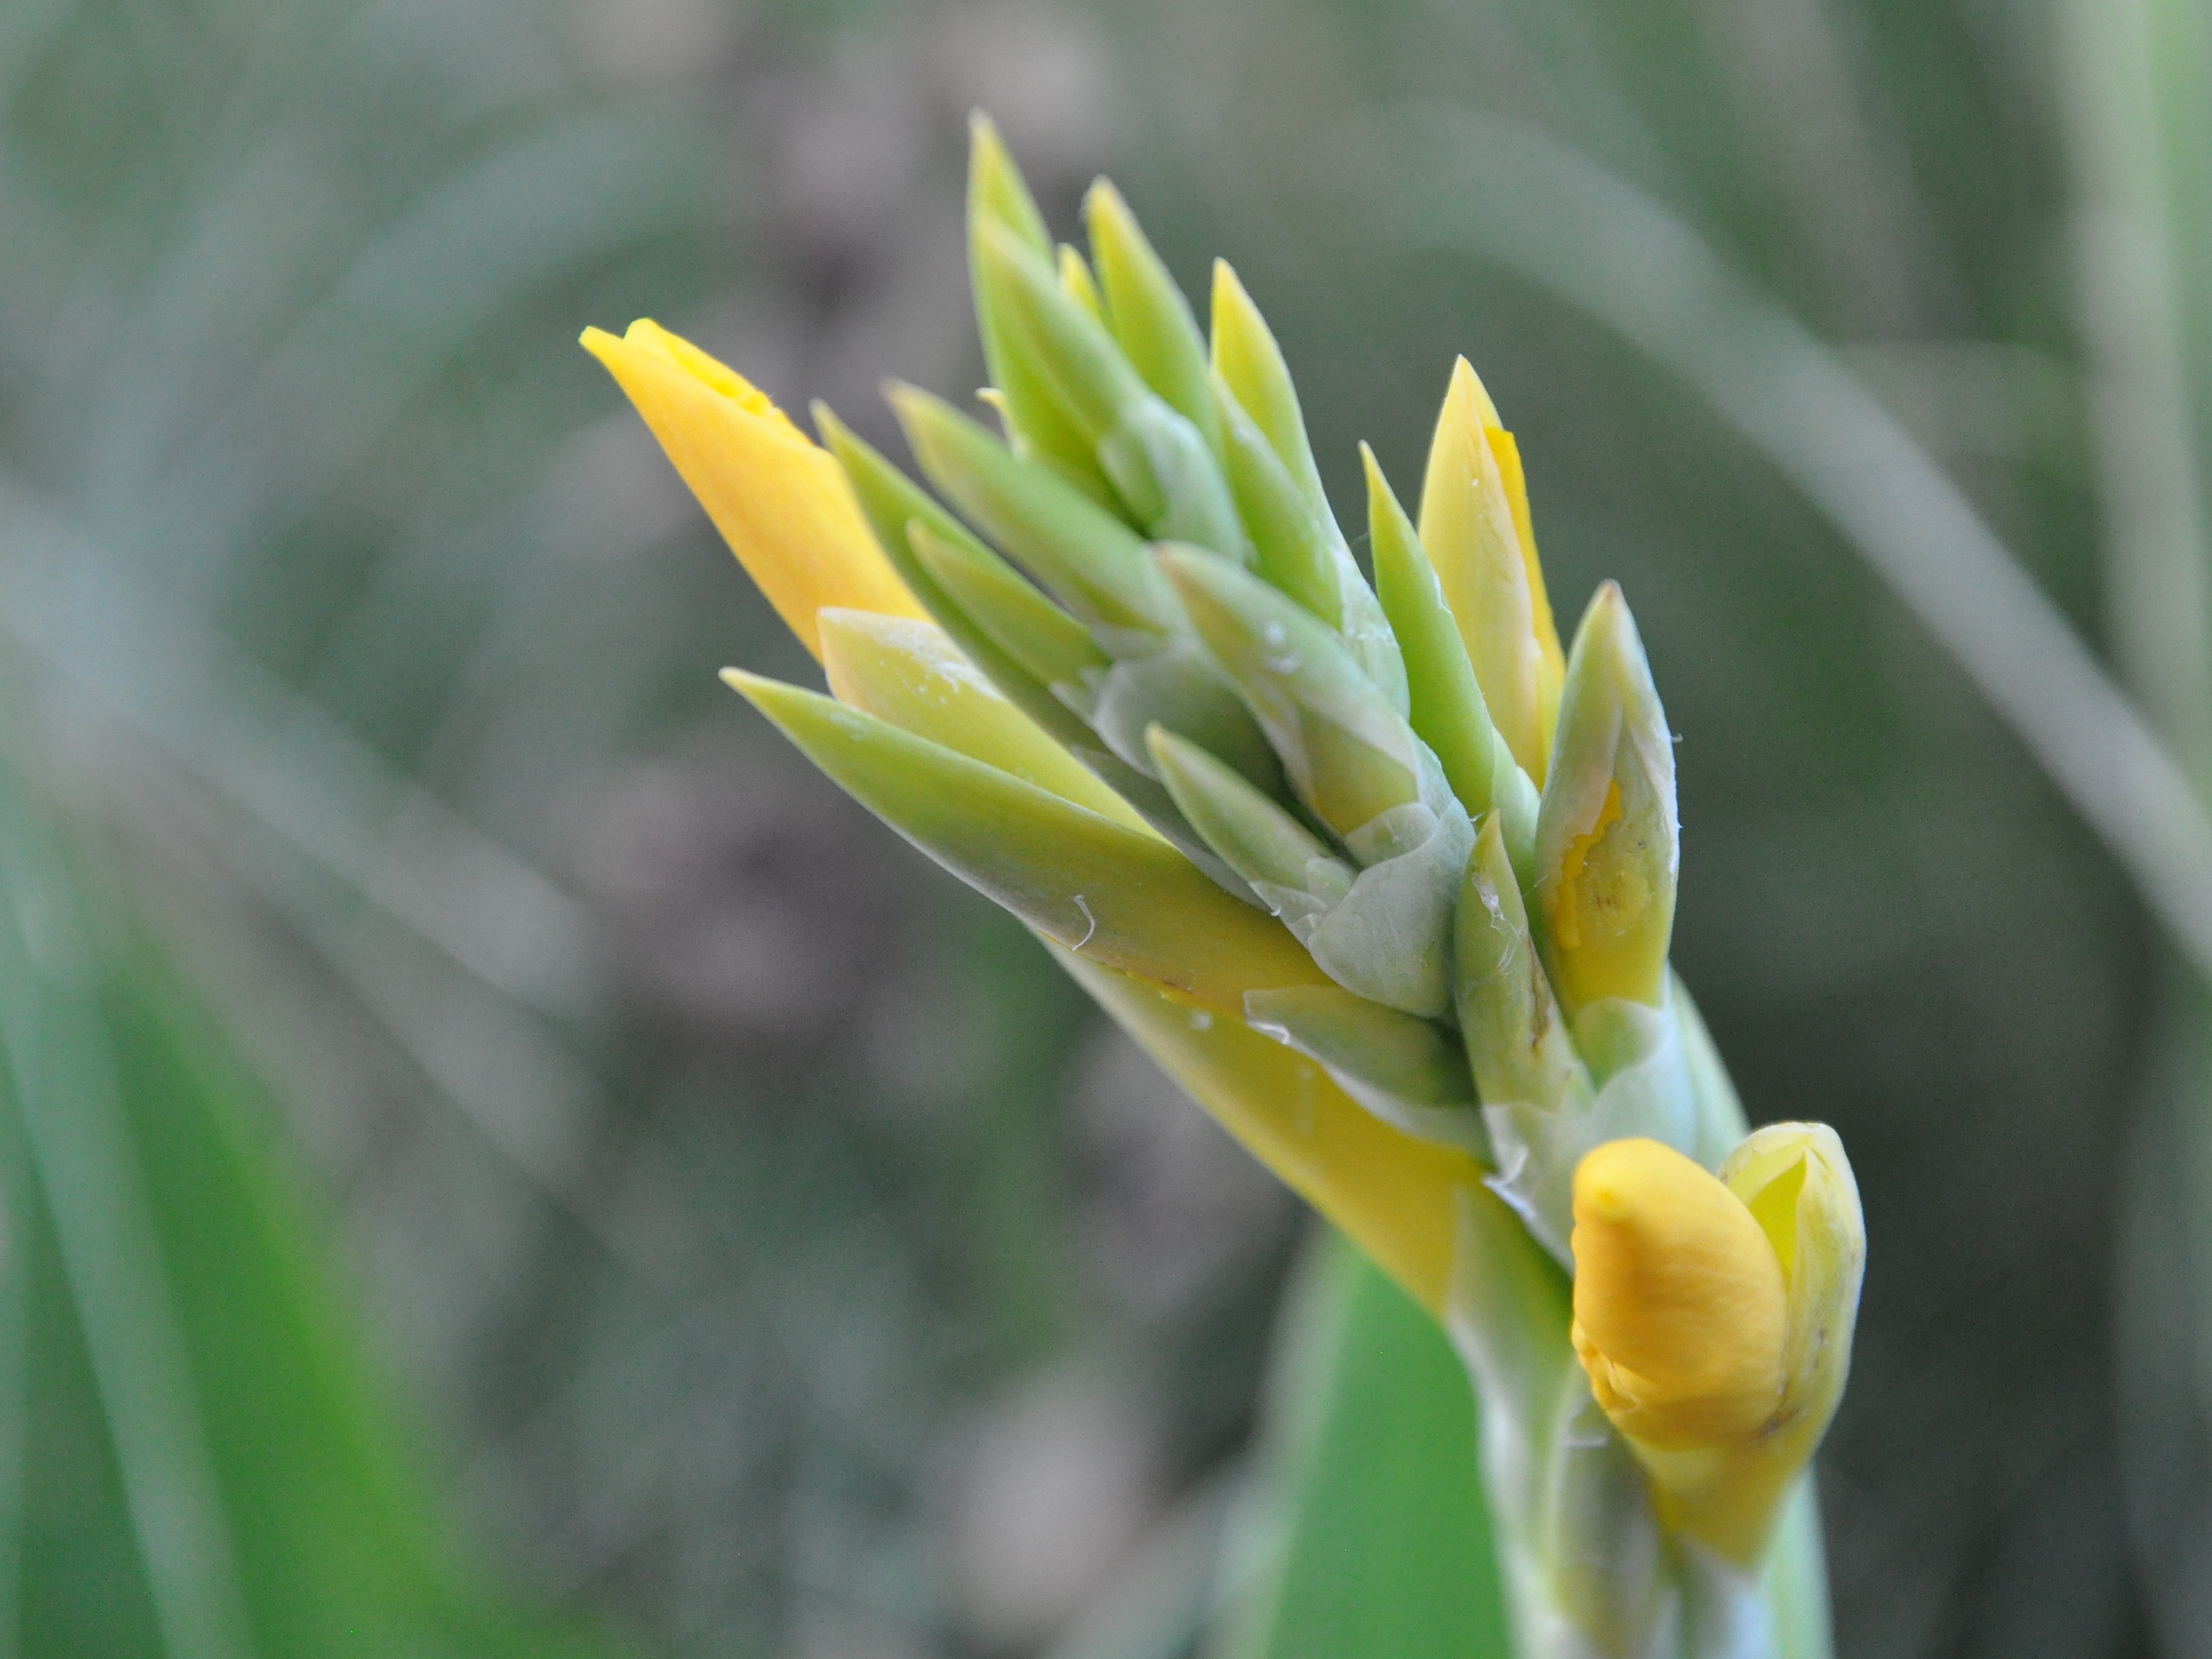
On a brighter note, I received this gorgeous yellow calla lily in a pot last year. Mike transplanted it for me in the front garden and it’s spreading its proverbial wings.
Yellow Canna lily, a thank you gift from FDC
It’s flowered twice and is now showing off its interesting seed pods as the plant goes dormant.
Calla lily seed pod
Our garden is densely planted now, requiring careful thought when a new plant joins the mix. This calla lives in the shadow of the Magnolia tree, not far from the deck. I love the cheerful display.
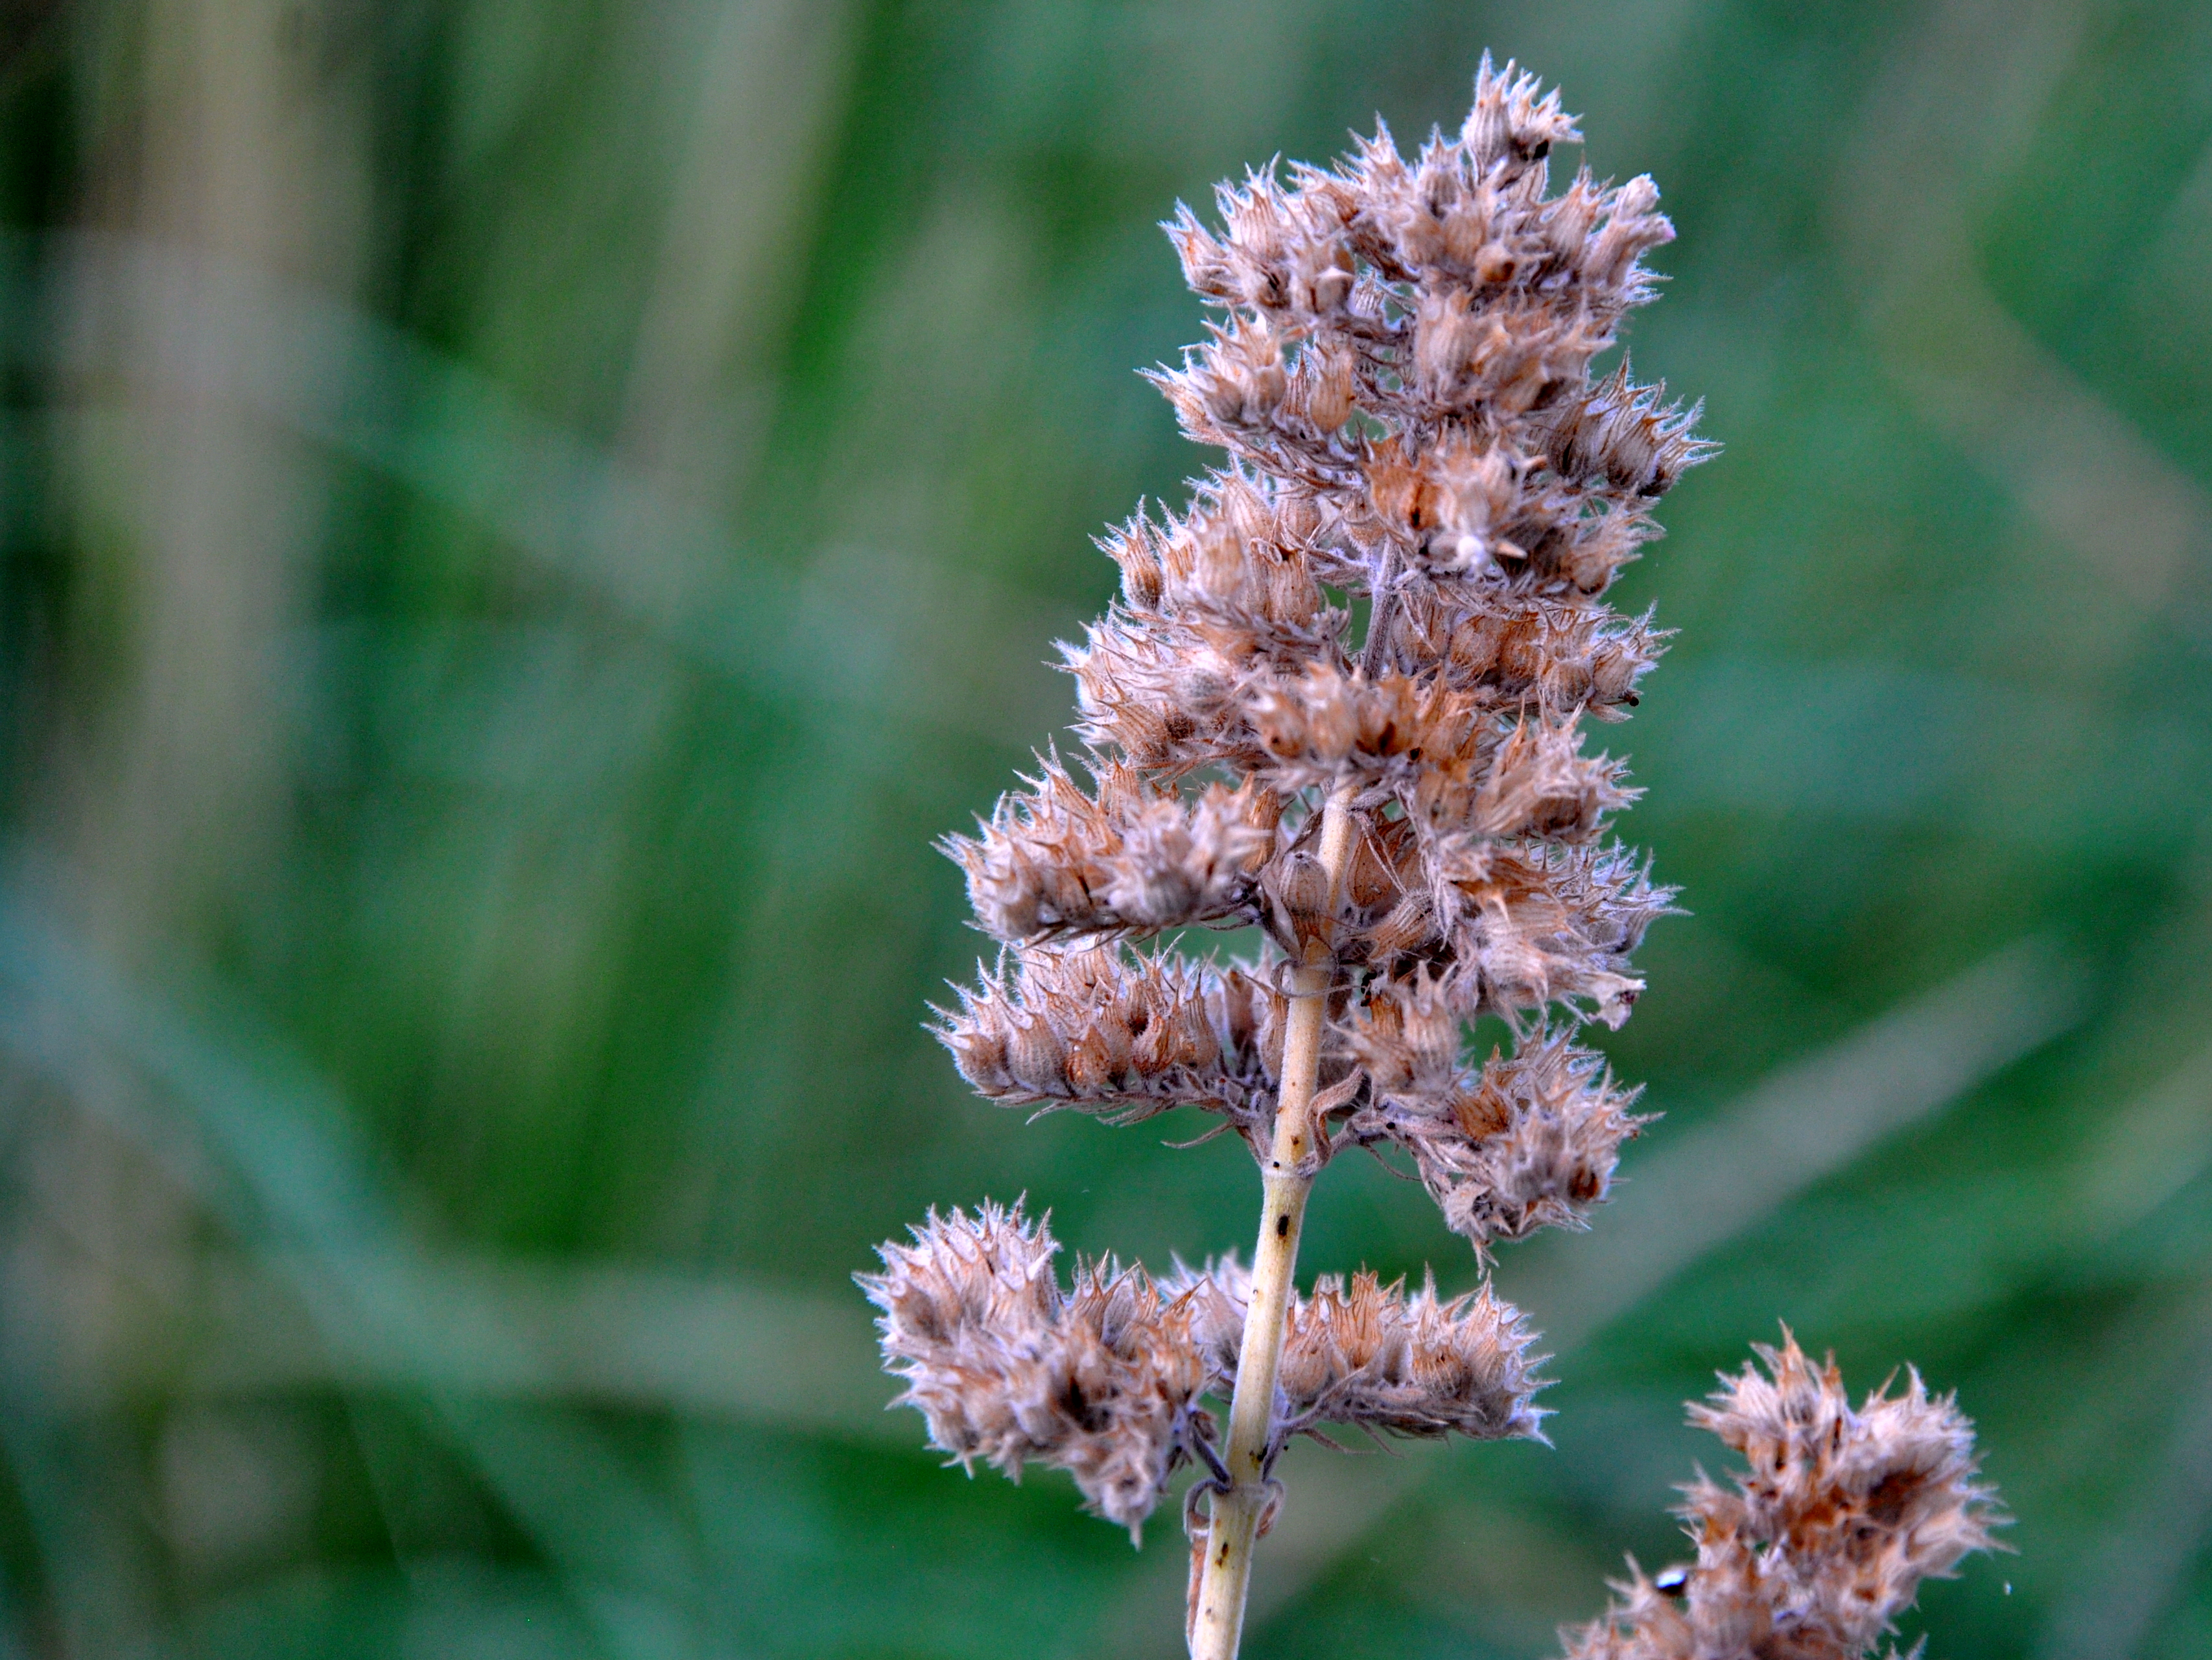
Nepeta going to seed
Nepeta, also known as catnip or catmint reseeds every year. It’s an herb, pleasing to cats, and humans alike. It produces a subtle scent in the garden unless of course, you’re a cat.
Tessa enjoying the nepeta Mouse the cat lounging on the nepeta
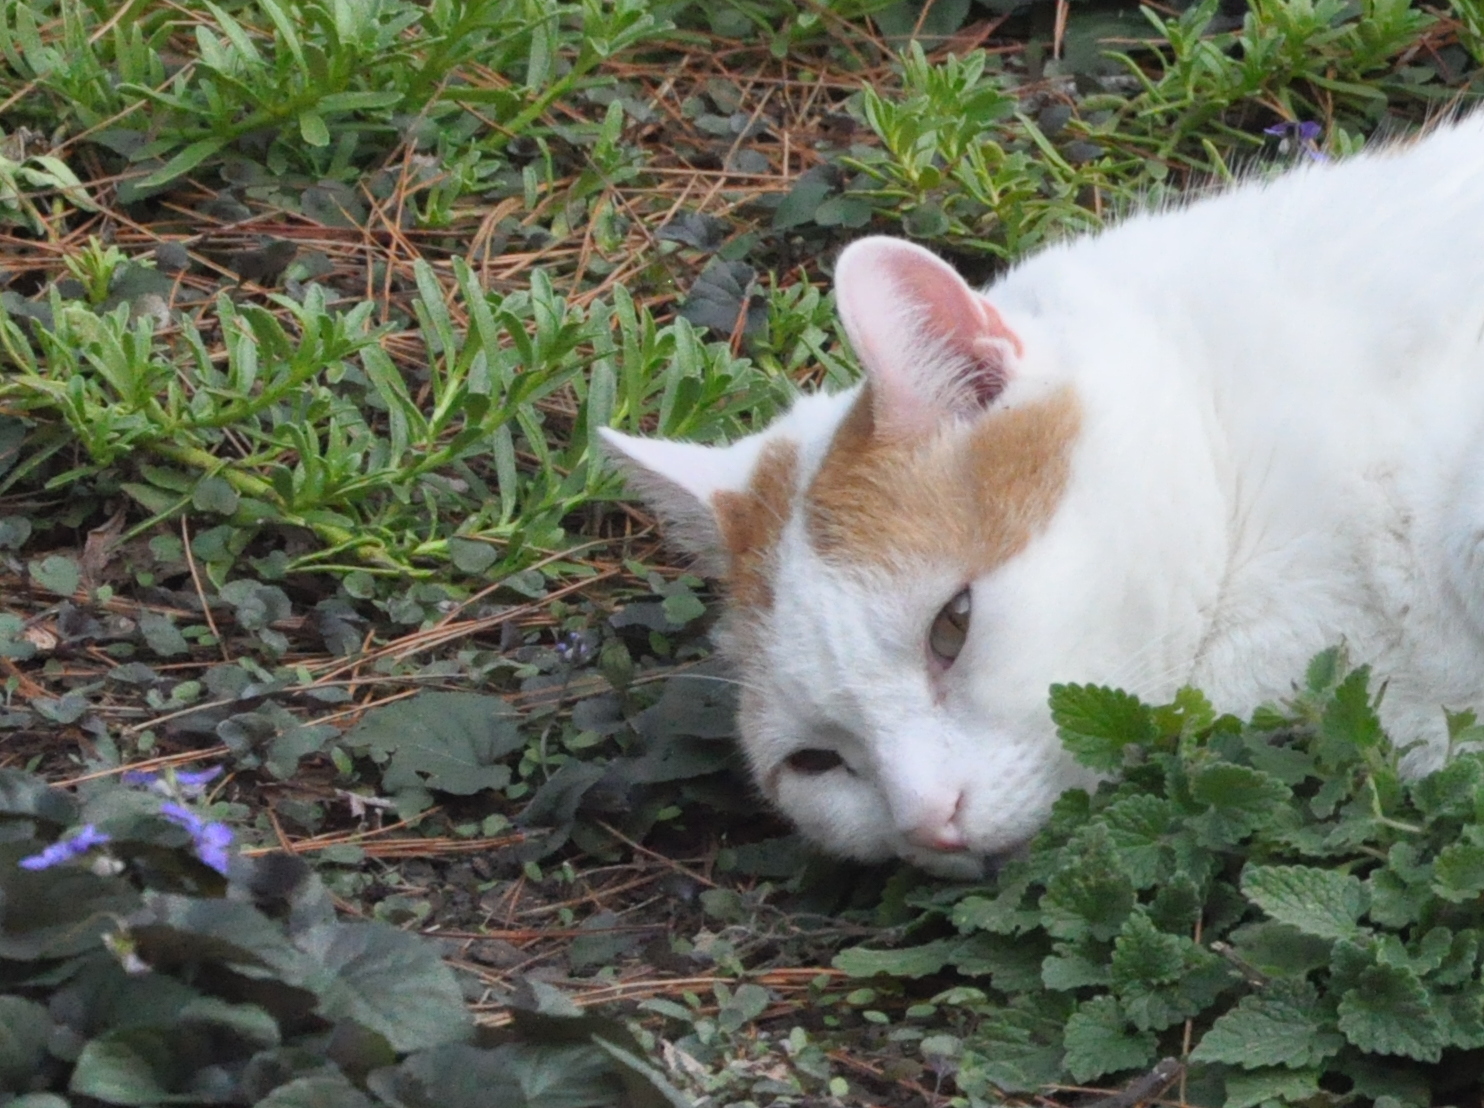
Lindy sleeping near the nepeta
Our cats become quite possessive of the plant near the patio, though Mouse likes to visit the plant in the side yard as well. We all have our favorites.
As the temperatures change, the nasturtiums return
End of season for the pink hydrangea
Succulents and nasturtium
The path is passable once again
As for anniversaries, I married this wonderful man 24 years ago today.
Celebrating then and now (Went Brothers Winery, Livermore | Winchester Mystery House fundraiser, San Jose)
It was the first day of autumn that year as we wed on the grounds of Wente Brother’s winery in Livermore. The day went by in a blur, so I’m grateful for the photographs that help solidify the memories. I’m grateful for Mike every day and for our life together.
I’m grateful for you, too, dear reader, for continuing to show up and read my posts.
This year I’m crafting Halloween cards from my garden. It’s been a lot of trial and error, but I’m having fun.
My approach to crafting Halloween cards is often catch-as-catch can. I’ll spot a few things here and there in a store, or I’ll pull together items from my stash. No two cards are alike, and I’m fine with that. For me, that’s part of the fun.
Halloween cards from prior years
This year, using my Big Shot die-cutting gadget, I’ve made several chlorophyll prints from the abundant pumpkin leaves trailing across my garden. The leaves transferred beautifully, revealing wonderful detail.
Pumpkin leaf impression
With success on my side, I decided to try making prints using the bright yellow pumpkin flowers. I had to be judicious, because although the pumpkin’s leaves last for weeks, the flowers close and drop within a day or two. I made flower impressions in phases, also enjoying the process.
Though the flowers transferred well, the color didn’t last. Within a few days the brightness faded to a soft peach. I used the imprints anyway, for a subtle suggestion of color and because they work well with my Halloween theme.
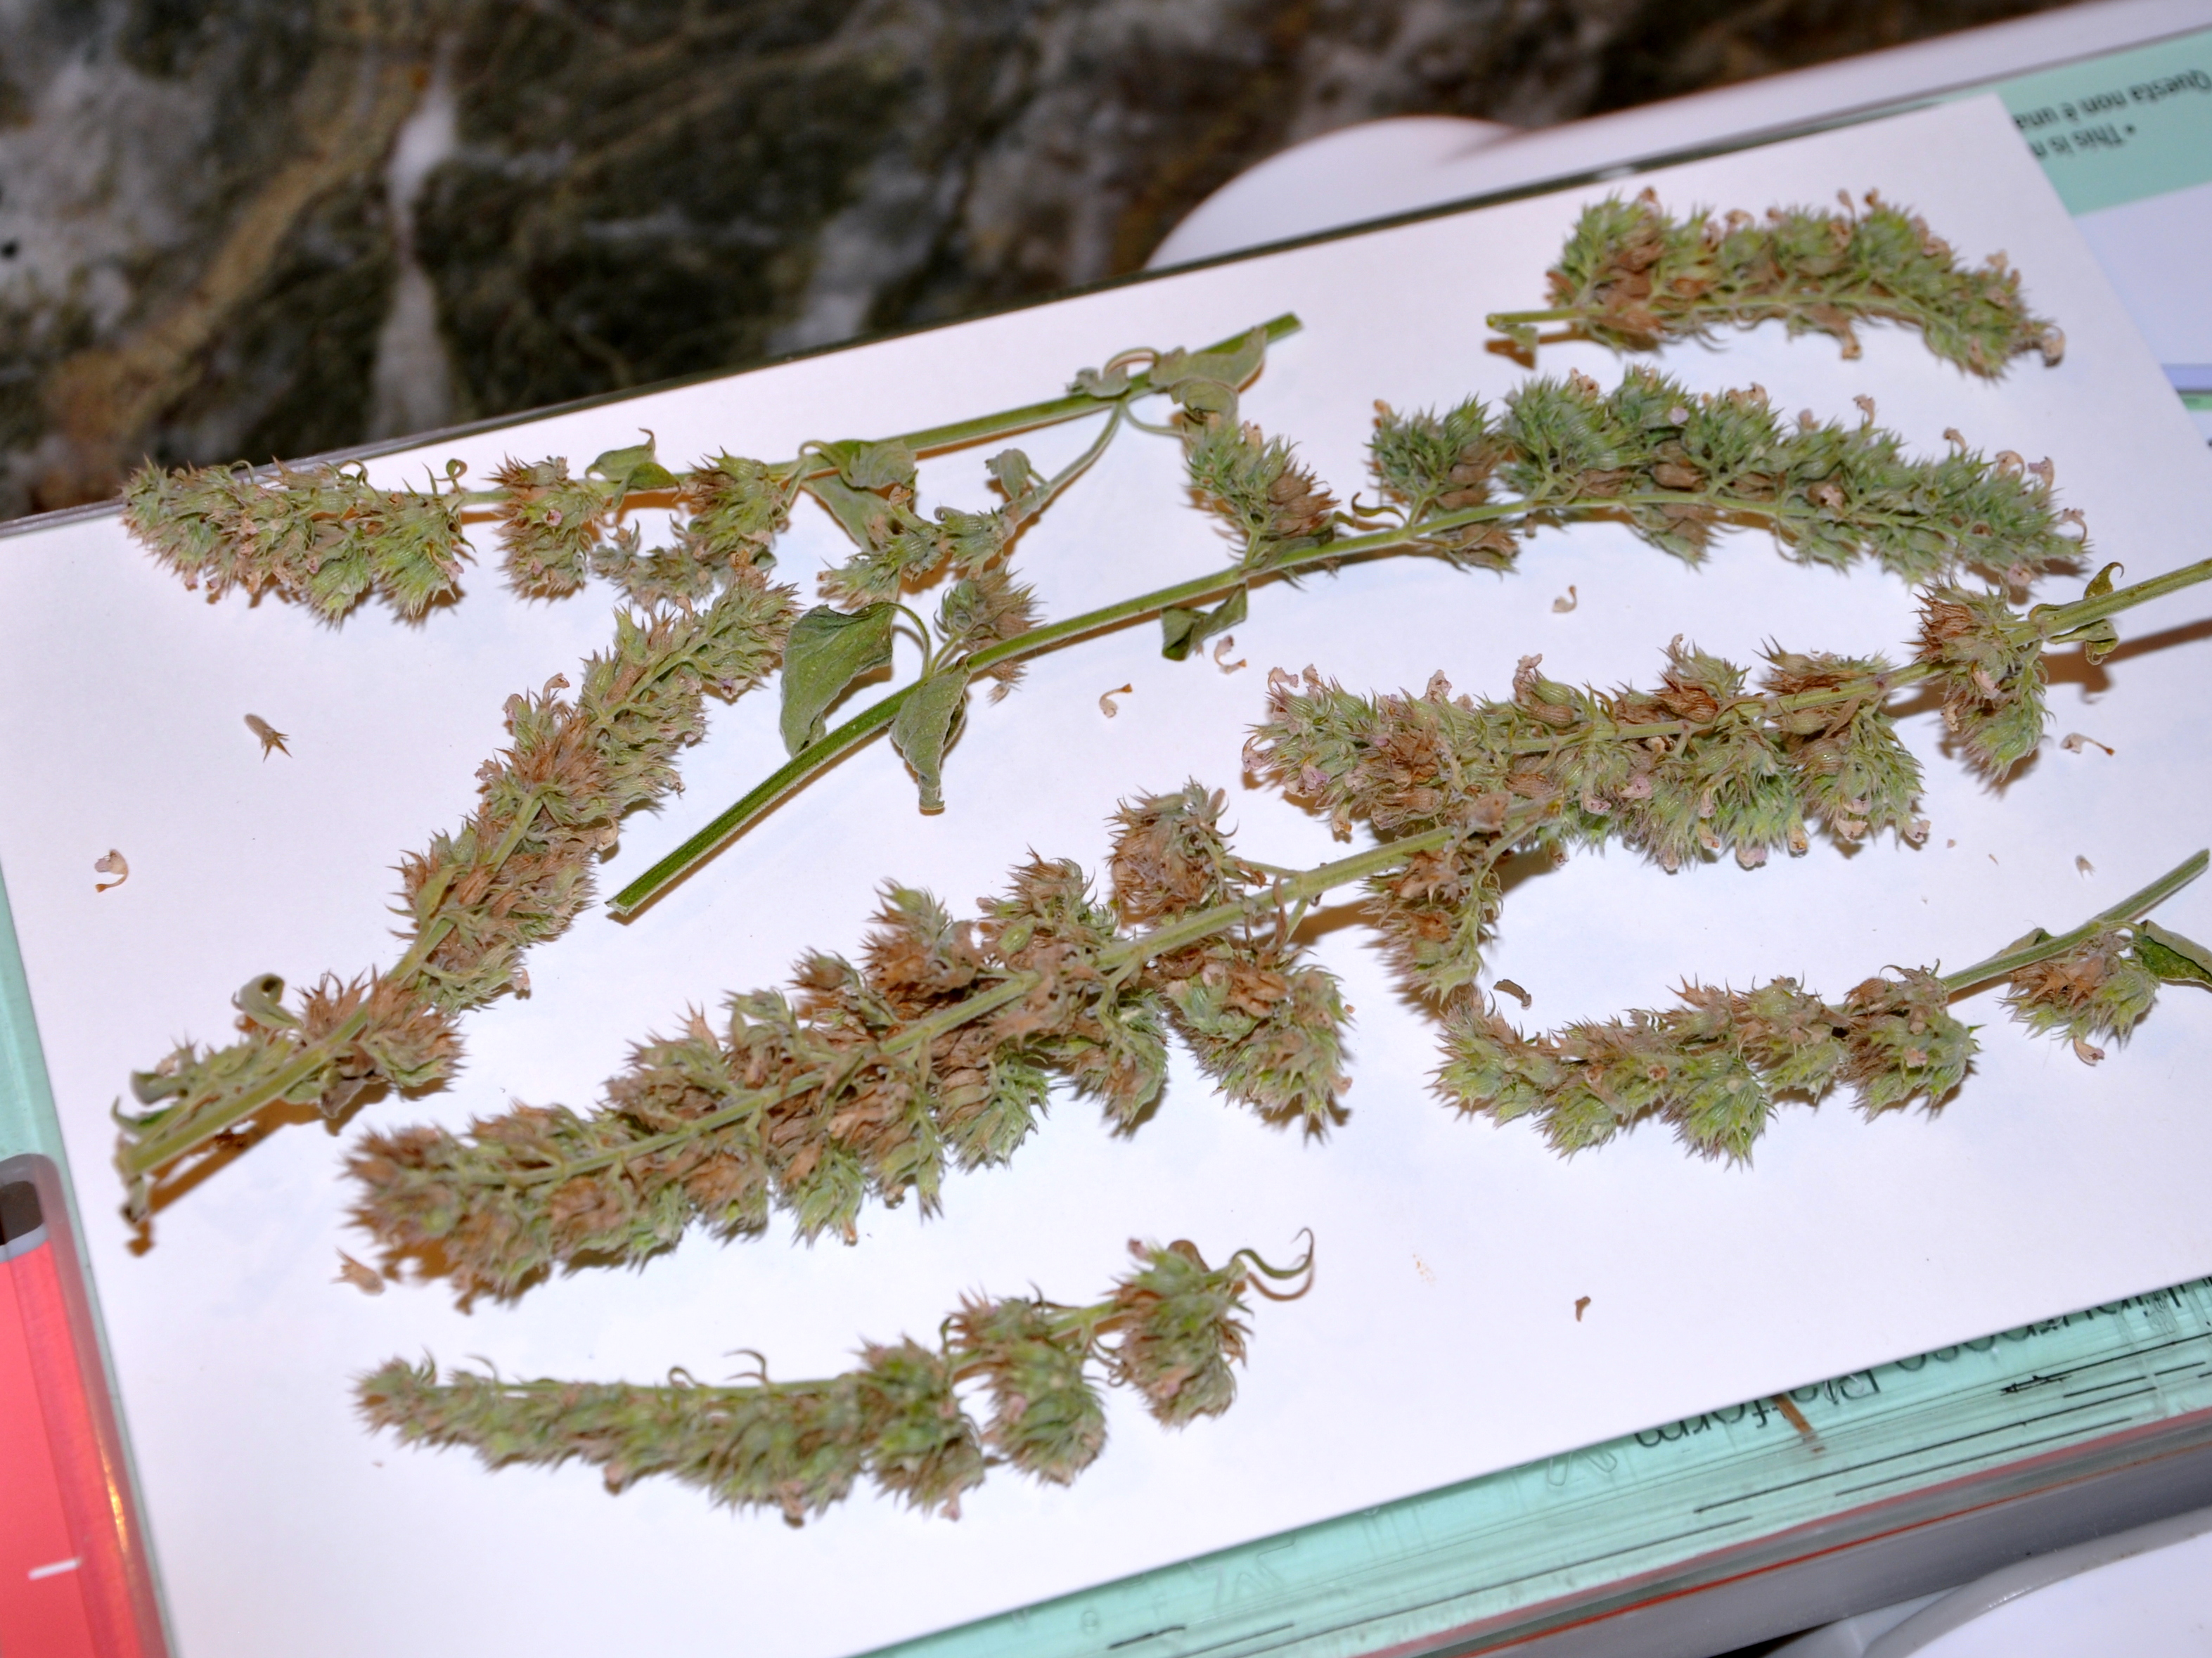
Since I was on a roll, I braved the crazy heat, and gathered a few more items: the drying flowers of the Nepeta (cat mint) and some of the dropped pine needles from a neighboring tree. The dried flowers left a mottled brown impression, perfect for the pumpkin stems, also known as a peduncle.
Nepeta going to seed
Drying Nepeta flowers and leaves on paper before pressing
Nepeta impressions for peduncles and background
The pine needles made a wonderful textured paper. I wanted to suggest the ribbing you would see on a real pumpkin. It’s subtle, but I like the way they turned out.
I rubbed yellow ink on the textured paper, then stamped two more layers of the stamp set with orange and russet ink. After stamping two different pumpkin shapes, I cut the small pumpkin images using my Big Shot. I made the stems using the Nepeta paper print.
Dried pine needles taped to card stock
Removing the pine needles after passing it through the Big Shot
Textured paper
Textured paper, rubbed with yellow ink
Close up of colored, textured paper
Beautiful texture for pumpkins
Two more layered pumpkin stamps
Die cut pumpkins
Pumpkins on the face of the card
Here’s the design:
I used a clever die to create the black card-stock base of the card. I used the pumpkin leaf imprint on one side and the flower imprint on the other. In the center I cut two small pumpkins from the pine needle paper using a clever die and stamp set that allows layering for a more realistic effect. I cut the stems, known as a peduncle, from the mottled Nepeta print for a natural look.
On the left, pumpkin flower imprint, on the right, a pumpkin leaf imprint
Z-shaped card with window
Z-shaped card laying flat
Card in the open position
I’ve had this small rubber stamp for years.
This particular style is labor-intensive, so I only managed to make eight cards. That said, I did a lot of experimenting along with using new tools. Next year I’ll be able to apply what I learned. I punched squared out of all the different materials I used and mounted them on a piece of card stock. This will help me remember the different techniques for next year.
I used the remaining chlorophyll prints to make traditional fold-over cards. They were equally fun. I’ll blog about them later this week.
Are you trying something new and interesting?
Note:
To my friends out of the area, please know that we are safe. There is an active series of fires, 100 miles north of San Jose. Though we are sheltering from the heavy smoke as best we can, we are not in danger. My friends in Santa Rosa are safe. You can read more at the link below.
Transferring the image of a leaf to paper has been around for years. It’s only recently though, that I learned of a technique using a Big Shot, one of those crafting tools I’ve put off buying for years.
Sizzix Big Shot
Dawn, who blogs at Petals. Paper. Simple Thymes created these beautiful cards using the technique. Dawn’s post and her stunning cards were the impetus I needed. I bought a Big Shot so I could give the technique a try. I’m sharing the Big Shot tool with my sister, Sharon, who makes all of her own cards. We bought some fun dies for her to use for her holiday cards this year.
As Dawn says, this is a wonderful opportunity to combine two loves: gardening and paper crafts.
According to Wiki:
Chlorophyll (also chlorophyl) is any of several closely related green pigments found in cyanobacteria and the chloroplasts of algae and plants.[1] Its name is derived from the Greek words chloros (“green”) and phyllon, (“leaf”).[2] Chlorophyll is essential in photosynthesis, allowing plants to absorb energy from light. – Wikipedia
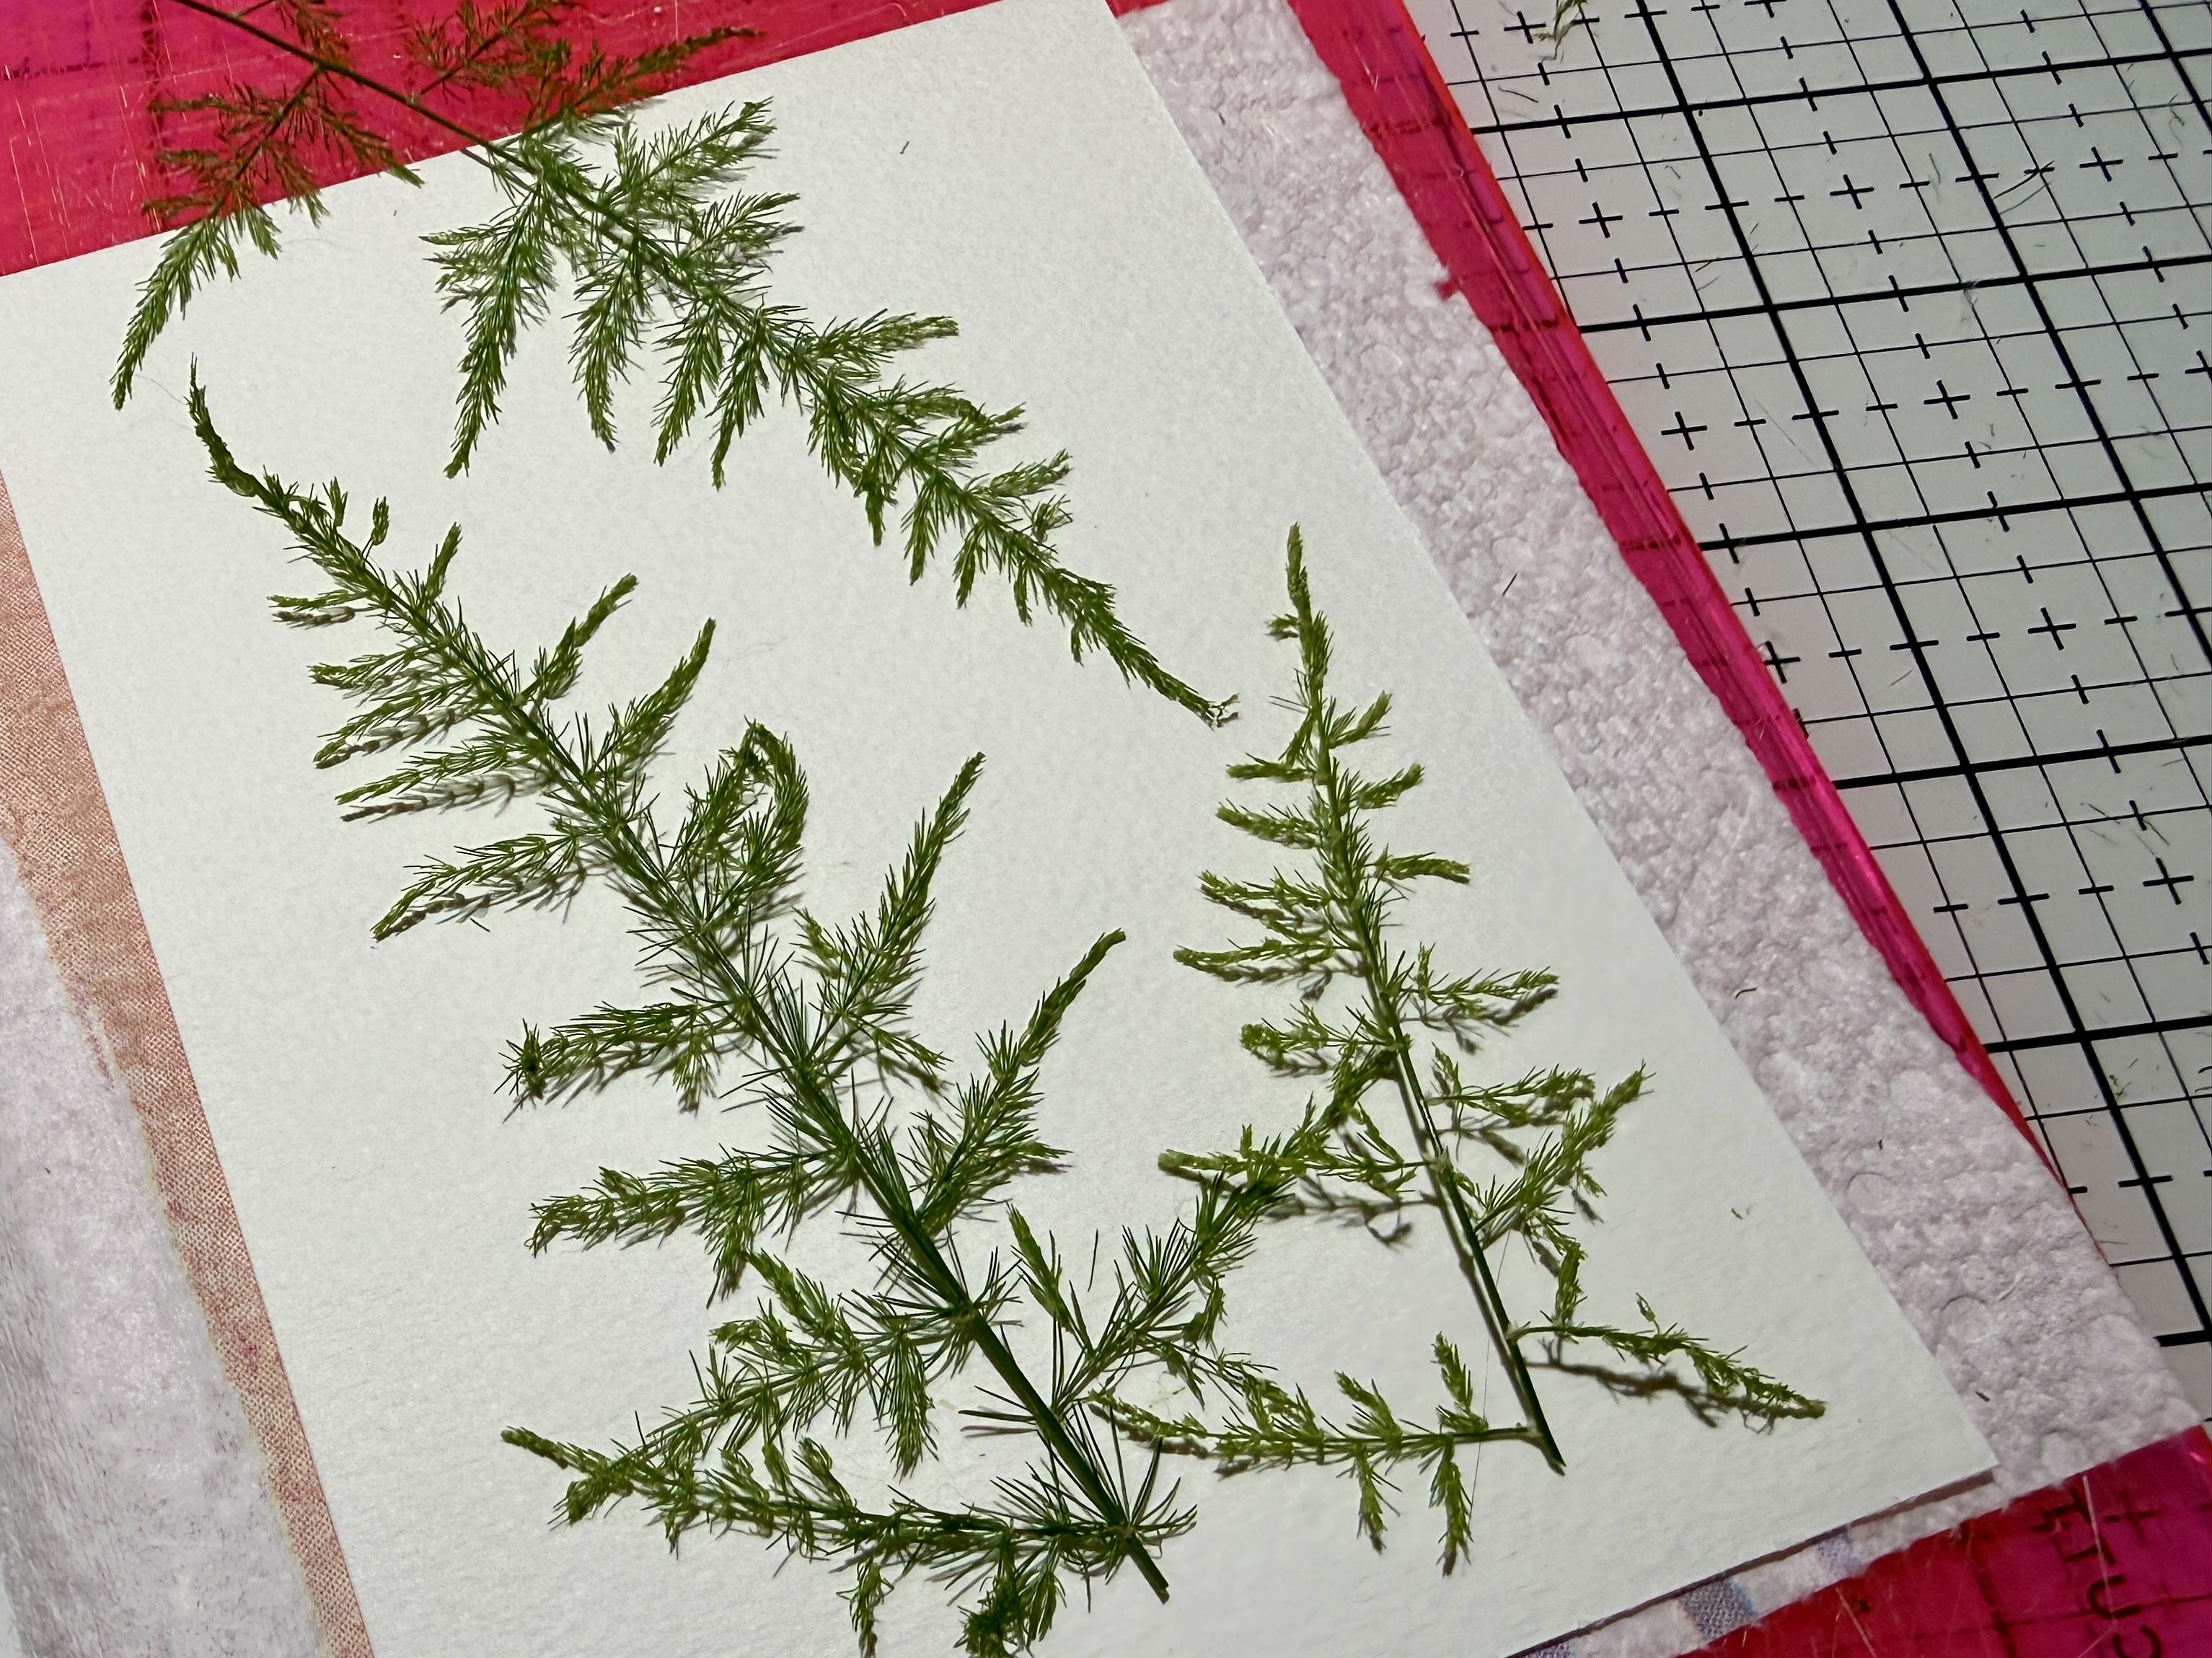
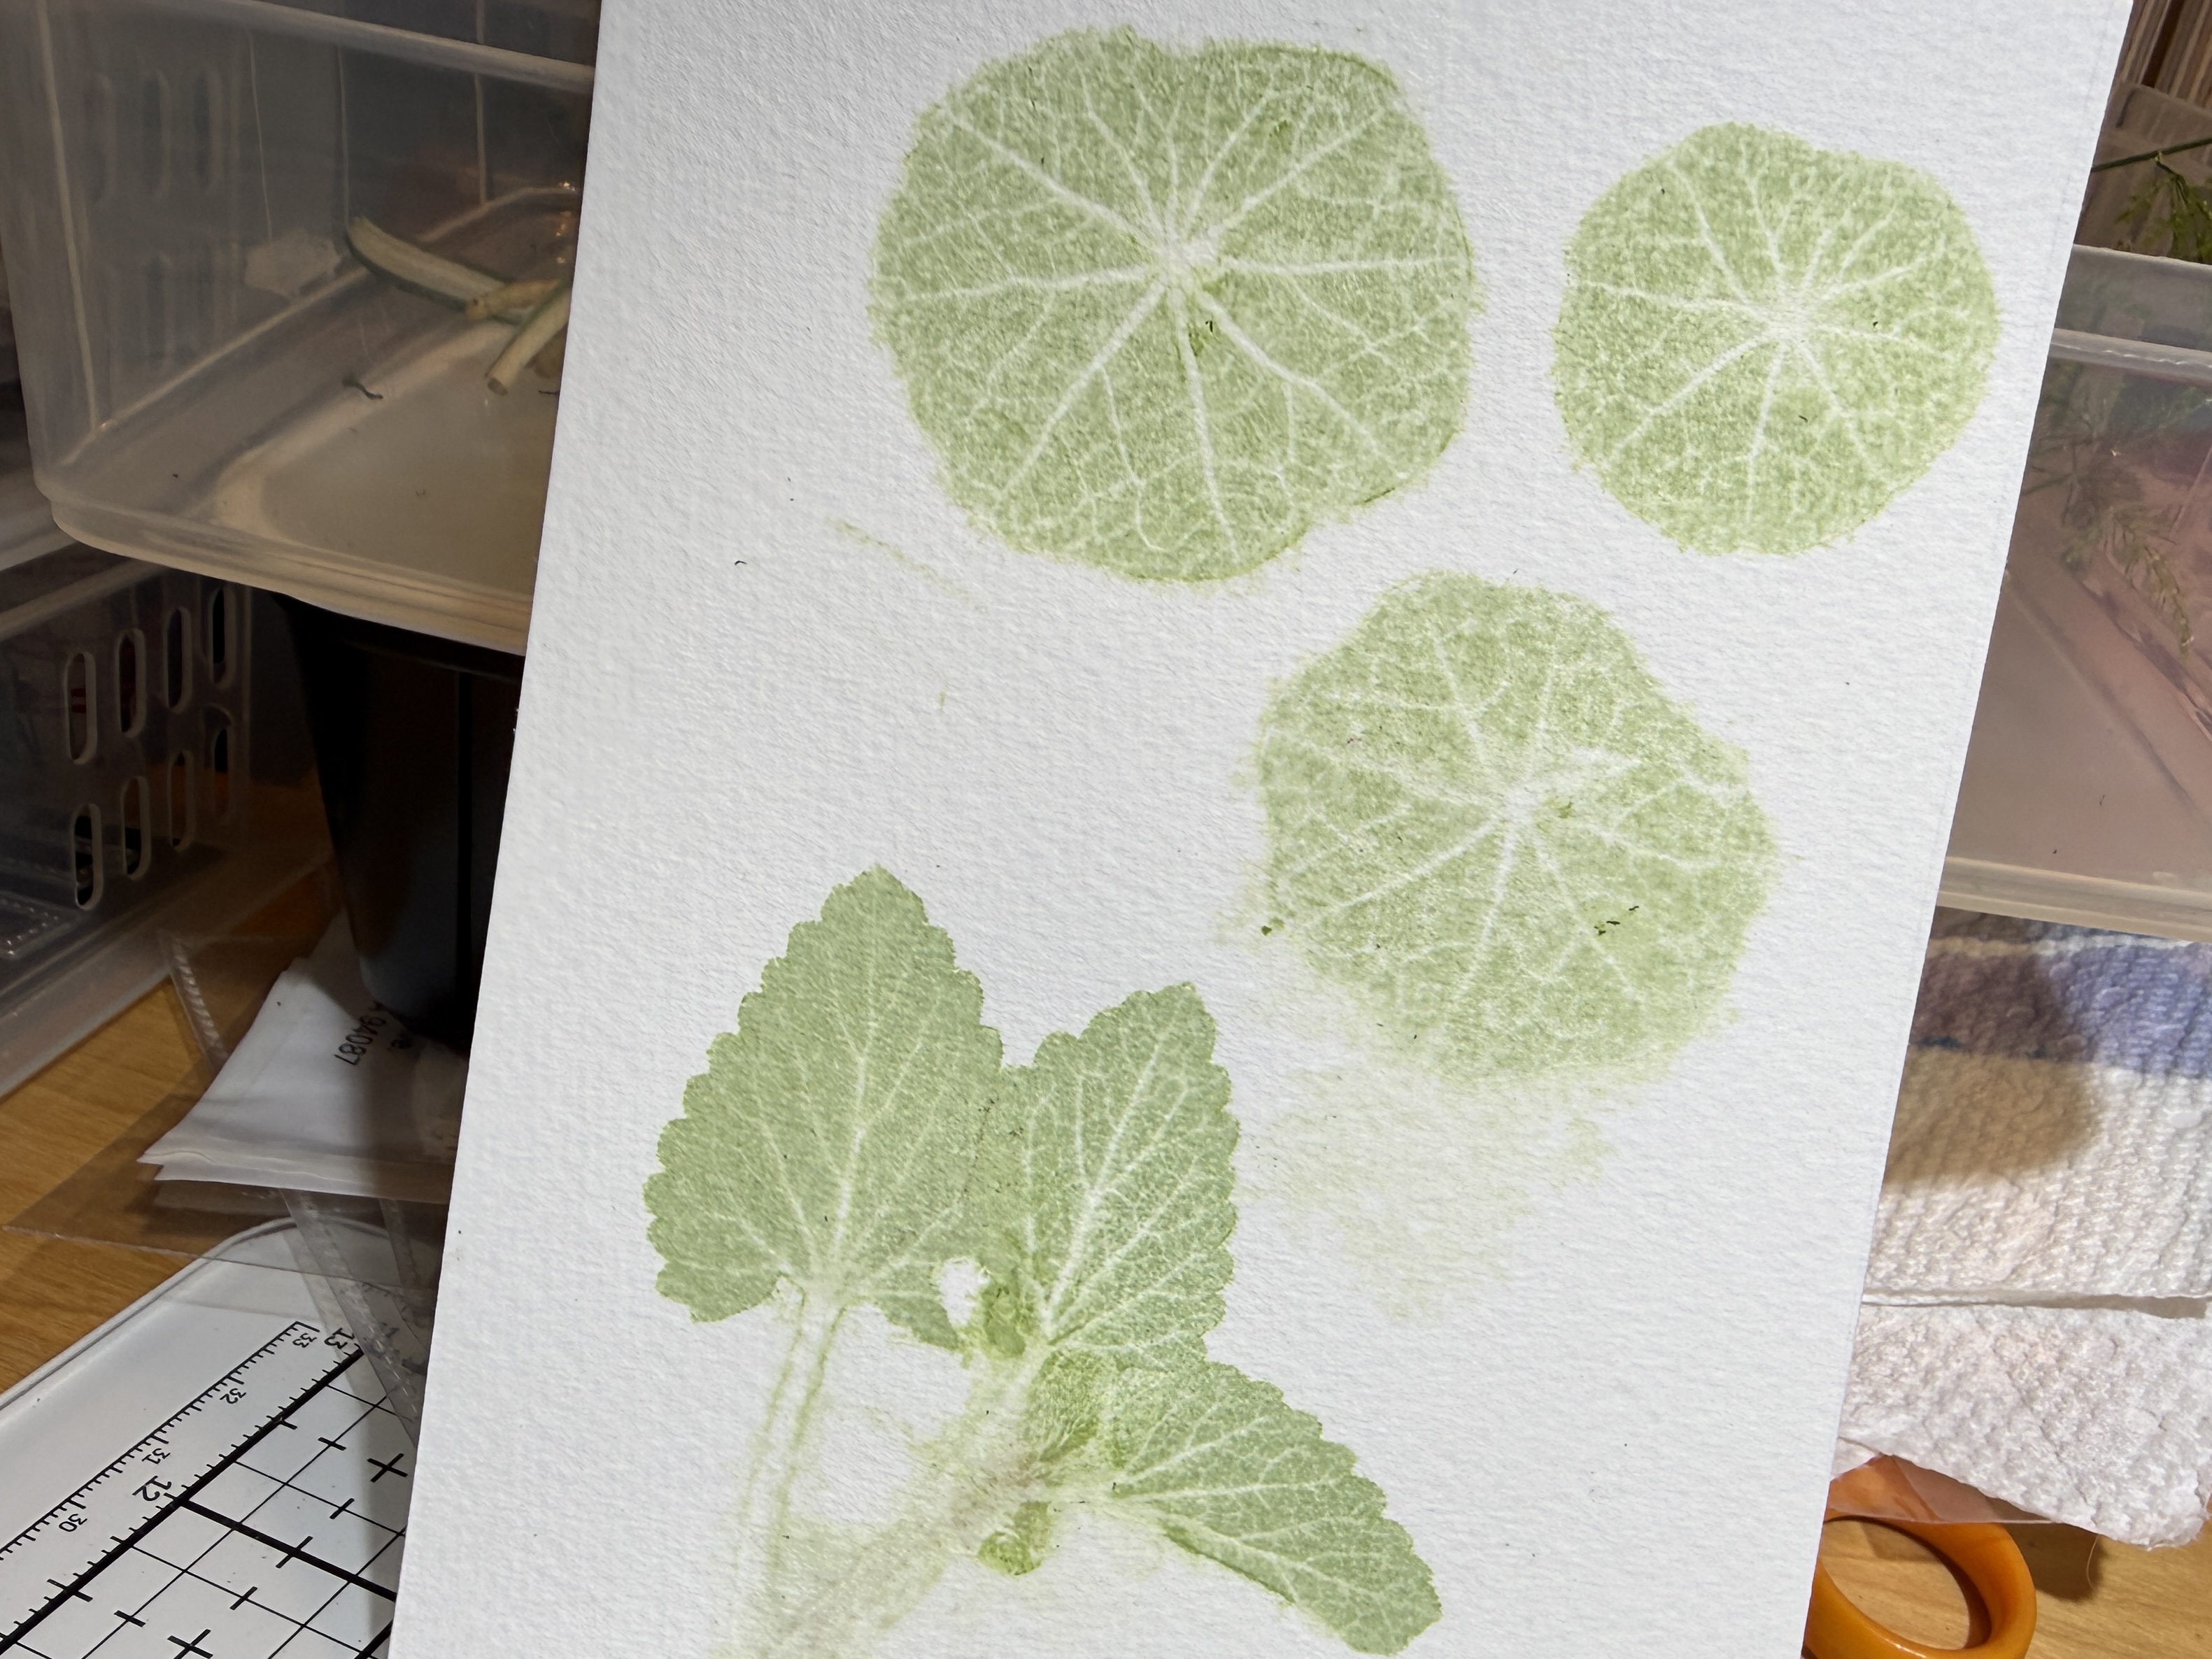
The technique is simple. You sandwich a leaf or petal between a folded piece of paper, run it through the Big Shot, and the green pigment created by the chlorophyll transfers to the paper. As Pauline King would say, I’m at the messy stage of this process. I’ve yet to make a single card, but not from lack of trying.
I gathered several scraps of paper from my stash to get started, including an old file folder, card stock, old-fashioned typewriter paper and vellum.
Paper: File Folder * Verdict: so-so
Paper: Watercolor * Verdict: Nice most of the time but not for all plant material
Paper: Velum * Verdict: It looks like a Rorschach Test
I quickly learned that all paper is not created equal. In the end it was a scrap of watercolor paper that worked the best. It absorbed some of the natural moisture and showed off the texture of the plant material to good effect.
My collection of leaves were a mixed bag as well. Some were so wet and juicy, that they produced images that were half leaf imprint, half splat. My prints are definitely not ready for prime time, but I am having fun.
I’m still trying to get a good imprint from my coleus leaves. They’re a beautiful mix of red and green and sometimes purple. They’re also heart-shaped. If I can manage to get the impressions just right without the extra moisture they’ll look terrific on a card.
My favorite imprints so far are the fern and the Nepeta.
This imprint is from my lacy fern, a plant I’ve carted around with me for nearly thirty years. It went from a small, seventy-nine cent plant on my nightstand, to owning a corner of our garden. I love it.
Chlorophyll transfer of fern and sweet pea petal to watercolor paper
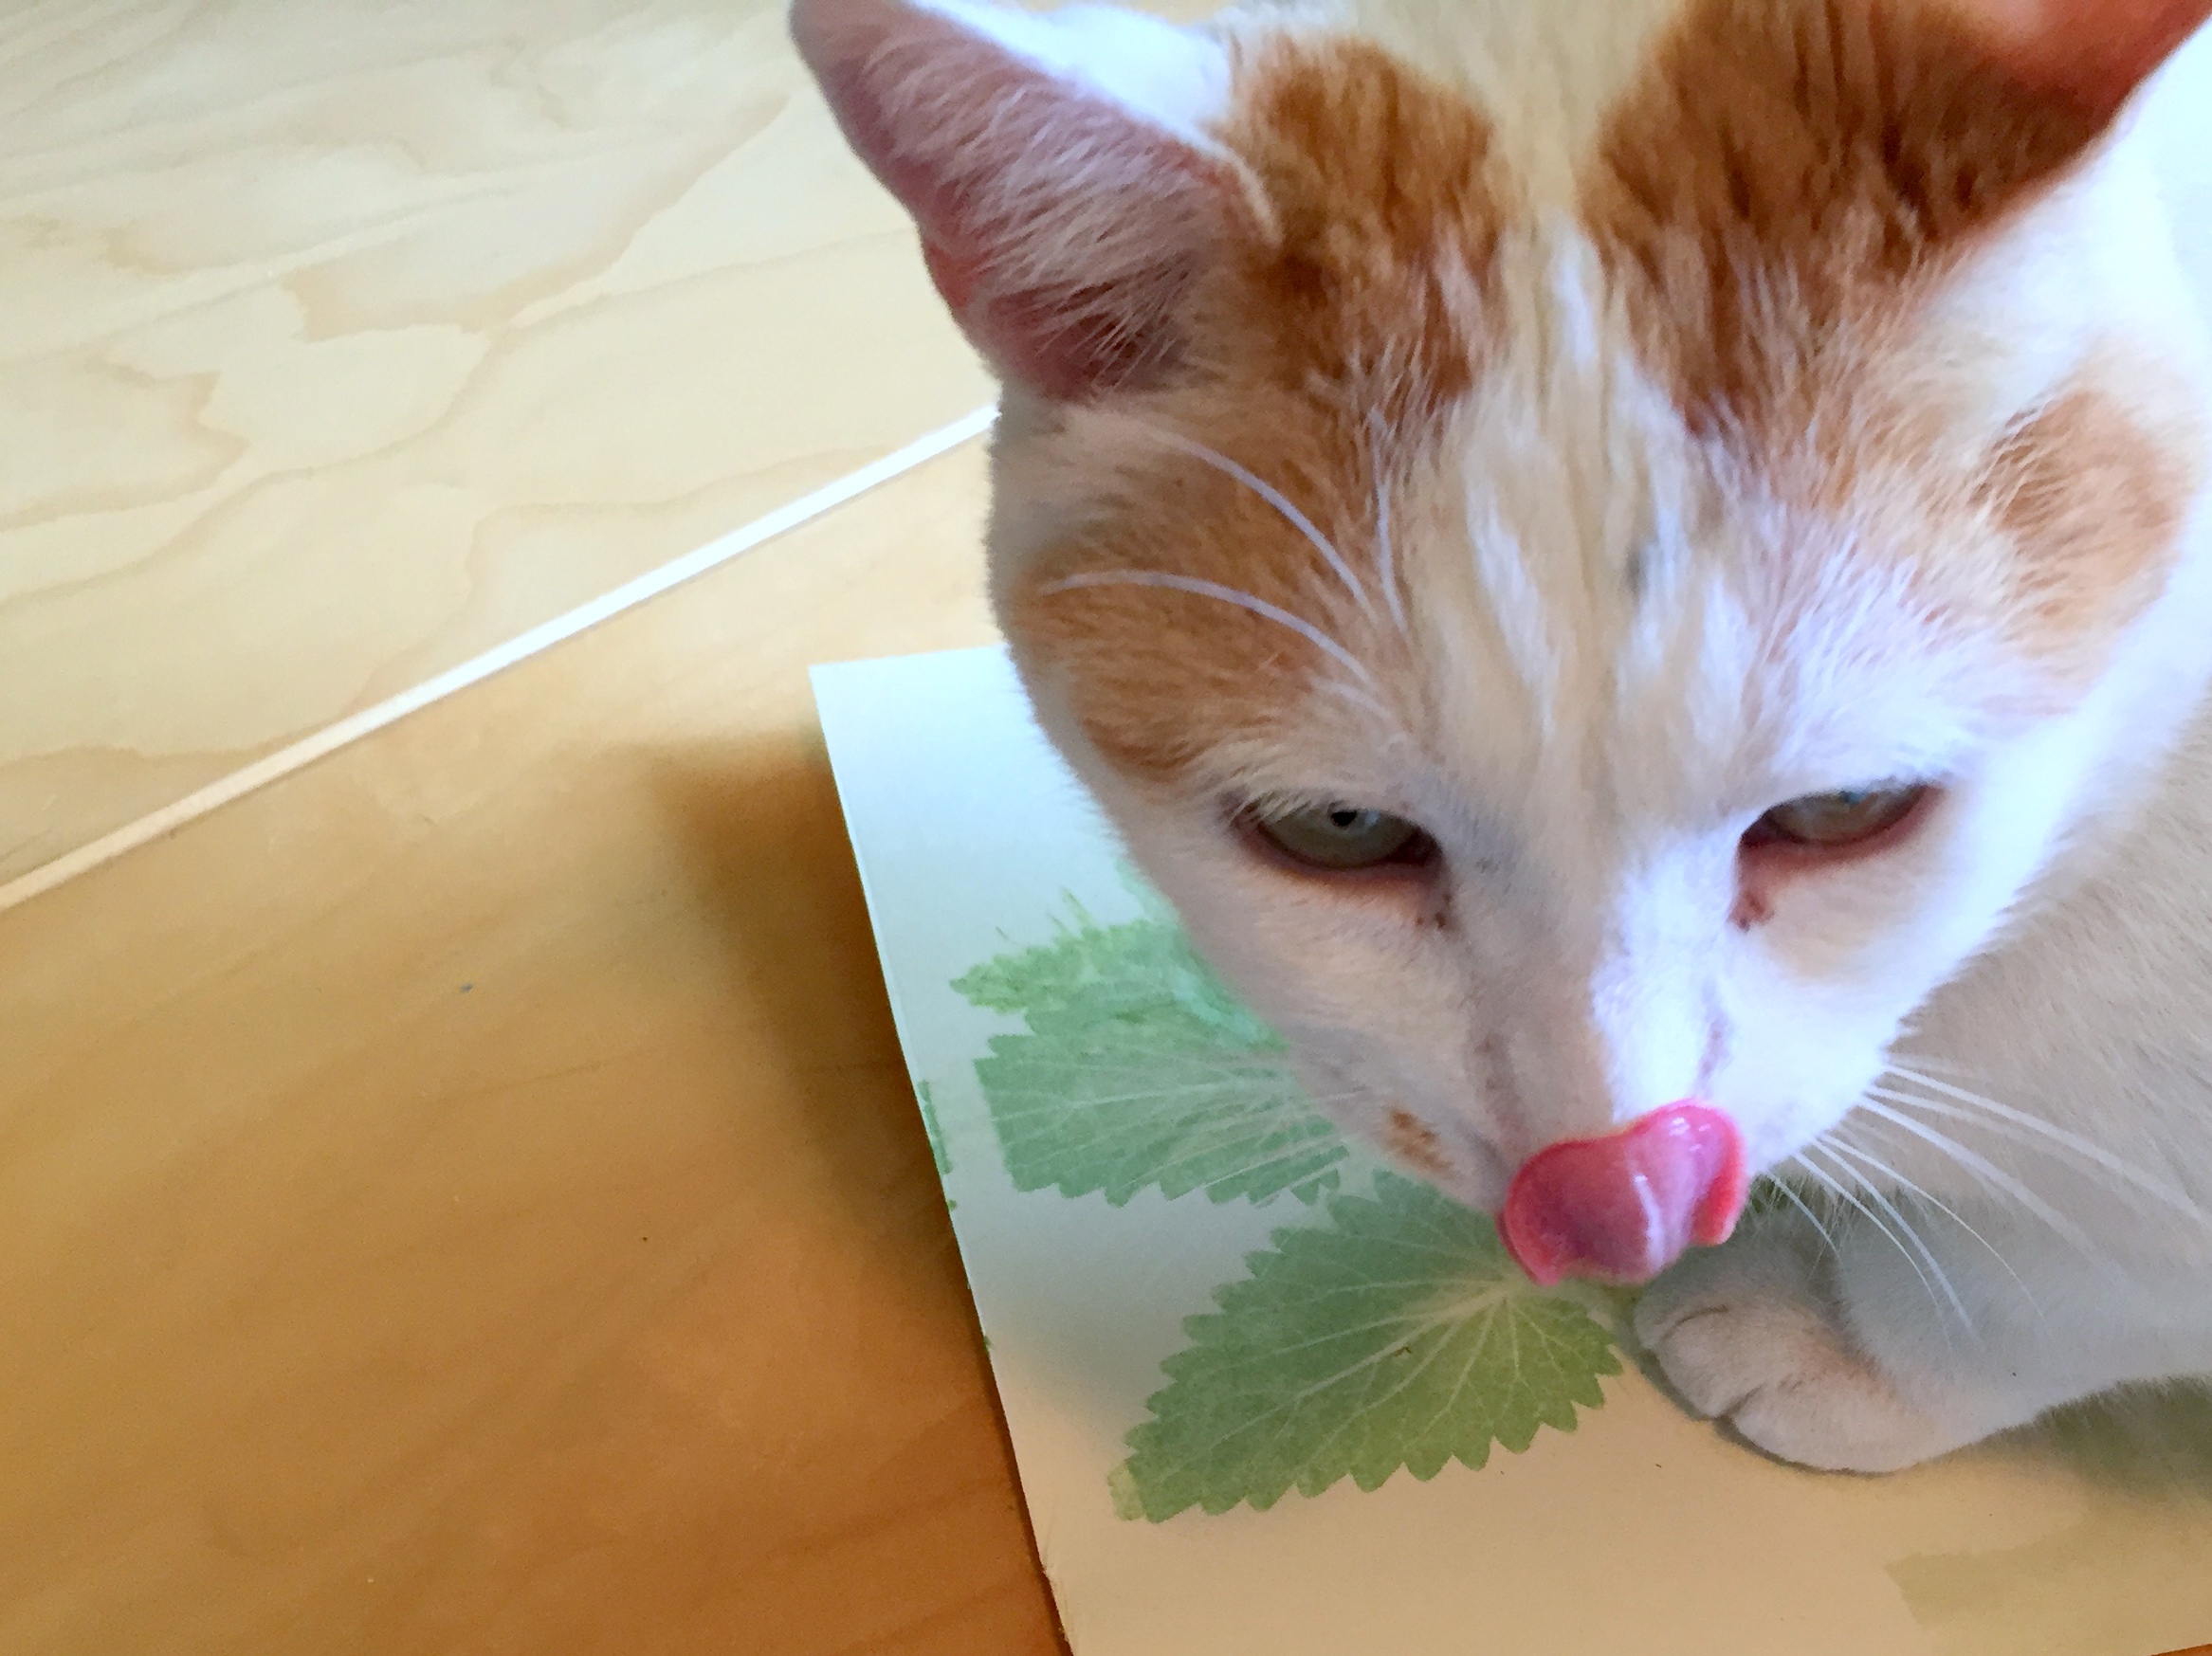
The Nepeta or cat nip also transferred well, and comically, retained some of its potency. Mouse the Cat hopped up on the desk and enjoyed the scent.
Mouse Approved
Nepeta (cat mint) transfer
I’ll keep experimenting and hope to eventually have some bona fide cards to share. I tossed the small samples, but gathered the rest of them into a sample booklet, held together with baker’s twine and a few strips of Washi tape.
Chlorophyll Sample Booklet
Have you been working away at a technique for a while with mixed results? Let us know in the comments below.
It’s always nice to bring your hostess a bunch of flowers from your garden, but what about the resident cat? Since kitty usually calls the shots in feline-centric households, it only seems fair. I propose catnip on a string.
Not all cats are susceptible to the intoxicating oils of the catnip or cat-mint plant. When presented with a fragrant bunch of greens, about half of all cats will respond. Be sure to offer your gift in an appropriate setting. If kitty drools green catnip all over your hostesses white couch, you probably won’t be invited back.
Hostess Gift Catnip with a Bow
I hope this is organic
Shall I go ahead and give it a try?
Tasty!
Catnip Bouquet Tutorial
Turn at least 70% of your growing space into a catnip garden.
Pinch a few leaves from the plant once it’s fully grown.
Tie a bow around the bunch (six inches or less, please so kitty doesn’t get tangled).
Deliver to your feline host.
If you follow these instructions carefully, you’ll be invited back again and again. Enjoy!
The verdict is in, at least as far as our cats are concerned. It’s a resounding “yes” to fresh-picked catnip. I performed this highly scientific test in random order. In other words, whatever feline showed interest first. Since Lindy, 10, had her eye on the plant, I started with her. She immediately dove into the lawn where I placed the catnip, rubbing her chin against the leaves. I pulled my hand away to take the picture, and she continued to nuzzle the leaves. Next up, Beijing, 15,who came by to see what all the fuss was about. She leaned down to smell it, rubbed it a bit, then picked it up and took a nibble. Tasty! Slinky, 2, is a wild one, frightened of just about everything. She took some coaxing, but once she got a whiff of the catnip she immediately took to the scent as well.
Neighbor kitty hung out on the fence, observing the tests and making sure I didn’t falsify the results and jeopardize my catnip seed funding.
Lindy-Lu gives it a Paws-Up
Beijing Finds it Tasty
Slinky Says Yes to Catnip
Neighbor Kitty: I’ve got my eye on you!
You can read more about the properties of Nepeta cataria, also known as catnip or cat mint here.
I’ve been scouting for the perfect spot to plant our catnip which needs full sun and easy feline access. I had pretty much resigned myself to planting in a low pot, when I noticed this bare patch of earth near the lawn next to the other mint. Kismet! er…catnip!
We have a pair of seed-embedded cards from a Petco fundraiser we’ve been saving to plant this spring. I’ll plant one now, keeping the second as a back up just in case this first batch fails to deliver. It seems a bit of a shame to cover these clever cards with dirt, but I’ll save a fortune on catnip.
Here’s a bit about catnip also know as cat mint from catworld.com. This powerful herb has many human uses and attributes, beyond a feline-high:
Catnip tends to have a sedative effect on humans. It is most often drunk as a tea.
It is also useful for settling an upset stomach. It has also been used to treat headaches, scarlet fever, coughing, insomnia & smallpox.
Catnip can also be used for cuts, studies show it has a natural healing quality. Crush fresh catnip leaves, damp them & apply to your cut. **
Pregnant women should avoid catnip.
It can also be used as an aromatic herb in cooking & salads.


You must be logged in to post a comment.