Thirty Days in the Garden: Projects

I enjoy a good garden project. I like refreshing things as needed, but I know my skill set. I don’t tackle the unmanageable.

I have two garden projects lined up. Now that I’ve committed them to my blog, I know I’ll see them through.

San Jose summers are getting hotter, so I’ve learned to tackle outdoor projects long before the summer solstice. If I wait, then it’s just too hot.

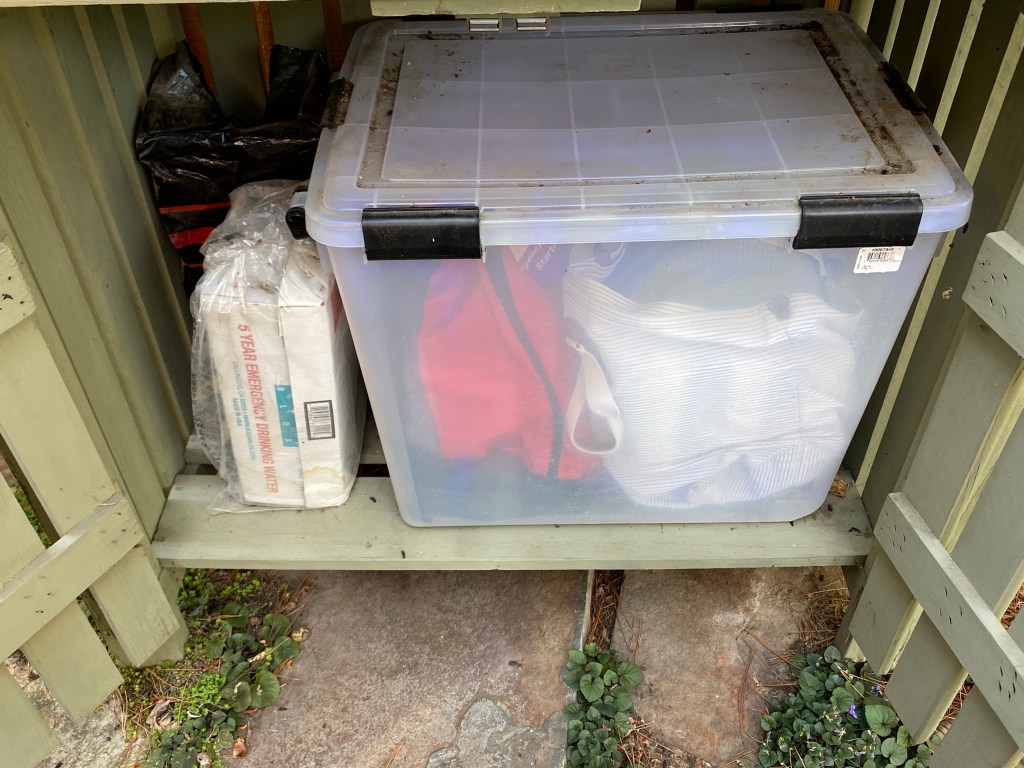
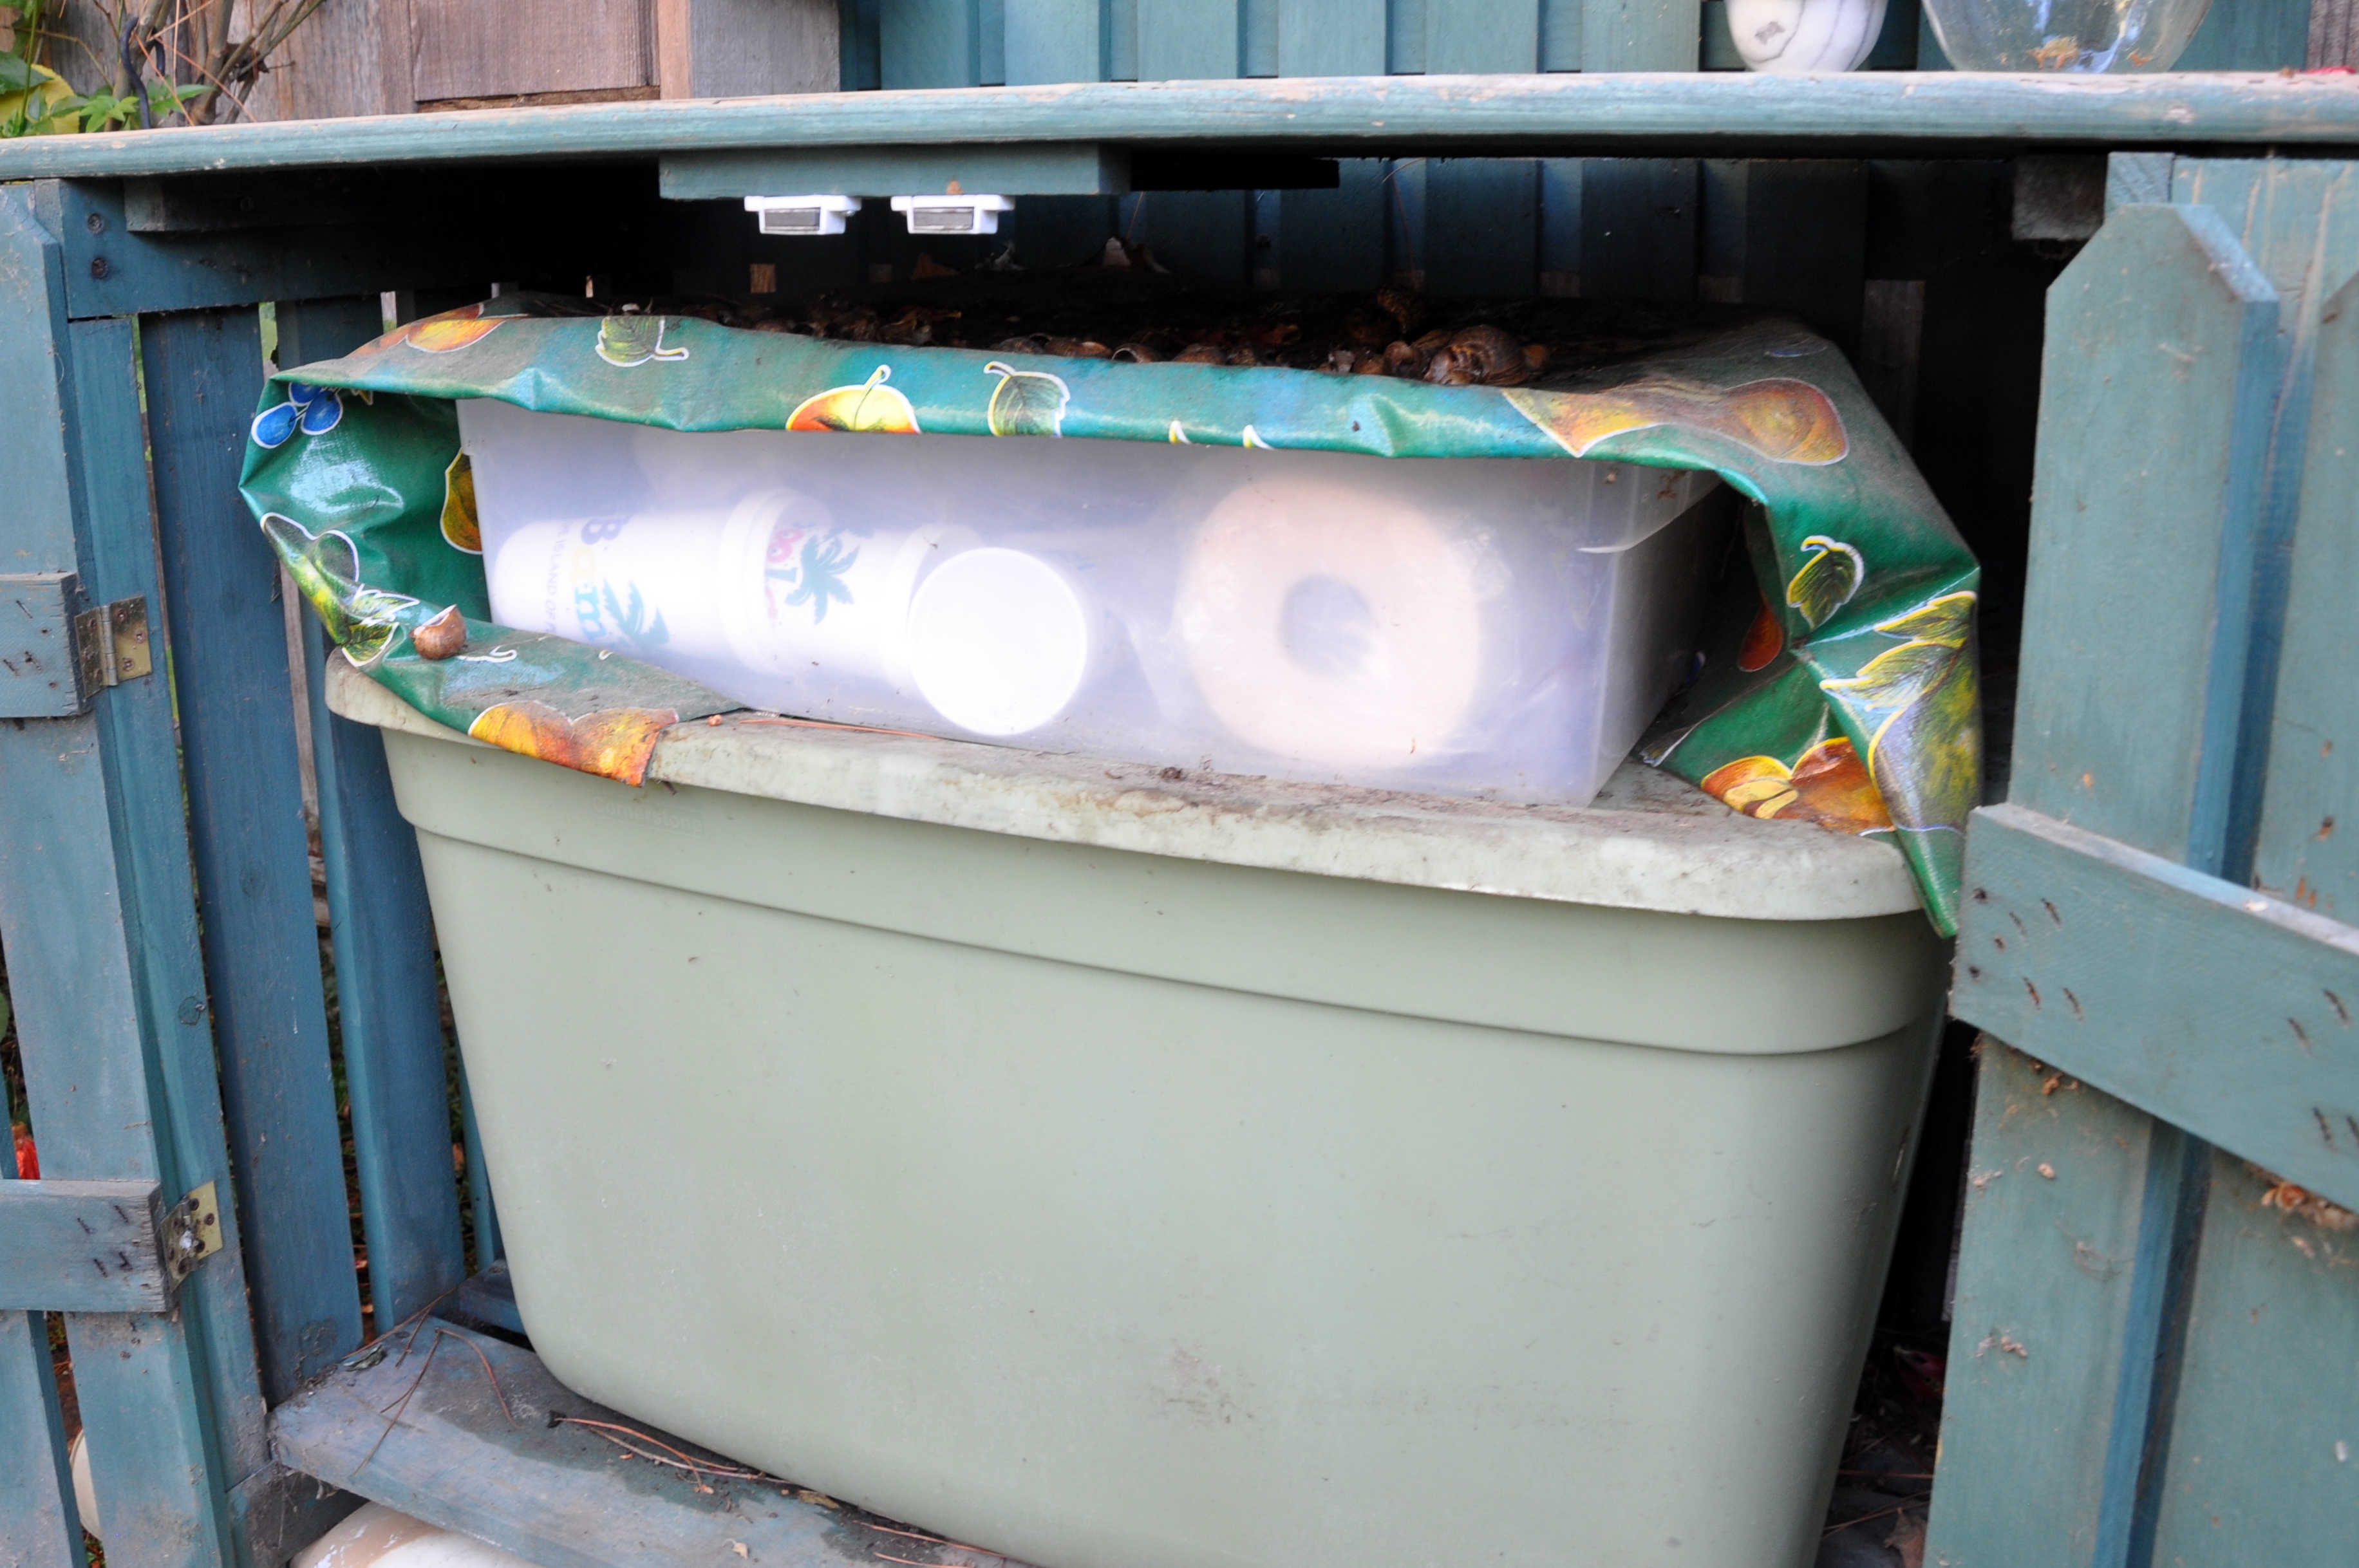
My first project is to replace the top of my potting bench. The bench doubles as a sideboard when we entertain (ha), and it also stores our emergency earthquake kit.

Our earthquake kit lives here

I sanded and repainted the entire bench a few years ago and it turned out well. I used chalk paint, a first for me. I stenciled a fern pattern on the lower half, a small detail that made me smile. It’s fun trying something new.

2018: The rest of the bench looks good, but the top is shot

Unfortunately, the surface of the bench didn’t last. The paint started to chip after just two years. Last year I decided to repaint the surface with house paint. House paint is made to stand up to weather, so it seemed like a safe bet. It was a production buying anything last year due to the pandemic, but we waited in line, got the paint, and came home. I sanded and repainted the surface and it looked ok.

This is what it looks like today.

2021: A year after house paint application

This time I plan to remove the boards and replace them with a solid piece of wood. I’m hoping the hardware store can cut a couple of notches for a snug fit, but if not, I’m happy to go with a rectangle. I’ll apply to coats of the house paint, and I might even buy a topper to extend the life of the bench.

The second project will come as a shock to my regular readers: I’ve decided to replace my garden swing with a glider.

2012: My first and most ambitious makeover

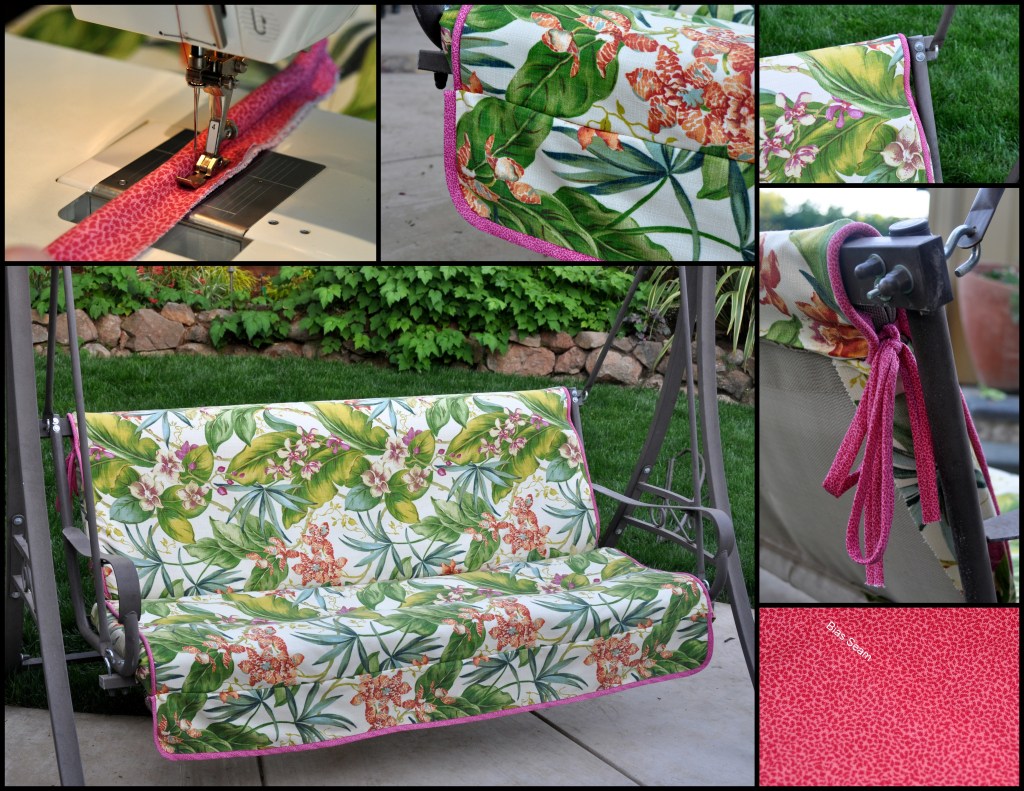
Mike and the boys bought me the swing for Mother’s Day in 2009. I’ve finally crossed over from sentimental to enough already. The challenge with this swing is that the cover and cushions are built-in to the structure. You can’t remove them during the off-season. Instead, I covered the entire swing with a clear drop-cloth. This protected it from the rain, but not the squirrels. Season after season I replaced the cover, re-stuffed the cushions, made new pillows, only to start over again in a year or two.

Mike will help me take apart the frame so we can move it through our narrow sideboard. Curbside recycling will haul and recycle the frame. Only the tattered cushion and mesh will go into the landfill.

I ordered the glider on-line, so it’s slowly making its way across the country. I hope it’s as pretty as it looked in the photo. Once the glider is set up, I’ll replace the half umbrella cover, and I might even paint the tables.

Once upon a time

I’ll let you know how it goes.

Reveal: Thrift Diving’s 30-Day Outdoor Overhaul

My 30-day outdoor overhaul is complete. I came in just under the wire, with the goal of finishing by April 30th. It’s been a full month with one three-day weekend spent in Reno chaperoning my son’s Key Club event and another partial weekend away touring colleges. Throw in an unexpected root canal and it’s been quite the month. Phew!

Serena of Thrift Diving hosts 30-day challenges a few times a year. Several of us sign up for the extra motivation that comes with a deadline. Since I live in California, I’ve been lucky with the weather. We had a bit of rain on one of my painting days, and some windy days too, but nothing like the rest of the group. Serena actually extended the deadline by one week, since so many of the participants have had late-season snow.

I’ll be sure to share Serena’s post with all the challengers when they finish.

Without further ado, here’s what I accomplished this month.

Goals for the 30-Day Outdoor Overhaul

Goal #1: Clean, *repair* and paint my old potting bench

I’ve talked about repainting my potting bench for years but never quite got around to it. Now it’s done and I’m so happy. I painted the bench inside and out with two coats of Annie Sloan’s chalk paint. Once dry, I stenciled ferns along the bottom slats in a lighter shade of chalk paint. I arranged a variety of glass jars with fresh sweet peas along the top of the bench. I like the look of green and purple together. My friend Sherri gave me the decorative bird you see at the top of the bench. It’s perched on a pine tree twig.

Goal #2: Research gate options for side yard

About six months ago, I installed a make-shift temporary “gate” pictured above to keep Tessa from wandering out of the yard. I used an old wooden trellis, a 2 x 4 and a scrap of shade cloth, all items I had on hand. On the plus side, it served its purpose (keeping Tessa in the yard). On the down side it was ugly and impractical.

Once I started calling for quotes, however, the options for a metal gate seemed bleak. They’re all custom-made and cost thousands of dollars! Instead I worked out an alternate plan for free.

We extended our cat-fence netting all the way to the wooden front gate facing the street. We had just enough leftover from the back fence to finish the job. We used a remnant to cover the gate leading to the street. I’m so happy to have access to the side-yard once again and I’m pleased with the way it looks.

Here is a bit of serendipity. I reused the old trellis to complete goal 4. Though the bottom of the wooden trellis is partially decayed, I simply attached a pair of garden stakes with zip ties to support it and to keep the trellis off of the soil. Mike helped me pound the stakes into the ground to support the free-standing trellis.

 Goal #3: Outdoor sandbox for cats

This goal is neither exciting nor blog worthy, but a goal is a goal. I picked up two bags of sanitized sand at a hardware store and poured it into the back corner of the garden.

Tessa and Mouse explored and then started using the sandbox. I’m hoping this cuts down on the deposits in other areas of the garden.

I made the Kitty-Loo sign out of scrap paper and Washi tape, then slipped it into the bottom of a page-protector. The silver cord came from my stash. I wanted something to photograph for this post besides a pile of sand.

Goal #4: Camouflage and Beautify

Goal 3 blends nicely with goal 4: camouflaging the kitty box and beautifying the back corner. I bought a 10 x 40 inch planting box, and set it on an angle in the corner near the back fence. Instead of a vine (my original plan) I bought a gorgeous white camellia. I planted purple periwinkle (vinca minor) on either side. The camellia will grow wider over time, eventually hiding the trellis all together. This corner looks so much better than it did.

Goal #5: Create a step-up to the raised garden along the back fence

I used 10 inch pavers to create a small step-up to the elevated planting bed along our back fence. I only needed ten stones, and a bag of pea gravel to pull it together. Although the rock wall is natural and the pavers manufactured, I was able to soften the edges with a couple of plants. The first time I used the steps I felt like a kid in a candy shop. They work really well.

Home Depot garden paving stones

Future garden steps

garden near back fence

Garden, back left corner

garden near side yard

Garden near side yard

There are a number of challengers working hard to finish their outdoor projects. When Serena posts her blog with all the finishers, I’ll be sure to share it here with you.

If you think you might like to sign up for a future Thrift-Diving challenge, you can subscribe to Serena’s blog or follow her on Facebook at Thrift Diving.

Thrift Diving’s 30-Day Outdoor Overhaul Makeover

Two years ago I signed up for Serena’s Thrift Diving challenge: a 30-day outdoor patio makeover. She’s hosting another one this month, also outdoors. It’s amazing how these challenges can light a fire under your feet.

Serena hosts these challenges a few times a year. You can read about her April challenge here. Several of us sign up for the extra motivation that comes with a deadline. She even has a closed Facebook group where we can post pictures, ask questions and share in other do-it-yourself projects. It’s a lot of fun.

Today, however, I’m feeling the pressure of the challenge. We have college tours coming up this month and a weekend away chaperoning a school activity, so I need to keep moving. Writing this post will help me collect my thoughts. I have a good start thanks to Serena’s Outdoor Overhaul Makeover Journal. 

These are my goals for my 30-Day Outdoor Overhaul

Goal #1: Clean, *repair* and paint my old potting bench

green potting bench

15 year-old garden/potting bench

Repair wasn’t part of the deal, but this morning I moved the bench on my own to the patio for cleaning and broke one of the planks. The bench is 15 years old and stays outside year round so it’s not that surprising. It looks like they used staples instead of screws to attach the top planks. I’ll need to sort that out.

The broken plank exposed a few startled silver fish. After they vacated the premises I employed my multi-step cleaning process.

I used my small leaf blower to chase away the large debris. I used a small brush to clean the crevices, then a larger brush and finally gave it a strong blast with the hose before one last scrubbing.

We have two more sunny days before a set of storms pass through, so I’m taking advantage of the weather.

Then, finally, the fun begins: repainting my old potting bench

Goal #2: Research gate options for side yard

makeshift gate

Makeshift “gate” to keep Tessa and our other cats safe in the yard

This is a long story, but I’ll try to make it quick. We had to replace the damaged fence along our side yard over a year ago. It took nine months from the start of the quotes to a finished fence for a variety of reasons. We had cat-netting along the old fence to keep the kitties safe in the yard. I wanted to add a second gate so we could reduce the amount of netting which gets tangled in the vines, but one that you could see through. The fence company couldn’t do it.  It’s now been six months and I still haven’t sorted out a quote or a DIY solution to keep our climbing kitten safe in the yard.

 Goal #3: Outdoor sandbox for cats

Tessa's future sandbox

Back corner of garden under neighboring pine tree

Yes, you read that correctly. When you have small children you keep your sandbox covered to avoid unwanted deposits from the cats. My boys are young adults and the sandbox is history, but our kitten, Tessa, prefers using the garden mulch to take care of business. I’m hoping to add a sandy area along the back fence to encourage her to use that instead. Cats like sand, so it should do the trick.

Goal #4: Camouflage and Beautify

back corner of garden

Back corner of garden where things don’t like to grow

The back corner of the garden has always been challenging. A large, neighboring pine tree shades the area, drops pine needles and sends up roots. It’s almost impossible to dig in that area, and when we have managed to wrangle the roots out-of-the-way to plant other things, they struggle to thrive.  I’m going to look for a planting box that sits on the soil at an angle. I’ll plant a shade-loving vine, then add a trellis behind the box. This will beautify the area, and at the same time camouflage Tessa’s outdoor facilities.  Win-win!

Goal #5: Create a step up to the raised garden along the back fence

Fence line

Raised garden bed along fence line. A few pavers should do the trick

Ah, age! It doesn’t look like much of a rise, but I’m finding it increasingly difficult to get up and down from the raised planting area along the back fence. It hurts my back, or my knees or my feet. I don’t know why I didn’t think of this sooner, but I’m going to buy a few pavers to create one or two steps to make it more accessible. After these last storms I can remove the cover from the table and chairs.

Tessa loves spending time in the garden. It will be nice to have her company as I work through this 30-day challenge.

Tessa on the potting bench

Tessa lounging and playing on the potting bench

Thank you Serena for inspiring us.

Do you have a room, patio or deck in need of some TLC?

Garden Curiosities

My garden is full of curiosities. Come have a look.

This is the only snapdragon to survive the winter. I don’t know why this survived, but it sure is pretty.

yellow snap dragon in pot

Overwintered snapdragon

If you take a closer look though, the plant below the flowers looks terrible. Dots of black, sooty material coat the leaves, an as-yet to be determined garden pest. Curious.

snapdragon infestation

Snapdragon infestation

Our aging orange tree produces an impressive amount of fruit, but they’re not very sweet. The rats, however love them and lay waste to a half a dozen oranges a day. Somehow they overlooked the larger orange. It grew like the heart of the Grinch on Christmas day.

pair of oranges

The orange that ate New York

Since we live in California, we keep an up to date earthquake emergency kit, stored under my potting bench in the backyard. The lower bin holds water, blankets and a first aid kit, and the top bin stores canned goods and assorted items. The bins remain disguised but at the ready if we ever need them.

I use the top of the potting bench to stage some of my photos and in the summer it doubles as a buffet for outdoor meals.

Well.

Apparently some unknown critter had the same idea. Just under the top of the bench I found a mass of hollow snail shells. Do you think the snails hide there by day, providing a tasty buffet for a night dweller, or do you think the night dweller brings them there for his meal?

potting bench with ribbon

Potting bench, earthquake storage and a place where snails go to die

earthquake kit

Outdoor earthquake kit

snail wasteland

Snail evisceration

I was home alone one morning this week when I heard scratching on the living room window. Yikes. I screwed up the courage to investigate and saw a goldfinch repeatedly fluttering into the window. This went on for most of the afternoon and on into the second day.

We have ultraviolet decals on the windows to discourage flying accidents. Some birds will fly straight into the window thinking the reflection is more blue sky. The decal alerts the bird and prevents injury. But this was different. Over and over again, he would fly up to the window from his resting branch, and without injuring himself, flutter his wings on the glass.

I did a bit of reading and learned that the birds small brain thinks the reflection is a competitor. This exhausted little bird has been defending his territory for two days…against himself. I taped a large piece of red plastic to the glass and it broke the spell. Curious indeed.

window decal ultraviolet

Ultraviolet window decal, barely visible from indoors but highly visible to the birds

Here’s the view from the tree.

reflective window

Goldfinch nemesis: His own reflection

While cleaning up oranges from under the tree, I made the mistake of drawing back the branches of a fern. I wonder who’s living in that hole? I released the branches of the fern and backed away. I’m curious but, not that curious.

unearthed crevice under orange tree

Anybody home?

Finally, what’s more curious than a cat named Mouse licking dew drops from the edge of a daffodil while a little snail travels down the center of the bloom?

Mouse sips water from the flower, snail inside

Mouse, always curious

Blogging 101, Day Ten: Build and display your blog roll.

Please have a look at my sidebar and see if you find something of interest. Then click away. If you’ve been blogging for a while you know that comments and blogrolls are the spice of the blogging community. Belly up to the table and enjoy.