
There’s a first time for everything, right? I’ve never included my name in the title before, and frankly it’s a bit weird. Since one of the goals of Blogging 101 is to stretch yourself, I’m doing just that. So, there it is Alys, front and center.
We’re tackling our About Page today. We start by jotting down a few ideas along with descriptors of who we are and what we’re about. With scribbled notes and ideas in hand, we’re to write enticing prose that will attract readers far and wide. Not just any old reader, but the reader who waits breathlessly for your next post.
Or something like that.
In other words, if you write a decent about page, you’ll attract ‘your people.’
Last week Pauline suggested I take an excerpt from one of my posts and include it on my about page. Then up popped this assignment. Life is grand when the dots connect.
Bunting for Fran
Speaking of Pauline, she proposed a Random Act of Kindness on her blog in November, then collaborated with The Snail of Happiness. You can read more about this charming act of giving here and here. Together they decided that Fran’s garden needed bunting. For those of us joining in, the only parameters were to include a margin a the top of the bunting for threading and since it would hang in her garden sanctuary, could it please be weatherproofed. I hemmed and hawed over this one, a bit stumped for suitable outdoor material. Eventually I settled on burlap. Not only is it natural and rugged, but it reminds me of the material enclosing Sanctuary on all sides. Fran and Steve garden in Tasmania, Australia, home to a LOT of voracious creatures. Without its enclosure, the garden becomes a free for all.
Something Old, Something New
Here’s what I did. I bought a roll of narrow burlap, then divided it into seven sections. After creating a notched template out of a piece of cardboard, I cut and hemmed each section at the top. All the other edges are raw. With my sewing machine, I zig-zag stitched all the remaining edges to discourage unraveling.
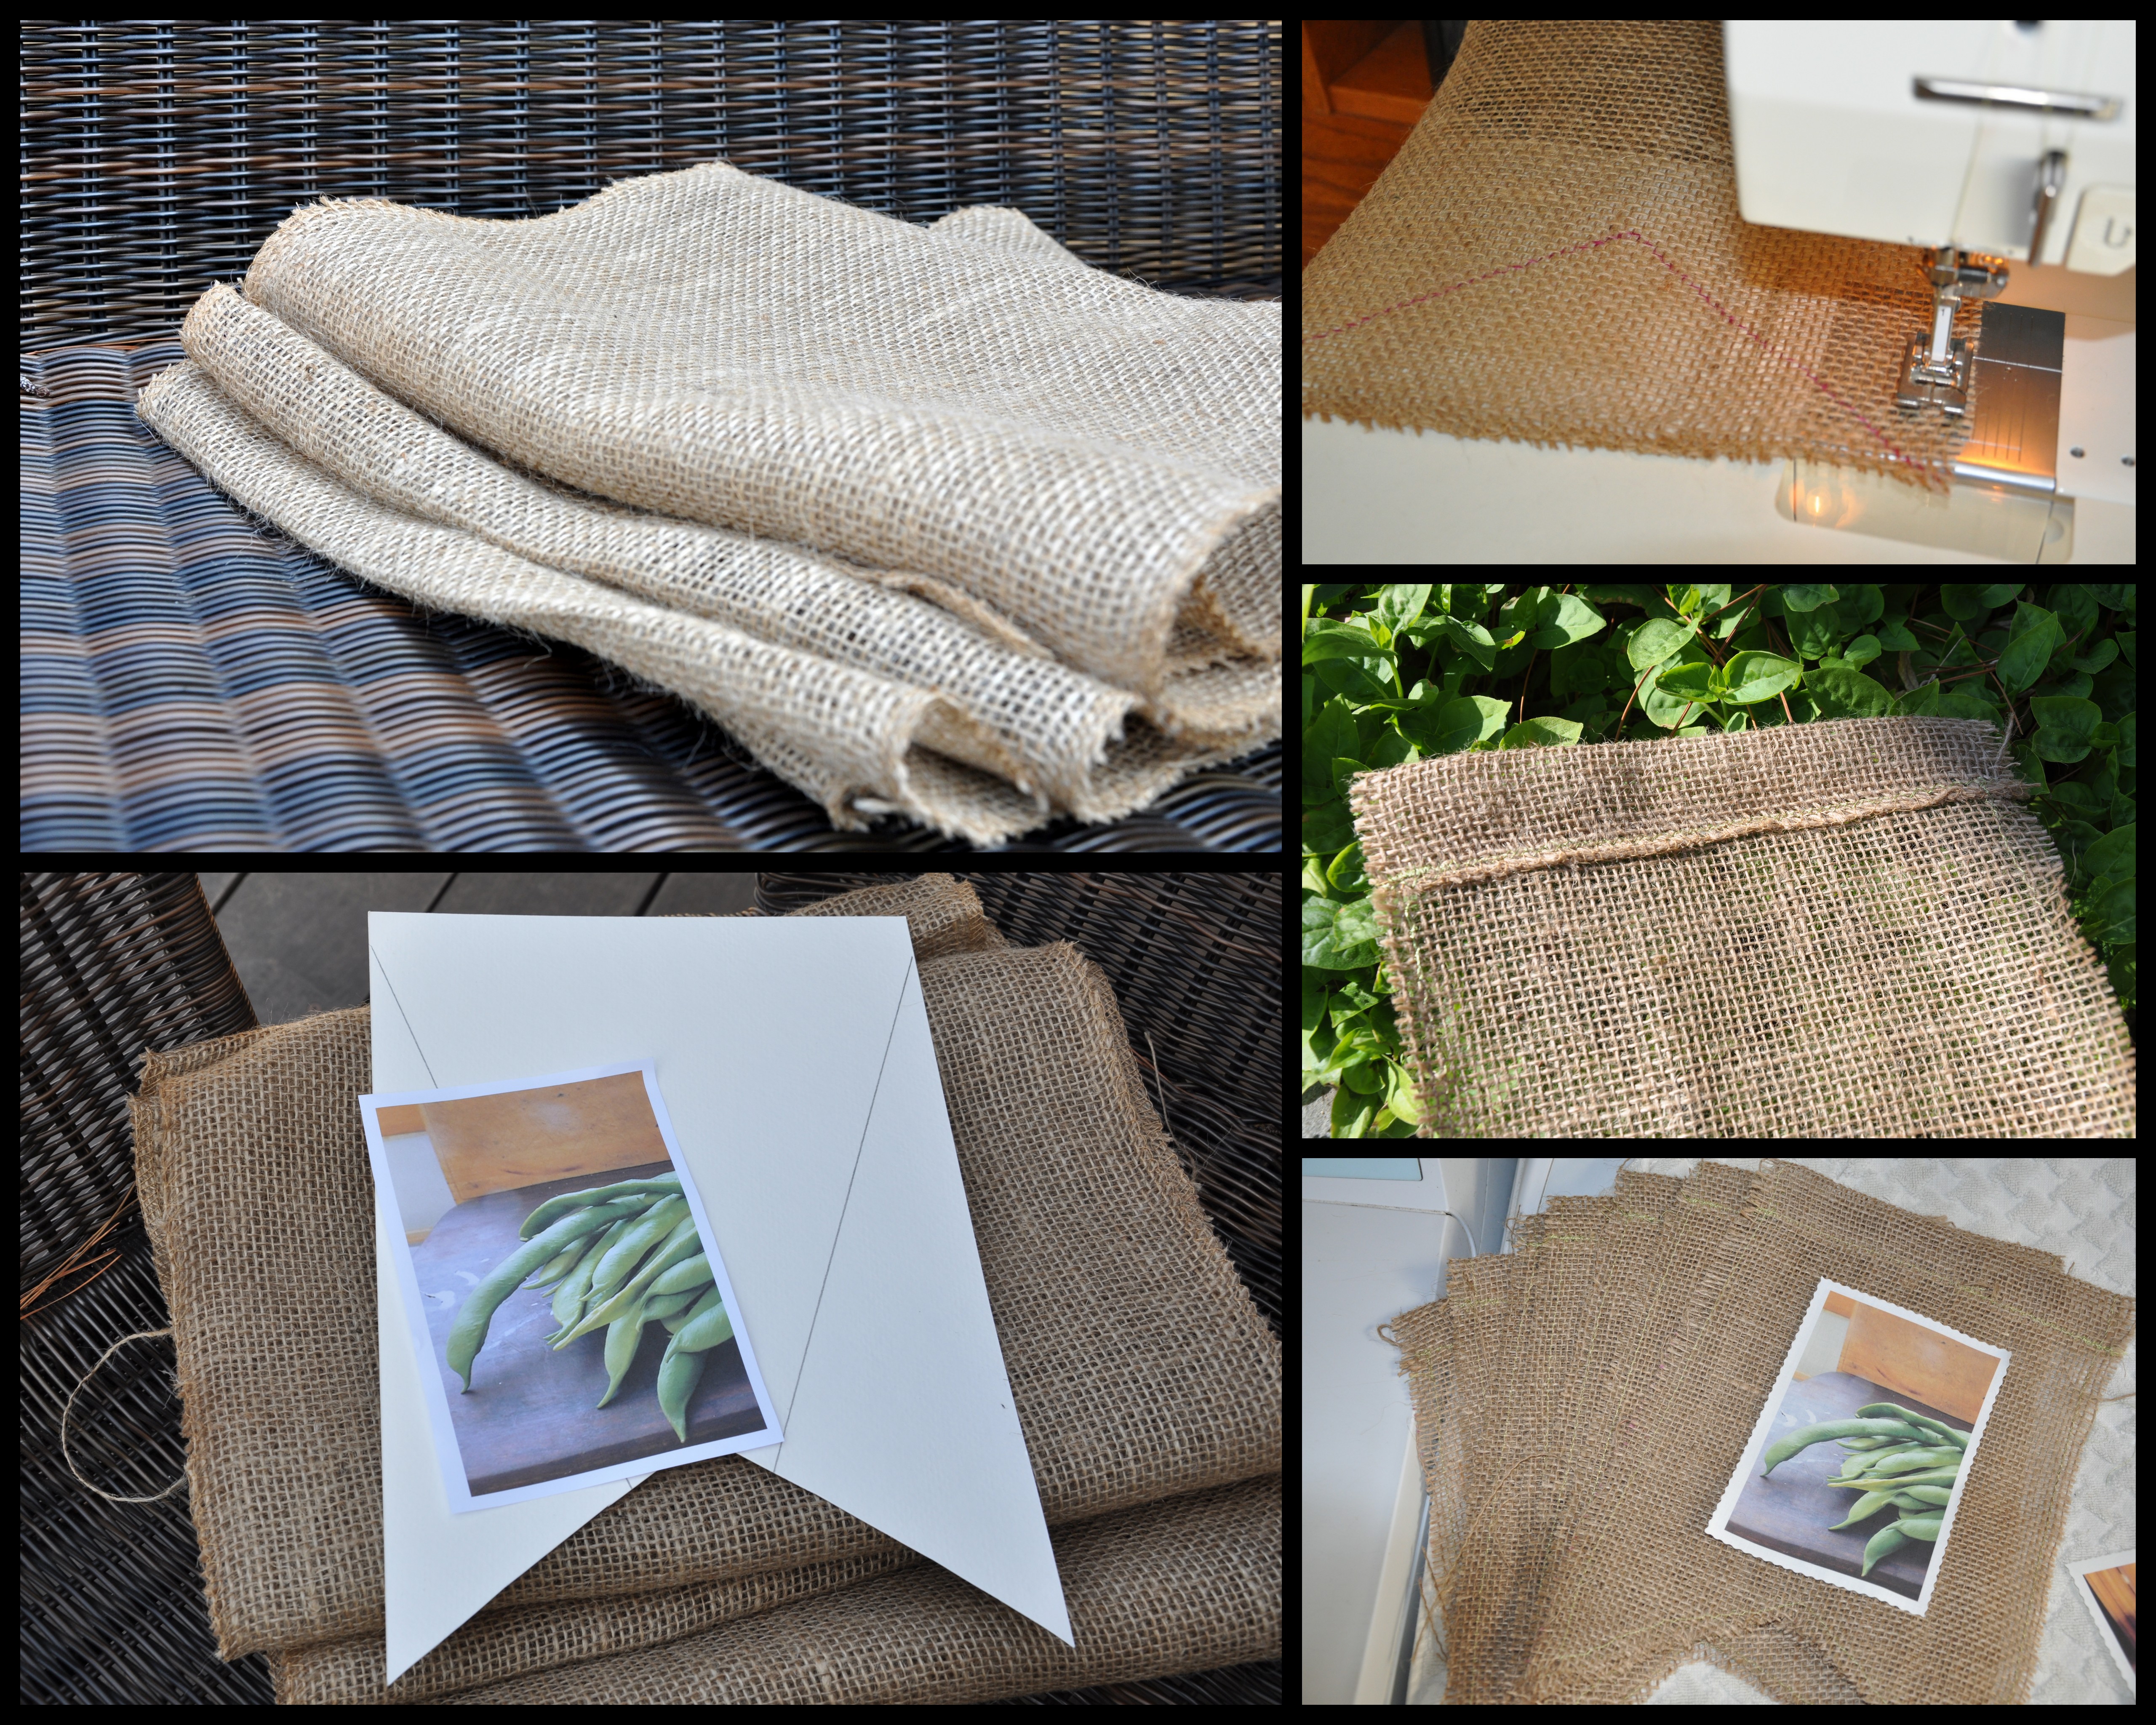
The new part for me was printing on sheets of fabric. That was so cool! The sheets, manufactured by The Electric Quilt Company, feed through your printer. There are only six sheets to a package so I crossed my fingers and toes and hoped the printer was in a good mood that day.
I downloaded seven photos from Fran’s blog, then printed them as 4 x 6 images on to the cotton satin fabric sheets. It worked!

After peeling the backing, I ironed the cloth, then cut all four edges with my scalloped paper-cutter, again holding my breath. I practiced on a few scraps, then I went for it.
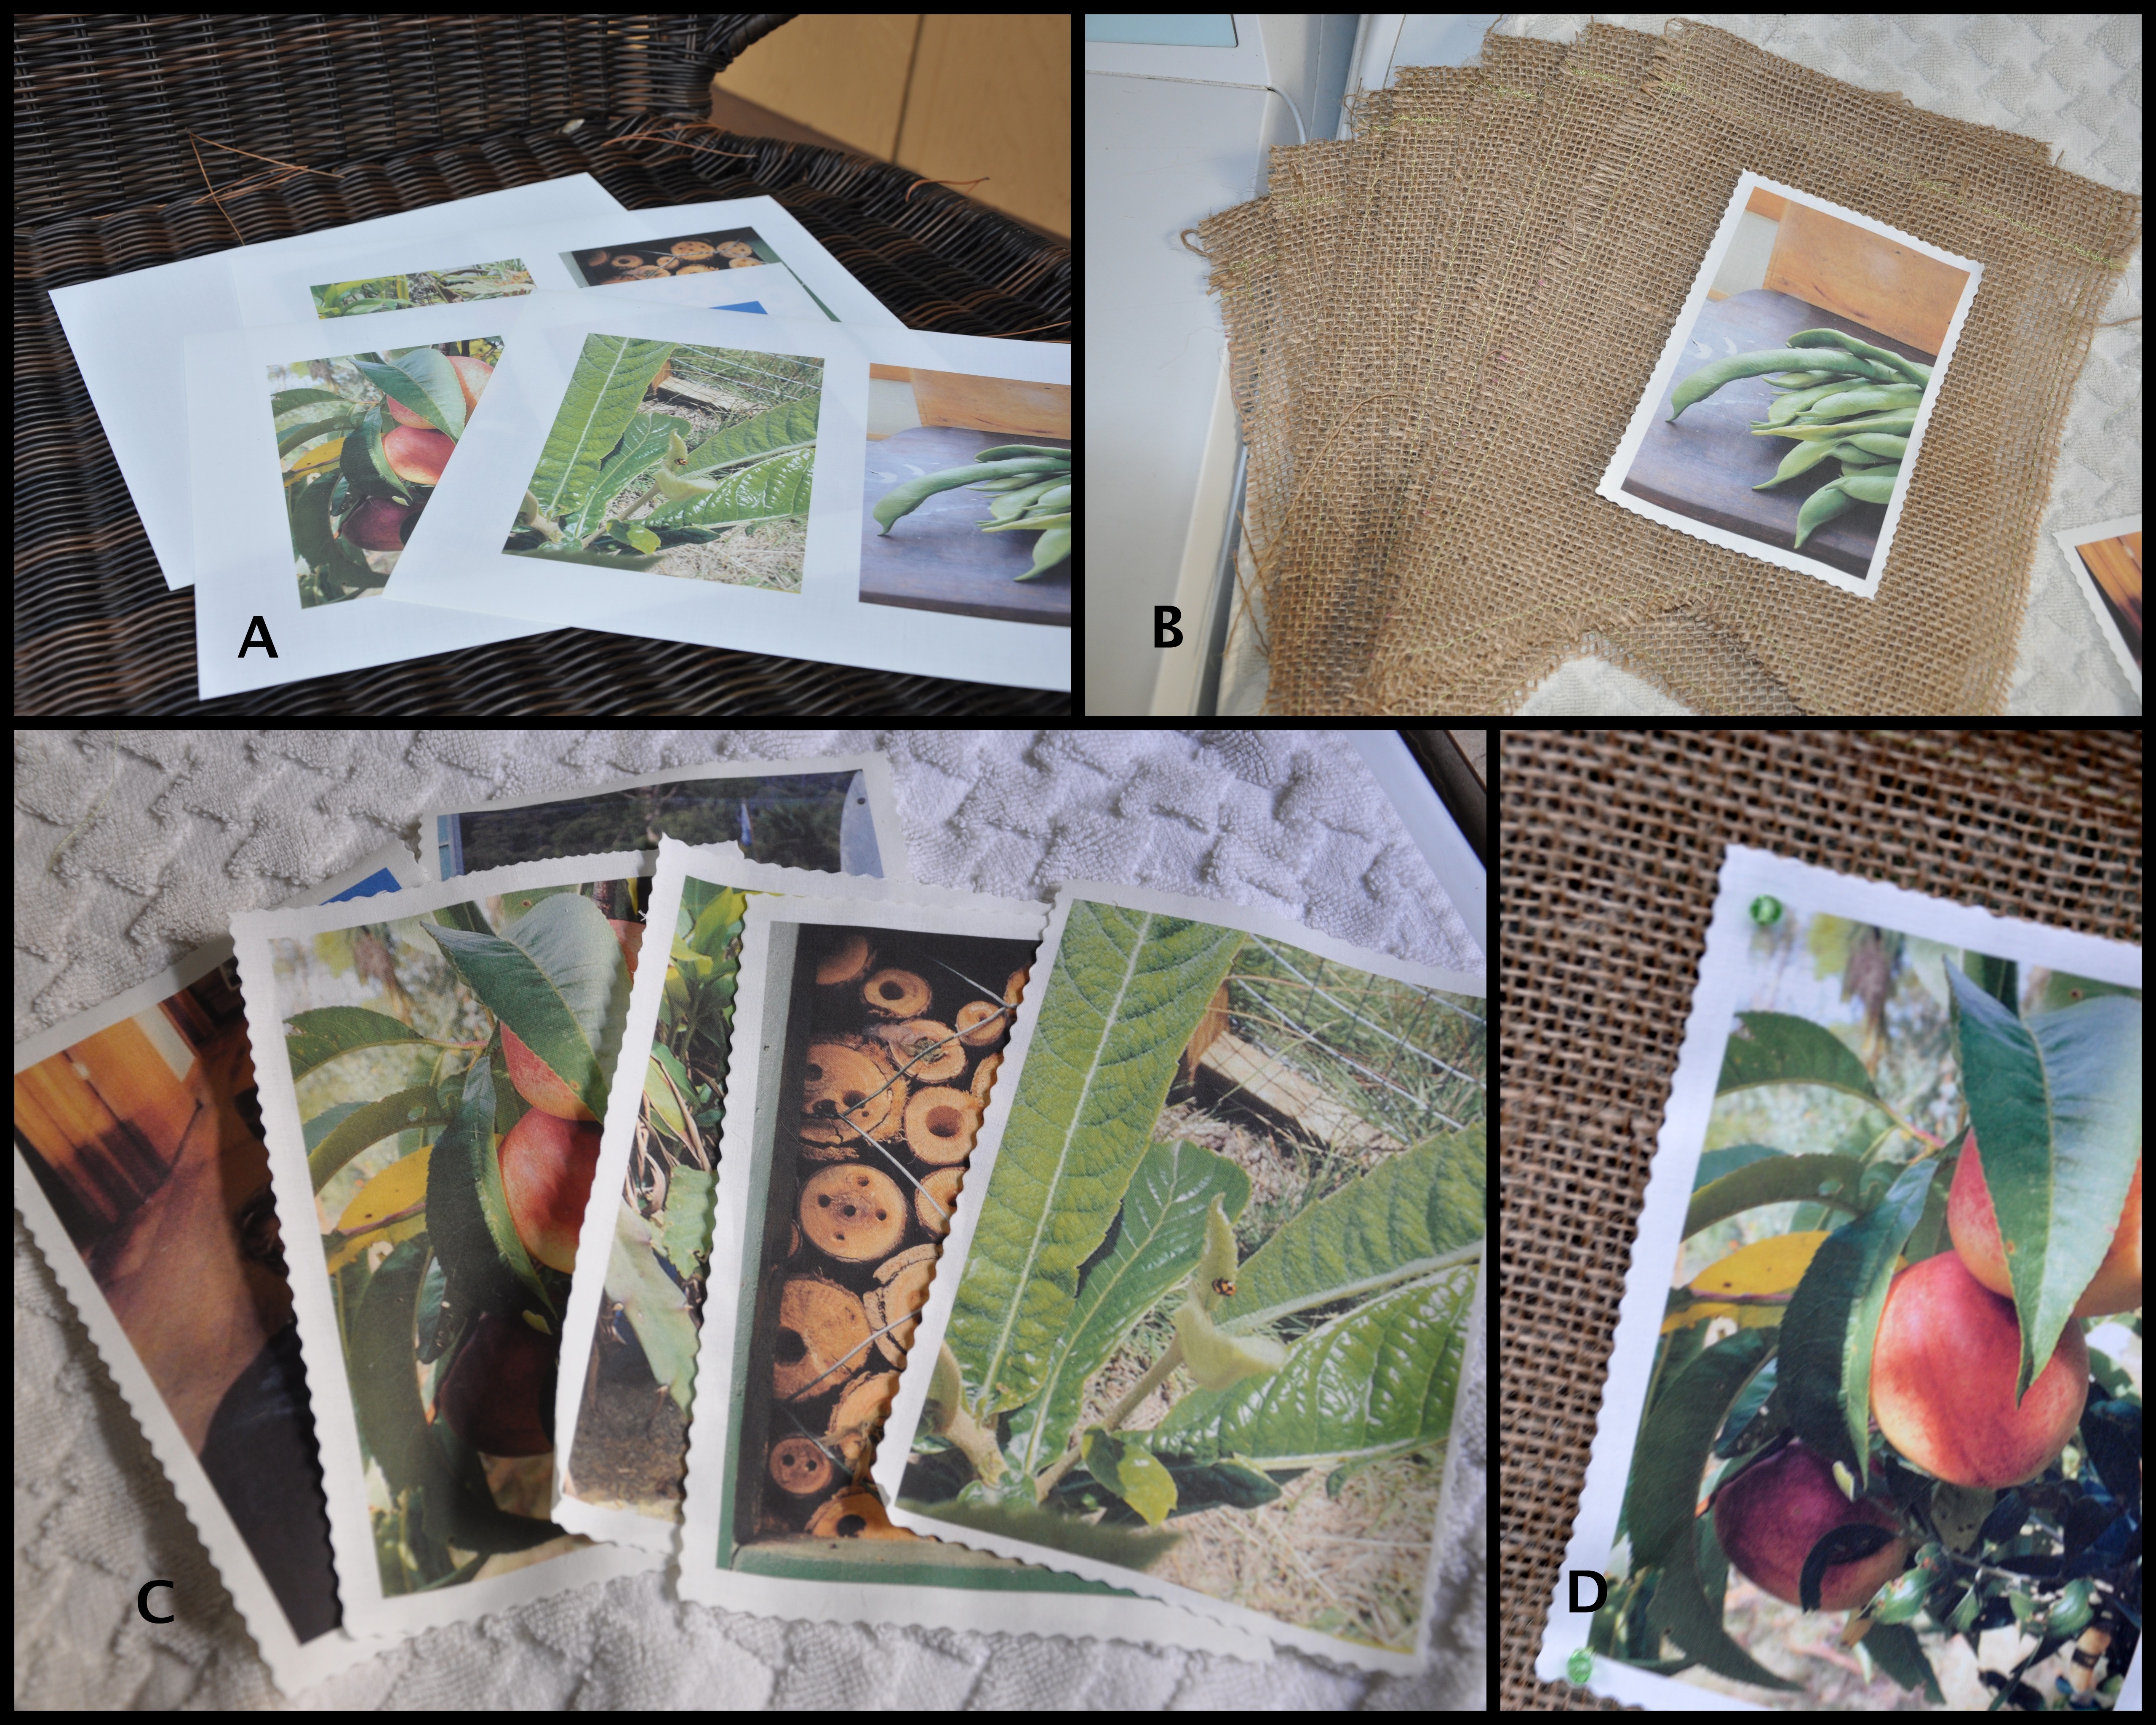
Bunting Assembly: Garden photos copyrighted The Road to Serendipity
Finally, I attached the photos at the corners with a bit of thread and some crystal beads to catch the light. The panels thread through a strand of parachute cord, available at craft stores for about three bucks.

Detail: small crystal beads sewn at each corner

Burlap Bunting Close-up

Burlap Bunting
- You can read Fran’s perspective on the burlap bunting at The Road to Serendipity
- Take a look at Pauline’s beautiful bunting here.
- Marlene at In Search of It All made her colorful bunting from oil cloth. It’s right here.
I’m almost certain there is one more banner floating around the blogosphere, so if I’ve missed anyone, please share the link and I’ll edit this post accordingly.
Just one more thing before you go: if you have a minute, will you please take a look at my About Page? Constructive criticism welcome. This has been the most difficult assignment to date.

You must be logged in to post a comment.