
Once I got past my fear of messing things up, making this postage stamp table top was great fun. Here’s how I did it:
I started with a pre-made plywood circle. While I like the idea of using power tools, I find them intimidating. When I took scenery design as one of my required theater courses, the horror stories of lost digits and visits to the ER put me off of them for good. I have ten perfectly good fingers and plan to keep it that way. I headed to our local Home Depot instead and bought a round plywood table top for about $20. I wanted a round surface to suggest stamps from around the world.
I sanded the edges to smooth out the roughness, then added a coat of paint. Taking a page from Keeping Up with Mrs. Smith, I used left over touch up paint from our living room walls. It’s great using what you have on hand, and since the finished table goes in that room, it will coordinate beautifully.

Plywood table top with a coat of green paint
The following day I sanded the painted surface a second time, then froze with indecision for another few weeks. Once I started applying my dad’s postage stamps with Mod Podge® there would be no turning back. Originally I planned to use sections of the pages, but I didn’t like how it looked.

My dad’s postage album
When I realized the album had four triangular-shaped stamps I knew I had a plan. It was December by now, so I put the unique stamps in a small wax envelope for safe keeping. The stamps ‘disappeared’ and I was sure I had inadvertently sent them off in the mail. It took a thorough tidying up of my crafting boxes to locate them once again.

I had exactly four triangle stamps for the center.
Then one Saturday afternoon I just went for it. Using the surface of the kitchen counter, the only working space high enough to accommodate my Amazonian height, I got to work sorting Dad’s stamps. Page by page and stamp by stamp, I removed the postage, sorting them in piles by color.
Now I was in the zone. My back was aching from standing so long, but I didn’t want to stop.
I placed a pencil dot in the center of the circle, brushed on a layer of Mod Podge, and placed the first four stamps. From there I moved out in rainbow order.
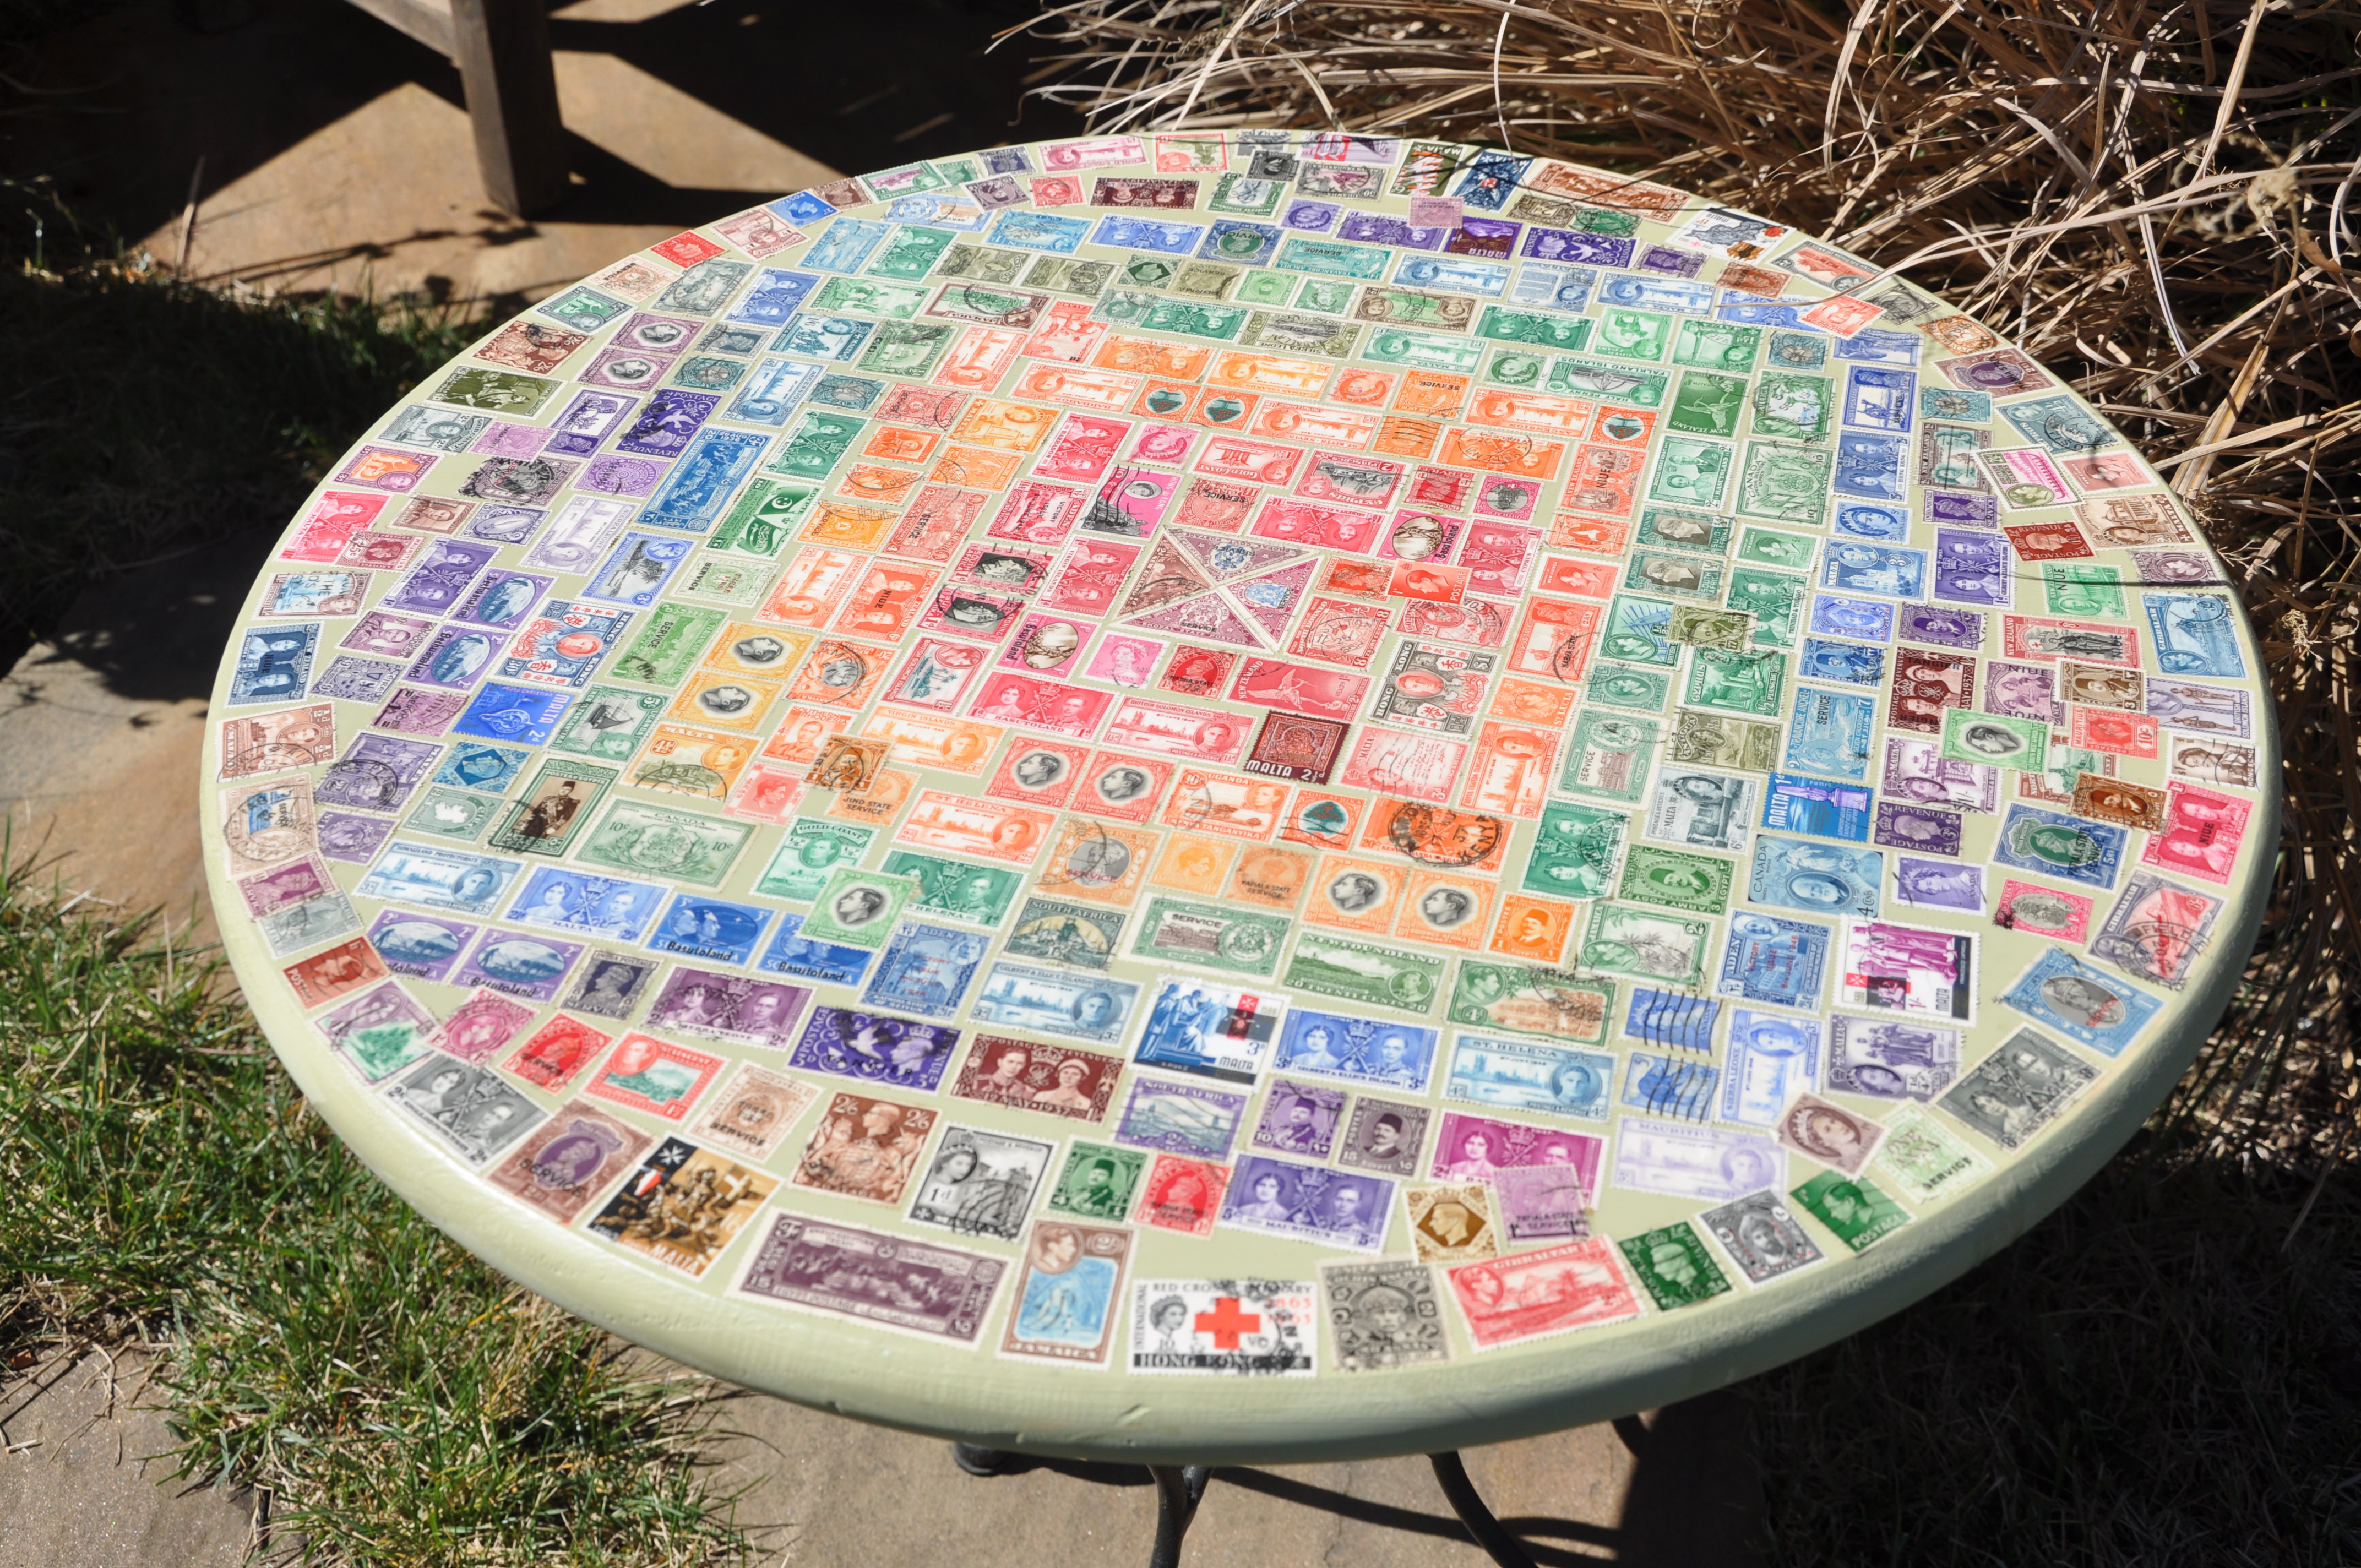
Stamps from around the world
Once I reached the outer edges, I changed the stamp’s orientation. Brown, black and multicolored stamps circle the border, completing the table top surface.

I saved the multicolored stamps for the table border
With the drama of the table top finally behind me, I went in search of a base. I really like the way it looks on the little outdoor table we have, so searched high and low for something similar. Several visits to vintage and thrift stores turned up nothing. Then I learned that I could order the same table through Pier One Imports. It should arrive this week.

Plywood table top
Day Eight: Be a Good Neighbor via Blogging 101
Today’s assignment: leave comments on at least four blogs that you’ve never commented on before. It’s all about engagement. So once I press the publish key, I’m off in search of a few (more) good blogs. Should be fun.
In the meantime, check out these DIY blogs. They make it look easy and fun. And guess what? None of these women are afraid of power tools.
- Serena at Thrift Diving
- Leilani at Keeping up with Mrs. Smith
- Val at Nikitiland

You must be logged in to post a comment.